It’s easy to get frustrated when your Arduino project needs a responsive touch interface. The options seem endless, but every display or sensor comes with its own quirks. You might have tried panels that were slow, too small, or just didn’t play nicely with your hardware.
Finding the right capacitive touch panel for Arduino is tricky. There are trade-offs between screen size, shape, integration, and touch accuracy. Some panels are easy to wire but lack features. Others are packed with tech but need careful setup or extra code.
Prices range from simple, cheap modules to more advanced displays that can do much more than just sense a touch. It’s not always obvious which one fits your project best.
This guide will help you see what actually matters when choosing a capacitive touch panel for Arduino, so you can pick the right one for your needs and skip the confusion.
What Makes Choosing A Capacitive Touch Panel Hard?
Most people look at specs first and end up overwhelmed by numbers. But the real questions are about use: Do you want something basic for touch input, or a full display for rich interaction? Will you use it for a compact sensor, a smart device interface, or a DIY control panel? Compatibility, connection type, and even the shape of the display all play a role. Many buyers get stuck trying to match features without thinking about what their project actually needs.
How To Think About Your Choice
Start with your project’s goals. If you only need simple touch detection, a small sensor module might be enough. If you want graphics, feedback, or a sleek UI, a full touch display makes sense—even if it’s pricier or a bit harder to set up.
Consider how much space you have, what you want to display, and how you’ll connect everything. Don’t get distracted by features you won’t use. Focus on what will make your build smoother and more reliable.
Below you’ll find a range of capacitive touch panels compatible with Arduino, each picked for different needs and project types. Scan through and match your project with the style and complexity that fits best.
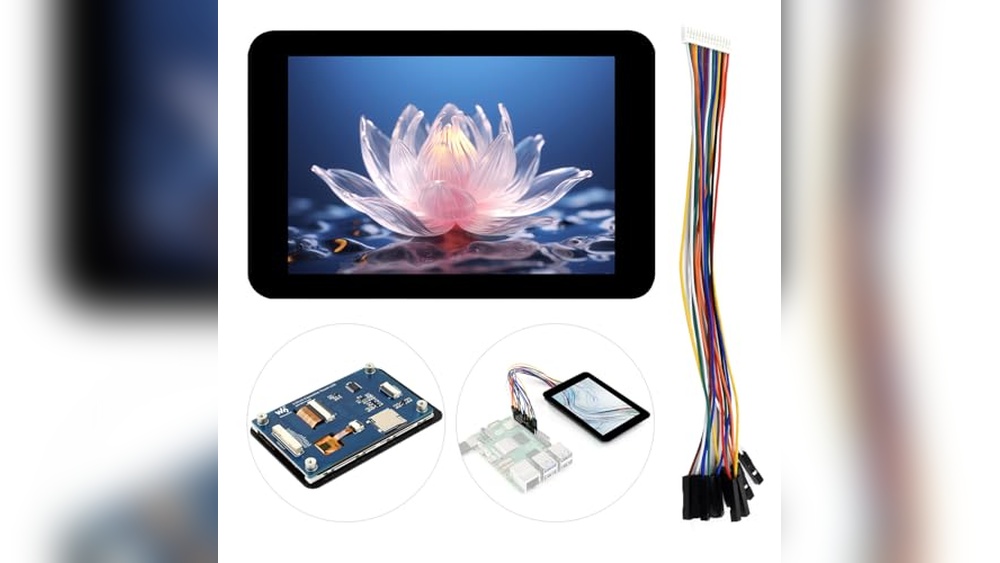
Waveshare 3.5″ Capacitive Touch Panel
For buyers seeking the Best Capacatative Touch Panel for Arduino, this Waveshare module stands out with its fast response and vibrant display.

The Waveshare 3. 5″ Capacitive Touch Panel is a compact IPS display designed for projects where crisp visuals and responsive touch matter. It connects easily to a range of boards, including Arduino and ESP32, making it ideal for interactive interfaces and portable devices.
The clear 320×480 resolution and high color depth help your project stand out.
Using this panel feels intuitive and reliable for hobbyists and makers. The touch response is fast, and the screen transmittance is high, so you get consistent feedback when navigating menus or controlling devices. Its compatibility with different voltages means less worry about damaging components, and the onboard TF card slot opens up more creative options.
Standout Benefits For Diy Projects
- Responsive capacitive touch for smooth interaction
- Vibrant IPS display enhances readability
- Wide compatibility with popular boards like Arduino and ESP32
- Easy integration with SPI and I2C communication
- TF card slot supports extra media storage
- Reliable voltage translator for 3.3V/5V systems
- Rich Wiki resources for guided setup
Consider Before Buying
- No true “plug and play”—requires manual setup
- Limited to 3.5″ screen size
- May need technical know-how for first-time users
Where This Shines
This touch panel is ideal for makers who need a reliable, colorful display for Arduino projects or similar boards. It removes the hassle of mismatched voltages and lets you focus on building interactive designs without worrying about compatibility. If you want to add touch functionality to your project, this module delivers consistent performance.
For best results, consult the official Wiki resources—these guides help you avoid setup mistakes and get more from the panel’s features. You’ll enjoy peace of mind knowing the driver and touch chips are proven for stable operation. I recommend storing your media on the TF card for easy access and more flexibility.
| Best for | Why |
|---|---|
| Arduino interactive displays | Fast touch response and simple integration |
| Portable device prototypes | Compact size and reliable voltage compatibility |
| Raspberry Pi user interfaces | High color depth and clear visuals |
| Media storage projects | Onboard TF card slot expands possibilities |
Aitrip 2.8″ Esp32-s3 Touchscreen Panel
Best Capacatative Touch Panel for Arduino users seeking a responsive color display with integrated WiFi and Bluetooth for modern projects.

This is a compact 2. 8-inch capacitive touch panel module built around the ESP32-S3 chip, designed for effortless integration with Arduino projects. It solves the need for a vivid, touch-enabled display that also connects wirelessly via WiFi or Bluetooth, fitting applications from smart appliances to custom controls.
Using this panel feels intuitive, with smooth touch response and clear visuals thanks to the IPS color screen. Its mounting bracket makes installation clean and simple, letting you focus on your project rather than hardware headaches. Consistent performance and low power use mean less time troubleshooting and more time building.
Key Benefits For Arduino Makers
- Responsive capacitive touch for interactive control
- Integrated WiFi and Bluetooth for wireless connectivity
- Bright 240×320 IPS color display with wide viewing angles
- Easy installation with included black mounting bracket
- Low power consumption for energy-saving designs
- Versatile use in smart home, appliances, and industrial systems
Things To Consider Before Buying
- Requires familiarity with ESP32-S3 and serial communication
- Not suitable for projects needing larger displays
- Limited to color LCD, not e-paper or OLED
Who This Fits Best
If you want to upgrade your Arduino project with a sleek, interactive interface, this panel is an excellent fit—especially for smart home systems, appliance controls, or industrial displays. It removes the hassle of combining multiple modules for display and connectivity, saving both time and wiring effort.
To get the best results, make sure to explore the ESP32-S3’s wireless features alongside the touch interface, which opens up advanced control options. Reliable performance and easy mounting provide peace of mind for long-term installations. I find this panel helps keep projects neat and professional-looking, reducing surprises during setup.
| Best for | Why |
|---|---|
| Smart appliance interfaces | Combines touch control and wireless communication |
| Industrial monitoring panels | Durable, easy-to-mount, and color-rich display |
| Arduino IoT projects | Integrated WiFi/Bluetooth reduces extra modules |
| Upgrading legacy displays | Modern look and simple installation replace old screens |
Adafruit 2.8″ Capacitive Touch Shield
A top pick for Best Capacatative Touch Panel for Arduino thanks to its easy integration and responsive touch interface.

The Adafruit 2. 8″ Capacitive Touch Shield is designed to bring smooth, intuitive touch input to your Arduino projects. It replaces basic buttons and dials with a single-touch interface, making any project feel modern and easy to use. Its 240×320 color display with capacitive touch solves the problem of clunky user input and adds a visual upgrade.
Using this panel feels seamless and accurate—taps and swipes register quickly, and the included libraries help you get working code fast. The board fits standard Arduino headers, so getting started is straightforward. Screen visibility is strong thanks to a bright white LED backlight, and setup doesn’t require much troubleshooting.
It gives you confidence that your project will respond the way you expect, every time.
Why Builders Like It
- Capacitive touch is highly responsive and accurate
- Compatible with classic Arduino boards and easy to integrate
- Bright, clear color display for real-time feedback
- Touchscreen library with example code simplifies setup
- MicroSD support for extra project storage
- Multiple available GPIO pins for further expansion
Points To Consider
- Single-touch only (no multi-touch support)
- Requires I2C pins, which may limit pin availability for other modules
- Pin 4 is used if MicroSD is needed, reducing flexibility
When I’d Pick This
This shield is best for Arduino users who want to add a reliable, modern touch interface without fighting with complicated wiring or custom code. It takes away the guesswork of matching displays and touch panels, and the included libraries make touch input easy to implement.
If you’re building a control panel, data logger, or interactive project, this panel removes hassle and lets you focus on your design.
To get the best results, check your board’s available pins before connecting other modules. Once set up, you can trust the interface to be consistent and responsive, so there are fewer surprises during demos or use. Personally, I like how it makes DIY projects look polished and professional with minimal fuss.
| Best for | Why |
|---|---|
| Arduino-based touch interfaces | Quick integration and responsive single-touch control |
| Projects needing color displays | Bright, high-resolution TFT with easy library support |
| Simple control panels or GUIs | Streamlines user input and display in one module |
| Prototyping with limited space | Compact, lightweight shield fits standard Arduino stack |
Wonrabai 3.4″ Dsi Round Touch Lcd
For those seeking the Best Capacatative Touch Panel for Arduino, this display stands out with responsive multi-touch and broad compatibility for single board projects.

The Wonrabai 3. 4″ DSI Round Touch LCD is a compact, high-resolution touch panel for DIY electronics. It solves the hassle of finding a display that works seamlessly with Raspberry Pi, ESP32, and similar boards. Its 10-point capacitive touch and crisp 800×800 IPS panel make it a practical pick for interactive projects.
Using this touch panel feels smooth and accurate, letting you focus on your code or design instead of troubleshooting your hardware. The toughened glass and aluminum back add confidence, making it reliable for both prototypes and finished gadgets. Setting up is straightforward thanks to the online tutorial, saving you time and reducing trial-and-error.
Why This Touch Panel Stands Out
- Clear, sharp 800×800 IPS round display
- Responsive 10-point capacitive touch for multi-finger control
- Easy compatibility with Raspberry Pi, ESP32, and more
- Durable toughened glass panel (6H hardness)
- Solid aluminum alloy back with passive cooling
- Optical bonding for improved clarity and less glare
- Helpful online guides and resources provided
What To Consider Before Buying
- Not a plug-and-play solution for all Arduino models—may need adapter or extra setup
- Round form factor may not suit every project enclosure
- DSI interface required; may not fit older boards without this port
Where This Shines
This touch panel is best for makers and developers building custom interfaces or dashboards on single board computers. It removes the frustration of mismatched drivers and unreliable touch by offering broad compatibility and consistent performance across supported boards. To get the most out of it, follow the online guide for your specific board—this avoids common setup issues and gets your project running faster.
If you want a reliable, well-built display that just works and feels solid in your hand, this is a strong pick. Its build quality and clear visuals mean you’re less likely to run into surprises after installation. Personally, I appreciate not having to worry about overheating or accidental scratches during prototyping.
| Best for | Why |
|---|---|
| Raspberry Pi dashboards | Easy compatibility and responsive touch control |
| Interactive IoT projects | Multi-point touch and tough glass for frequent use |
| Custom enclosures or wearables | Round IPS panel with strong aluminum back |
| Learning and prototyping with tutorials | Online guides reduce setup time and confusion |
Waveshare 1.28″ Round Touch Lcd Module
The Best Capacatative Touch Panel for Arduino offers a compact, colorful display with smooth touch response, ideal for interactive electronics projects.

This is a small, round 1. 28-inch LCD module with a capacitive touch panel, made for makers who want crisp visuals and responsive touch on their Arduino projects. It solves the hassle of connecting displays and touch by using minimal pins thanks to its SPI and I2C interfaces, making it easy to add to different microcontroller setups.
Using it feels intuitive: the touch screen responds quickly and accurately, so you don’t have to tap twice or wait for input. The vibrant colors and clear graphics help projects stand out, while its compact size fits into tight spaces or wearable tech. You’ll spend less time fiddling with wiring and more time focused on your design.
Why It Stands Out For Makers
- Clear, colorful IPS display enhances project visuals
- Fast, accurate capacitive touch panel
- Easy integration with Arduino, Raspberry Pi, and STM32
- Minimal pin use with SPI and I2C support
- Online manuals and code examples included
- Small, round design suitable for wearables or compact devices
Consider Before Buying
- Round shape may not suit all enclosure designs
- No built-in enclosure or mounting hardware
- Requires basic wiring and coding skills
What I’d Tell A Friend
If you’re building a smart device, control panel, or wearable with Arduino and want a reliable, responsive touch experience, this module is a solid fit. It removes the guesswork of matching touch and display hardware, making your build process smoother.
For best results, check the online guides for wiring tips and use the provided sample code to get started quickly.
You’ll avoid annoying wiring mistakes and get consistent touch performance, so there are fewer project surprises. I like that it’s small enough to experiment with creative designs, but robust enough for daily use. It’s an easy upgrade if you want interactive features in your DIY projects.
| Best for | Why |
|---|---|
| Arduino touch interfaces | Quick, reliable touch response with minimal wiring |
| Wearable or compact projects | Small, round form factor fits tight spaces |
| Learning and prototyping | Comes with online resources and code examples |
| Multi-platform support | Works with Arduino, Raspberry Pi, and STM32 boards |
Mtdele Capacitive Touch Sensor Module
A top pick for Best Capacatative Touch Panel for Arduino users who want reliable touch control compatible with both Arduino and Raspberry Pi.

This module from MTDELE offers capacitive touch sensing for simple integration into Arduino or Raspberry Pi projects. It’s a compact board designed to let you add touch-based input without complex wiring or programming, making it ideal for interactive prototypes and learning environments.
In daily use, it responds consistently to touch, giving clear digital output for quick feedback. The small size helps it fit easily onto breadboards or inside tight enclosures. Set up is straightforward, making it approachable for beginners and reliable enough for more advanced makers.
Touch Sensor Advantages For Diy Projects
- Works smoothly with Arduino and Raspberry Pi
- Simple digital output for easy integration
- Compact size suits small builds and breadboards
- Low voltage operation (2.0–5.5V) for flexibility
- Consistent touch detection removes guesswork
- Ideal for prototyping and educational use
Consider Before Buying
- Requires basic electronics knowledge for setup
- Touch sensitivity limited to one point per module
- No built-in enclosure; extra protection needed for rugged use
Where This Shines
This touch sensor module is best for hobbyists, students, or anyone creating interactive electronics with Arduino or Raspberry Pi. It takes the hassle out of adding touch input—no complex coding or hardware design required. The board’s compact footprint means it fits wherever you need a tactile trigger.
It removes the guesswork in DIY touch controls by offering reliable detection and a simple output pin. To get the most out of it, mount the sensor securely and avoid touching exposed circuits during use. You’ll enjoy peace of mind knowing your touch interface will work consistently, project after project.
| Best for | Why |
|---|---|
| Arduino prototyping | Direct compatibility and easy digital output |
| Raspberry Pi projects | Works seamlessly with Pi digital inputs |
| Learning electronics | Simple setup for hands-on experimentation |
| Compact builds | Small size fits tight spaces and enclosures |
Waveshare 3.5″ Esp32-s3 Capacitive Touch Display
As the Best Capacatative Touch Panel for Arduino, this display board delivers precise touch control and wireless connectivity for hands-on smart device projects.

This is a 3. 5-inch capacitive touch display development board from waveshare, designed for makers building interactive Arduino projects. With its IPS panel and Wi-Fi/BLE support, it solves the challenge of adding reliable touch and wireless features to smart devices and DIY controls.
Using this panel feels intuitive, with responsive touch and clear visuals that streamline the prototyping process. The included development resources make setup smooth, so you can focus on creating rather than troubleshooting. It’s especially helpful for those seeking consistent results and a hassle-free experience when integrating touch and connectivity into custom builds.
Why This Touch Panel Stands Out
- Responsive capacitive touch for accurate input
- High-quality IPS display with wide viewing angle
- Integrated Wi-Fi and BLE 5 for wireless projects
- Supports AI speech and offline voice control
- Compatible with Arduino IDE and ESP-IDF
- Works with popular cameras for image/video tasks
- Comes with case for added protection
What To Consider Before Buying
- Requires some familiarity with ESP32 or Arduino environments
- Not the smallest form factor for compact builds
- No bundled camera; must purchase separately for video applications
When I’d Pick This
This panel fits best if you’re designing smart interfaces or controls that demand both touch accuracy and wireless connectivity—think custom dashboards, IoT panels, or interactive displays. It eliminates the hassle of sourcing separate modules for touch, display, and connectivity, letting you get started faster and with fewer compatibility worries.
For anyone who wants to avoid piecing together multiple parts, this board is a solid shortcut.
For best results, make use of the provided SDK and tutorials—they save time and help avoid common setup issues. The robust build and included case give peace of mind, ensuring reliable performance through repeated prototyping and testing. If I were building a project that needed voice or AI interaction, I’d start here for a smoother experience.
| Best for | Why |
|---|---|
| Arduino-based smart device interfaces | Easy integration of touch, display, and wireless features |
| Prototyping IoT dashboards | Supports Wi-Fi/BLE and AI voice control out of the box |
| Projects needing image or video input | Compatible with OV2640/OV5640 cameras |
| Learning and development environments | Rich SDK and tutorials for quick start |
Waveshare Esp32-s3 3.5″ Capacitive Touch Display
If you want the Best Capacatative Touch Panel for Arduino projects, this Waveshare board stands out for its vivid display and versatile connectivity.

This is a development board with a 3. 5-inch capacitive touch IPS display, built around the powerful ESP32-S3 processor. It solves the need for a responsive and colorful interface, while offering seamless wireless options for Arduino and IoT projects.
Using this board feels straightforward—touch input is smooth, and visuals are clear. The onboard connectivity and expansion options mean you spend less time wiring and more time prototyping. Integration with peripherals is easy, letting you focus on your project goals.
Reasons To Choose This Board
- Dual-core ESP32-S3 processor delivers fast performance for interactive tasks
- High-resolution capacitive touch IPS display offers vivid visuals
- Built-in Wi-Fi and Bluetooth 5 for wireless communication
- Multiple interface options (I2C, UART, USB, GPIO) for flexible integration
- Onboard camera and TF card interfaces for multimedia and storage
- Efficient power management with battery support for portable setups
What You Should Know Before Buying
- May require basic hardware setup experience for full use
- Camera modules are not included and need to be purchased separately
- Display size (3.5″) might be small for some advanced applications
Where This Shines
This board fits makers, educators, and hobbyists who need a reliable touch panel for Arduino and embedded projects. It removes the hassle of managing separate wireless modules or display drivers, making prototyping smoother and faster. The integrated camera interface is handy for vision projects and adds flexibility.
If you’re new to touch displays, start with simple UI sketches to get comfortable. You’ll appreciate the stable power management and robust connectivity—no worrying about unexpected interruptions. Personally, I like how the touch response feels as natural as a smartphone, which reduces frustration during testing.
| Best for | Why |
|---|---|
| Arduino touch interface projects | Capacitive touch panel with fast processor and clear visuals |
| Wireless IoT prototyping | Onboard Wi-Fi and Bluetooth 5 simplify connectivity |
| Camera-enabled applications | Compatible with OV2640/OV5640 camera modules |
| Portable, battery-powered devices | Efficient power management IC supports battery use |
Waveshare Esp32-s3 Capacitive Touch Panel
This is the Best Capacatative Touch Panel for Arduino offering a compact 2-inch IPS display with reliable touch controls for versatile embedded projects.

The Waveshare ESP32-S3 Capacitive Touch Panel is a development board designed for Arduino enthusiasts who need a compact 2-inch capacitive touch display with vibrant IPS colors and smooth responsiveness. It integrates a powerful ESP32-S3 dual-core processor and supports Wi-Fi and Bluetooth connectivity, making it suitable for various IoT and embedded applications.
Using this panel feels seamless with its clear 240×320 resolution and easy-to-configure GPIO pins. The onboard touch display combined with SPI and I2C communications allows developers to save IO resources while quickly prototyping or integrating it into their projects without hassle.
Key Advantages Of This Touch Panel
- Compact 2-inch capacitive touch display with IPS panel for clear visuals
- Powerful 32-bit LX7 dual-core processor running up to 240MHz for fast processing
- Supports Wi-Fi 2.4GHz and Bluetooth 5 with onboard antenna for wireless connectivity
- Efficient use of SPI and I2C for display and touch to save IO pins
- Built-in lithium battery recharge manager for portable applications
- Flexible GPIO pin configuration with 22 pins for diverse uses
- Includes TF card slot for expanded storage of files or images
Considerations Before Buying
- Does not include OV560 camera, although it has a compatible camera interface
- Display size is small, which may limit detailed visual projects
- Requires familiarity with SPI and I2C protocols for optimal use
When This Panel Makes Sense
This panel is ideal for developers needing a compact yet powerful capacitive touch display for Arduino or ESP32 projects, especially when space and IO pin conservation are important. It removes the complexity of adding separate display and touch modules by integrating both in a small board.
To get the best results, plan your project’s communication protocols ahead and leverage the onboard battery recharge feature for portable designs. Its combination of speed, connectivity, and touch responsiveness provides peace of mind with consistent performance over time.
| Best for | Why |
|---|---|
| Arduino and ESP32 developers | Integrated capacitive touch and display simplify prototyping |
| Portable IoT projects | Built-in lithium battery recharge support enables mobility |
| Small form-factor applications | Compact 2-inch IPS panel fits limited space |
| Projects requiring wireless connectivity | Onboard Wi-Fi and Bluetooth support with antenna included |
Waveshare 2″ Capacitive Touch Panel
As the Best Capacatative Touch Panel for Arduino, this module offers reliable touch performance and vivid display for hands-on projects.

The Waveshare 2″ Capacitive Touch Panel is a compact display module designed to add responsive touch input to Arduino and other single board projects. Its clear 240×320 IPS screen with 262K colors solves the problem of dull, hard-to-read displays, making user interfaces and graphics easy to see in all lighting conditions.
The module uses both SPI and I2C communication, minimizing the number of pins needed.
Using this panel feels smooth and intuitive, thanks to fast touch response and high transmittance. The compact size fits well into small enclosures, and compatibility with 3. 3V and 5V systems removes the need for extra hardware. Once set up, you can interact confidently, knowing touch inputs will be accurate and consistent.
What Stands Out For Builders
- Responsive and reliable capacitive touch
- Colorful, clear display in a compact size
- Works with Arduino, Raspberry Pi, ESP32, and more
- Low pin requirement eases wiring
- Supports both 3.3V and 5V systems
- Official Wiki resources help setup
Things To Consider Before Buying
- Small screen size may not suit all applications
- Requires basic wiring and code setup
- No included enclosure or mounting hardware
Where This Shines
This panel is best for Arduino users and DIYers who want a reliable, space-saving touch interface without complex wiring. It removes the hassle of mismatched voltages and guesswork over compatibility with popular boards like Raspberry Pi and ESP32. If you need a small but vivid display for interactive menus, dashboards, or simple games, it’s a practical fit.
One tip: check the official Wiki for wiring diagrams and sample code to speed up your first project. With its fast touch response and clear visuals, you can focus on development instead of troubleshooting, which means fewer surprises and a smoother experience. I find that having official resources handy is a real time-saver.
| Best for | Why |
|---|---|
| Arduino touch interface projects | Simple wiring, touch accuracy, and vivid display |
| Compact dashboards or menus | Small size fits tight spaces, easy to integrate |
| Learning SPI/I2C display setup | Official Wiki guides and broad compatibility |
| Multi-board prototyping | Works with Arduino, Pi, ESP32 without adapters |
Key Considerations When Choosing A Capacitive Touch Display Module
- Compatibility: Check that the module works with your board (Raspberry Pi, Arduino, ESP32, etc.). Some displays require specific interfaces or drivers.
- Screen Size and Shape: Decide if you need a standard rectangle or a round display. Larger screens offer more information but may require more power and space.
- Touch Technology: Capacitive touch is standard, but consider if you need single-touch or multi-touch support, especially for advanced interfaces.
- Resolution and Color: Higher resolution and color depth improve visuals, but may be unnecessary for simple projects.
- Expansion Options: Modules with camera, TF card, or extra GPIO pins allow for future upgrades or added features.
Common Mistakes To Avoid
- Overlooking Driver Requirements: Not all modules are plug-and-play. Always check if additional drivers or libraries are needed.
- Ignoring Power Supply Limits: Verify voltage compatibility. Some modules work with both 3.3V and 5V, others do not.
- Assuming Full Board Support: Some displays are not universally compatible. Confirm support for your board and operating system.
- Neglecting Physical Fit: Ensure the display fits your enclosure or project space, especially with round or large screens.
Who Might Want To Avoid These Modules?
- Those needing simple, non-touch displays for basic output.
- Users uncomfortable with wiring or software setup—these modules often require custom configuration.
- Projects with strict power or space constraints.
- Anyone requiring industrial-grade durability—most modules are intended for hobbyist or light development use.
Setup And Usage Tips
- Read the manufacturer’s wiki or tutorial before connecting.
- Check pinouts and wiring diagrams carefully; incorrect connections can damage the module or board.
- Install all required libraries and drivers for your platform.
- Test touch sensitivity and screen responsiveness before finalizing your build.
- Consider mounting options—some displays include brackets or cases, others require custom solutions.
Faqs
Will These Touch Displays Work Out Of The Box With Raspberry Pi Or Arduino?
Most displays need extra configuration or driver installation. Review the manufacturer’s instructions before use.
Can I Use Multiple Touch Modules On One Board?
It is possible, but may require careful pin and resource management. Check your board’s capacity and documentation.
Do These Modules Support Multi-touch?
Some modules support multi-touch, others are single-touch only. Review product details for specific capabilities.
Is A Capacitive Touch Screen Better Than Resistive?
Capacitive screens offer better sensitivity and durability. Resistive screens can work with gloves or stylus but are less common.
How Do I Update The Firmware Or Drivers?
Follow the manufacturer’s wiki or online resources. Updates may require programming tools or specific software.
Can I Use These Displays Outdoors?
Most are designed for indoor use. Outdoor use may require additional protection against moisture and sunlight.
Summary
Capacitive touch display modules offer flexible options for interactive projects with Raspberry Pi, Arduino, and ESP32. The right choice depends on your board compatibility, touch requirements, and project constraints. Take time to review setup steps and confirm fit for your application.
With careful selection and preparation, these modules can add rich, responsive interfaces to your designs.