Security cameras help protect homes and businesses, but they often attract an unwanted guest—spiders. These tiny creatures build webs around cameras, causing blurry footage, false motion alerts, and even blocking the lens. For anyone who relies on security cameras, spiders can be a real headache. Yet, most people don’t realize that the problem is both common and preventable. In this guide, you’ll learn proven ways to keep spiders away from security cameras, with practical advice and easy-to-follow steps. Whether you manage a business, own a home, or simply want better camera footage, you’ll find clear solutions that work.
Why Spiders Love Security Cameras
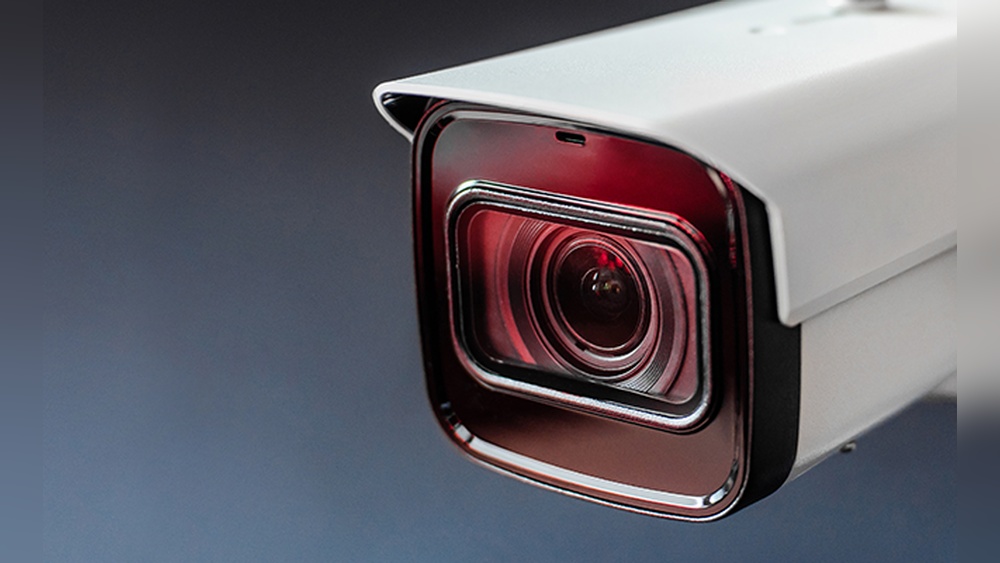
Spiders are not drawn to cameras because of the technology. Instead, they are attracted by insects that gather around the camera lights. Security cameras often have infrared (IR) lights for night vision. These lights attract bugs, which in turn attract spiders looking for food. The camera’s warm surface and sheltered location also make it a good spot for spiders to build webs.
Many people think the issue is rare, but it’s very common. In fact, spider webs are among the top causes of blurry or blocked camera footage. According to a report by the Security Industry Association, up to 30% of outdoor camera maintenance calls are related to insect and spider problems.
For example, outdoor cameras installed under eaves or close to gardens often become spider hotspots within just a few days. This is because plants and shaded corners provide ideal hiding places for bugs, and cameras create a warm, protected shelter that spiders love.
Even if you clean the lens, spiders return as long as insects keep coming.
Another detail people often overlook is that some camera brands use brighter IR LEDs than others. These brighter LEDs can attract even more insects, which means even more spiders. If you use cameras with very strong night vision, you may need to take extra steps to keep spiders away.
Problems Caused By Spiders On Security Cameras
Spiders don’t harm cameras directly, but their webs and presence cause several issues:
- Blurry images: Webs block the lens, reducing clarity.
- False alerts: Movement of webs or spiders triggers motion detection.
- Frequent cleaning: Webs require regular maintenance to keep cameras clear.
- Reduced security: Important events may not be recorded or seen due to blocked views.
Some security systems also send alerts when even a small movement is detected. A spider crawling across the lens can set off dozens of false alarms each night, making the system less reliable.
In some cases, spiders can completely block the lens with dense webs, causing footage to be almost useless. For businesses, this can mean missing evidence during a break-in. For homeowners, it can mean being unable to check on deliveries, visitors, or pets.
Over time, the hassle of cleaning and dealing with false alarms adds up, making the security system less effective and more frustrating to use.
A less obvious issue is that spider webs, especially when wet from dew or rain, can reflect IR light back into the camera. This “halo effect” makes night footage especially hard to see, turning what should be clear images into a blurry white fog.
How To Keep Spiders Away From Security Cameras
It’s not enough to just clean the camera. Spiders return unless you make changes. Here are the most effective ways, with details on how to apply each method.
1. Regular Cleaning And Maintenance
Clean your cameras at least once a week. Use a soft brush or compressed air to remove webs and dust. Avoid harsh chemicals that may damage the lens or housing.
- Tip: Clean not only the lens, but also the area around the camera.
- Common mistake: Using water spray or rough cloth, which can scratch the lens.
For best results, use a microfiber cloth for the lens and a paintbrush for hard-to-reach corners. Compressed air can blow away dust without touching the camera. If your camera is mounted high, use a telescoping duster or pole to reach it safely.
Always check the camera housing and mounting bracket, as spiders often hide behind these parts.
A detail many people miss: after cleaning, check the camera’s video feed to ensure there are no smudges or streaks left behind. Even a small fingerprint can blur the image, so a final check helps guarantee clear footage.
2. Reduce Insect Attraction
Spiders follow their food. If you reduce insects near your camera, spiders will stay away.
- Turn off unnecessary lights: Many bugs are attracted to bright lights. If your camera has a spotlight, use it only when needed.
- Use yellow or amber lights: These colors attract fewer bugs compared to white or blue lights.
| Light Color | Bug Attraction |
|---|---|
| White | High |
| Blue | High |
| Yellow | Low |
| Amber | Low |
Another practical step is to use motion-activated lights instead of leaving outdoor lights on all night. Lights that switch on only for people or large animals reduce the number of insects in the area, making it less attractive to spiders.
Also, check for light leaks from windows or doors near your cameras. Even small sources of light can draw bugs in.
A good example: Homeowners who swapped their white porch lights for yellow “bug lights” saw far fewer insects and, over time, a big drop in spider webs around their cameras.
3. Apply Spider Repellent
There are sprays and natural solutions that keep spiders away. Common repellents include:
- Peppermint oil: Mix 10 drops with water in a spray bottle. Spray around the camera, not directly on the lens.
- Vinegar: Spray diluted vinegar (50/50 with water) near the camera housing.
Commercial repellents are also available, but always check if they are safe for electronics.
- Non-obvious insight: Many repellents last only 1-2 weeks, so reapply regularly.
For best results, apply the spray to a cloth and wipe it around the base and mounting bracket, avoiding any electronic parts. You can also use cotton balls soaked in peppermint oil and place them near, but not touching, the camera.
Be careful not to spray any liquid directly onto wires or open ports.
Some people add a few drops of eucalyptus or tea tree oil for extra strength, as spiders dislike these scents as well. Always test any repellent on a small area first to make sure it doesn’t react with your camera’s plastic or metal.
4. Use Physical Barriers
Some people install simple barriers to stop spiders from reaching the camera.
- Petroleum jelly: Apply a thin layer around the camera housing (not on the lens). Spiders find it hard to walk over the sticky surface.
- Tape or foam: Surround the camera base with sticky tape or soft foam. This blocks spiders from crawling up.
You can also use double-sided tape as a barrier around the mounting plate. When spiders try to cross, they get stuck and quickly move away. For a more permanent solution, flexible rubber gaskets can be added behind the camera mount to block small entry points.
A tip: If you use petroleum jelly, check it after rain or hot days, as it may wash away or melt. Reapply as needed for continued protection.
5. Install Camera Shields Or Covers
Camera shields are small covers that protect the lens and reduce places where spiders can build webs.
- Dome covers: These are especially good for outdoor cameras.
- DIY solutions: Use a plastic cup or small box as a temporary shield.
| Shield Type | Effectiveness | Cost |
|---|---|---|
| Dome Cover | High | Medium |
| Flat Shield | Moderate | Low |
| DIY Cup | Low | Very Low |
Shields not only protect against spiders but also from rain and dust. When installing a dome or shield, make sure it doesn’t block the camera’s view or interfere with night vision. Some covers have special coatings to resist dust and spider webs, making them easier to clean.
If you use a DIY shield, like a cut plastic bottle, secure it well so it doesn’t blow away. Replace or clean shields regularly, as webs and dirt can still build up over time.
6. Change Camera Location
Spiders prefer quiet, sheltered places. If your camera is near plants, corners, or under eaves, move it to a more open spot.
- Avoid: Mounting cameras near bushes, tall grass, or outdoor lights.
- Non-obvious insight: Moving the camera just a few feet can reduce spider problems.
For example, a camera moved from a shaded corner under the eaves to a higher, open wall had far fewer webs. Even shifting the camera to the opposite side of a doorway can make a big difference.
Before relocating, check the camera’s view to ensure you still cover the important areas. Sometimes, a small change in angle or height is enough to make the spot less attractive to spiders, while still giving you good security footage.
7. Use Motion-activated Lights
Motion-activated lights turn on only when they detect movement. This reduces the time bugs are attracted to the area and keeps spiders away.
- Install separate lights: Place them near but not directly on the camera.
- Adjust settings: Make sure the light is not too sensitive, or it will turn on for every small movement.
Good quality motion-activated lights let you adjust sensitivity and duration. Set them to activate for people or cars, not small insects. Some models allow you to set a “cool-down” period, so the light doesn’t stay on too long.
A practical example: One business owner found that after switching from always-on floodlights to motion-activated ones, insect and spider problems dropped by more than half, with no loss in night security.
8. Seal Entry Points
Check for gaps or holes near the camera mount. Spiders and insects can enter through these spaces.
- Use caulk: Seal any openings around the camera housing.
- Check regularly: Weather and time can create new gaps.
Foam weatherstripping works for larger gaps, while silicone caulk is best for small cracks. Check both the wall and the camera mount for any holes. Even a small gap can become an entry point for bugs and spiders.
If your camera is wired, make sure cables are sealed where they enter the building. Cable grommets or bushings can help block tiny spaces that spiders love.
9. Clean Surroundings
Remove leaves, twigs, and debris near your cameras. These attract bugs, which attract spiders.
- Trim plants: Keep bushes and grass away from the camera area.
- Clear corners: Spiders love corners and sheltered spots.
If possible, create a “clean zone” around each camera by removing spider-friendly clutter for at least one meter. Regularly sweep or blow away debris, especially after storms or windy days.
A small detail: Even decorative items like wreaths or hanging baskets can attract spiders and bugs. Place these away from camera locations to reduce risk.
10. Use Ultrasonic Pest Repellers
Ultrasonic devices emit sounds that are unpleasant for spiders and insects but not heard by humans. Place them near your cameras to reduce pests.
- Effectiveness: Works best as part of a larger pest control plan.
- Cost: Prices vary, but basic models start around $20.
These devices are easy to install and use very little electricity. Some models even have solar panels, so you don’t need an outlet. However, results can vary—ultrasonic repellers are more effective when combined with cleaning and other spider prevention steps.
11. Install Mesh Screens
For cameras in covered areas, mesh screens can block spiders without affecting the footage.
- Choose fine mesh: Small holes prevent spiders but allow clear view.
- Install securely: Loose mesh can become a new place for webs.
When installing mesh, make sure it’s tight and doesn’t flap in the wind, as movement can trigger false alerts. Use plastic or rust-proof metal mesh for durability. Clean the mesh regularly, as dust and pollen can build up.
A non-obvious tip: If you have several cameras, mesh screens are especially helpful for those mounted in garages, sheds, or other enclosed spaces where spiders are common.
12. Try Natural Predators
Birds and some insects eat spiders. Attracting these natural predators can help control spiders.
- Bird feeders: Place feeders near the camera area.
- Non-obvious insight: Do not place feeders too close, or birds may block the camera.
You can also encourage beneficial insects like ladybugs, which eat spider eggs. Avoid using strong pesticides, as these can kill helpful animals along with pests.
A creative example: Some people install small birdhouses or bat boxes nearby. Bats eat thousands of insects each night, reducing the overall bug population and making your cameras less attractive to spiders.
Best Products And Solutions For Spider Prevention
There are many products on the market, but not all are safe for security cameras. Here’s a look at some popular options:
| Product | Type | Safe for Cameras? | Duration |
|---|---|---|---|
| Peppermint Oil Spray | Natural | Yes (when used carefully) | 1-2 weeks |
| Commercial Spider Spray | Chemical | Check label | 2-4 weeks |
| Petroleum Jelly | Barrier | Yes (avoid lens) | 2-3 weeks |
| Ultrasonic Repeller | Electronic | Yes | Continuous |
| Mesh Screen | Physical | Yes | Permanent |
Always read product labels to make sure they won’t damage your camera.
Another factor to watch: Some products may leave residue or odors. Test new products on a small area first, especially if your camera is close to windows or air intakes.
How To Clean Security Cameras Safely
Cleaning is not just about removing webs. It’s also about protecting your camera.
- Turn off the camera: Always power down before cleaning.
- Use a soft brush: Gently sweep away webs and dust.
- Avoid water: Water can damage electronics.
- Use lens wipes: Special wipes remove smudges without scratching.
- Inspect for damage: Look for cracks or loose parts.
Common mistake: Using strong chemicals or alcohol, which can damage the lens and housing.
For stubborn dirt, use a mild soap solution on a cloth, not directly on the camera. Dry all parts thoroughly before restarting the camera. Check that the camera is firmly attached and wires are secure—loose parts can attract spiders and insects.
If your camera has a removable shield or dome, clean both the inside and outside, as webs can form in hidden spots.
Where To Place Cameras To Avoid Spiders
Location is key. Spiders like places with shelter and food. Here’s how to choose the best spot:
- Open areas: Less shelter means fewer spiders.
- Away from lights: Lights attract bugs, which attract spiders.
- High above ground: Spiders are less likely to build webs high up.
- Avoid corners: Corners and overhangs are favorite spots for webs.
A common mistake is mounting cameras too close to walls or ceilings, where spiders feel safe. Instead, choose locations with good airflow and sunlight if possible—these are less attractive to both insects and spiders.
If you must install a camera near a sheltered area, use shields, repellents, and regular cleaning to keep it clear.

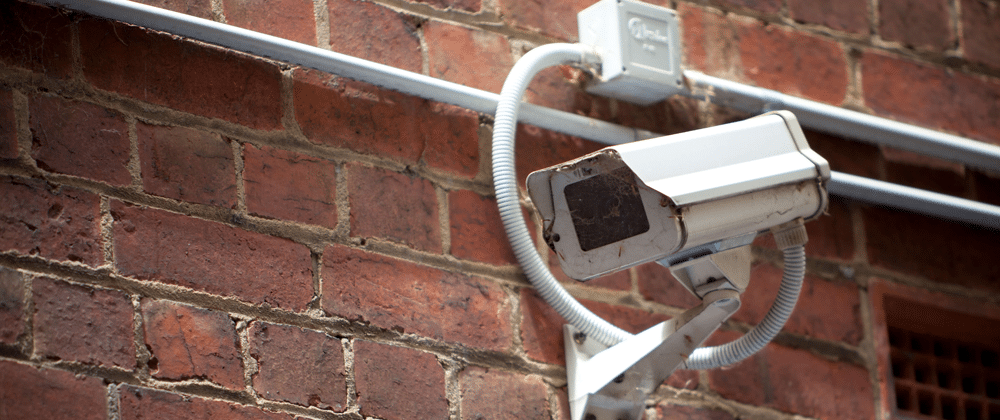
Credit: www.clearway.co.uk
How To Set Camera Settings For Fewer False Alerts
If you can’t fully prevent spiders, adjust your camera settings to reduce false alarms.
- Lower sensitivity: Reduce how much movement triggers an alert.
- Set detection zones: Exclude areas where spiders are common (like corners).
- Use scheduled alerts: Turn off alerts during times when spiders are most active (night).
Most modern security cameras have advanced settings. Learn to use them to get better performance.
For example, you can often draw a “mask” on the camera’s view to ignore certain parts of the image. This is helpful if a web keeps appearing in the same spot. Experiment with different settings until you find a balance between security and fewer false alarms.
A less obvious detail: Some cameras let you set the minimum object size that triggers motion alerts. By increasing this size, you can avoid alerts from small spiders while still catching people or cars.
What Not To Do When Dealing With Spiders
Some actions can make the problem worse. Avoid these mistakes:
- Spraying directly on the lens: Can damage glass and reduce image quality.
- Using sticky traps near the camera: Traps can attract more bugs.
- Ignoring webs: Spiders multiply quickly—one web can become many.
- Using harsh chemicals: May harm the camera and the environment.
- Covering the camera completely: Reduces visibility and defeats the purpose.
Another mistake is removing webs with your bare hands. Some spiders bite, and web residue can cause skin irritation. Always use gloves or tools when cleaning.
Credit: www.ssasecurity.com
Real-life Example: A Homeowner’s Experience
Let’s look at a real case. Sarah, a homeowner in Texas, installed outdoor security cameras. Within two weeks, she noticed blurry footage and frequent false alerts. After inspecting, she found spider webs covering the lens. She tried cleaning, but the webs returned.
Sarah started using peppermint oil spray every two weeks. She also moved her camera away from plants and installed a dome cover. Within a month, the spider problem was gone. Her footage became clear, and false alerts dropped by 90%.
Key takeaway: Combining methods works best. Regular cleaning, repellents, and good placement solve the problem.
Sarah also noticed that after trimming back her garden and switching her porch light to yellow, there was a noticeable drop in bugs and spiders around her front door. The key lesson: small changes together create big results.
Data: Effectiveness Of Spider Prevention Methods
A survey of 200 camera owners showed the following:
| Method | Reported Success Rate |
|---|---|
| Cleaning only | 35% |
| Cleaning + Repellent | 70% |
| Cleaning + Shield | 65% |
| Cleaning + Repellent + Relocation | 85% |
| Ultrasonic Repeller | 40% |
As the data shows, using multiple methods together gives the best results.
Another insight: Only 5% of users who relied on a single method reported long-term success. Most long-term users found that alternating repellents and regular maintenance helped prevent spiders from adapting to one solution.
How Often Should You Maintain Your Cameras?
To keep cameras clear, follow this routine:
- Weekly cleaning: Remove webs and dust.
- Monthly repellent: Reapply sprays or barriers.
- Seasonal check: Inspect for cracks, gaps, or damage.
- After storms: Check for new webs and debris.
Non-obvious insight: Spider activity increases in spring and summer. Increase cleaning during these seasons.
For businesses, consider adding camera checks to routine property inspections. For homes, check cameras when you do other outdoor chores, like mowing the lawn or washing windows. The more consistent your routine, the fewer problems you’ll have.
Environmental And Safety Concerns
Many people worry about chemicals near their cameras. Natural solutions like peppermint oil and vinegar are safe for pets and people. Avoid strong pesticides—they can harm the environment.
If you use electronic repellents, check that they don’t interfere with your camera’s signals. Most modern devices are safe, but always check the manual.
Also, consider the impact on local wildlife. Some chemical sprays can harm bees, butterflies, or birds. Stick with natural or physical barriers for the safest long-term solution.
Professional Solutions And When To Call For Help
If spiders keep returning, consider professional help. Pest control companies offer safe solutions for homes and businesses.
- Benefits: They use safe, effective products.
- Cost: Varies, but average is $100–$300 per visit.
- When to call: If cleaning and home remedies don’t work after 2–3 months.
Professionals can treat the whole area, not just the camera. They may also spot other pest issues you missed, like ants or termites, which attract more spiders. Some companies offer eco-friendly treatments that are safe for pets and children.
How Spiders Affect Night Vision And Recording
Spider webs are more visible at night due to IR lights. Webs reflect infrared, causing bright spots or blurry images.
- False motion alerts: IR lights trigger alerts when webs move.
- Reduced quality: Important events may be missed.
Tip: Use cameras with adjustable IR settings or shield the IR lights.
Some high-end cameras allow you to adjust the strength or direction of IR lights. If your camera supports this, point the IR LEDs slightly away from the lens to reduce web reflections. You can also try using external IR illuminators placed away from the camera to light the area without attracting bugs directly to the camera.
Credit: reolink.com
Useful Resources For Spider Prevention
If you want more information, visit the National Pest Management Association for research and advice. Their site covers safe pest solutions and camera care.
national Pest Management Association
Frequently Asked Questions
Why Do Spiders Build Webs On My Security Cameras?
Spiders build webs because insects gather around camera lights. The camera provides a warm and safe spot. Spiders follow their food, not the camera itself.
Will Spider Sprays Damage My Security Camera?
Most natural sprays like peppermint oil and vinegar are safe if you avoid the lens and electronics. Always check the product label. Chemical sprays may damage the camera if used incorrectly.
How Often Should I Clean My Security Cameras To Prevent Spiders?
Weekly cleaning is best. During spring and summer, clean more often as spider activity increases. Remove webs and dust, and check for gaps near the camera.
Can I Use Ultrasonic Pest Repellers Near Security Cameras?
Yes, most ultrasonic repellers are safe for cameras. Place them near, but not directly on the camera. Make sure they do not block the lens or interfere with signals.
What Is The Best Way To Keep Spiders Away From Security Cameras?
The best approach is to combine methods: regular cleaning, applying repellent, reducing insect attraction, and using physical barriers or shields. Moving the camera to a less sheltered area also helps.
Keeping security cameras clear from spiders is not difficult, but it requires regular attention and smart prevention. By understanding why spiders are attracted to cameras and using proven methods, you can enjoy clear footage, fewer false alerts, and better security.
Remember, combining several solutions is the most effective strategy. With these steps, you’ll keep spiders away and your cameras working perfectly all year round.