
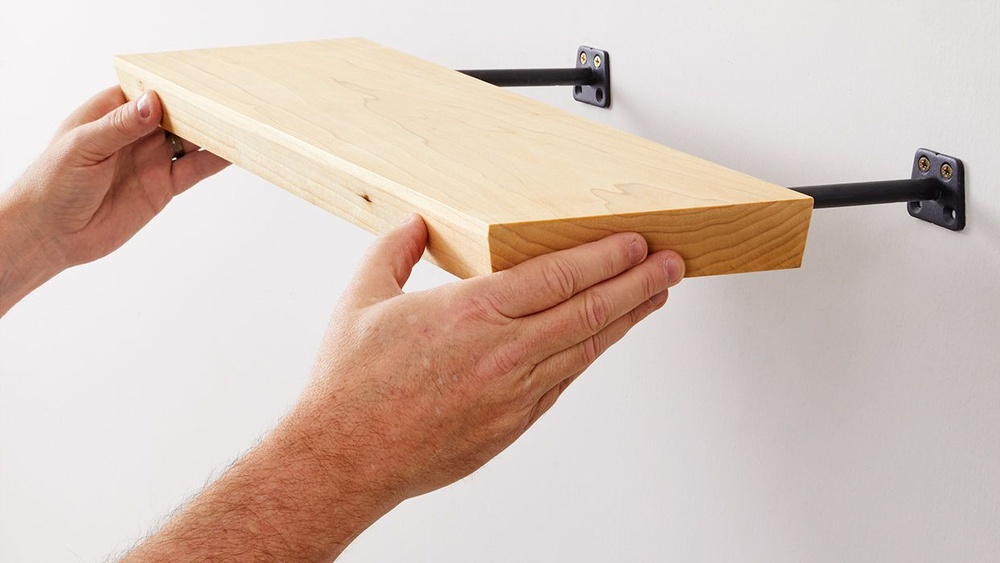
Mounting floating shelves is one of the most popular ways to add both storage and style to your home. These shelves seem to “float” against the wall, with no visible brackets or supports. But while the final look is clean and modern, the process of mounting floating shelves requires careful planning and the right technique.
If you’ve ever wanted to display books, photos, or décor with a minimalist touch, this guide will walk you through every step.
Installing floating shelves is not just about drilling holes and hanging wood. The material of your wall, the weight you want to support, and the tools you use all play a part in making sure your shelves are safe and last for years.
Many first-timers make mistakes that can lead to shelves pulling out of the wall or tilting after a few months. With the right advice and a clear plan, you can avoid these problems.
What Makes Floating Shelves Unique?
Floating shelves get their name because the mounting hardware is hidden inside the shelf itself. This creates the illusion that the shelf is hovering on the wall. Unlike standard shelves with visible brackets, floating shelves give you a clean, modern look that works in any room. They can be made from wood, metal, glass, or even engineered materials. The most common are wooden floating shelves, which are sturdy and easy to customize.
Because there are no visible supports, the way you attach the shelf to the wall is critical. The hidden bracket must be strong enough to hold both the weight of the shelf and whatever you plan to put on it.
This means every part of the installation process matters, from choosing the right wall anchors to making sure your shelf is level.
Tools And Materials You’ll Need
Before you begin, gather all the necessary tools and materials. Having everything ready will make the installation smoother.
Common tools and materials:
- Floating shelf kit (includes the shelf and hidden bracket)
- Drill (corded or cordless)
- Drill bits (wood, masonry, or multipurpose, depending on your wall)
- Level (a 24-inch level works well)
- Tape measure
- Pencil
- Stud finder
- Wall anchors (if you’re not drilling into studs)
- Screwdriver
- Screws (usually included with the shelf kit)
- Painter’s tape
- Safety goggles
Pro tip: Always check what’s inside your wall before drilling. Use a stud finder to locate safe spots.
Credit: www.diymontreal.com
Deciding Where To Mount Your Floating Shelves
Placement is important both for style and function. Think about what you’ll be storing or displaying on the shelves. Heavier items require more support and careful placement.
Key factors when choosing location:
- Wall type: Drywall, plaster, brick, or concrete all need different methods.
- Studs: Shelves are strongest when attached to wall studs.
- Height: For books, aim for 48–52 inches from the floor; for above a sofa, 10–12 inches above the back.
- Spacing: Leave at least 12 inches between shelves if you’re stacking them.
Tip: Tape off the outline of your shelf on the wall to visualize the final look before drilling.
Understanding Wall Types And Their Impact
Not all walls are the same, and the material will affect how you install your shelves. Here’s a comparison of the main wall types:
| Wall Type | Best Fasteners | Typical Challenges |
|---|---|---|
| Drywall | Heavy-duty anchors or screws into studs | Weak if not fixed to studs; risk of pulling out |
| Plaster | Masonry anchors, toggle bolts, or screws into studs | Can crack easily; older homes often have plaster |
| Brick/Concrete | Masonry screws/anchors | Requires special bits and anchors; harder to drill |
For most home walls, drywall is the most common. If you’re unsure, make a small test hole in a hidden spot.
Choosing The Right Floating Shelf
Not all floating shelves are created equal. The type you choose should match your needs and wall type.
Main considerations:
- Material: Solid wood is best for heavy loads. MDF is cheaper but less strong.
- Bracket design: Some use a metal rod that fits inside the shelf, others have a wide steel plate.
- Shelf depth: Deeper shelves hold more, but need stronger brackets.
- Weight rating: Always check how much weight the manufacturer says it can hold.
Here’s a quick comparison of shelf materials:
| Material | Strength | Cost | Best For |
|---|---|---|---|
| Solid Wood | High | $$$ | Books, heavy items |
| MDF | Medium | $$ | Light décor, photos |
| Metal | High | $$$ | Modern look, kitchen use |
| Glass | Low | $$ | Bathrooms, light items |
Non-obvious insight: Some cheaper shelves use hollow-core boards, which can warp or bow over time, especially if overloaded.
Measuring And Marking Accurately
A floating shelf that is not level or is off-center will always look wrong. Take time to measure and mark before you drill.
Steps for accurate marking:
- Find the studs: Use a stud finder and mark the stud location with pencil or painter’s tape.
- Mark shelf height: Use a tape measure and a level to mark a straight line where the shelf will sit.
- Bracket position: Hold the bracket or shelf up to the wall and mark where the screws will go.
- Double-check: Step back and check your marks from different angles.
Practical tip: If you are hanging multiple shelves, cut a piece of wood to use as a spacer. This keeps the gap consistent without measuring each time.
Drilling And Inserting Anchors
Drilling into the wall is the point of no return. Get it right, and your shelf will be sturdy and safe.
How to drill safely:
- Use a drill bit that matches your anchor or screw size.
- Start with a small pilot hole to prevent the bit from slipping.
- Drill slowly; don’t force the bit through.
- For masonry walls, use a hammer drill and masonry bit.
Anchor types for floating shelves:
- Plastic wall anchors: Good for light loads on drywall.
- Toggle bolts: Better for medium-heavy loads, spread weight inside the wall.
- Molly bolts: Expand behind the wall, strong grip.
- Concrete/masonry anchors: Essential for brick or stone.
If you can hit a stud, you often don’t need an anchor—just a strong wood screw.
Advanced tip: For very heavy loads (over 30 lbs), always try to anchor at least one bracket screw into a stud.
Installing The Shelf Bracket
The bracket is the hidden hero of your floating shelf. Secure it well, and your shelf won’t sag or wobble.
Steps to install the bracket:
- Hold the bracket against your marked line on the wall.
- Align screw holes with your drilled holes.
- Insert screws through the bracket and into the wall or anchors.
- Tighten screws firmly with a drill or screwdriver.
- Use your level to check that the bracket is perfectly horizontal.
Insider tip: Some brackets allow for tiny adjustments after mounting. If yours does, use this to fine-tune before adding the shelf.
Mounting The Shelf Onto The Bracket
Now for the satisfying part—sliding the shelf onto its hidden support.
Typical mounting methods:
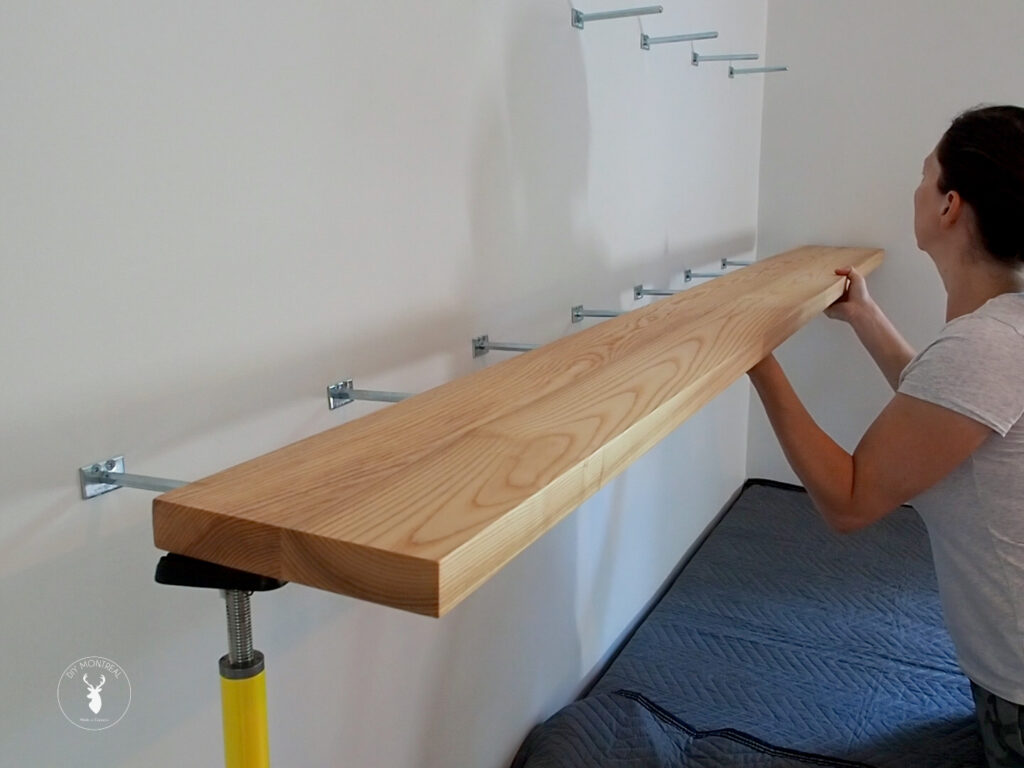
- Rod style: Metal rods stick out from the wall and slide into holes drilled in the back of the shelf.
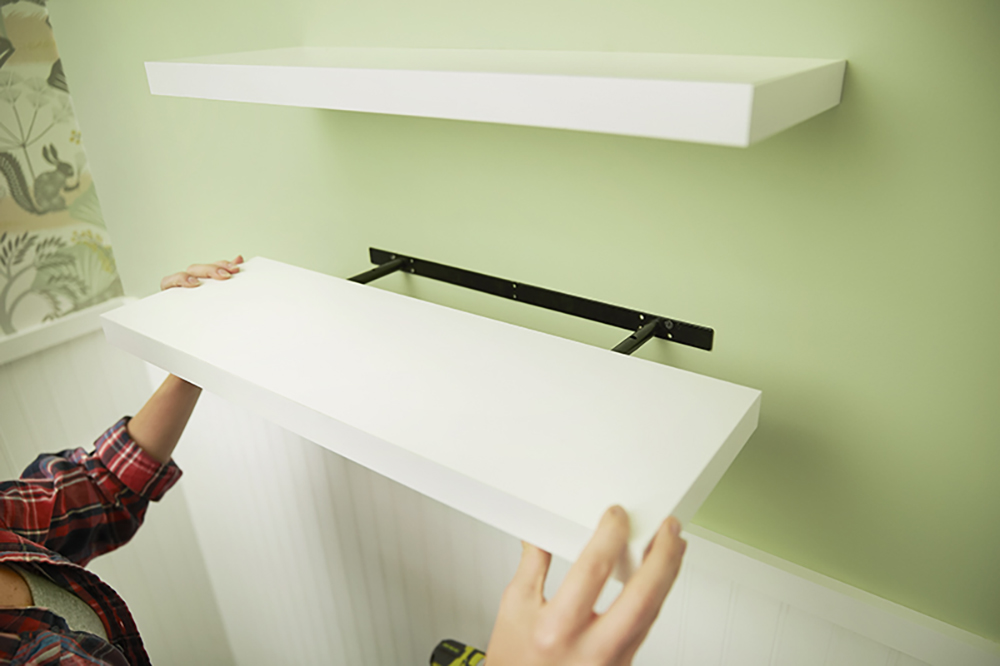
- Plate style: A wide metal plate fits into a groove or pocket in the shelf.
- Screw lock: Some shelves have a small screw that locks the shelf to the bracket for extra security.
How to mount:
- Align the holes in the back of the shelf with the bracket rods or plate.
- Gently slide the shelf onto the bracket. It should fit snugly.
- If your shelf has a locking screw, use a small screwdriver to tighten it.
Mistake to avoid: Forcing the shelf onto the bracket can split the wood. If it won’t fit, remove and check for obstructions.
Checking For Level And Stability
Even with careful measurement, shelves can end up a little crooked. This step makes sure everything is perfect.
- Place your level on top of the shelf. Adjust if needed.
- Gently press on different points to check for wobble.
- If the shelf is not level, you may need to loosen the bracket, adjust, and retighten.
Pro tip: Place a small weight (like a book) on each end of the shelf. If one side dips, check for loose screws or anchors.
Credit: www.homedepot.com
Finishing Touches
A well-mounted shelf deserves a great finish. Fill any visible holes with wood filler or paintable caulk. Touch up the wall with matching paint if needed.
Decorating your shelf:
- Start with heavier items near the ends for balance.
- Layer items for depth: Books, then small decor, then a plant.
- Leave some empty space so the shelf doesn’t look crowded.
Hidden insight: If your shelf is near a door or window, avoid placing fragile items where they could fall from vibration.
Common Mistakes To Avoid
Mounting floating shelves isn’t hard, but small mistakes can lead to big problems.
Top mistakes:
- Skipping the stud finder: Shelves mounted into drywall alone often pull out over time.
- Using the wrong anchors: Not all anchors are rated for heavy loads.
- Poor measurement: “Eyeballing” often leads to crooked shelves.
- Overloading: Always check the shelf’s weight rating.
- Ignoring wall material: Plaster, brick, and drywall all need different approaches.
Real-world example: In a 2022 home DIY survey, 34% of people who installed floating shelves reported at least one shelf starting to pull away from the wall within a year—most due to missing studs or weak anchors.
Advanced Tips For Heavy Loads
If you want to store heavy items (like books or dishes), go beyond the basics.
- Use double brackets for longer shelves (over 36 inches).
- Choose shelves with a steel core for extra strength.
- For brick/concrete, use heavy-duty anchors rated for at least 50 lbs each.
- If possible, mount into two studs, not just one.
Example: For a 48-inch shelf meant to hold cookbooks, use two brackets spaced 32 inches apart, each screwed into a wall stud.
Customizing Your Floating Shelves
Floating shelves are not just for storage—they can be a design feature.
- Paint or stain your shelf to match the room.
- Add LED strip lights underneath for a modern look.
- Choose a live-edge wood slab for a natural, rustic effect.
- Install multiple shelves in a staggered pattern for visual interest.
Design tip: For a “gallery wall” effect, mix floating shelves with art prints and photos.
Maintenance And Safety
Once your shelves are up, keep them safe and looking good.
- Check screws and anchors every 6–12 months, especially for heavy shelves.
- Dust shelves regularly to avoid buildup.
- Avoid sudden impacts—floating shelves are strong but not indestructible.
- For shelves in kitchens or bathrooms, use moisture-resistant wood and seal the finish.
Less obvious advice: If you move, remove the shelf by unscrewing from the wall, not by pulling. This avoids wall damage.
Comparing Floating Shelves To Other Shelf Types
Why choose floating shelves over traditional brackets or built-ins? Here’s a quick comparison:
| Shelf Type | Appearance | Strength | Installation Ease | Best Use |
|---|---|---|---|---|
| Floating | Modern, hidden hardware | Medium-High | Medium | Living rooms, kitchens |
| Bracketed | Visible brackets | High | Easy | Garages, bookshelves |
| Built-in | Custom, seamless | Very high | Hard | Closets, offices |
| Corner | Space-saving | Medium | Medium | Bathrooms, kitchens |
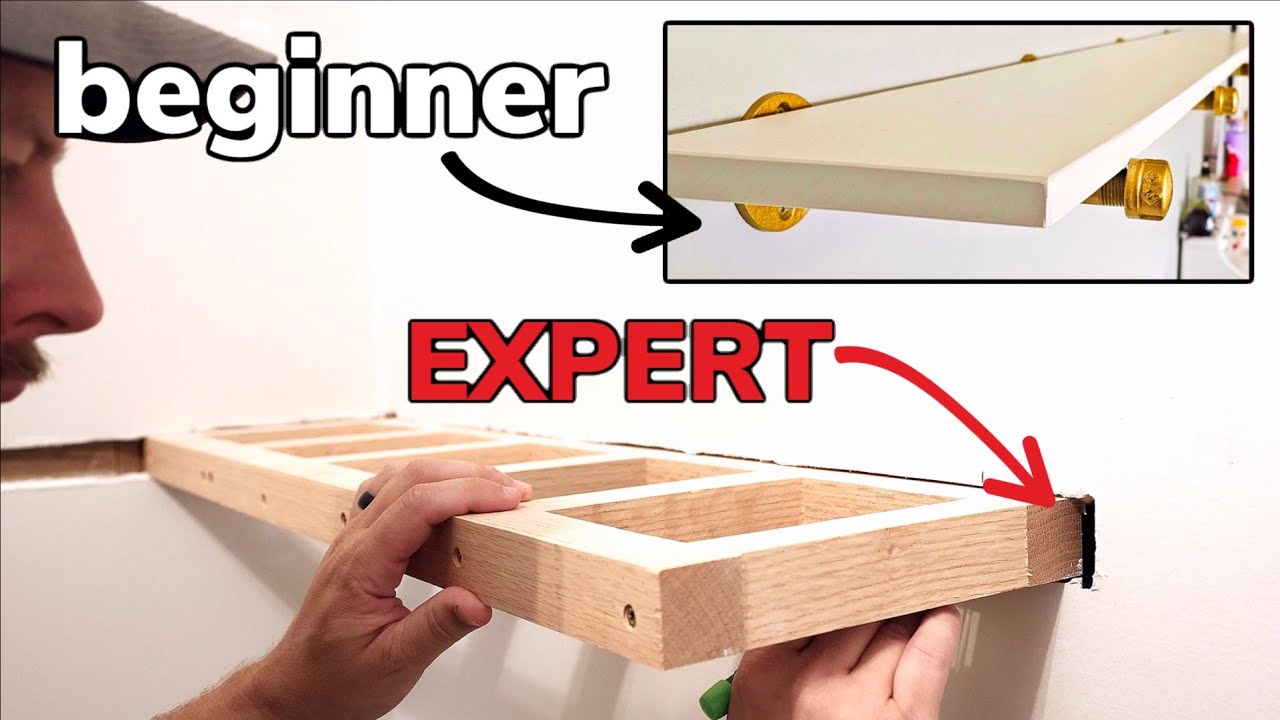
Floating shelves are the go-to choice for style and flexibility. They suit modern homes, but also look great in rustic or classic settings.
Credit: www.youtube.com
Where To Buy Quality Floating Shelves
You can find floating shelves at most home improvement stores, but not all are created equal.
- IKEA: Offers affordable, stylish options. Quality varies; check load ratings.
- Home Depot & Lowe’s: Larger selection of materials and finishes.
- Custom wood shops: More expensive but top quality, especially for odd sizes.
- Online retailers: Amazon, Etsy, Wayfair offer many choices but read reviews carefully.
When shopping, look for shelves with steel brackets and clear installation instructions. Avoid products with vague weight limits.
External resource: For more on wall anchors and fasteners, check out this guide from Family Handyman.
Real-life Examples And Case Studies
Seeing how others use floating shelves can spark ideas. Here are three real-life scenarios:
1. Studio Apartment:
A renter wanted more storage but couldn’t use large furniture. They installed two 36-inch floating shelves above their desk, attached to wall studs. This added space for books and plants without taking up floor space.
2. Kitchen Remodel:
Homeowners added floating shelves on a tiled backsplash. They used a masonry bit and anchors, and chose sealed hardwood for moisture resistance. The shelves now hold spices, mugs, and décor.
3. Children’s Room:
Parents added floating shelves above a dresser for toys and books. They made sure to mount into studs and chose rounded-edge shelves for safety.
Lesson: Each case required a slightly different approach, but all started with careful planning and the right materials.
Troubleshooting: What To Do If Something Goes Wrong
Even with careful work, issues can happen. Here’s how to fix common problems:
- Shelf tilts down: Check if the bracket is loose or the wall anchor failed. Remove, reinforce with a stronger anchor or find a stud, then remount.
- Shelf pulls out: Remove the shelf. Patch holes with wall repair compound. Move the shelf slightly up or down to a new spot with fresh anchors.
- Shelf won’t slide on: Sand or widen holes in the back of the shelf slightly, but don’t force.
- Visible screws/holes: Use wood filler or paint to hide them.
Expert advice: Don’t overload shelves. If you want to display heavy items, switch to a bracketed shelf for more support.
Frequently Asked Questions
How Much Weight Can A Floating Shelf Hold?
The weight capacity depends on the shelf material, bracket type, and wall anchors. A well-installed solid wood shelf into wall studs can usually hold 30–50 lbs. Shelves attached only to drywall with plastic anchors may only support 10–15 lbs. Always check the manufacturer’s rating and never exceed it.
Can I Install Floating Shelves On Tile Or Brick Walls?
Yes, but you need special tools. Use a masonry drill bit and heavy-duty anchors. Go slowly to avoid cracking tile or brick. Always check that your anchors are rated for the material and weight.
What’s The Best Way To Find Wall Studs?
The most reliable method is a stud finder. Slide it slowly across the wall; it will beep or light up at stud locations. If you don’t have one, tap the wall and listen for a solid sound, or measure 16 or 24 inches from a corner—studs are usually spaced at these intervals.
How Do I Make Sure My Shelves Are Level?
Use a long spirit level and mark both ends of your planned shelf line. Double-check before drilling. For extra accuracy, use a laser level. After mounting, adjust the shelf before final tightening.
What Should I Do If My Shelf Starts To Sag?
First, remove all items. Check if the bracket or anchors have loosened. Reinforce the shelf by adding stronger anchors or remounting into a wall stud. For long shelves, consider adding a second bracket or switching to a thicker shelf.
Mounting floating shelves is a project that rewards careful planning and attention to detail. Done right, these shelves will look great and provide years of sturdy service. Whether you want to add storage, show off your style, or just enjoy a modern look, a floating shelf is a smart and satisfying choice for any home.