
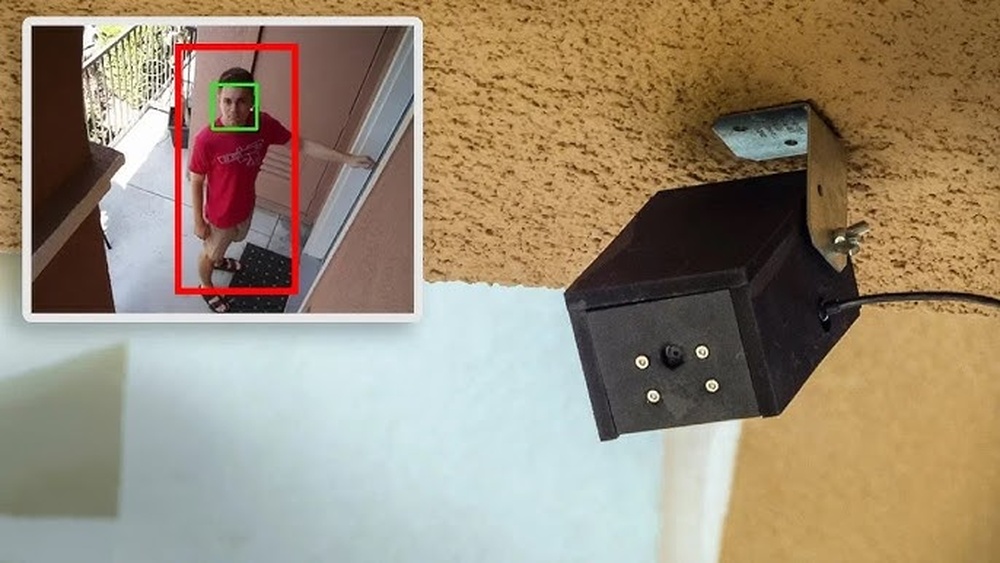
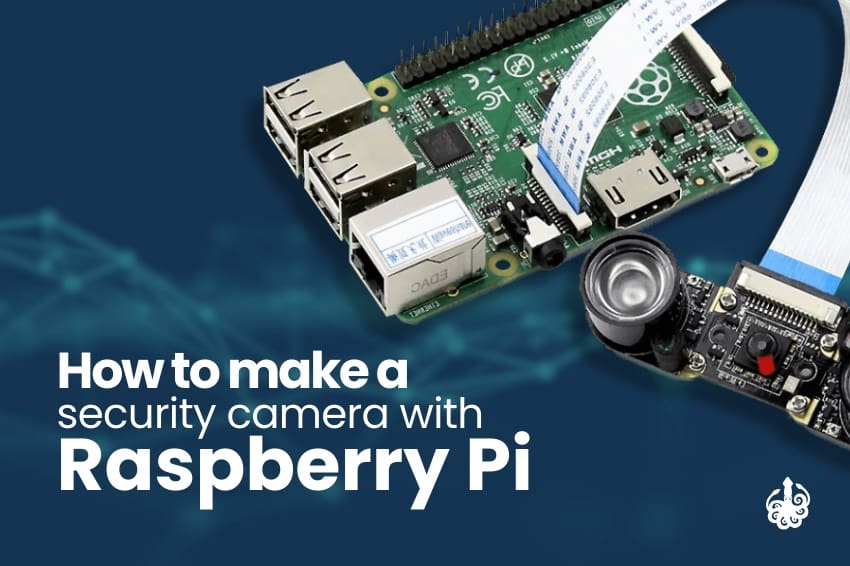
Building a home security camera can be rewarding and surprisingly affordable. If you’re curious about technology, a Raspberry Pi offers a flexible, low-cost way to create your own surveillance system. You don’t need to be a programmer or a tech wizard—just a bit of patience and willingness to learn. This guide shows you, step-by-step, how to make a security camera with Raspberry Pi, covering everything from hardware choices to software setup, real-world use, and troubleshooting. Whether you want to monitor your front door, garage, or even a pet, you’ll find clear answers and real advice here.
Why Use A Raspberry Pi For A Security Camera?
The Raspberry Pi is a small, affordable computer. People use it for many projects, but one of its most popular uses is building DIY security cameras. Why do so many choose Raspberry Pi?
First, cost. Buying a commercial security camera system can be expensive—often $100 to $400 per camera for a decent setup. A Raspberry Pi-based camera can cost less than $60, even with all parts included.
Second, flexibility. With Raspberry Pi, you decide what features you want. Night vision? Cloud storage? Alerts to your phone? You can add them, often for free.
Third, privacy and control. Commercial systems often send data to company servers. With Raspberry Pi, your videos stay in your hands, not in the cloud—unless you choose otherwise.
And finally, learning and satisfaction. Building your own camera teaches you about hardware, software, and networks. Many people find the process enjoyable, and you’ll have something to show for your effort.
What You Need: Essential Components And Alternatives
Before starting, you need to gather the right parts. Here are the essentials, plus some optional upgrades.
Required Parts
- Raspberry Pi Board
- Model 3B, 3B+, 4, or Zero W are common choices.
- Raspberry Pi 4 offers the best performance for video.
- MicroSD Card
- At least 16GB, Class 10 or higher for speed.
- Power Supply
- Official Raspberry Pi power adapter (5V, 2.5–3A).
- Camera
- Official Raspberry Pi Camera Module (v2 or HQ).
- Or a standard USB webcam (not all are compatible—check model).
- Case
- For protection and mounting—especially if placing outside.
- Network Connection
- Wi-Fi or Ethernet cable (for Pi 3/4 and Zero W).
- Monitor, Mouse, Keyboard (for setup)
- Optional if you use SSH for remote setup.
Optional But Helpful Add-ons
- Infrared LEDs for night vision.
- Heat sinks or fans (for Pi 4).
- Long camera cables for flexible placement.
- Weatherproof enclosure for outdoor use.
- USB storage drive if you need extra space.
Typical Cost Breakdown
| Component | Estimated Price (USD) |
|---|---|
| Raspberry Pi 4 (2GB) | $45 |
| Official Camera Module | $25 |
| 16GB MicroSD Card | $8 |
| Power Supply | $10 |
| Case | $8 |
| Total (basic) | $96 |
If you already have some parts, your costs drop quickly. Raspberry Pi Zero W kits can be even cheaper, but have lower performance.
Choosing The Best Raspberry Pi Model
Selecting the right model for your security camera depends on your needs.
| Model | Pros | Cons | Best For |
|---|---|---|---|
| Raspberry Pi 4 | Fast, supports 2+ cameras, 4K video | Heats up, slightly higher price | HD video, multi-camera systems |
| Raspberry Pi 3B/3B+ | Stable, lower power | Lower resolution, slower processing | Basic single camera |
| Raspberry Pi Zero W | Very cheap, tiny size, low power | Slower, limited to basic video | Discreet or portable setups |
Tip: For outdoor or 24/7 use, Pi 4’s speed is a plus, but it can run hot. Consider a fan or heatsink.
Choosing And Connecting The Camera
You have two main options: Raspberry Pi Camera Module or a USB webcam.
Raspberry Pi Camera Module
- Designed for Pi, connects via ribbon cable to the CSI port.
- Offers better image quality and lower CPU use.
- The v2 version gives 8MP images and 1080p video at 30fps.
- The HQ version has a larger sensor and supports lenses for better night vision or zoom.
Usb Webcam
- Connects to a standard USB port.
- Easy to use, but not all models work with the Pi’s Linux system.
- Lower video quality and higher CPU load are common.
Non-obvious insight: Some USB webcams draw too much power from the Pi, causing crashes. Use a powered USB hub if you experience random shutdowns.
How To Connect
- Power off your Raspberry Pi.
- For the camera module: Gently lift the plastic latch on the Pi’s CSI port, slide in the ribbon cable (silver contacts facing the HDMI port), and push the latch down.
- For USB webcam: Plug it into a USB port.
- Power on the Pi.
Practical tip: If you’re using a long ribbon cable for the Pi camera, don’t bend it sharply—gentle curves only, or you risk breaking the wires inside.
Setting Up The Raspberry Pi
Before you can use the camera, you need to prepare your Pi.
1. Flash The Operating System
- Download Raspberry Pi OS Lite (or Desktop, but Lite is faster) from the official Raspberry Pi website.
- Use the free tool Raspberry Pi Imager or balenaEtcher to write the OS image to your microSD card.
- Insert the card into your Pi.
2. Initial Boot And Configuration
- Connect your Pi to a monitor, keyboard, and mouse, or use SSH for remote setup.
- Power on. The Pi will boot for the first time.
- Run `sudo raspi-config` in the terminal.
- Set your country, language, and time zone.
- Change the default password for security.
- Enable Camera (under “Interfacing Options”).
- Enable SSH if you want to access remotely.
- Reboot when done.
3. Update The System
Keep your system up-to-date for security and compatibility:
sudo apt-get update
sudo apt-get upgrade
Non-obvious insight: Many camera issues are fixed by updating the OS and firmware. If the camera doesn’t appear, try `sudo rpi-update` to update firmware.
Installing And Configuring Motioneyeos
For most beginners, MotionEyeOS is the easiest way to turn your Pi into a security camera. It’s a free, open-source system built for video surveillance.
What Is Motioneyeos?
MotionEyeOS is a complete operating system for security cameras. It provides a web interface, motion detection, video recording, streaming, and alerts—no coding required.
Installation Steps
- Download MotionEyeOS from the official GitHub releases page.
- Be sure to choose the correct version for your Pi model.
- Write the image to your microSD card using Raspberry Pi Imager or balenaEtcher.
- Insert the card into your Pi and connect camera, power, and network.
- First Boot: The Pi will boot, configure itself, and get an IP address.
Tip: For Wi-Fi, you must create a file called `wpa_supplicant.conf` on the SD card’s “boot” partition before first boot. Add your Wi-Fi SSID and password.
Accessing The Web Interface
- Use a network scanner app (like Fing) or check your router to find the Pi’s IP address.
- On your PC or phone, open a browser and visit `http: //
:8765`. - Default user: Admin (no password).
- Set a strong password immediately.
Basic Camera Configuration
- The web interface shows your camera feed.
- Set up the video resolution and frame rate for your needs.
- Choose where to store video: MicroSD, USB drive, or network folder.
Practical example: If you want to save storage, use 640×480 at 10fps. For detailed faces or license plates, use 1280×720 or higher.
Advanced Features: Motion Detection, Alerts, And Cloud Storage
One big advantage of using Raspberry Pi is the ability to customize features.
Motion Detection
- MotionEyeOS can detect movement in the camera view.
- It saves video clips or images only when motion is detected.
- You can adjust sensitivity and detection zones to reduce false alarms (like moving tree branches).
Email Or Push Alerts
- MotionEyeOS can send alerts when motion is detected.
- Set up email notifications with your email account.
- For phone push alerts, use services like IFTTT or Telegram Bot integration.
Non-obvious insight: Excessive alerts can be annoying. Test sensitivity over a few days and adjust to avoid hundreds of unnecessary messages.
Cloud And Network Storage
- Save video to cloud services like Google Drive or Dropbox (with some extra setup).
- Or use a NAS (Network Attached Storage) for local storage without filling the Pi’s SD card.
Tip: For long-term use, avoid writing constantly to the SD card—it wears out over time. External USB drives or network storage are better for heavy recording.
Adding Night Vision And Weatherproofing
Night Vision
- The Raspberry Pi NoIR Camera Module captures infrared light and works with IR LEDs for clear night video.
- Add IR LED strips or modules powered separately.
- Place LEDs near, but not touching, the camera lens to avoid glare.
Weatherproofing For Outdoor Use
- Use a weatherproof case (plastic or metal).
- Seal all cable entry points with silicone or rubber grommets.
- Mount under an eave or awning for rain protection.
- Check temperature limits—extreme heat can cause shutdowns.
Example: People often use affordable waterproof electrical boxes with cutouts for the lens.

Credit: www.gabinetedelaorden.com
Streaming Video To Your Phone Or Pc
Once your camera is running, you’ll want to view it remotely.
- MotionEyeOS gives a live feed through its web interface.
- For mobile, use any browser or apps like IP Cam Viewer (Android/iOS).
- You can also set up RTSP (Real-Time Streaming Protocol) to view in software like VLC.
Tip: If accessing from outside your home network, set up port forwarding on your router and use a strong password. For better security, use a VPN.
Expanding Your System: Multiple Cameras And Integration
Adding More Cameras
- MotionEyeOS supports multiple cameras on one Pi (if USB power and bandwidth allow).
- Or, set up more Pis and view all feeds in one dashboard.
- Use the “Add Camera” function in the web interface to link feeds.
Home Automation Integration
- Connect your Pi camera to smart home systems like Home Assistant or OpenHAB.
- Trigger lights or alarms when motion is detected.
- Share camera feeds with other devices in your home network.
Example: Some users automate turning on porch lights when the Pi detects movement at night.
Credit: www.gabinetedelaorden.com
Common Problems And Troubleshooting
Even a well-built Pi camera system may have issues. Here are some common problems and how to solve them.
Camera Not Detected
- Check ribbon cable connection (for Pi camera).
- Make sure camera is enabled in `raspi-config`.
- Try a different USB port (for webcam).
- Update system and firmware.
Video Is Laggy Or Choppy
- Lower resolution or frame rate in settings.
- Use Ethernet instead of Wi-Fi for smoother streaming.
- For multiple cameras, check Pi’s CPU and RAM usage.
Sd Card Fills Up Quickly
- Use motion detection instead of continuous recording.
- Save videos to a USB drive or network storage.
- Set auto-delete for old files in MotionEyeOS.
Pi Overheats
- Add heatsink or small fan.
- Place in a ventilated area.
- Lower camera resolution if possible.
Non-obvious insight: Cheap power adapters can cause random reboots or video glitches. Use an official or high-quality power supply.
Security Considerations
A DIY camera offers privacy, but it can also be a security risk if not set up correctly.
- Change default passwords immediately.
- Don’t expose the camera to the internet without a strong password and, ideally, a VPN.
- Keep your Pi updated to patch security holes.
- Turn off unused services (like SSH or HTTP) if not needed.
- Consider enabling firewall rules with `ufw` (Uncomplicated Firewall).
Example: In 2019, thousands of unsecured IP cameras were found online due to weak or default passwords. Don’t let yours be one of them.
Real-world Use Cases
People use Raspberry Pi security cameras for many reasons. Here are a few real examples:
- Front Door Camera: See who’s at your door from your phone, even when you’re away.
- Garage or Driveway Monitor: Watch for deliveries, visitors, or suspicious activity.
- Pet or Baby Monitor: Check on pets or sleeping children from another room.
- Wildlife Observation: Capture wildlife activity in your backyard or at a bird feeder.
- Small Business Security: Low-cost monitoring for shops or workshops.
Data point: According to a 2022 survey, 42% of DIY smart home users build camera systems for peace of mind, while 29% use them mainly for package delivery tracking.
Comparison: Raspberry Pi Camera Vs. Commercial Security Cameras
How does a Raspberry Pi camera stack up against commercial options?
| Feature | Raspberry Pi Camera | Commercial Camera |
|---|---|---|
| Cost | Low (<$100) | Medium to High ($80–$400) |
| Customization | Very high | Limited |
| Cloud Storage | Optional, self-controlled | Often requires paid plan |
| Privacy | Full control | Dependent on brand |
| Ease of Setup | Moderate | Easy (plug-and-play) |
| Maintenance | DIY, hands-on | Automatic updates/support |
Maintenance And Upgrades
To keep your camera system working well:
- Backup your SD card regularly (use a tool like Win32 Disk Imager).
- Clean the camera lens every few months to avoid blurry images.
- Check for software updates for MotionEyeOS or Raspberry Pi OS.
- Test alerts and storage every few months to ensure everything works.
If you want more features, explore:
- Face recognition (with OpenCV or third-party tools).
- License plate recognition for driveways.
- Temperature and motion sensors for smarter alerts.
Is A Raspberry Pi Camera Right For You?
This DIY approach isn’t for everyone. Here’s when it’s a good fit:
- You want full control over your data and camera features.
- You enjoy learning about technology and don’t mind a few challenges.
- You want to save money, especially for multiple cameras.
- You need a custom setup not offered by commercial cameras.
If you want simple, no-maintenance cameras, commercial options may be easier. But for flexibility and privacy, Raspberry Pi is hard to beat.

Credit: www.youtube.com
Where To Learn More
The Raspberry Pi and maker community is huge. If you get stuck, there’s help:
- Official Raspberry Pi forums: Great for troubleshooting hardware or OS problems.
- MotionEyeOS GitHub: For software issues or feature requests.
- YouTube tutorials: Visual guides for every step.
- Raspberry Pi Documentation for in-depth technical details.
Frequently Asked Questions
How Long Does It Take To Build A Raspberry Pi Security Camera?
For most people, gathering parts and setting up the software takes 2–4 hours the first time. If you’re comfortable with computers, setup is faster. Allow extra time for testing and adjusting camera placement.
Can I Use Any Webcam With Raspberry Pi?
Not all USB webcams work with Raspberry Pi. The best compatibility is with the official Raspberry Pi Camera Module. If you use a USB webcam, check online lists for models confirmed to work with Raspberry Pi OS.
How Can I Watch The Video When I’m Not At Home?
You can access your camera remotely using the web interface, but you’ll need to set up port forwarding on your router. For better security, use a VPN. Avoid opening your camera to the internet without strong passwords and updates.
Does The Raspberry Pi Camera Record All The Time?
You can choose continuous recording, but most people use motion detection to save storage and review time. MotionEyeOS lets you set recording schedules or only record when movement is detected.
What If My Raspberry Pi Camera Stops Working?
Check the power supply, cables, and SD card first. If you changed settings recently, try undoing them. Update the OS and firmware. If all else fails, re-flash the SD card and start fresh—backup your videos first.
Creating your own security camera with Raspberry Pi is a project that can save money, teach you new skills, and give peace of mind. With the right setup and a bit of patience, you can build a system that rivals many commercial options—while keeping your data truly private.