
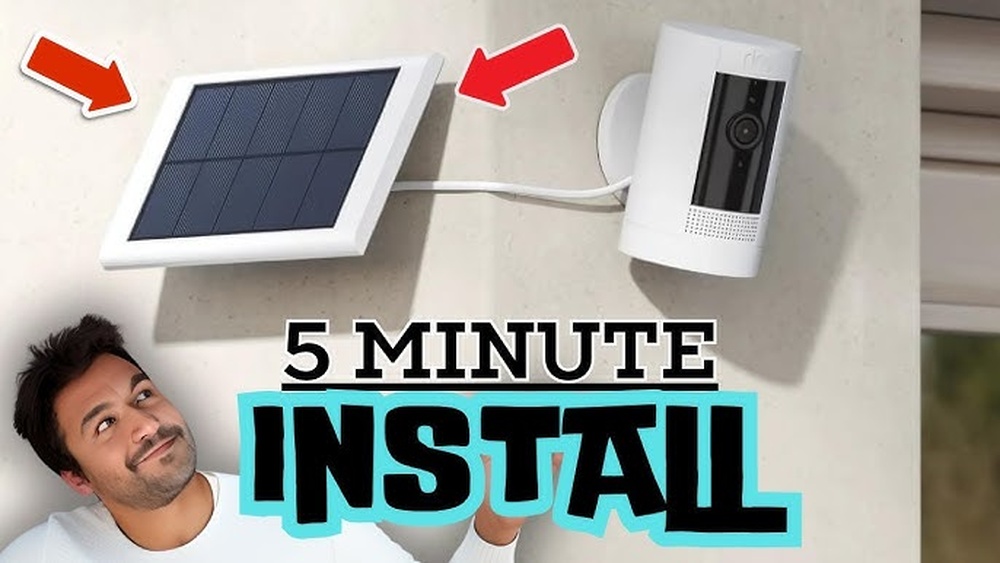
Connecting a solar panel to your Ring camera can be a smart way to keep your home security active without worrying about battery changes or wiring. Many people want a reliable, eco-friendly solution to power their devices. But for beginners, the process can feel confusing. This guide will walk you through everything you need to know—from choosing the right panel, understanding compatibility, and step-by-step installation, to tips for best performance. You’ll find answers to common questions and practical advice that most first-timers miss. By the end, you’ll know exactly how to set up your solar-powered Ring camera for continuous security.
Why Connect A Solar Panel To Your Ring Camera?
Ring cameras are popular for home security, but their batteries need regular charging—sometimes every few weeks depending on use. If your camera protects a busy area or faces a lot of motion, the battery drains faster. Using a solar panel solves this problem. Here’s why it makes sense:
- Continuous power: Solar energy keeps your camera running even in remote spots.
- Less maintenance: No need to recharge or replace batteries often.
- Eco-friendly: Uses renewable energy and reduces your carbon footprint.
- Saves money: Over time, you spend less on batteries and electricity.
A solar panel can be especially helpful for cameras mounted in hard-to-reach places. Once installed, the system works almost automatically.
Understanding Ring Camera And Solar Panel Compatibility
Not every Ring camera works with every solar panel. Before buying, you need to check a few key details to avoid frustration or wasted money.
Which Ring Cameras Support Solar Panels?
Most battery-powered Ring cameras are compatible with solar panels, but plug-in models are not. Here are the main ones:
- Ring Stick Up Cam Battery
- Ring Spotlight Cam Battery
- Ring Spotlight Cam Plus (Battery)
- Ring Spotlight Cam Pro (Battery)
- Ring Video Doorbell 2/3/4 (with some third-party panels)
Wired-only models (like Ring Floodlight Cam) do not support solar panels.
Types Of Solar Panels For Ring Cameras
You have two main choices:
- Official Ring Solar Panel: Designed by Ring, guaranteed compatibility, easy installation.
- Third-party solar panels: Often cheaper, but you must check voltage, connector type, and weatherproof rating.
Key Compatibility Factors
- Voltage: Most Ring cameras need 5V-8V DC input. Too high or low can damage your device.
- Connector: Official Ring panels use a proprietary barrel plug. Many third-party panels come with adapters.
- Power output: At least 2-3 watts for normal use; more if your camera records often.
- Cable length: Make sure the cable reaches from the panel to your camera location.
- Weatherproofing: Both the panel and cable should be rated for outdoor use.
Here’s a quick comparison of popular Ring-compatible solar panels:
| Solar Panel Model | Max Output | Cable Length | Compatible Cameras | Weatherproof |
|---|---|---|---|---|
| Ring Solar Panel | 2.2W | 13 ft | Stick Up, Spotlight (Battery) | Yes |
| Ring Super Solar Panel | 5W | 13 ft | Stick Up, Spotlight (Battery) | Yes |
| Wasserstein Panel | 3.5W | 16 ft | Stick Up, Spotlight (Battery) | Yes |
| iTODOS Panel | 3W | 11.5 ft | Stick Up, Spotlight, Video Doorbell | Yes |
Insight: Don’t assume all solar panels with a USB or barrel connector will work. Always check the voltage and output in the camera’s manual.
Tools And Materials Needed
Before you start the installation, gather all the necessary tools and parts. Skipping this step often leads to delays or extra trips to the hardware store. Here’s what you’ll need:
- Ring camera (battery-powered model)
- Compatible solar panel
- Mounting kit (usually included with the panel)
- Drill (for outdoor wall or soffit mounting)
- Screwdriver
- Measuring tape (for cable routing)
- Level (to make sure the panel faces the sun)
- Weatherproof clips or cable ties
- Silicone sealant (optional, for extra weatherproofing)
Tip: If you’re using a third-party panel, check if an adapter is included for the Ring camera plug.
Step-by-step: How To Connect A Solar Panel To A Ring Camera
This section gives you a clear, practical process. Even if you’re not handy with tools, these steps are simple enough for most homeowners.
1. Choose The Right Location
- Sunlight exposure: Pick a spot where the panel gets at least 3-4 hours of direct sunlight daily. South-facing walls or roofs are best in the US.
- Camera proximity: The panel must be close enough for the cable to reach the camera.
- Avoid shade: Trees, gutters, or nearby buildings can block the sun and reduce charging.
Non-obvious tip: If you live in a place with lots of cloudy days, consider a higher-wattage panel for better performance.
2. Mount The Solar Panel
- Mark the drill holes: Hold the mounting bracket against the wall and use a pencil to mark where to drill.
- Drill pilot holes: This prevents the wall from cracking.
- Attach the bracket: Use weatherproof screws for outdoor walls.
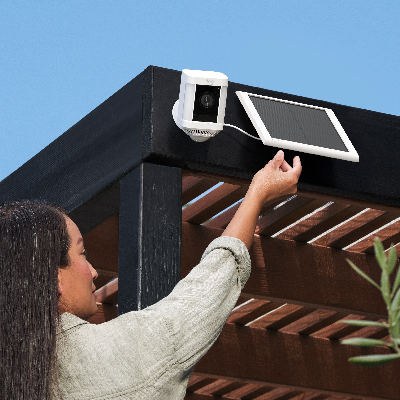
- Snap the panel onto the bracket: Adjust the angle toward the sun. Most panels let you tilt up/down and side-to-side.
3. Route The Cable
- Plan your path: Avoid sharp bends, moving parts, or places where pets chew.
- Secure the cable: Use the included clips or weatherproof cable ties.
- Seal gaps: If you pass the cable through a wall, add silicone sealant around the hole for extra protection.
4. Connect The Panel To The Camera
- Remove the camera from its mount (if already installed).
- Open the power port cover: Usually found at the back or bottom of the camera.
- Plug in the panel’s connector: Make sure it clicks in place.
- Secure the camera back on its mount.
Important: The camera will still need a charged battery to start. The solar panel keeps it topped up but does not replace the battery.
5. Check The Connection In The Ring App
- Open the Ring app.
- Go to your camera’s device settings.
- Look for “Solar Status” or “Connected” under Device Health.
- If it shows “Connected,” the panel is working.
If you don’t see the solar status, check the connections and make sure the panel is getting sunlight.
Performance: What To Expect From A Solar-powered Ring Camera
Many users wonder how reliable a solar-powered system is. Here’s what you can expect in real life.
Charging Speed And Battery Life
A typical Ring solar panel adds about 1-2% charge per hour of direct sunlight. This is enough to keep the battery level steady for most homes with 10–20 motion events per day.
If your camera records a lot (busy street, many notifications), the battery may slowly drop over several weeks, especially during winter.
Real-world Example
In a test with a Ring Stick Up Cam and the standard Ring solar panel in Texas:
- Average sunlight: 5 hours/day
- Camera: 10 motion events/day
- Battery remained at 95–100% for months
In contrast, a camera on a shaded porch with only 2 hours of sunlight dropped to 80% over a month.
Factors Affecting Performance
- Season: Less sunlight in winter means slower charging.
- Location: North-facing walls or heavy shade reduce effectiveness.
- Camera use: More live views or motion events drain the battery faster.
Non-obvious insight: Cleaning the panel every few months removes dust and bird droppings, which can block up to 15% of sunlight.
Common Problems And How To Fix Them
Even a simple installation can have small issues. Here are the most frequent problems and how to solve them.
1. Solar Panel Not Charging The Camera
- Check if the panel is in direct sunlight.
- Make sure the cable is fully connected at both ends.
- Inspect the cable for damage or pinched spots.
- Try the panel on another camera if possible.
2. “solar Status: Not Connected” In The App
- Restart the Ring camera by removing and reinserting the battery.
- Double-check the connector is fully inserted.
- Try moving the panel to a sunnier spot for testing.
3. Battery Draining Even With Solar Panel
- Check the motion sensitivity—if too high, the camera records too often.
- Reduce unnecessary motion zones.
- Clean the solar panel surface.
- Upgrade to a higher-wattage panel if you live in a low-sun area.
4. Panel Or Cable Damaged By Weather
- Use weatherproof tape to seal any exposed connectors.
- Replace the cable with a weatherproof extension if needed.
- Move the panel to a spot with less wind or rain exposure.
5. Panel Interferes With Camera Mount
- Use a right-angle adapter if the cable blocks the mount.
- Choose a different mounting spot for the panel, as long as the cable reaches.
Pro tip: Always check the Ring app after big storms to make sure the solar status is still “Connected.”

Credit: www.amazon.com
Comparing Ring’s Official Solar Panel Vs Third-party Options
Is it better to use the official Ring solar panel, or is a third-party one just as good? Here’s a quick comparison to help you decide.
| Feature | Ring Official Panel | Third-Party Panel |
|---|---|---|
| Compatibility | Guaranteed | Check voltage/output |
| Warranty | 1 year (Ring) | Varies (often 6-12 months) |
| Price | Higher ($40–$60) | Lower ($20–$35) |
| Build Quality | Very good, weatherproof | Varies by brand |
| Included Accessories | Mount, cable, clips | May lack some parts |
| Support | Full Ring support | Limited, may require DIY fixes |
Summary: The official Ring panel is the safest choice, especially for beginners. If you are comfortable checking specs, a third-party panel can save money and sometimes offer a longer cable or higher output.
Advanced Tips For Best Results
If you want to get the most out of your solar-powered Ring camera, here are some extra tips that most guides miss:
- Angle the panel: Most sunlight comes from the south (in the Northern Hemisphere). Tilt the panel about 30–45 degrees for maximum efficiency.
- Seasonal adjustments: In winter, lower the tilt angle to catch more sun as the sun sits lower in the sky.
- Monitor energy usage: Check the Device Health section in the Ring app weekly. If battery drops below 80%, check for new shade or extra camera activity.
- Firmware updates: Keep your Ring camera’s firmware up to date for best battery and solar charging performance.
- Test before final mounting: Before screwing the panel in place, connect it and leave it for a day to make sure charging works as expected.
Safety Precautions
Don’t skip safety, even for a simple project:
- Only use weatherproof panels and cables for outdoor installations.
- Use a sturdy ladder and have someone help if you mount the panel high.
- Don’t overtighten screws, which can crack plastic mounts.
- If you drill into brick or concrete, use the right drill bits and wall plugs.
- Never try to connect a non-compatible power source. Wrong voltage can permanently damage your camera.
Environmental Impact And Cost Savings
Switching to a solar panel is not just convenient; it’s also good for the planet and your wallet.
Energy Savings
A Ring camera battery typically needs recharging every 1–2 months using about 5–10 kWh per year. A solar panel replaces this with renewable energy, saving a small but real amount of electricity.
Reduced E-waste
Fewer battery replacements mean less waste. A well-installed solar panel can last over 5 years with little maintenance.
Long-term Cost
- Upfront cost: $30–$60 for a panel.
- Battery savings: Less frequent replacements, especially for high-activity cameras.
- Time savings: No more taking down the camera for recharging.
When Not To Use A Solar Panel
Solar panels are great, but not always the best choice. Here are situations where you might want to avoid them:
- No sunlight: Deep shade, north-facing walls, or covered porches won’t get enough energy.
- Severe weather: In areas with heavy snow or storms, panels may get damaged or blocked.
- Aesthetics: Some homeowners’ associations restrict exterior panels.
If you can’t use solar, consider an extra battery pack or a plug-in Ring camera.
Case Study: Real-life Solar Panel Setup
Let’s look at a real example. Sam lives in Florida and uses a Ring Spotlight Cam Battery on his detached garage. The battery used to last only 3 weeks due to high motion from cars and animals.
What Sam did:
- Installed a Ring Super Solar Panel on the south wall of the garage.
- Used the full 13-foot cable to route to the camera.
- Adjusted the camera’s motion zones to reduce false alerts.
- Cleaned the panel every 2 months.
Results:
- Battery level stayed above 95% even with daily motion alerts.
- No more ladder trips for battery charging.
- System survived summer storms with zero issues.
Lesson: The right panel location, combined with smart camera settings, provides true “set and forget” security.
Solar Panel Maintenance Tips
Solar panels need little upkeep, but a few small habits can improve performance:
- Wipe the panel every 2–3 months with a soft, damp cloth to remove dust and debris.
- Check for shade—new plants or growing trees can block sunlight over time.
- Inspect cable and connectors for wear after big storms.
- Re-tighten screws if you notice the panel is loose or has shifted angle.
If you live near the coast, salt can build up on the panel. Clean more often to prevent corrosion.
Upgrading Or Expanding Your Solar-powered System
If you want to add more cameras or improve your setup:
- Choose higher-wattage panels for busy areas.
- Use separate panels for each camera; don’t try to split one panel between two.
- For larger properties, consider solar-powered Wi-Fi repeaters to boost coverage.
Note: Mixing different brands of panels and cameras may require adapters. Always check specs before buying.
Credit: ring.com
How Solar Panels Affect Ring Camera Warranty
Using the official Ring solar panel will not void your camera’s warranty. However, third-party panels might. If you ever need support from Ring, they may ask which panel you use.
- Official panel: Full support and warranty coverage.
- Third-party panel: Warranty may be limited; check with Ring if unsure.
If you’re renting or plan to move, the panel can be removed and installed at your new place.
Top Mistakes To Avoid
Even experienced users make these errors:
- Wrong panel type: Buying a panel for “security cameras” that’s not designed for Ring.
- Poor sunlight location: Mounting on a north wall or under an eave blocks sunlight.
- Loose connections: Not pushing the connector in fully leads to charging failures.
- Ignoring maintenance: Dust and leaves can block sunlight quickly.
- Overloading with motion alerts: Setting the camera to record every small movement drains the battery.
Stay alert to these and your system will run smoothly.

Credit: www.youtube.com
Frequently Asked Questions
How Long Does It Take For The Solar Panel To Charge A Ring Camera Battery?
Charging speed depends on sunlight and camera activity. In full sun, the panel adds 1–2% per hour. If your camera is not recording much, the solar panel can keep the battery near 100% most days. If the battery is fully drained, the panel alone might take several days to recharge, so it’s best to start with a charged battery.
Can I Use Any Solar Panel With My Ring Camera?
Not all panels are compatible. You must match the voltage (usually 5V–8V DC), connector type, and weatherproofing. The official Ring panel is safest, but some third-party panels work if they fit these specs. Always check the product details before buying.
Do I Need To Remove The Battery When Using A Solar Panel?
No, the battery stays inside the camera. The solar panel charges the battery, so your camera works day and night. If you remove the battery, the camera will not work—even with the solar panel connected.
Will The Camera Still Work At Night Or On Cloudy Days?
Yes. The battery stores power from the solar panel during the day and keeps the camera running at night or during bad weather. If there are many cloudy days in a row, the battery level may drop, but it usually recovers when the sun returns.
Where Can I Learn More About Solar-powered Smart Home Devices?
For more details, you can visit the Wikipedia page on solar-powered security cameras, which covers technology, benefits, and different use cases.
Switching to a solar panel for your Ring camera is a simple, effective upgrade that saves time and energy. With the right setup and a little maintenance, you’ll enjoy reliable security and less hassle for years to come.