
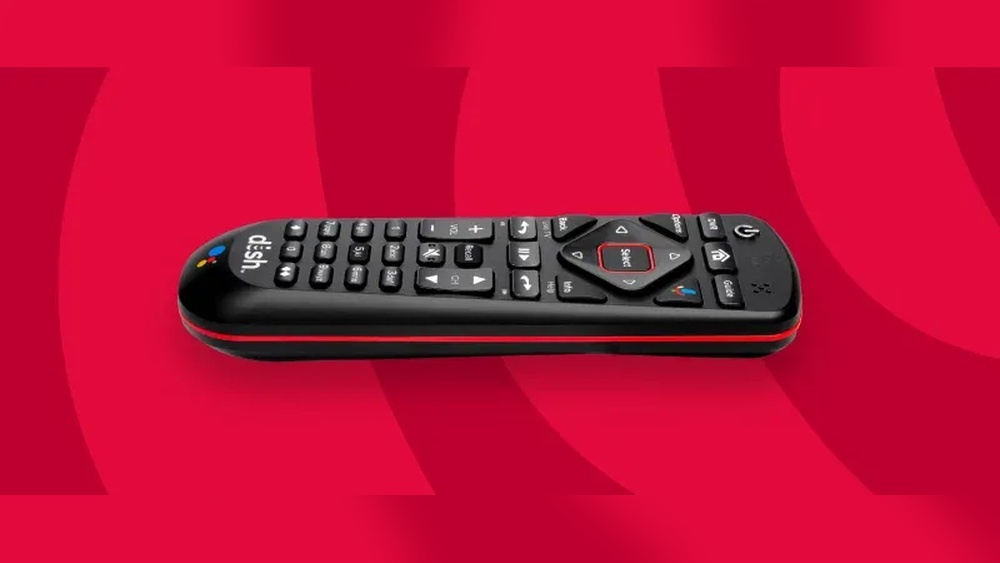
Programming a new Dish Network remote control can feel confusing if you’ve never done it before. But with the right steps, it’s a straightforward process that anyone can master at home. Whether you want to control your TV, sound system, or other devices, learning how to set up your Dish remote saves time and makes your viewing experience smoother.
This guide will walk you through each step in simple language, explain the differences between remote models, and share practical tips that most new users miss. By the end, you’ll know exactly how to program your Dish Network remote, avoid common mistakes, and get the most out of your home entertainment system.
Understanding Dish Network Remote Controls
Dish Network offers several types of remote controls. Each has unique features and programming methods. Knowing your remote model is the first step in programming it correctly.
Main Types Of Dish Remotes
Most Dish remotes fall into these categories:
- 40.0, 50.0, 52.0, 54.0 Voice Remotes: These are the latest models, often called Hopper or Joey remotes. They support voice commands and Bluetooth.
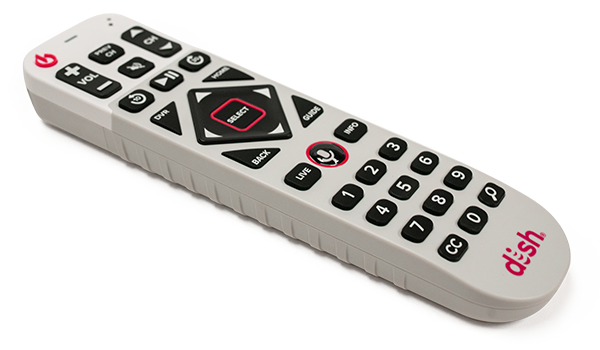
- 20.0, 21.0, 32.0 Remotes: Often used with older receivers, these have fewer advanced features.
- Universal Remotes (e.g., 21.1 IR/UHF, 20.1 IR): They work with multiple devices and offer basic programming.
You can find the model number printed inside the battery compartment or on the back label.
Differences That Matter
- Voice Remotes: Pair with your receiver using Bluetooth, which means you don’t need to point them directly at the device.
- Older Remotes: Use infrared (IR) or ultra-high frequency (UHF), requiring line-of-sight for IR models.
- Universal Remotes: Control TVs, soundbars, and other devices, but may need extra codes or steps.
Understanding your remote type makes the programming steps much easier.
Preparation: What To Do Before Programming
Before you start programming, a few simple checks help avoid problems later.
Gather Everything You Need
- The Dish remote control
- Fresh batteries (weak batteries cause programming failures)
- The device you want to control (TV, soundbar, etc. ), powered on
- The correct receiver model (Hopper, Wally, ViP, etc.)
- Access to the device’s brand and model number
Check For Interference
Make sure there’s no physical obstruction between the remote and the device if you use an IR remote. For Bluetooth remotes, keep other wireless devices away during programming.
Locate The Pairing Or Programming Button
Most Dish receivers have a SAT button, Pairing button, or a System Info button. This is often behind a front panel door.
Update Your Receiver
For the best compatibility, make sure your Dish receiver has the latest software update. Newer remotes may not work with outdated receivers.

Credit: www.amazon.com
Step-by-step Guide: Programming A Dish Network Remote
Programming a Dish remote can mean pairing it with a receiver or teaching it to control your TV or other devices. The steps vary depending on your remote model.
How To Pair A Voice Remote With Your Dish Receiver
For models like 54.0, 52.0, 50.0, and 40.0:
- Press the Home button on the remote twice. If your remote has a Menu button instead, press it twice.
- On your TV, select Settings.
- Choose Remote Control.
- Select Pair Remote to Receiver.
- Press and hold the SAT button (sometimes called the Pairing button) on the receiver for three seconds. A System Info screen appears.
- On the System Info screen, press the SAT button again on the remote, or press Pairing as shown on-screen.
- Wait for confirmation. The TV should display a message saying the remote is paired.
If you see “Pairing Succeeded,” you’re done. If not, repeat the steps slowly.
Pro Tip
If you have several remotes in your home, do this process one at a time to avoid cross-pairing.
Programming The Remote To Control Your Tv
Dish remotes can also control your TV’s power, volume, and input. Here’s how:
- Press the Home or Menu button on your Dish remote twice.
- Select Settings.
- Choose Remote Control.
- Select the remote model you’re using.
- Choose TV under the Devices section.
- Pick your TV brand from the list.
- Follow the on-screen steps to test power and volume. The system will try different codes and ask if the TV responds.
- Once you find a working code, select Finished.
If your TV isn’t listed, try the Manual Code Entry option. You can find TV codes in the Dish remote manual or on the official Dish website.
Manual Programming (if Your Tv Isn’t Listed)
- Locate the 3-digit, 4-digit, or 5-digit code for your TV brand.
- Press and hold the TV button on the remote until all mode buttons light up.
- Enter the code using the number buttons.
- Release the TV button and test power/volume.
Programming The Remote For Other Devices
Dish remotes can also control soundbars, DVD players, and more.
- Go to Settings > Remote Control as before.
- Select the device type (e.g., Audio Receiver, DVD/Blu-ray).
- Choose the brand.
- Follow the on-screen prompts to test codes.
Some devices may need manual code entry, just like for TVs.
Using The Power Scan Feature (for Unlisted Devices)
If your device brand isn’t listed, use the Power Scan method:
- Turn on the device you want to control.
- Press and hold the TV (or AUX) button until all mode buttons light up.
- Press and release the Power button.
- Press the Up arrow repeatedly. The remote will cycle through codes. When the device turns off, stop.
- Press Pound (#) to save the code.
This method is slower but works for many hard-to-find brands.
Troubleshooting Programming Problems
If the remote won’t program, try these:
- Check batteries: Weak batteries are a top cause of failure.
- Restart the receiver: Unplug for 10 seconds, then plug back in.
- Clear remote memory: Remove batteries, press every button twice, reinsert batteries.
- Try a different code: Some brands have several possible codes.
- Move closer: Especially for IR remotes, distance matters.
Comparison Of Dish Remote Models
Choosing the right remote model makes programming easier. Here’s a quick comparison of main features.
| Model | Connection Type | Voice Control | Device Support | Programming Method |
|---|---|---|---|---|
| 54.0 Voice | Bluetooth/IR | Yes | TV, Audio, Receiver | On-screen pairing |
| 50.0 Voice | Bluetooth/IR | Yes | TV, Audio, Receiver | On-screen pairing |
| 21.1 IR/UHF | IR/UHF | No | TV, Receiver | Manual code entry |
| 20.1 IR | IR | No | TV, Receiver | Manual code entry |
Notice that newer models support more devices and are easier to pair.
Common Programming Mistakes (and How To Avoid Them)
Even experienced users sometimes run into trouble. Here’s what to watch for:
- Wrong remote model selected: Always choose the exact model in the on-screen menu.
- Old batteries: Even partially drained batteries can cause pairing to fail.
- Programming too far from the device: IR remotes need a clear line of sight.
- Skipping receiver updates: Outdated receivers may not recognize new remotes.
- Not saving after testing codes: Always confirm and save the working code.
A non-obvious mistake is trying to program the remote while the receiver is off or in standby mode. Make sure all devices are fully powered on before starting.
Tips For Advanced Programming
Most guides stop at basic setup. Here are extra tips for more control:
Using Learning Mode
Some Dish remotes support learning mode, where you “teach” the remote using the original device’s remote. This is useful for devices not in the code database.
- Place the Dish remote and the original remote head-to-head.
- Enter learning mode (see your remote’s manual).
- Press the button on the Dish remote, then the matching button on the original remote.
- Repeat for each function you want to copy.
Setting Up Multiple Devices
You can program your Dish remote to control up to three devices: your TV, audio receiver, and Dish receiver. Use the mode buttons (TV, AUX, SAT) to switch between them.
- Press the mode button before using the remote for a specific device.
- Each mode can have its own code.
Resetting The Remote
If things get confusing, reset the remote to factory settings:
- Remove the batteries.
- Hold down the Home or Menu button for 10 seconds.
- Reinsert the batteries and repeat the programming steps.
Pairing Multiple Remotes To One Receiver
If you have several remotes (e. g. , in different rooms), pair them one at a time, making sure only one is in pairing mode. Each remote gets a unique address.
Troubleshooting Interference
If your remote works sometimes but not always, check for:
- Bright sunlight: Can block IR signals.
- Nearby wireless devices: May interfere with Bluetooth.
- Low batteries: Cause erratic behavior.
How To Unpair Or Reset A Dish Network Remote
Sometimes you need to unpair a remote (for example, if you buy a new TV or move your receiver). Here’s how:
Unpairing A Voice Remote
- Go to Settings > Remote Control.
- Select the paired remote.
- Choose Unpair Remote.
- Follow on-screen instructions.
Factory Resetting The Remote
- Press and hold the Back and Guide buttons together for three seconds.
- The remote will flash, then reset.
- Re-pair using the steps above.
A full reset helps if your remote is acting strangely or won’t program.
What To Do If Programming Doesn’t Work
Even after careful steps, some remotes don’t program on the first try. Here’s a troubleshooting checklist:
- Double-check the device brand and model: Sometimes, brands have similar names or multiple code sets.
- Try all possible codes: Some TVs or soundbars use several codes.
- Move closer to the device: Especially for IR remotes, get within 5 feet.
- Power cycle everything: Turn off and unplug all devices for 30 seconds.
- Try programming from a different mode: For example, use AUX instead of TV.
- Replace the batteries again: Even new batteries can sometimes be defective.
- Test the remote with the receiver only: Make sure the remote works with Dish before adding other devices.
If you still have problems, contact Dish support or visit their support page for updated codes and troubleshooting.
Credit: www.dish.com
How To Program A Dish Remote For Special Tvs And Devices
Not all TVs and devices behave the same. Some, like Samsung, LG, Sony, and off-brands, need extra attention.
Samsung, Lg, And Sony Tvs
- Use the most recent code from the Dish website.
- Try programming from both the TV and AUX mode.
- If the TV has “hotel mode” or “store demo,” turn it off first.
Off-brand Or Non-mainstream Tvs
- Use the Power Scan method (described above).
- Try codes for similar brands.
- Look for universal remote code lists online.
Soundbars And Audio Receivers
- Many soundbars use TV codes. If the listed audio code doesn’t work, try the TV code for your brand.
- Some soundbars need to be in programming or pairing mode. Check the soundbar manual.
Dvd/blu-ray Players And Streaming Boxes
- Not all Dish remotes support these, especially older models.
- Use AUX mode and try multiple codes.
- For streaming boxes (Roku, Fire TV), Dish remotes typically only control power and volume.
Extra Features On Dish Network Remotes
Modern Dish remotes offer more than just basic control. Here are some features you might not know about:
Voice Search
- Press and hold the Microphone button.
- Speak a channel, show, or actor.
- The system searches live TV, recordings, and streaming apps.
Backlit Buttons
- Models like 54.0 have backlighting for night use.
- If your buttons aren’t lighting up, check for low batteries.
Find Lost Remote
- On Hopper receivers, press the Locate Remote button on the receiver.
- The remote will beep to help you find it.
Custom Shortcuts
- Some remotes allow you to program shortcut buttons for favorite channels or apps.
- Check the manual for your model.
Data Table: Tv Brands And Common Codes
Programming works best with the right code. Here’s a sample of popular TV brands and their most-used codes.
| TV Brand | Common Codes | Special Instructions |
|---|---|---|
| Samsung | 0702, 0178, 0644 | Try both TV and AUX mode |
| LG | 1423, 0178, 11423 | Restart TV before programming |
| Sony | 0810, 1685, 1738 | Use the latest code from Dish site |
| Vizio | 1758, 0864, 0885 | Try manual entry if auto fails |
| TCL | 1756, 11756, 12434 | Try Power Scan for Roku models |
Always use the most recent codes for best results.
Why Programming Your Dish Remote Matters
Many users never program their Dish remote beyond the basics. But full programming lets you:
- Control all devices with one remote.
- Use advanced features like voice search.
- Switch between TV, soundbar, and receiver easily.
- Reduce clutter and confusion.
Proper programming means fewer remote-control headaches and a smoother TV experience.
Non-obvious Insights For New Users
- Receivers in cabinets: If your receiver is inside a cabinet or behind a wall, use a Bluetooth-capable remote. IR remotes won’t work through obstacles.
- Universal remote overlap: If you use another universal remote (like a Logitech Harmony), program the Dish remote first to avoid code conflicts.
- Device power cycles: Some TVs or soundbars need to be unplugged and plugged back in before they accept new codes.
- Multiple TVs in one home: Label each remote and test them separately to avoid mixing up codes.
When To Replace Your Dish Remote
No matter how well you program, remotes wear out. Replace your Dish remote if:
- Buttons are unresponsive or sticky.
- The battery compartment is corroded.
- The remote fails to pair with a known working receiver.
- You upgrade to a new receiver model.
Replacement remotes are available from Dish, electronics stores, or online retailers. Always buy genuine Dish products to ensure compatibility.

Credit: www.amazon.com
How Dish Remote Programming Compares To Other Brands
Programming a Dish remote is generally easier than with other satellite or cable providers. Here’s a brief comparison:
| Provider | Programming Method | Device Support | Difficulty Level |
|---|---|---|---|
| Dish Network | On-screen, manual, power scan | TV, audio, some streaming | Easy to Moderate |
| DirecTV | Manual, on-screen | TV, audio | Moderate |
| Xfinity | On-screen, code entry | TV, audio, streaming | Moderate |
| U-Verse | Manual code entry | TV, audio | Hard |
Dish’s on-screen pairing, especially for voice remotes, makes the process less frustrating for most users.
Where To Find More Codes And Support
If your device is not working with standard codes, visit the official Dish Network support page. They update code lists and troubleshooting tips regularly.
You can also contact Dish customer service for live help or order replacement remotes.
Frequently Asked Questions
How Do I Know Which Dish Remote Model I Have?
Check inside the battery compartment or on the back label of your remote. The model number is printed clearly (e.g., 54.0, 21.1 IR/UHF). This helps you follow the correct programming steps.
Can I Program My Dish Remote To Control More Than One Device?
Yes, most Dish remotes can control multiple devices, such as your TV, audio receiver, and Blu-ray player. Use the TV, AUX, and SAT mode buttons to switch between devices.
What If My Tv Brand Is Not Listed In The On-screen Menu?
If your TV brand isn’t listed, try the manual code entry or Power Scan method. Check the Dish website for more codes, or try similar brand codes. Power Scan can take time but works for many off-brand devices.
Why Won’t My Remote Pair With My Receiver?
Common reasons include old batteries, interference from other wireless devices, or outdated receiver software. Always update your receiver, check batteries, and make sure you use the exact pairing steps for your remote model.
Is There A Way To Find My Lost Dish Remote?
Yes, most modern receivers have a Locate Remote button. Press it, and your remote will beep. This feature is available on Hopper and Wally receivers with compatible remotes.
Programming your new Dish Network remote puts you in control of your home entertainment. It may take a few tries, but with careful steps and the right codes, you’ll enjoy a more seamless TV experience. Take your time, and don’t hesitate to look up extra codes or get help if needed—soon, you’ll be flipping channels and adjusting volume with just one remote in hand.