
Opening a Sony TV remote control may seem simple, but it can be tricky, especially if you have never done it before. Whether you need to replace the batteries, clean the inside, or fix a stuck button, knowing how to open your Sony remote safely is very important.
Many people damage their remotes by using the wrong tools or too much force. This article will guide you step by step through the process, explain the different types of Sony remotes, and share useful tips to avoid common mistakes.
You will also learn how to identify your remote model, understand the tools you need, and get practical advice on cleaning and reassembling your remote. By the end, you will feel confident opening almost any Sony TV remote control.
Understanding Sony Tv Remote Models
Sony has released many types of TV remotes over the years. Each model can be a bit different, especially in how the case is put together. Some remotes have visible screws, while others use snap-fit plastic. Knowing your model helps you find the right method to open it.
Common Types Of Sony Tv Remotes
- Standard IR Remotes: Used for most older and mid-range Sony TVs. These usually have a simple plastic shell and often use AA or AAA batteries.
- Smart TV Remotes: Newer models for Android TV or Google TV. These may have more buttons, voice control, and sometimes built-in rechargeable batteries.
- Touchpad or Magic Remotes: These are less common for Sony but exist for high-end models. They have touch-sensitive areas.
- Universal Remotes: Can control multiple devices, not just Sony TVs.
How To Identify Your Remote
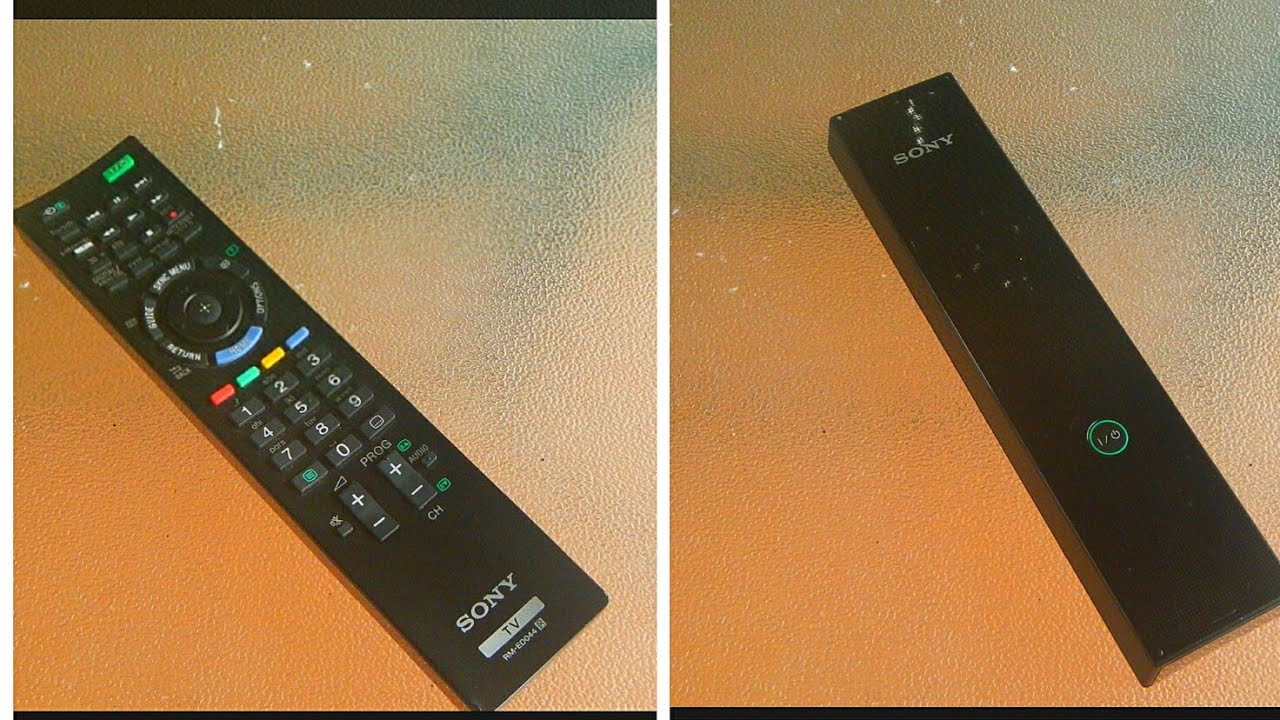
Look for the model number on the back of your remote. It usually starts with “RM-” (like RM-YD092). You can also check your TV manual or Sony’s official support website.
Why Model Matters
- Screw vs. Snap Fit: Some remotes open with screws; others snap together.
- Battery Type: Some have removable batteries, others have internal rechargeable batteries.
- Button Layout: High-end remotes may have extra or delicate parts inside.
Reasons For Opening A Sony Tv Remote
People open their remotes for many reasons. Some of the most common include:
- Replacing batteries (when the cover is stuck or jammed)
- Cleaning the inside to fix sticky or unresponsive buttons
- Fixing or replacing buttons that no longer work
- Removing debris or liquid spills
- Repairing loose connections inside the remote
- Checking or changing the circuit board (advanced users)
Many users open their remote because a simple battery change did not solve the problem. Sometimes, dust or dirt inside the remote can cause it to stop working.
Safety First: Precautions Before You Start
Opening a remote is usually safe, but there are a few things to remember:
- Remove the batteries before opening.
- Work on a clean, flat surface.
- Use the right tools to avoid damage.
- Keep small parts away from children or pets.
- If your remote has a rechargeable battery, avoid touching metal parts with wet hands.
Never use sharp knives or tools that can slip and hurt you or damage the plastic. If your remote is under warranty, opening it may void that warranty. Always check first.
Tools You Will Need
You do not need expensive tools to open most Sony TV remotes. However, using the right ones makes the job safer and easier. Here are the most helpful tools:
- Small Phillips screwdriver (for screws)
- Plastic pry tool or guitar pick (for snap-fit cases)
- Tweezers (for picking up small parts)
- Soft cloth (to protect the remote’s surface)
- Small bowl or tray (to keep screws and buttons safe)
Avoid using metal screwdrivers to pry open the case, as they can scratch or crack the plastic.

Credit: www.sony-latin.com
Step-by-step Guide: How To Open A Sony Tv Remote Control
There are two main ways to open a Sony TV remote: using screws or prying open a snap-fit case. The steps below will help you with both.
Step 1: Remove The Batteries
Always start by removing the batteries. This stops any power from reaching the circuit board and helps protect you and the remote.
- Slide off the battery cover.
- Take out all batteries.
If the battery cover is stuck, try gently pressing it down and sliding. Do not use too much force.
Step 2: Check For Screws
Look for screws on the back of your remote. Most screws are small and located in the battery compartment or under labels.
- Use a flashlight to check all possible areas.
- Some screws are hidden under small rubber pads or stickers.
If you find screws:
- Use a small Phillips screwdriver to remove them.
- Place the screws in a bowl so they do not get lost.
If you do not see any screws, your remote uses a snap-fit design.
Step 3: Opening A Snap-fit Remote Case
If there are no screws, the two halves of the remote are held together by small plastic clips. Here’s what to do:
- Insert a plastic pry tool or guitar pick into the seam running around the edge of the remote.
- Gently twist or slide the tool until you feel the clips pop open.
- Move along the seam, opening clips one by one.
- If you feel strong resistance, double-check for hidden screws or labels.
Do not use too much force. If the plastic bends sharply or cracks, stop and check for missed screws.
Step 4: Separate The Remote Halves
Once all the clips are open or all screws are removed, gently lift the top half of the remote away.
- Be careful with any buttons or rubber pads—these may fall out.
- If the halves are still stuck, look for additional clips or screws.
Step 5: Remove And Organize Internal Parts
Inside, you will see:
- Rubber button pad
- Printed circuit board (PCB)
- Battery contacts
- Plastic shell
Carefully lift out the rubber pad and circuit board if needed. Note how each part fits so you can reassemble it later.
Cleaning And Maintenance Tips
Opening your remote is a great chance to clean it. Dust and dirt often cause buttons to stop working. Here’s how to clean safely:
- Rubber Button Pad: Wash with mild soap and water. Dry completely before reinstalling.
- Plastic Shell: Wipe with a damp cloth. Avoid strong cleaners.
- Circuit Board: Use a dry, soft brush or compressed air. Do not use water.
If there is sticky residue, a tiny amount of isopropyl alcohol on a cotton swab can help. Never soak the circuit board.
Tips For Deep Cleaning
- For stubborn grime, let the rubber pad soak in soapy water for 5-10 minutes.
- Use a toothpick to gently remove dirt from small holes or button spaces.
- Let all parts dry completely before putting the remote back together.
Non-obvious insight: Many remotes fail because the carbon pads under each button wear out. If cleaning does not help, you can buy conductive paint online to repair the pads.

Credit: www.youtube.com
Reassembling Your Sony Remote
Once everything is clean and dry, it is time to put your remote back together.
- Place the circuit board back into the lower shell.
- Align the rubber button pad on top of the circuit board.
- Carefully snap the two halves together or replace the screws.
Make sure all clips and screws are fully in place before inserting the batteries. If buttons feel stuck, open the case again and realign the rubber pad.
Common Reassembly Mistakes
- Forgetting small springs or plastic parts: Some remotes have tiny springs for certain buttons. Double-check before closing.
- Misaligned rubber pad: If buttons do not work or feel wrong, the pad may be out of position.
- Pinched wires: In rare cases, remotes with LEDs or microphones have small wires. Be careful not to trap them.
Troubleshooting: If Your Remote Still Does Not Work
Sometimes, a remote will not work even after opening and cleaning. Here are some things to check:
- Check battery orientation: Make sure batteries are in the right way.
- Inspect the battery contacts: Clean if there is corrosion.
- Look for broken or burned areas on the circuit board.
- Test the remote with a digital camera: Point the remote at your phone’s camera, press a button, and see if you see a light.
If the remote still does not work, it may be time to buy a replacement.
Table: Common Sony Remote Problems And Solutions
| Problem | Possible Cause | Solution |
|---|---|---|
| Buttons not working | Dirt under pad, worn carbon contacts | Clean or repair with conductive paint |
| Remote not responding | Dead batteries, bad contacts, broken PCB | Check batteries, clean contacts, inspect PCB |
| Sticky buttons | Spilled liquid, sticky residue | Deep clean rubber pad and shell |
| Battery cover stuck | Debris, worn latch | Gently pry open, clean latch area |
| Remote works sometimes | Loose contacts, weak batteries | Reseat batteries, check contacts, clean inside |
Comparing Sony Remotes: Screw Vs. Snap-fit Designs
Not all Sony remotes open the same way. Here is a quick comparison to help you understand which type you might have:
| Type | How to Open | Difficulty | Common Models |
|---|---|---|---|
| Screw-secured | Remove screws, separate halves | Easy | RM-YD092, RM-GD005 |
| Snap-fit | Pry open with plastic tool | Medium | RMF-TX200U, RMF-TX310U |
| Hybrid (screw + snap) | Remove screws, then pry clips | Medium to hard | Some smart remotes |
Non-obvious insight: Some snap-fit remotes can be easier to open if warmed slightly with a hair dryer on low. The plastic softens a bit, making clips less brittle.
Tips For Specific Sony Remote Models
Sony’s remote lineup is wide, but a few popular models stand out. Here are some specific tips:
Rm-yd092 (classic Infrared Remote)
- Has 1-2 screws in the battery compartment.
- Button pad is easy to remove and clean.
- Be careful not to lose the small power button spring.
Rmf-tx200u (smart Tv Remote)
- Uses a snap-fit design, no visible screws.
- Pry tool needed for safe opening.
- The voice control microphone is connected by a small wire; do not pull halves apart quickly.
Rm-gd005 (older Bravia Remote)
- Usually 2 screws near the bottom.
- Buttons can be stiff; clean thoroughly if sticky.
How To Open A Sony Remote With A Stuck Battery Cover
Sometimes, the hardest part is simply removing the battery cover. Here’s what you can try:
- Tap the remote gently on your palm to loosen the cover.
- Use a thin plastic card (like a credit card) to slide under the edge and lift slightly.
- If there is visible dirt, clean around the edges with a toothpick.
- For very stubborn covers, wrap the remote in a towel and gently tap it against a table.
Never use sharp knives or metal tools, as they can crack the plastic or cause injury.
Preventing Damage When Opening Your Remote
Many people accidentally damage their remotes while trying to open them. To avoid this:
- Always use plastic tools, not metal.
- Do not force clips—if stuck, check for hidden screws.
- Keep a small tray or bowl for screws and buttons.
- Take photos during disassembly to help with reassembly.
If you feel unsure, search for a video guide for your exact remote model. Sony’s official support site sometimes has diagrams or repair instructions.
Credit: www.youtube.com
When To Replace Instead Of Repair
Sometimes, opening and cleaning your remote does not help. Here are signs it may be time for a new one:
- Cracked or broken circuit board
- Battery contacts are too corroded to clean
- Missing buttons or parts you cannot replace
- Remote still unresponsive after cleaning and new batteries
Replacement Sony remotes are widely available online. Always buy from a trusted seller to avoid fake products.
Table: Cost Comparison – Repairing Vs. Replacing
| Option | Average Cost (USD) | Time Needed | Success Rate |
|---|---|---|---|
| DIY Cleaning/Repair | $0 – $10 | 30–60 minutes | High (if cleaning) |
| Professional Repair | $20 – $40 | 3–5 days | Medium |
| Buy New Remote | $15 – $50 | 1–3 days (shipping) | Very High |
Advanced Tips For Tech-savvy Users
If you are comfortable with electronics, you can try these advanced steps:
- Replace worn carbon pads with conductive paint.
- Fix broken solder joints on the circuit board using a soldering iron.
- Swap parts between two remotes (if same model).
Warning: Only do this if you understand electronics. If not, stick to cleaning and basic repairs.
A common mistake among beginners is trying to glue broken plastic clips. Super glue can damage the shell or make it impossible to reopen the remote later. Instead, use a small piece of clear tape if you need extra security.
Environmental Responsibility: Recycling Old Remotes
If you decide to replace your Sony TV remote, do not throw the old one in the trash. Many remotes contain small batteries and electronic parts that can harm the environment. Instead:
- Take old remotes to a local electronics recycling center.
- Some electronics stores accept used remotes for recycling.
- Remove batteries before recycling.
This small step helps keep harmful chemicals out of the environment.
For more information on electronics recycling, visit the EPA’s official guide.
Frequently Asked Questions
How Do I Open My Sony Remote If There Are No Visible Screws?
Most likely, your remote uses a snap-fit design. Use a plastic pry tool or guitar pick along the edge. Gently work your way around until the clips pop open. Be careful to avoid cracking the plastic.
What Should I Do If A Button Still Does Not Work After Cleaning?
If cleaning does not help, the carbon pad under the button may be worn out. You can buy conductive paint online to repair it, or replace the rubber pad if available for your model.
Can I Use Water To Clean The Inside Of My Sony Tv Remote?
It is safe to wash the rubber button pad and plastic shell with mild soap and water, as long as you dry them completely. Never wash the circuit board with water; use a dry brush or compressed air instead.
Is It Safe To Open A Remote With A Rechargeable Battery?
Yes, but be extra careful. Remove the battery if possible before opening. Do not touch battery contacts with wet hands, and avoid using metal tools near the battery.
Will Opening My Remote Void The Warranty?
Usually, yes. If your Sony TV or remote is still under warranty, check with Sony support before opening. Opening the remote may void your warranty, especially if you damage any parts.
Opening a Sony TV remote control is not difficult with the right tools and a little care. Whether you need to replace the batteries, clean sticky buttons, or fix a problem, following these steps will help you do the job safely and successfully.
Remember to take your time, organize small parts, and never force the case open. With proper cleaning, many remotes can last for years. And if your remote is beyond repair, recycling it responsibly helps protect the environment. With this guide, you can handle almost any Sony TV remote with confidence.