
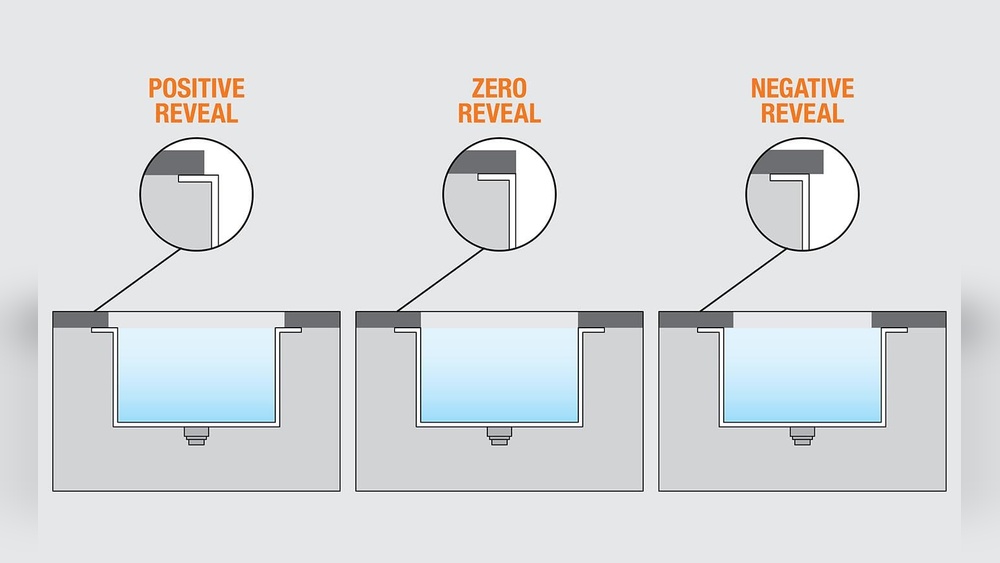
Mounting an undermount sink is a project many homeowners consider when upgrading their kitchen or bathroom. These sinks are popular because they create a sleek, modern look. They also make cleaning the countertop easier, as there is no rim to catch crumbs or dirt. But installing an undermount sink is not as simple as dropping a sink into a hole. It requires careful planning, proper tools, and good technique. If you are willing to take your time and follow each step closely, you can achieve a professional result.
This article will guide you through the full process of mounting an undermount sink. You’ll learn what tools and materials you need, how to prepare the countertop, and how to attach the sink securely. We’ll cover special tips that can prevent common mistakes, as well as answer some frequently asked questions at the end.
Whether you are a DIY enthusiast or just want to understand what your installer will do, this guide gives you clear, practical advice.
Understanding Undermount Sinks
Before you start, it’s important to know what makes an undermount sink different from other types. Unlike drop-in sinks, undermount models are attached below the countertop. The edge of the sink does not sit on the counter, but is instead hidden underneath. This creates a seamless transition from counter to sink.
Undermount sinks are usually made from stainless steel, granite composite, or ceramic. Each material has its own benefits and challenges during installation. Stainless steel is lighter and easier to handle, while stone or ceramic sinks are heavier and may need extra support.
One thing many beginners miss is that not all countertops are suitable for undermount sinks. Solid surface countertops like granite, quartz, or solid-surface acrylic are ideal because they can handle the weight and allow for a clean cut. Laminate countertops are not recommended, as they can weaken over time and may not support the sink properly.
Tools And Materials Needed
Getting the right tools and materials before you start will make the process easier and safer. Here’s what you’ll need:
- Undermount sink (make sure it fits your cabinet and countertop)
- Mounting clips or brackets (usually included with the sink)
- Silicone sealant (waterproof, kitchen/bath grade)
- Epoxy (for stone countertops)
- Measuring tape
- Drill and drill bits
- Screwdriver
- Wrench
- Level
- Painter’s tape
- Clamps (for holding the sink in place)
- Rubbing alcohol (for cleaning surfaces)
- Safety glasses and gloves
- Caulk gun
- Bucket (for catching water during plumbing)
- Utility knife
- Putty knife
- Wood support strips (for heavy sinks)
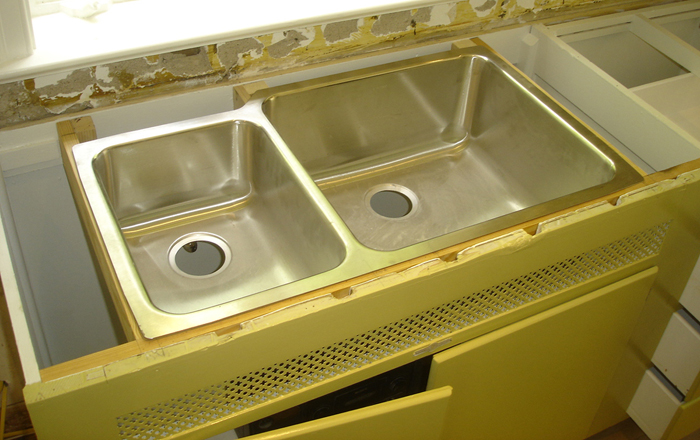
Some sinks, especially larger or heavier models, may require extra support bars or plywood strips inside the cabinet. Make sure you have these ready if your sink’s instructions suggest it.
Credit: concretecountertopinstitute.com
Preparing The Countertop And Cabinet
Preparation is crucial. If you rush this step, you may end up with leaks, a crooked sink, or a countertop that chips. Take your time and follow these tips:
Measuring And Marking
Start by measuring the sink and the cabinet opening. The sink should fit comfortably inside the cabinet, with enough room for plumbing. Most undermount sinks are designed to fit standard cabinet sizes, but always check the measurements.
Lay the sink upside down on the countertop and center it over the opening. Use painter’s tape to mark the edges. This helps you visualize how the sink will sit and gives you a guide for cutting or drilling.
Cutting The Countertop
If you are installing a new countertop, the fabricator will usually cut the sink hole for you. But if you are retrofitting an existing counter, you may need to cut the opening yourself. Use a template provided by the sink manufacturer, or trace the sink outline on the countertop.
For granite or quartz, use a wet saw or diamond-tipped blade. For solid-surface acrylic, a jigsaw works well. Always wear safety glasses and follow manufacturer instructions. Check the size often as you cut to avoid mistakes.
Cleaning And Preparing Surfaces
Clean the edge of the countertop and the rim of the sink with rubbing alcohol. This removes dust and oil, which can prevent the sealant from sticking. Dry the surfaces completely before moving to the next step.
Many beginners forget to clean these surfaces well, but skipping this can cause leaks later. Make it a habit to clean twice.
Dry-fitting The Sink
Before you apply any adhesive or sealant, do a dry fit. Place the sink under the countertop and check the alignment. Use a level to make sure the sink is straight. Check that the sink’s rim matches up with the countertop opening and that the mounting clips will fit.
If you see gaps or uneven spots, adjust the sink’s position. Sometimes, countertops are not perfectly flat, so you may need to sand or shave a small area. Do not force the sink into place, as this can crack the countertop or the sink.
This step is important because it allows you to spot problems before the adhesive is applied. Many installers skip the dry-fit and end up with a crooked sink that is hard to fix later.
Attaching The Sink
Now comes the most crucial part: attaching the sink to the countertop. This section explains step-by-step how to do it safely and securely.
Applying The Sealant
Apply a bead of silicone sealant around the edge of the sink rim. Use a caulk gun for even application. The sealant creates a waterproof barrier and holds the sink in place. Do not use too much; a thin, continuous bead is enough.
For stone countertops (granite or quartz), also apply epoxy to the rim for extra strength. Epoxy bonds well with stone and prevents the sink from loosening over time.
Positioning The Sink
Carefully lift the sink into place under the countertop. If the sink is heavy, ask a friend to help. Hold the sink against the bottom of the countertop, making sure the rim is lined up with your marks.
Use clamps to hold the sink in place while the adhesive sets. Some sinks have special brackets that fit over the rim; use them if available.
Installing Mounting Clips
Attach the mounting clips or brackets to the underside of the countertop. These clips keep the sink secure. Most clips are screwed into the stone or solid surface. For granite, you may need to use epoxy to glue the brackets.
Tighten the clips gradually, alternating sides to keep the sink level. Do not overtighten; this can crack the countertop. Use a level to check the sink’s alignment as you tighten.
Adding Extra Support
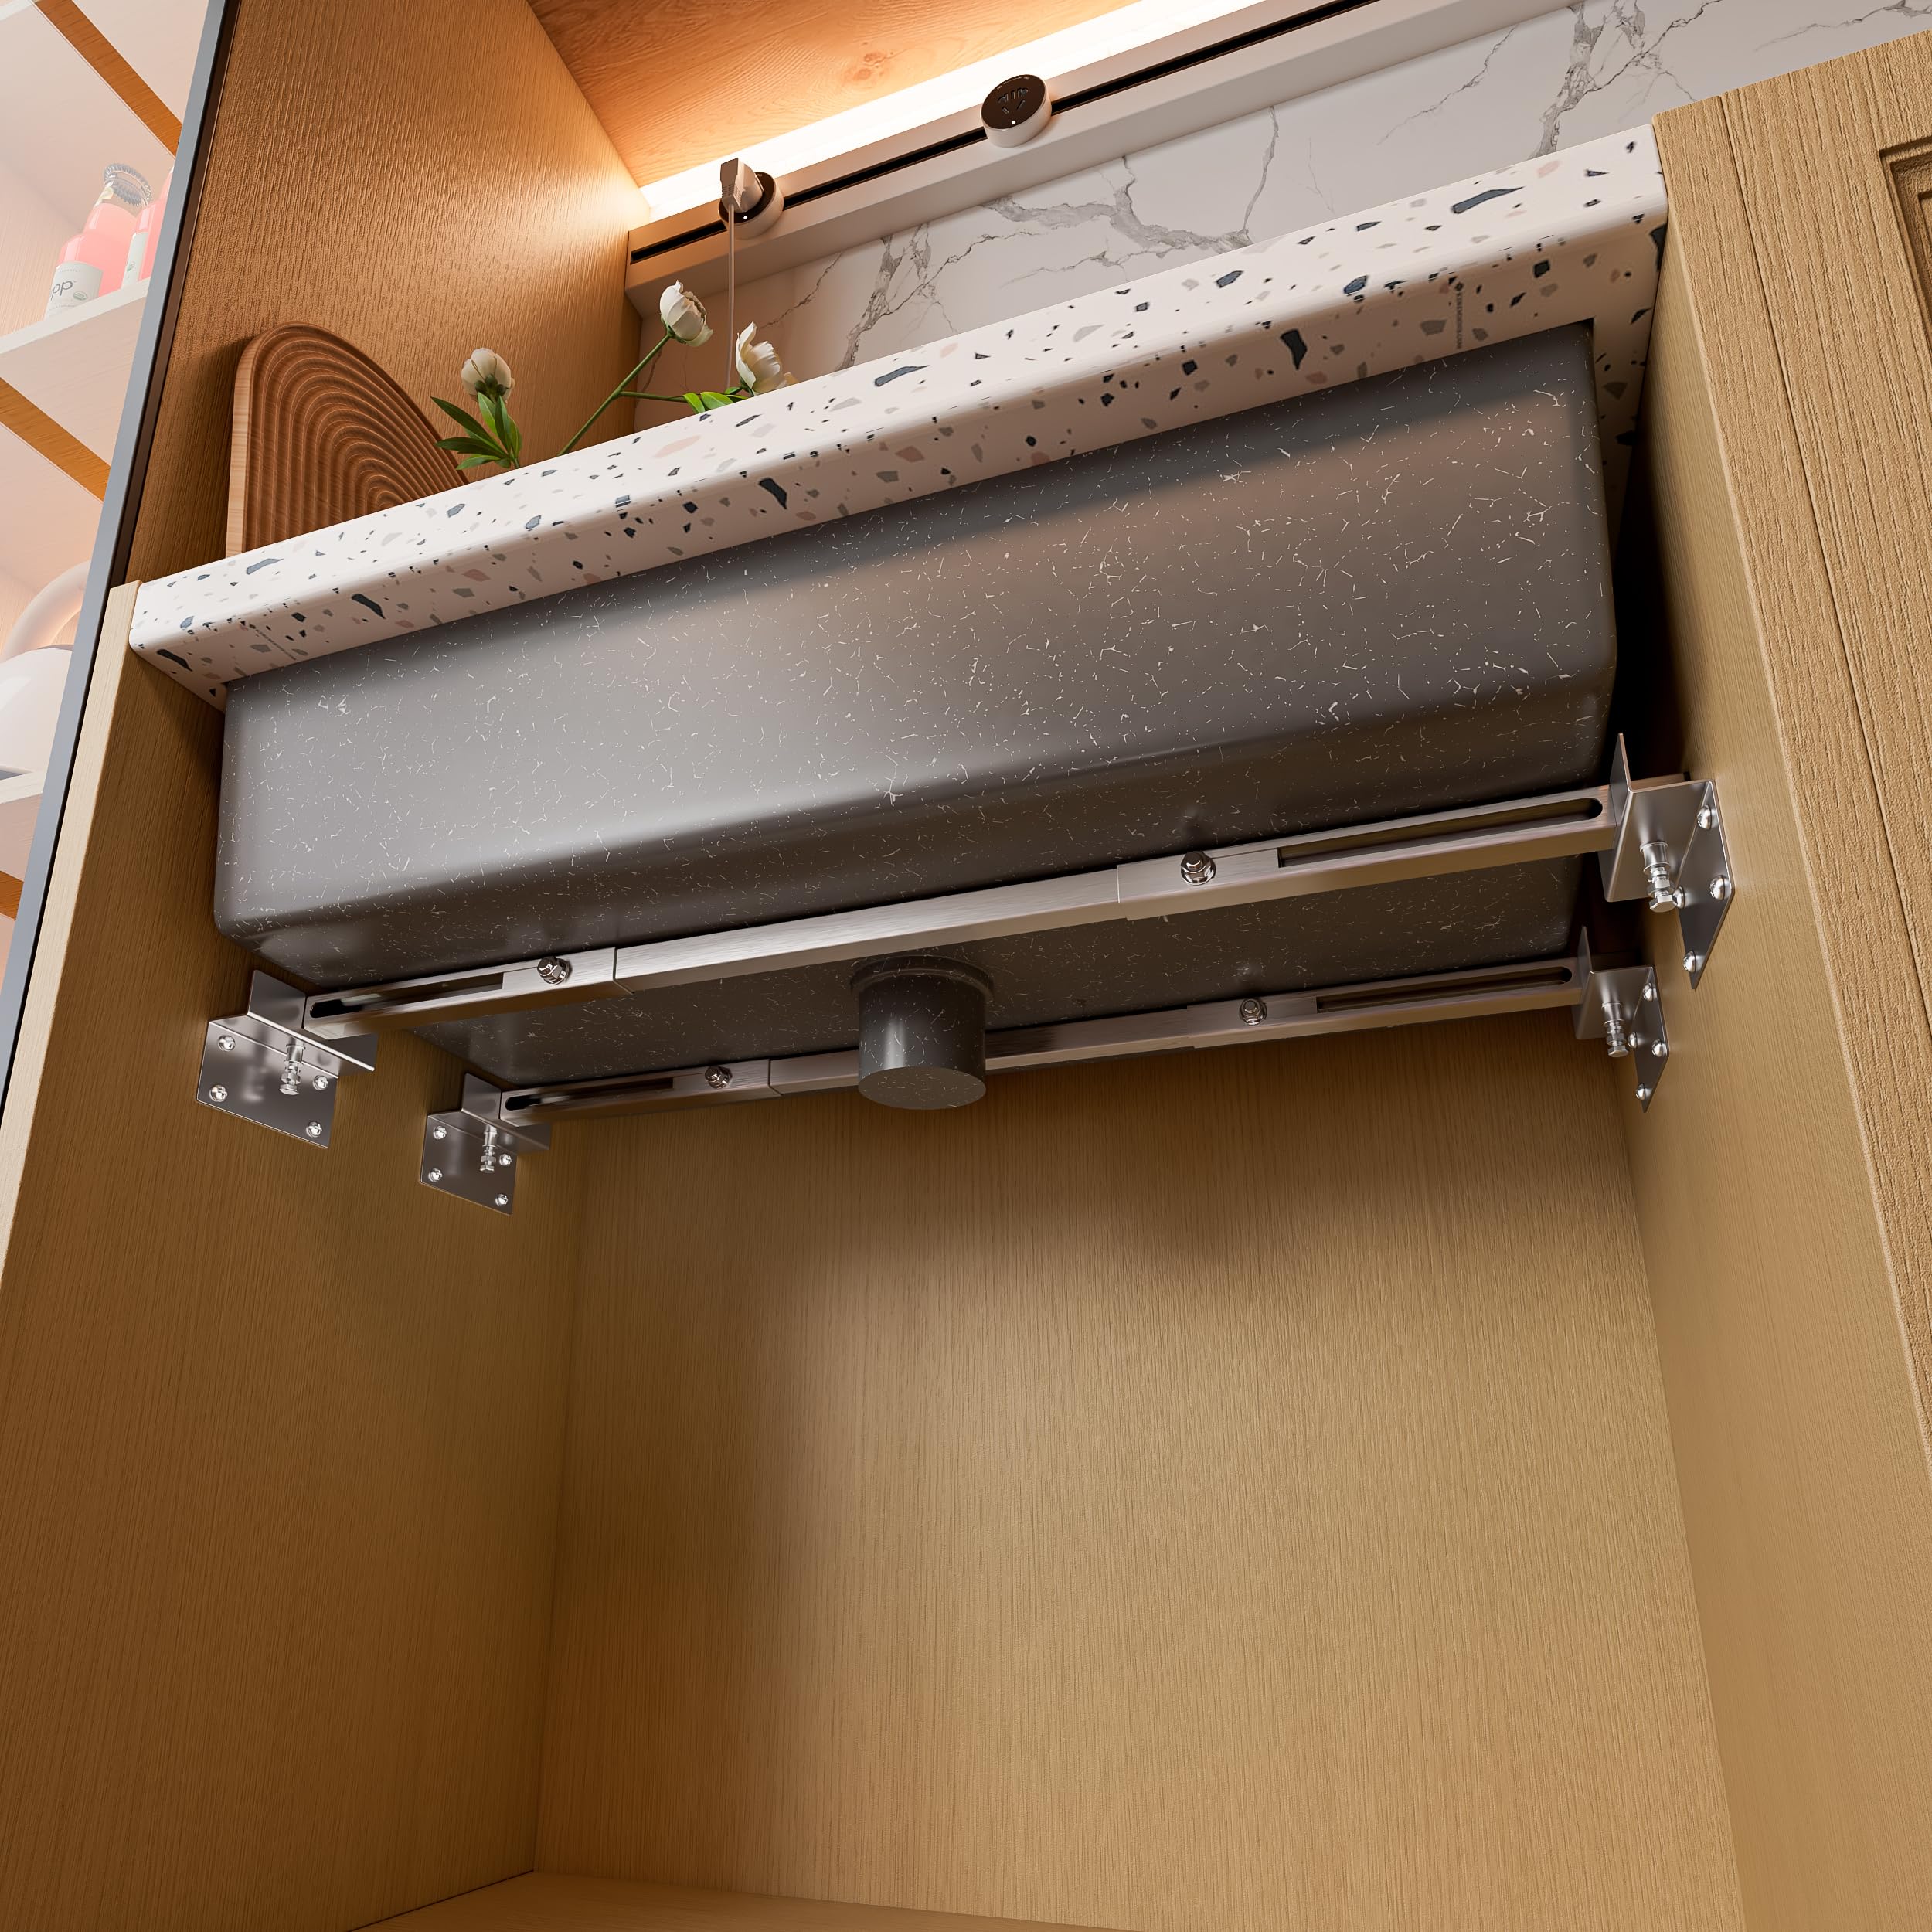
If your sink is especially heavy (like a cast iron or stone sink), add wood support strips inside the cabinet. These strips hold the sink up and prevent sagging. Attach the strips to the cabinet walls using screws.
Many people overlook this step, but it is crucial for long-term durability. Over time, a heavy sink can pull away from the countertop if it is not properly supported.
Letting The Adhesive Cure
After the sink is attached, let the adhesive and sealant cure. Follow the manufacturer’s instructions for curing time. Most silicone sealants need 12–24 hours to set fully. Do not use the sink or install plumbing until the adhesive is dry.
During curing, avoid moving the sink or disturbing the clips. If possible, leave the clamps in place until the sealant is fully cured.
Connecting Plumbing
Once the sink is secure, you can connect the plumbing. This includes the drain, faucet, and water supply lines.
Installing The Drain
Attach the drain assembly to the sink. Use plumber’s putty or silicone around the drain flange to prevent leaks. Tighten the drain nut underneath using a wrench.
Connect the P-trap and waste pipes. Make sure all connections are tight and aligned. Place a bucket under the pipes and run water to check for leaks.
Installing The Faucet
Install the faucet according to the manufacturer’s instructions. Most faucets mount above the countertop, but some models have components under the sink.
Connect the water supply lines and turn on the water. Check for leaks and tighten connections as needed.
Checking For Leaks
Run water through the sink and check all connections. If you see any leaks, tighten the fittings or add extra sealant. Dry the area with a cloth and inspect again.
Finishing Touches
Now that the sink is mounted and plumbing connected, you can finish the installation.
Cleaning Up
Remove any excess sealant from the countertop and sink rim using a utility knife or putty knife. Clean the area with rubbing alcohol and a soft cloth.
Sealing The Countertop Edge
Some installers recommend sealing the edge of the countertop with silicone to prevent water damage. Apply a thin bead of sealant around the cut edge, especially if you have a stone or solid-surface counter.
Reinstalling Accessories
If you removed accessories like soap dispensers or sprayers, reinstall them now. Make sure everything is secure and functional.
Credit: www.youtube.com
Comparing Undermount Sink Materials
Choosing the right material affects both installation and long-term maintenance. Here’s a simple comparison to help you decide:
| Material | Weight | Installation Difficulty | Durability |
|---|---|---|---|
| Stainless Steel | Light | Easy | High |
| Granite Composite | Medium | Moderate | Very High |
| Ceramic | Heavy | Hard | Medium |
| Cast Iron | Very Heavy | Very Hard | High |
Stainless steel sinks are the easiest to install and are very durable. Granite composite sinks look great and resist scratches but need careful support. Ceramic sinks can chip during installation if not handled gently. Cast iron sinks are extremely heavy and may require professional installation.
Typical Costs For Mounting An Undermount Sink
Budgeting is an important step. Here’s a quick cost breakdown for mounting an undermount sink:
| Item | Typical Cost (USD) |
|---|---|
| Undermount Sink | $150–$600 |
| Mounting Clips/Hardware | $10–$40 |
| Silicone Sealant/Epoxy | $15–$30 |
| Tools (if needed) | $40–$100 |
| Professional Installation | $200–$500 |
DIY installation can save money, but you must factor in tool costs and time. Professional installation is more expensive but often comes with a warranty.
Credit: www.amazon.com
Common Mistakes To Avoid
Even experienced DIYers make mistakes when mounting undermount sinks. Here are some pitfalls and how to avoid them:
- Skipping the dry-fit. Always check the sink’s alignment before applying adhesive.
- Using the wrong sealant. Only use kitchen/bath grade silicone. Other sealants may not hold or could break down over time.
- Overtightening mounting clips. This can crack stone countertops.
- Not adding extra support for heavy sinks. Wood strips or plywood are essential for stone or cast iron sinks.
- Failing to clean surfaces before sealing. Dust or grease can cause leaks later.
- Ignoring curing time. Using the sink too soon can break the seal.
- Incorrect plumbing connections. Always check for leaks after attaching pipes.
- Cutting the countertop incorrectly. Measure twice, cut once. Use the right tools for your countertop material.
A non-obvious tip: If you are retrofitting a sink into an existing countertop, check for hidden pipes or supports before cutting. Many people damage plumbing because they forget to look underneath.
Practical Tips For A Professional Finish
To achieve a truly professional result, use these extra tips:
- Apply masking tape along the countertop edge before sealing. This helps you make a straight, clean bead.
- Double-check level with a bubble level after tightening each clip.
- For stone sinks, use two people for lifting and positioning. Dropping the sink can crack it.
- If your countertop is uneven, use plastic shims to level the sink. Remove shims after tightening clips.
- Clean up excess sealant before it dries. It is much easier to remove wet sealant than dry.
- After installation, run water for 15 minutes to check for hidden leaks. Sometimes leaks appear only after extended use.
Another insight: Some undermount sinks have a slight lip or curve. Make sure the lip faces down, not toward the countertop, for a smooth look.
Maintenance After Installation
Once your undermount sink is mounted, it’s important to maintain it. Here are some key points:
- Inspect mounting clips every six months. Tighten if needed.
- Clean the sealant seam regularly to prevent mold or mildew.
- For stone sinks, seal the countertop edge once a year with a waterproof sealant.
- Avoid dropping heavy objects into the sink, especially for ceramic or granite.
- If you notice sagging, add more support strips under the sink.
Proper maintenance ensures your sink stays secure and leak-free for years.
Comparing Undermount Vs. Drop-in Sinks
If you’re still deciding between an undermount and a drop-in sink, here’s a helpful comparison:
| Feature | Undermount Sink | Drop-In Sink |
|---|---|---|
| Installation Difficulty | Hard | Easy |
| Cleaning | Easy | Moderate |
| Appearance | Sleek, modern | Traditional |
| Countertop Compatibility | Stone/Solid Surface | All types |
| Support Needed | Extra | Minimal |
| Cost | Higher | Lower |
Undermount sinks give a modern look and make cleaning easier, but require more skill and support. Drop-in sinks are simpler to install and fit all countertop types.
When To Call A Professional
While many homeowners can mount an undermount sink themselves, there are times when calling a professional is best:
- If your countertop is granite or quartz and you don’t have the right tools
- If the sink is very heavy (cast iron or stone)
- If you are unsure about plumbing connections
- If you want a warranty on the installation
Professionals have the tools and experience to handle tricky installations and can fix problems quickly. They also know how to avoid damaging expensive countertops.
Real-world Example: Installing A Granite Undermount Sink
Let’s look at a real-world example. John, a homeowner in California, wanted to mount a granite composite undermount sink in his kitchen. His countertop was quartz, and his cabinet was standard size. He followed these steps:
- Measured the cabinet and sink.
- Marked the sink outline using painter’s tape.
- Used a diamond-tipped blade to cut the opening.
- Cleaned all surfaces with rubbing alcohol.
- Applied silicone and epoxy to the sink rim.
- Positioned the sink with a friend’s help.
- Attached mounting clips with epoxy.
- Added wood support strips inside the cabinet.
- Let adhesive cure for 24 hours.
- Connected plumbing and checked for leaks.
John’s sink installation took about 4 hours (not including curing time), and he spent about $350 on materials. His biggest challenge was lifting the heavy sink and keeping it level. He learned to use shims and clamps for a perfect finish.
Frequently Asked Questions
What Countertop Materials Are Best For Undermount Sinks?
The best materials are granite, quartz, and solid-surface acrylic. These are strong enough to support the sink and allow for a clean, smooth edge. Laminate and tile countertops are not recommended because they can weaken or crack under the sink’s weight.
How Long Does It Take To Mount An Undermount Sink?
The actual installation usually takes 3–5 hours, depending on the sink and countertop. The adhesive must cure for 12–24 hours before you can use the sink or connect plumbing. If you hire a professional, the process is often faster.
Can I Mount An Undermount Sink Myself?
Yes, if you have basic DIY skills and the right tools. The most challenging parts are cutting the countertop and lifting the sink into place. If your sink or countertop is heavy or expensive, consider hiring a professional for safety.
How Do I Prevent Leaks With An Undermount Sink?
Clean all surfaces well before sealing. Use kitchen-grade silicone sealant and apply a continuous bead around the sink rim. Let the sealant cure fully before using the sink. Check plumbing connections for leaks after installation.
Do Undermount Sinks Require Extra Support?
Yes, especially for heavy sinks like stone or cast iron. Use wood strips or plywood inside the cabinet to support the sink. Mounting clips alone may not be enough for heavy sinks.
Mounting an undermount sink is a rewarding project that upgrades your kitchen or bathroom. By following these detailed steps and tips, you can achieve a durable, leak-free installation. Remember to prepare carefully, use the right materials, and check your work at every stage. If you want more guidance or examples, check out this Family Handyman guide for more expert advice.
With patience and attention to detail, you can enjoy a sleek, modern sink for years to come.