
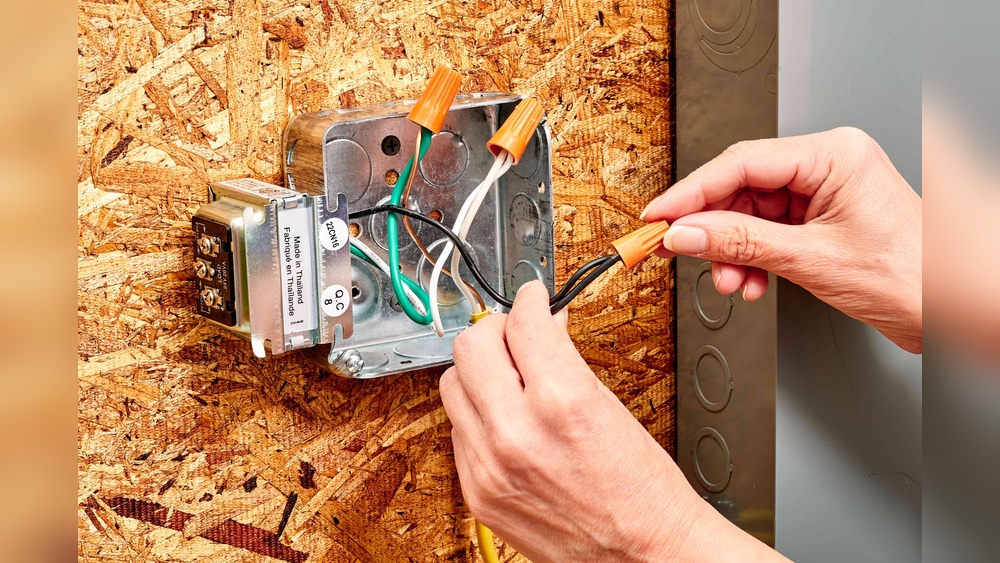
Mounting a doorbell transformer is a task that sounds technical, but with the right guidance, most homeowners can do it safely and effectively. Whether you are upgrading to a smart doorbell, replacing an old transformer, or installing a doorbell system for the first time, understanding how to mount the transformer correctly is essential.
A poorly installed transformer can cause electrical issues, reduce your doorbell’s lifespan, or even create safety hazards. This guide will walk you through every step, from choosing the right transformer to connecting wires and testing your setup. You’ll also learn troubleshooting tips, safety warnings, and answers to common questions.
Let’s break down the process, highlight important details, and give you practical advice that will save you time and trouble.
What Is A Doorbell Transformer And Why Does It Matter?
A doorbell transformer is a small electrical device that converts your home’s high-voltage power (120V in the US) down to a much lower voltage (often 16V or 24V AC) that is safe for doorbell circuits. Most doorbells, especially modern video models, cannot run directly from your home’s main voltage. They need the steady, lower voltage that a transformer provides.
If your transformer is not powerful enough or is installed incorrectly, your doorbell might not work, could have a weak chime, or may fail entirely. In the worst cases, incorrect installation can lead to electrical hazards. That’s why mounting the transformer the right way is important for both performance and safety.
Tools And Materials You’ll Need
Before starting, gather all necessary tools and materials. This prevents mistakes and saves you from running back and forth.
- Doorbell transformer (matching your doorbell’s voltage and power needs)
- Voltage tester or multimeter
- Screwdriver (flathead and Phillips)
- Wire stripper/cutter
- Drill (with masonry or wood bits, depending on mounting surface)
- Mounting screws and wall anchors
- Wire nuts or terminal connectors
- Electrical tape
- Safety gloves and goggles
- Flashlight (for dark spaces like basements or attics)
- Ladder (if mounting high up)
Optional but helpful: a small level, zip ties for cable management, and a notepad for labeling wires.
Choosing The Right Doorbell Transformer
Not all transformers are the same. Picking the correct one for your doorbell is critical.
Key Factors To Consider
1. Voltage Output
Most traditional doorbells use 16V AC. Smart doorbells (like Ring or Nest) may need 16-24V AC. Always check your doorbell’s manual.
2. Current (amperage) Or Power (va) Rating
VA (volt-amps) shows how much power the transformer can provide. For a single mechanical chime, 10VA is usually enough. Video doorbells often need 20VA or 30VA.
3. Compatibility
Modern smart doorbells can draw more power than old chimes. If you’re upgrading, your old transformer may not be strong enough. Double-check requirements before buying.
4. Physical Size
Transformers come in different sizes. Make sure yours fits in the intended location, such as an electrical box or on a wall stud.
Example Comparison
Here’s a quick comparison of common transformer types:
| Type | Voltage (AC) | VA Rating | Best For |
|---|---|---|---|
| Standard | 16V | 10VA | Basic chimes |
| High Output | 16-24V | 20-30VA | Video/smart doorbells |
| Multi-Door | 16V | 15-20VA | 2+ chimes |
Where To Buy
You can find doorbell transformers at hardware stores, electrical supply shops, or online retailers. Stick to trusted brands like Nutone, Heath Zenith, or Honeywell for reliability.
Where Should You Mount A Doorbell Transformer?
Finding the right spot for your transformer is just as important as the wiring itself.
Common Locations
- Electrical panel: Often mounted on or near your home’s main breaker box.
- Basement or utility room: Frequently near the chime or where wiring is accessible.
- Garage: A popular spot, as it’s close to main power and often out of sight.
- Attic: Sometimes used, but harder to access for repairs.
Location Comparison
Here’s a simple comparison to help you decide:
| Location | Accessibility | Safety | Ease of Wiring |
|---|---|---|---|
| Electrical Panel | Medium | High | Good |
| Basement | Easy | High | Good |
| Garage | Easy | High | Very Good |
| Attic | Hard | Medium | Fair |
Tip: Choose a location that is dry, free of dust and debris, and where the transformer won’t be disturbed by daily activity.
Local Code And Safety
Always check your local building codes. Some areas require doorbell transformers to be installed inside a metal electrical box, especially if connected directly to line voltage. If unsure, consult a licensed electrician.
Safety Precautions Before You Start
Working with electricity is dangerous if you don’t take proper precautions.
- Turn off power at the breaker panel before starting any work. Never assume wires are safe until tested.
- Use a voltage tester or multimeter to confirm the power is off before touching wires.
- Wear insulated gloves and safety goggles.
- Only use tools with insulated handles.
- If you feel unsure at any point, stop and seek professional help.
Non-obvious insight: Sometimes, even after turning off the correct breaker, other circuits in the box can remain live. Always double-check with a tester.
Step-by-step Guide To Mounting A Doorbell Transformer
Let’s walk through the process in clear, simple steps. Follow them carefully for a safe and successful installation.
1. Turn Off Power At The Electrical Panel
Find the breaker that controls the circuit you’ll be working on. Flip it to the “off” position. If you don’t know which breaker controls the area, turn off the main breaker for complete safety. Use your voltage tester on the wires to confirm that the power is off.
2. Locate The Mounting Spot
Pick your mounting spot based on the earlier location guide. Make sure there’s enough space for the transformer and that it’s close enough to both the main power source and the doorbell wiring.
- If mounting inside an electrical box, open the cover and clear any obstacles.
- If mounting on drywall, brick, or wood, make sure the surface is stable.
3. Prepare The Mounting Surface
- For drywall or wood: Mark the screw holes with a pencil. Drill pilot holes if needed.
- For brick or concrete: Use masonry bits and wall anchors to ensure a tight fit.
- For an electrical box: Use the knockout hole provided for transformer mounting.
Wipe away any dust or debris to help the transformer sit flush.
4. Mount The Transformer
- Line up the transformer’s mounting bracket or tab with your holes.
- Attach using screws, making sure they’re tight but not over-tightened (which can crack plastic).
- For box-mount transformers, insert the threaded end through the knockout and secure with the provided nut.
Non-obvious insight: If your transformer vibrates or hums after installation, it may not be tight enough or could be touching loose metal. Adjust or add a rubber washer to reduce noise.
5. Make Electrical Connections
Transformers have two sets of wires:
- Primary (input) wires: Connect to your home’s 120V supply (usually black and white, sometimes red).
- Secondary (output) wires: Connect to your doorbell’s low-voltage wires (often two thin, colored wires).
Connecting The Primary Side
- Strip about 1/2 inch of insulation from the ends of each wire.
- Use wire nuts or terminal connectors to join the transformer’s primary wires to your home’s supply wires. Match black to black (hot), white to white (neutral). If there’s a ground wire (green or bare), attach it to the box or a ground screw.
- Wrap connections with electrical tape for extra safety.
Connecting The Secondary Side
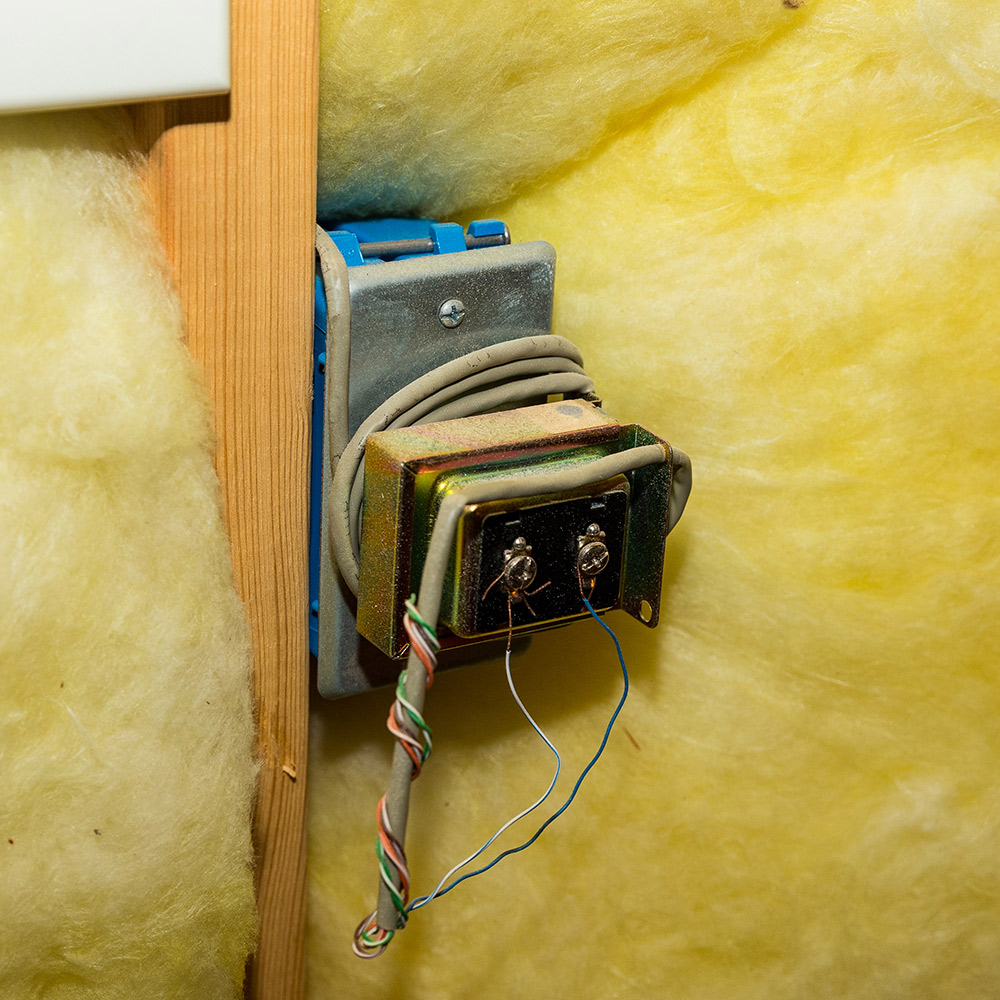
- Attach the transformer’s two low-voltage wires to the wires leading to your doorbell chime or button. Polarity does not matter for most doorbells—connect either wire to either terminal.
- Secure connections with wire nuts or screw terminals.
Example:
If your chime is in the hallway and your transformer is in the basement, the low-voltage wires will usually run through the wall between the two. Label them if possible for easier troubleshooting later.
6. Secure And Organize Wiring
- Neatly tuck wires inside boxes or along the wall.
- Use zip ties to bundle excess wire.
- Avoid letting wires touch hot pipes or sharp objects.
7. Double-check Your Work
Go over each connection:
- Are all screws and nuts tight?
- Are wire nuts secure and taped?
- Are exposed wires covered?
- Is the transformer firmly mounted?
Check that nothing is loose or pinched.
8. Restore Power And Test
- Flip the breaker back on.
- Use a voltage tester or multimeter at the secondary terminals to confirm you’re getting the expected voltage (e.g., 16V or 24V AC).
- Press the doorbell button. Listen for the chime or check if your video doorbell powers up.
If everything works, your installation is complete.
Troubleshooting Common Issues
Sometimes, even after following instructions, things don’t go as planned. Here’s how to fix common problems:
Doorbell Doesn’t Work
- No voltage at transformer output: Check breaker, connections, and test transformer input.
- Wrong transformer rating: Make sure the voltage and VA match your doorbell’s needs.
- Loose wires: Re-tighten all connections.
Transformer Gets Hot
A warm transformer is normal. If it’s too hot to touch, it’s overloaded or faulty.
- Check VA rating: Upgrade if you have multiple chimes or a video doorbell.
- Inspect for shorts: Look for damaged or crossed wires.
Buzzing Or Humming Noise
Some low-level hum is normal. Loud buzzing means a loose mount or overload.
- Tighten screws and add rubber washers to dampen vibration.
- Replace transformer if noise persists.
Doorbell Chime Is Weak Or Inconsistent
- Transformer too small: Upgrade to a higher VA model.
- Long wire runs: Use heavier gauge wire for long distances.
- Check for corroded terminals or loose connections.
Upgrading Or Replacing An Old Transformer
If you’re switching to a smart doorbell or your old transformer has failed, you’ll need to upgrade.
- Turn off power and remove old transformer.
- Check new requirements: Smart doorbells often need 16-24V AC, 20-30VA.
- Replace with a compatible model, following the same mounting and wiring steps.
- Test with your new device before closing up walls or ceilings.
Tip: Photograph old wiring before disconnecting, so you can match connections exactly.
Smart Doorbells: Special Considerations
Modern video doorbells (like Ring, Nest, Eufy) have higher power needs and sometimes require special installation steps.
- Always check the manufacturer’s requirements. Many smart doorbells won’t work with old 10VA transformers.
- Use the correct transformer: Most recommend 16-24V AC and 20-30VA.
- Consider a dedicated circuit if you have multiple doorbells or chimes.
- Firmware updates may be needed after installation.
Extra Tip: Some video doorbells have a built-in battery but still need the transformer for charging and advanced features.
Tips For A Professional-quality Installation
- Label wires before disconnecting anything.
- Use a level to mount the transformer perfectly straight.
- Leave a service loop (extra slack) in the wires in case you need to adjust later.
- Seal wall penetrations with caulk to keep out insects and moisture.
- Avoid over-tightening screws, which can crack plastic or strip threads.
- Use wire nuts sized for the wires you’re joining—too small is unsafe; too large is unreliable.
When To Call A Professional
Mounting a doorbell transformer is within the reach of most homeowners, but certain situations require expert help:
- Old or confusing wiring
- No accessible power source nearby
- Local code requirements you don’t understand
- Working in wet or cramped spaces
- If you feel unsafe at any time
Hiring a licensed electrician ensures safety and compliance. The peace of mind is often worth the extra cost.
Real-world Example
Let’s look at a common scenario:
Anna wants to upgrade to a Ring Video Doorbell. Her home has an old 16V, 10VA transformer. The Ring manual recommends 16-24V, 30VA. Anna buys a 24V, 30VA transformer. She mounts it near her electrical panel, following all safety steps and wiring instructions. After restoring power, her Ring device boots up, and she gets full video and chime functions. The upgrade fixed her “low power” warning and improved reliability.

Credit: www.youtube.com
Common Mistakes To Avoid
- Skipping the power-off step: This is the single most dangerous mistake.
- Using the wrong transformer: Always match both voltage and VA to your device.
- Loose connections: These can cause chime failures, buzzing, or even fire risk.
- Mounting in a wet area: Moisture can destroy your transformer and pose a shock risk.
- Not testing before closing walls: Always test first to avoid re-opening walls or ceilings.
- Ignoring local codes: This can cause problems if you sell your home or file insurance claims.
Cost And Time Estimate
- Transformer cost: $15–$35 for most standard models; $35–$60 for high-output or smart-compatible units.
- Tools and materials: Most tools are common household items; wire nuts and tape add $2–$10.
- Time required: 30–60 minutes for most installations; longer if running new wires or mounting in hard-to-reach spots.
:max_bytes(150000):strip_icc()/SPR-how-to-install-a-doorbell-5214163-step-03_30271-2dbd37d14eaa4bac8bde1b94817409cf.jpg)
Credit: www.thespruce.com
Maintenance And Longevity
- Transformers can last 10–20 years if installed correctly and kept dry.
- Check connections every few years if you notice any buzzing, heat, or chime problems.
- Replace if you upgrade to a more powerful doorbell or if you add extra chimes.
Additional Resources
For official safety codes and advanced wiring help, the National Electrical Code (NEC) is the standard reference. You can read more at the NFPA’s official NEC page.
Credit: www.homedepot.com
Frequently Asked Questions
How Do I Know If My Doorbell Transformer Is Bad?
If your doorbell has stopped working, the chime is weak, or a smart doorbell shows a “low voltage” warning, your transformer may have failed. You can use a voltage tester or multimeter to check the output. If the reading is much lower than the rated voltage (e.g., less than 16V when it should be 16V), it’s time to replace it.
Can I Mount A Doorbell Transformer Outside?
You should never mount a standard doorbell transformer outdoors unless it is rated for exterior use and protected from rain and snow. Outdoor mounting exposes the transformer to moisture, which can cause failure or a shock hazard. Always follow manufacturer guidelines for indoor mounting.
Does The Transformer Need To Be In A Metal Box?
In many areas, local electrical codes require that the transformer be installed in a metal electrical box, especially if connected directly to 120V wiring. This is for safety and to prevent fire risks. Always check your local code or ask an electrician if unsure.
What Size Transformer Do I Need For A Smart Doorbell?
Most video and smart doorbells need 16-24V AC and at least 20-30VA. Check your doorbell’s manual for exact requirements. Using a transformer that is too small can cause device failure, poor video quality, or “low power” errors.
Can I Use The Old Wires When Replacing My Transformer?
Yes, you can usually reuse existing low-voltage wires if they are in good condition and rated for the voltage and current needed. Inspect for cracks, cuts, or corrosion, and replace if damaged. Make sure connections are tight and secure for best performance.
Mounting a doorbell transformer is a project that rewards careful planning and attention to detail. By choosing the right transformer, picking a safe location, and following each step, you can ensure reliable doorbell performance for years. And remember, when in doubt, it’s always wise to call a professional for electrical work.