
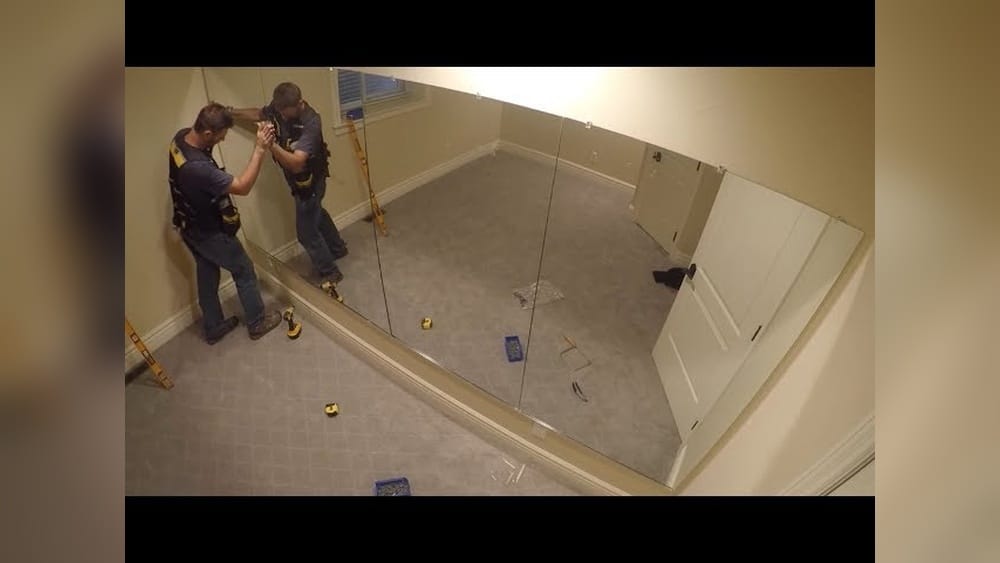
Mounting a mirror on the wall might look simple, but it’s a task that requires careful planning, the right tools, and a good understanding of your wall type. A well-placed mirror can make a room feel larger, boost natural light, and serve as a stylish focal point.
But a poorly mounted mirror can fall, break, and even cause injury. Whether you’re hanging a light bathroom mirror or a large decorative piece, knowing how to mount it safely and securely will give you peace of mind and help your home look its best.
Many people jump into this DIY project without considering essential factors such as the weight of the mirror, the type of wall, or the best mounting method. Some are unsure about the difference between using adhesive, brackets, or wire—and which is best for their situation.
This guide will walk you through every critical detail, including tools, materials, step-by-step methods, and troubleshooting tips. Along the way, you’ll learn insights that even experienced DIYers sometimes miss, so you can avoid common mistakes and achieve a professional result.
Understanding Mirror Mounting Basics
Before you pick up a drill, it’s important to understand a few basics about mirror mounting. Not all mirrors or walls are the same, and using the wrong method can lead to damage or accidents.
Types Of Mirrors
There are several types of mirrors you might want to mount:
- Framed mirrors: These have a wooden or metal frame, often making them heavier.
- Frameless mirrors: These are usually lighter but can be fragile at the edges.
- Bathroom mirrors: Often medium-sized, sometimes with built-in hardware.
- Large decorative mirrors: These can be very heavy and require strong support.
Each type may need a different mounting solution.
Assessing Your Wall Type
Your wall type determines what kind of anchors or supports you’ll need. The main types are:
- Drywall (plasterboard/sheetrock): Most common in homes. Not strong enough for heavy mirrors without anchors.
- Plaster: Found in older homes. More brittle than drywall.
- Masonry (brick or concrete): Very sturdy but harder to drill.
- Tile: Common in bathrooms. Requires special bits for drilling.
Not sure what you have? Knock gently on the wall—a hollow sound usually means drywall, while a solid sound suggests plaster or masonry.
Weight Matters
Mirrors can be surprisingly heavy. For example, a 24 x 36 inch framed mirror can weigh 20–30 pounds, while large decorative mirrors can exceed 50 pounds. Always check the manufacturer’s specifications. Overloading wall anchors is a top reason mirrors fall.
Key Mounting Methods
These are the most popular ways to mount a mirror:
- Mirror clips: Secure the edges of frameless mirrors.
- French cleat: A sturdy, interlocking bracket system for heavy mirrors.
- Picture wire and hooks: Common for medium-weight framed mirrors.
- Adhesive mounting: For lighter, frameless mirrors on smooth walls.
- Z-clips or L-brackets: For extra support or special installations.
Choosing the right method depends on your mirror’s weight, wall type, and whether you want it flush or raised from the wall.
Tools And Materials Needed
Having the right tools and supplies is half the battle. Here’s a breakdown to help you prepare:
Essential Tools
- Tape measure: For accurate placement.
- Pencil: For marking.
- Level: To ensure the mirror is straight.
- Drill and bits: Choose masonry bits for brick or tile.
- Screwdriver: Manual or powered.
- Stud finder: To locate wall studs for heavy mirrors.
- Hammer: For tapping in anchors.
- Painter’s tape: Helps with marking and drilling.
Common Materials
- Wall anchors: Plastic or metal, rated for the mirror’s weight.
- Screws: Compatible with anchors and wall type.
- Mounting hardware: Clips, cleats, wire, hooks, or adhesive.
- Protective gear: Safety glasses and gloves.
- Mirror mastic: Special glue for mirrors (if using adhesive).
Useful Extras
- Drop cloth: To catch debris or protect floors.
- Laser level: For perfect alignment.
- Helper: Large mirrors are much safer to lift with two people.

Credit: www.wikihow.com
Choosing The Right Mounting Method
The right mounting method depends on your mirror’s weight, shape, and wall type. Here’s a detailed comparison to help you decide:
| Mounting Method | Best For | Pros | Cons |
|---|---|---|---|
| Mirror Clips | Frameless, light-medium mirrors | Secure, easy to adjust, removable | Visible hardware |
| French Cleat | Heavy or large framed mirrors | Very strong, flush finish | Needs precise installation |
| Picture Wire & Hooks | Framed, medium-weight mirrors | Adjustable, simple to install | Mirror may tilt forward |
| Adhesive | Small, frameless mirrors | No visible hardware, quick | Hard to remove, not for heavy mirrors |
| Z-Clips/L-Brackets | Extra support, odd shapes | Very strong, less visible than clips | Can be tricky to align |
How To Choose
- For bathroom mirrors or small wall mirrors, clips or adhesive often work well.
- Large decorative mirrors need a French cleat, Z-clips, or brackets, especially on drywall.
- For rental properties, avoid adhesives or methods that damage walls.
- If mounting on tile or masonry, mechanical fasteners are best.
Pro tip: Always check the weight rating of your chosen hardware. Using under-rated anchors is a common mistake.
Step-by-step Guide: Mounting With Mirror Clips
Mirror clips are a popular choice for frameless mirrors and are easy to install for most people. Here’s how to do it safely:
1. Plan Your Placement
Decide where the mirror should go. Consider height, nearby outlets, and how the mirror will reflect light. For bathroom mirrors, center it over the sink at a comfortable face level.
2. Measure And Mark
- Hold the mirror up to the wall with a helper, or use painter’s tape to outline its shape.
- Use a tape measure to confirm the height and horizontal placement.
- Mark the top edge and sides lightly with a pencil.
3. Find Wall Studs
- Use a stud finder to check if any mounting points can go into wall studs. This gives the strongest support.
- If you can’t hit a stud, you’ll need wall anchors.
4. Install Bottom Clips
- Place the lower clips about 2–3 inches from the mirror’s edges.
- Mark the screw holes.
- Drill pilot holes. If not hitting a stud, insert wall anchors.
- Screw in the bottom clips, leaving a little slack for the mirror to slide in.
5. Position The Mirror
- Carefully lift the mirror and rest it in the bottom clips.
6. Install Top Clips
- With the mirror in place, mark where the top clips will sit.
- Remove the mirror (if possible), drill, and install the top clips.
- Slide the mirror back in and secure the top clips.
Caution: Never overtighten clips—this can crack the glass.
7. Check Level And Finish
- Use a level to double-check the mirror is straight.
- Tighten screws until snug, but not too tight.
When To Use This Method
Mirror clips are best for mirrors up to about 30 pounds on drywall with good anchors. For heavier mirrors, use a French cleat or brackets.
Using A French Cleat For Heavy Mirrors
The French cleat system is one of the safest ways to mount large, heavy mirrors. It uses two interlocking metal or wooden strips—one on the wall, one on the mirror.
1. Measure And Mark
- Mark the desired height and centerline for your mirror.
- Measure the distance between the top of the mirror and the mounting hardware.
2. Attach Cleat To Mirror
- Screw one part of the cleat securely to the back of the mirror frame.
- If your mirror doesn’t have a solid frame, add a wooden brace first.
3. Mount Wall Cleat
- Find and mark wall studs if possible.
- Hold the wall-side cleat level at the correct height and mark screw holes.
- Drill pilot holes and insert screws into studs or heavy-duty anchors.
4. Hang The Mirror
- With a helper, lift the mirror and hook the cleats together.
- Check that it’s level.
Tip: French cleats distribute weight evenly and allow for easy removal or adjustment. They’re much safer for mirrors over 30 pounds.
Why French Cleats Stand Out
- Stability: They prevent the mirror from tipping forward.
- Strength: Can hold mirrors well over 100 pounds with proper installation.
- Adjustability: You can slide the mirror left or right to fine-tune its position.
Adhesive Mounting: When And How
Mounting with adhesive is fast and leaves no visible hardware, but it’s only suitable for lightweight, small, frameless mirrors on smooth, clean walls.
1. Clean The Wall And Mirror
- Wash both surfaces with rubbing alcohol to remove dust and grease.
2. Apply Mirror Mastic
- Use only mirror-safe adhesive (regular glue can damage the backing).
- Apply dabs or lines on the back of the mirror, avoiding the edges.
3. Position And Press
- Hold the mirror in place (use painter’s tape to help).
- Press firmly for a few minutes, following adhesive instructions.
- Support the mirror with temporary blocks or tape for at least 24 hours.
4. Remove Supports
- Once cured, remove all supports and tape.
Warning: Never use regular construction adhesive—some chemicals can corrode the mirror’s silver backing.
When Adhesive Fails
Adhesive is not suitable for humid areas, textured walls, or heavy mirrors. In these cases, mechanical fasteners are safer.

Credit: dreamdesigndiy.com
Mounting With Picture Wire And Hooks
This traditional method works well for framed mirrors with built-in D-rings or hooks.
1. Attach Wire To Mirror
- Secure strong picture wire to the mirror’s D-rings. Leave a little slack, but not too much.
2. Find Mounting Points
- Measure the distance from the top of the mirror to the wire at full tension.
- Mark the wall where hooks should go.
3. Install Hooks
- Use hooks rated for the mirror’s weight.
- For drywall, use wall anchors if not going into studs.
4. Hang The Mirror
- Hang the wire on the hooks.
- Adjust as needed for a level position.
Drawback: The mirror will tilt slightly forward at the top. For heavy mirrors, use two hooks spaced apart for better balance.
Special Considerations For Wall Types
Choosing the right hardware is critical. Here’s a quick comparison:
| Wall Type | Best Anchor Type | Difficulty | Notes |
|---|---|---|---|
| Drywall | Toggle bolts, molly bolts, plastic anchors | Easy–Medium | Don’t rely on screws alone |
| Plaster | Masonry anchors, screws into lath | Medium | Drill slowly to avoid cracking |
| Brick/Concrete | Masonry screws, sleeve anchors | Medium–Hard | Use hammer drill |
| Tile | Masonry anchors, tile drill bit | Hard | Drill through grout when possible |
Common Mistakes
- Using regular screws in drywall without anchors (mirror may fall).
- Drilling too fast into plaster or tile (can crack).
- Skipping weight ratings on hooks or anchors.
Tip: For drywall, toggle bolts offer superior holding power for heavy mirrors.

Credit: www.youtube.com
Safety Tips And Professional Insights
Hanging a mirror is more than just a DIY project—it’s about safety. Falling mirrors can cause serious injuries and property damage. Here are some expert insights:
- Always wear safety glasses when drilling.
- Use a helper for mirrors over 20 pounds.
- Check for hidden wires or pipes with a stud finder before drilling.
- Use anchors or screws rated at least 20% above your mirror’s weight.
- Don’t assume wall studs are evenly spaced—always check.
- For humid areas (like bathrooms), use rustproof hardware and moisture-resistant anchors.
- If you’re unsure, consult a professional or visit a hardware store for advice.
Non-obvious tip: Mirrors mounted on exterior walls can attract condensation. Leave a tiny gap behind the mirror (with felt pads) to allow airflow and prevent moisture buildup.
Troubleshooting: What If Something Goes Wrong?
Even experienced DIYers run into problems. Here’s how to solve the most common issues:
Mirror Won’t Stay Level
- Check if the wall is uneven. Use felt pads or shims behind the mirror.
- For wire-mounted mirrors, adjust the hook spacing or wire tension.
Anchors Spin Or Pull Out
- This usually means the hole is too big or the wall is weak.
- Switch to a larger anchor or move to a nearby stud.
- For crumbling plaster, use a masonry anchor or toggle bolt.
Mirror Is Crooked
- Re-check your measurements.
- Use a level before final tightening.
- For cleats or brackets, loosen screws and adjust.
Mirror Adhesive Won’t Hold
- Wall or mirror may be dirty or damp.
- Make sure to use enough adhesive and let it cure fully.
- If the wall is textured or painted with gloss, sand lightly before mounting.
Cracked Mirror During Mounting
- This may be due to over-tightening clips or hitting the edge against the wall.
- Always handle mirrors with gloves, and tighten hardware only until snug.
Expert insight: If your wall has a history of cracks or damage, reinforce the area with a plywood backer board before mounting heavy mirrors.
Removing Or Replacing A Mounted Mirror
Sometimes you need to remove a mirror—maybe you’re painting, moving, or replacing it.
For Mirrors With Clips Or Brackets
- Unscrew the top clips or brackets first, supporting the mirror at all times.
- Lift the mirror out gently.
- Patch any wall holes with spackle.
For Adhesive-mounted Mirrors
- Carefully insert a thin wire or putty knife behind the mirror and work slowly.
- Wear heavy gloves and eye protection—adhesive can cause the mirror to crack.
- Use a heat gun to soften adhesive, but avoid overheating.
For French Cleat Or Wire
- Lift the mirror upward to release from the cleat.
- With wire, simply lift off the hooks.
Hidden danger: Old adhesives can pull paint or drywall off. Be prepared to do minor wall repairs.
Real-world Examples
Example 1: Hanging A Medium Bathroom Mirror
Sarah wanted to mount a 24 x 36 inch mirror in her bathroom. She used a stud finder but found no studs in the desired spot. Instead, she used plastic wall anchors rated for 30 pounds, installed mirror clips at all four corners, and leveled everything before tightening.
The mirror has stayed secure for three years—even with daily steam from showers.
Example 2: Large Decorative Mirror In Living Room
James bought a 48 x 60 inch framed mirror weighing 60 pounds. He installed a French cleat, screwing directly into two wall studs. With help, he lifted the mirror onto the cleat. The result was a perfectly flush, safe installation that also allowed easy removal when repainting.
Example 3: Adhesive Mounting Gone Wrong
Nina tried to stick a frameless mirror to her bathroom wall with regular construction adhesive. After a few weeks, dark spots appeared as the backing corroded, and the mirror loosened. She learned that only mirror-safe adhesive should be used, and that heavy mirrors need mechanical support.
Maintenance Tips For Mounted Mirrors
A well-mounted mirror should last for years, but a little maintenance helps keep it secure and looking good.
- Check screws and anchors once a year, especially in humid rooms.
- Clean the mirror with glass cleaner and a soft cloth—avoid getting water near mounting hardware.
- For mirrors in bathrooms, wipe down any condensation regularly to prevent mold.
- If you notice any movement or looseness, take the mirror down and inspect the hardware.
Pro tip: For mirrors near entryways or in busy rooms, add a safety film to the back. This holds shards together if the mirror ever breaks.
Sustainability And Mirror Disposal
When replacing a mirror, consider the environment:
- Glass can sometimes be recycled, but check local rules.
- Never put large mirrors in normal trash—broken glass can injure workers.
- Donate usable mirrors to charities, or offer them online.
- For broken mirrors, wrap all pieces in heavy cardboard and tape before disposal.
When To Call A Professional
Some situations require expert help:
- Mirrors over 100 pounds.
- Mounting on delicate plaster, tile, or masonry.
- Custom-shaped or antique mirrors.
- When electrical wires or pipes are present in the wall.
Professional installers have the right tools, insurance, and experience to handle tricky jobs safely. For most standard mirrors, though, careful DIY is perfectly achievable.
For more on safe wall mounting and hardware ratings, see Family Handyman.
Frequently Asked Questions
How Do I Know If My Wall Can Support A Heavy Mirror?
Check for wall studs with a stud finder. If you find one, you can anchor directly into it for the best support. For drywall without studs, use toggle bolts or heavy-duty anchors rated above your mirror’s weight. For brick or masonry, use masonry screws or anchors.
Always check hardware ratings and, when in doubt, choose a stronger option.
What Is The Best Height To Hang A Mirror?
For general use, the center of the mirror should be about 57–65 inches from the floor. In bathrooms, center the mirror above the sink at eye level. Consider the users’ heights and the room’s purpose for best results.
Can I Use Adhesive To Mount A Mirror On All Wall Types?
No, adhesive is only suitable for small, lightweight, frameless mirrors on smooth, clean, and dry surfaces. Never use it on textured walls, in high-moisture areas, or for heavy mirrors. Always use mirror-safe adhesive to avoid damaging the reflective backing.
What Should I Do If My Mirror Starts To Loosen Over Time?
First, take the mirror down and inspect the hardware. Replace any worn or undersized anchors with stronger ones. Check for wall damage and repair as needed. Reinstall the mirror, ensuring all screws and anchors are tight and rated for the weight.
Is It Safe To Hang A Mirror Above A Fireplace?
Yes, but only if you use strong, heat-resistant anchors and mount into studs or masonry. Avoid adhesive above fireplaces due to heat. Make sure the mirror is set back from direct heat to prevent warping or damage.
Mounting a mirror on the wall is a practical way to add style and function to any room. By understanding your wall type, choosing the right hardware, and following safe installation steps, you can enjoy a beautiful, secure mirror for years to come.
Take your time, double-check your measurements, and don’t hesitate to ask for help when needed—your walls and your safety are worth the extra effort.