
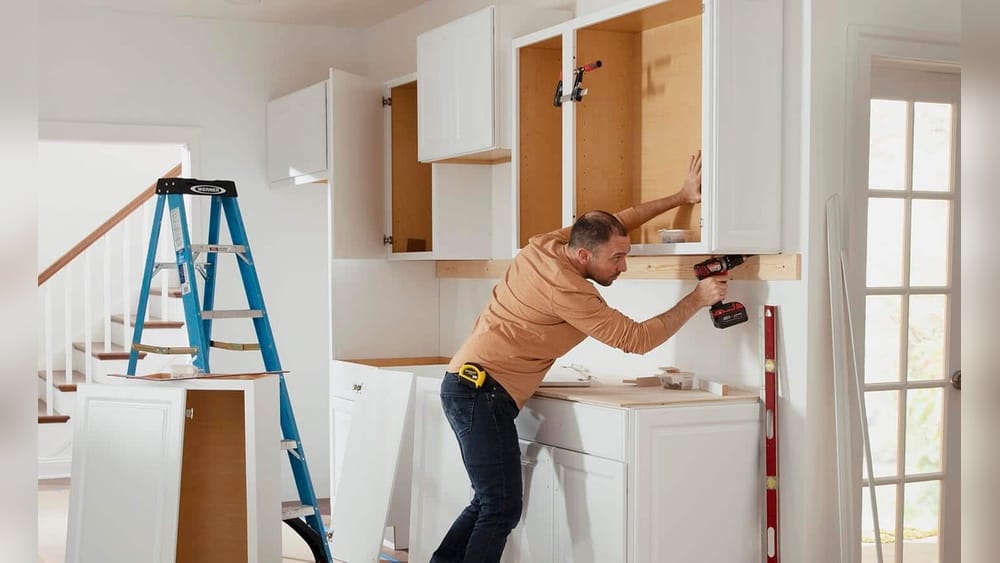
Mounting wall cabinets can transform your space, whether you’re updating a kitchen, creating extra storage in a garage, or organizing a laundry room. But the process demands careful planning, precise measurements, and the right tools. Mistakes can lead to cabinets falling, uneven alignment, or even damage to your walls.
This guide will show you, step by step, how to mount wall cabinets safely and professionally. Even if you’re not an expert, you’ll learn how to avoid common errors and ensure your cabinets stay secure for years.
Why Proper Cabinet Mounting Matters
Wall cabinets hold heavy items. Poor installation can lead to injuries, broken cabinets, and expensive repairs. Studies show that improper mounting causes more than 30% of cabinet failures in homes. Ensuring cabinets are level and firmly attached to studs is essential. It’s not just about looks; it’s about safety and durability.
When cabinets are mounted properly, they distribute weight evenly across the wall, reducing stress on any single point. This helps prevent long-term damage not just to the cabinets, but also to your wall structure. Imagine opening a cabinet full of dishes and hearing a creak—that’s often a warning sign of a weak installation.
Over time, gravity and daily use can make small mistakes much worse, leading to costly repairs. Also, a level and secure cabinet makes your kitchen or workspace more enjoyable and easier to use every day.
Tools And Materials You’ll Need
Before you begin, gather these tools and materials:
- Tape measure
- Level (preferably 4 feet)
- Pencil
- Drill with bits for wood and drywall
- Stud finder
- Screwdriver
- Cabinet screws (2.5” to 3” long, #10 or #12)
- Shims
- Clamps
- Step ladder
- Safety goggles
- Wood filler (for touch-ups)
- Painter’s tape
- Cabinet mounting rail (optional but helpful)
Having all tools ready prevents delays and mistakes. Quality tools make your job easier and help achieve a professional finish. For example, a sturdy 4-foot level ensures accurate measurements across wide cabinets, while a reliable stud finder helps you avoid electrical wires or plumbing inside the walls.
Using the right drill bit prevents splintering, and painter’s tape helps mark positions without damaging your wall’s surface. Don’t forget safety goggles—wood chips and dust can easily get into your eyes while drilling or screwing.
For people working alone, a cabinet jack or a simple homemade T-brace can also be helpful to hold cabinets in place while you secure them. These small additions can make a big difference in both safety and ease of installation.
Planning Your Wall Cabinet Installation
Measuring And Marking
Start with accurate measurements. Wall cabinets are usually hung 18 inches above countertops. Measure from the floor to the countertop, then add 18 inches. Mark this spot with a pencil.
Next, decide where each cabinet will go. Use painter’s tape on the wall to outline cabinet positions. This lets you visualize the layout and make changes before drilling.
If you have appliances, like a refrigerator or microwave, measure their height and width, too. Leave enough space above these items for airflow and easy use. For example, above a refrigerator, you might hang cabinets a little higher than the standard 18 inches for extra clearance.
Double-check all your measurements—mistakes here can ruin the whole installation.
Finding Studs
Cabinets must be attached to wall studs for strength. Use a stud finder to locate each stud. Mark their positions clearly. If your wall doesn’t have studs where you want to place cabinets, reconsider your layout or use a mounting rail.
Many beginners miss the importance of marking stud locations. Screws driven into drywall alone won’t support cabinet weight; always anchor to studs. If you’re unsure of your stud finder’s accuracy, try the “knock test”—tap the wall gently along your line.
A solid sound usually means a stud is present. For extra confidence, drive a small finish nail to test for wood behind the drywall.
Checking Wall Level
Walls are often not perfectly level. Use a long level to check both horizontal and vertical alignment. If your wall is uneven, shims will help balance cabinets. Sometimes, old homes have significant wall “waves”—in these cases, it’s better to adjust the cabinets than force them to follow the wall’s shape.
If the floor is not level, start your installation at the highest point. This way, your cabinets won’t look slanted or have large gaps at the top or bottom.
Planning For Electrical Outlets And Plumbing
Note any electrical outlets or plumbing lines behind the wall. Avoid drilling into these areas. If cabinets will cover outlets, plan how you’ll access them in the future.
Use your stud finder’s “live wire” mode if available, or consult your home’s electrical plans. If you must mount over plumbing, consider rerouting pipes or using shorter screws to avoid accidental damage. Planning ahead here can save expensive repairs and safety problems later.
Preparing Cabinets Before Mounting
Assembling Cabinets
Most wall cabinets come pre-assembled. If not, follow manufacturer instructions for assembly. Double-check that doors and drawers open smoothly. Lay cabinets on a soft surface, like a blanket, to avoid scratches during assembly.
Assemble any handles, hinges, or other hardware before mounting. This is easier on a flat surface than after the cabinet is on the wall. If your cabinets have adjustable shelves, leave them out until after mounting to keep the cabinet lighter.
Removing Doors And Shelves
Take off cabinet doors and shelves before installation. This makes cabinets lighter and easier to handle. It also reduces risk of damaging hinges or glass panels.
Label each door and shelf with painter’s tape so you can return them to their original positions. Some doors are not perfectly symmetrical, so mixing them up can lead to poor alignment after reinstallation.
Pre-drilling Mounting Holes
Some cabinets have pre-drilled holes. If not, measure and mark where mounting screws will go. Drill pilot holes to prevent wood from splitting.
Drill the holes slightly larger than the screw shank but smaller than the screw head. This helps the screw “bite” into the stud, giving a stronger hold. Place mounting holes about 2-3 inches from the top and bottom of the cabinet for best support.
Comparing Cabinet Types
Here’s a quick comparison of common wall cabinet types:
| Cabinet Type | Assembly Required | Weight (average) | Mounting Difficulty |
|---|---|---|---|
| Standard Wall Cabinet | No | 30-50 lbs | Moderate |
| Corner Cabinet | No | 40-60 lbs | Challenging |
| Open Shelf Cabinet | Yes | 20-35 lbs | Easy |
| Custom Cabinet | Yes | Varies | Varies |
Corner cabinets require extra care due to their weight and the need for precise alignment. Always check your space before ordering, as custom cabinets may need extra support or unique hardware.
Step-by-step Guide To Mount Wall Cabinets
Step 1: Mark The Bottom Line
Measure and draw a level line where the bottom of your cabinets will sit. Use a 4-foot level to ensure accuracy. This line guides your installation.
A helpful tip is to use painter’s tape to create this line—it’s easy to see and remove. Double-check this line from several points in the room, as small errors become more noticeable once cabinets are up.
Step 2: Locate And Mark Studs
Find studs using your stud finder. Mark their centers with a pencil. Cabinets must be attached here for strength.
For extra precision, measure from a fixed point (like a wall corner) to each stud center and note the distances. This way, you can quickly find the same points behind the cabinet when drilling mounting holes.
Step 3: Install A Temporary Support Rail
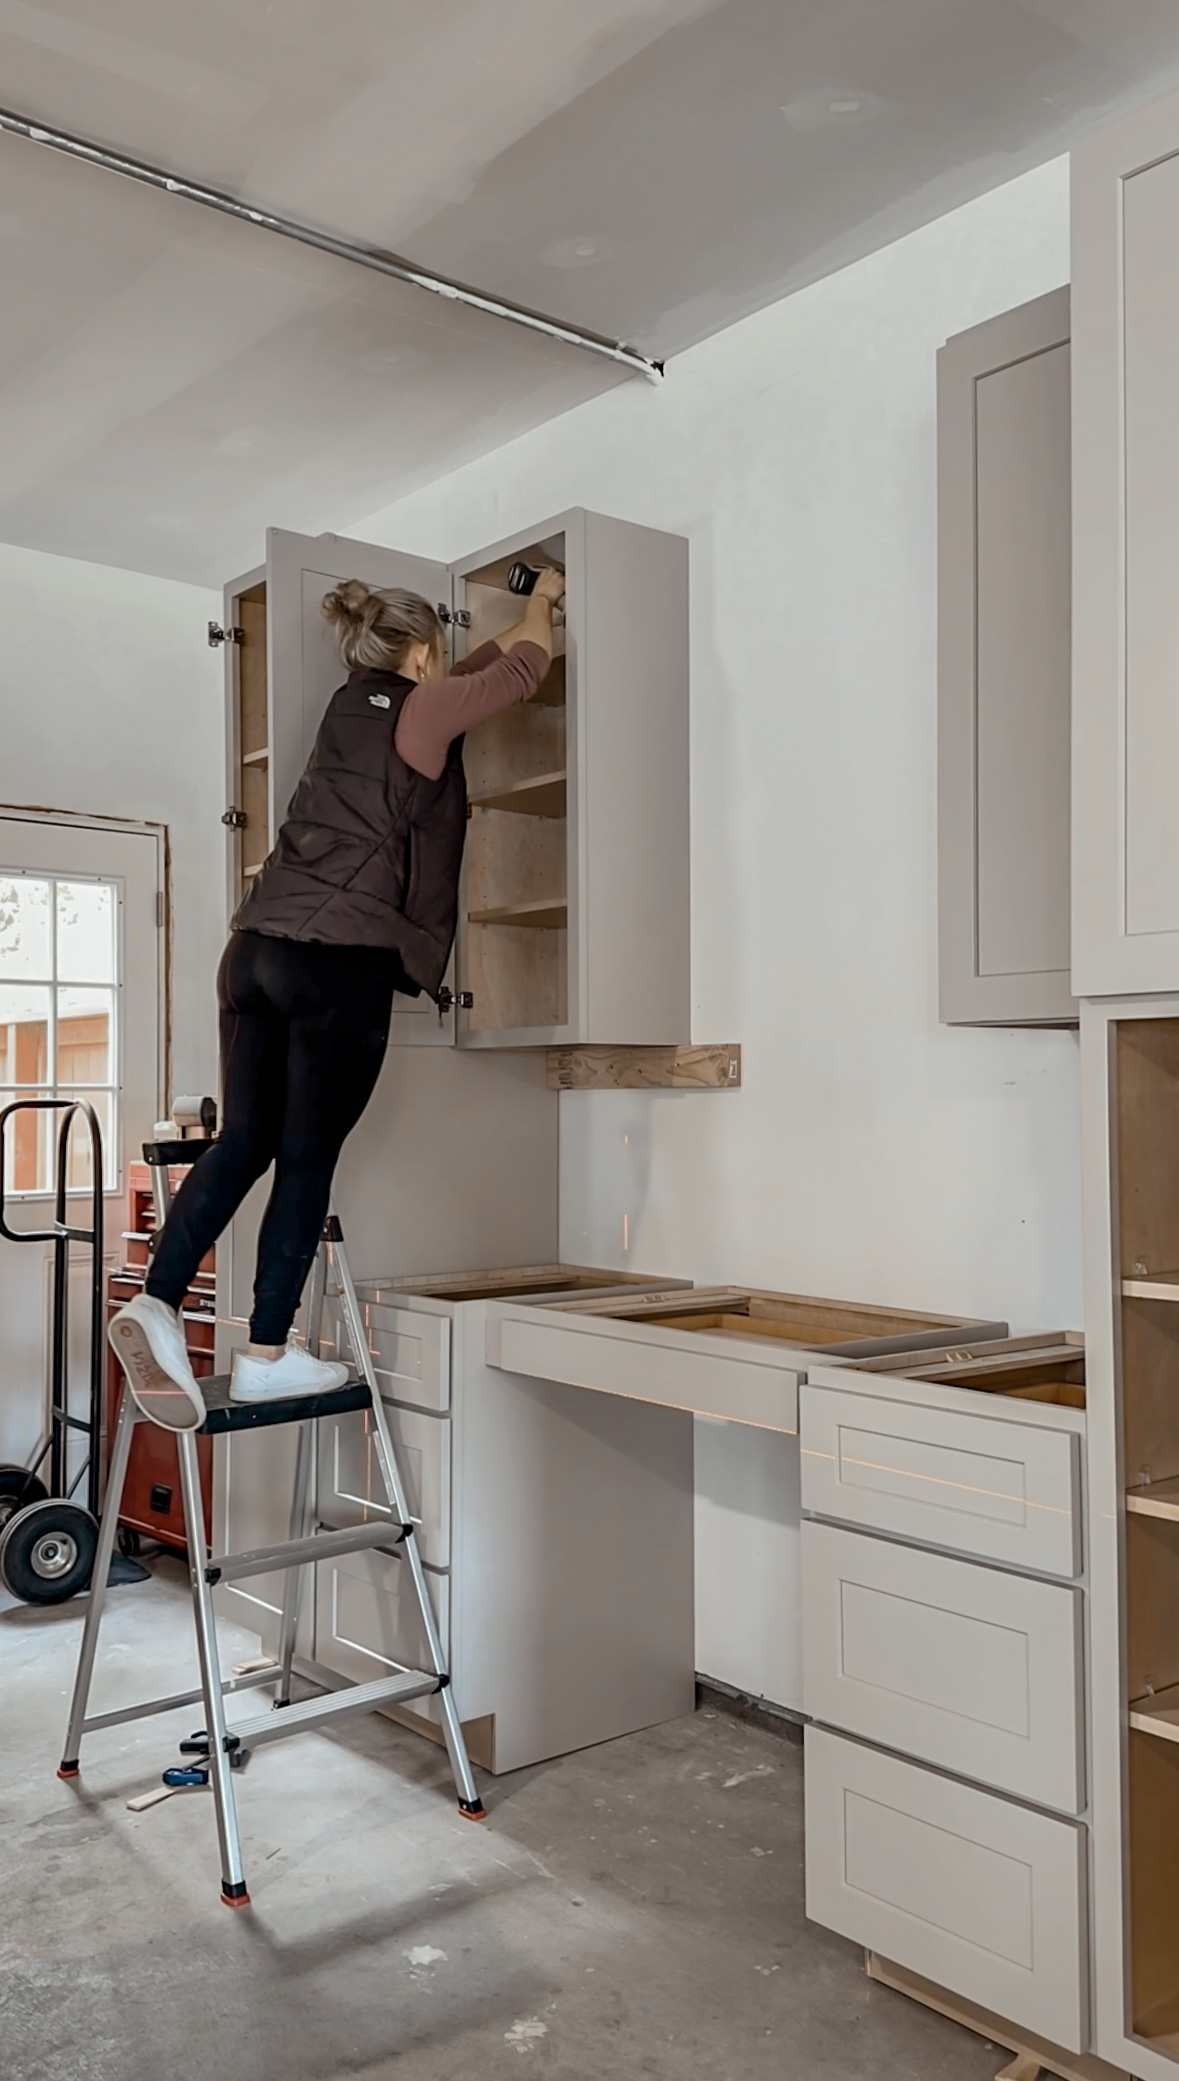
Screw a temporary wooden rail (1×3 or 2×4) into the wall along your bottom line. This supports cabinet weight while you mount them. After installation, remove the rail.
Many beginners skip this step, making installation harder and risking injury. The rail acts as a “third hand,” letting you adjust and level the cabinet before securing it. If you don’t have a rail, a helper can provide similar support.
Step 4: Pre-drill Cabinet Back
Drill holes in the back panel of each cabinet, aligning with your stud marks. Use a drill bit slightly smaller than your screws.
Take care not to drill too close to the cabinet edge to avoid splitting. Pre-drilling also prevents the cabinet back from bulging or cracking when you drive in the screws.
Step 5: Position First Cabinet
Lift the first cabinet onto the support rail. Check that it’s level. If your wall is uneven, use shims between the cabinet and wall.
If the cabinet doesn’t sit flat against the wall, adjust your shims until it does. Securing the first cabinet correctly is key, as all other cabinets will align with this one.
Step 6: Screw Cabinet Into Studs
Drive cabinet screws through pre-drilled holes into wall studs. Use at least two screws per stud for each cabinet. Check alignment as you go.
After partially tightening screws, check the cabinet’s level again. Only fully tighten once everything is perfectly aligned. This prevents warping or unwanted gaps.
Step 7: Add Next Cabinet And Clamp
Place the next cabinet beside the first. Use clamps to hold cabinets together. Align faces and tops. Drive screws into studs and into the side of the previous cabinet to join them.
Use a scrap piece of wood between the clamp and cabinet to avoid denting the finish. Joining cabinets together before final tightening helps create a seamless look.
Step 8: Continue Mounting Cabinets
Repeat for each cabinet. Always check level and use shims where needed. Secure cabinets together for a seamless look.
For long cabinet runs, check the level every two or three cabinets to catch small errors before they grow. It’s harder to adjust after all cabinets are mounted.
Step 9: Remove Support Rail
After all cabinets are mounted, remove the temporary support rail. Touch up wall paint if needed.
Be gentle when removing the rail to avoid damaging your new cabinets or the wall below.
Step 10: Reinstall Doors And Shelves
Put doors and shelves back. Adjust hinges so doors open and close smoothly.
If doors seem uneven, adjust the hinge screws (usually located inside the cabinet) for a perfect fit. Reinstall shelf pins and shelves to your preferred height.
Tips For Mounting Cabinets Alone
Mounting cabinets is easier with help, but you can do it solo:
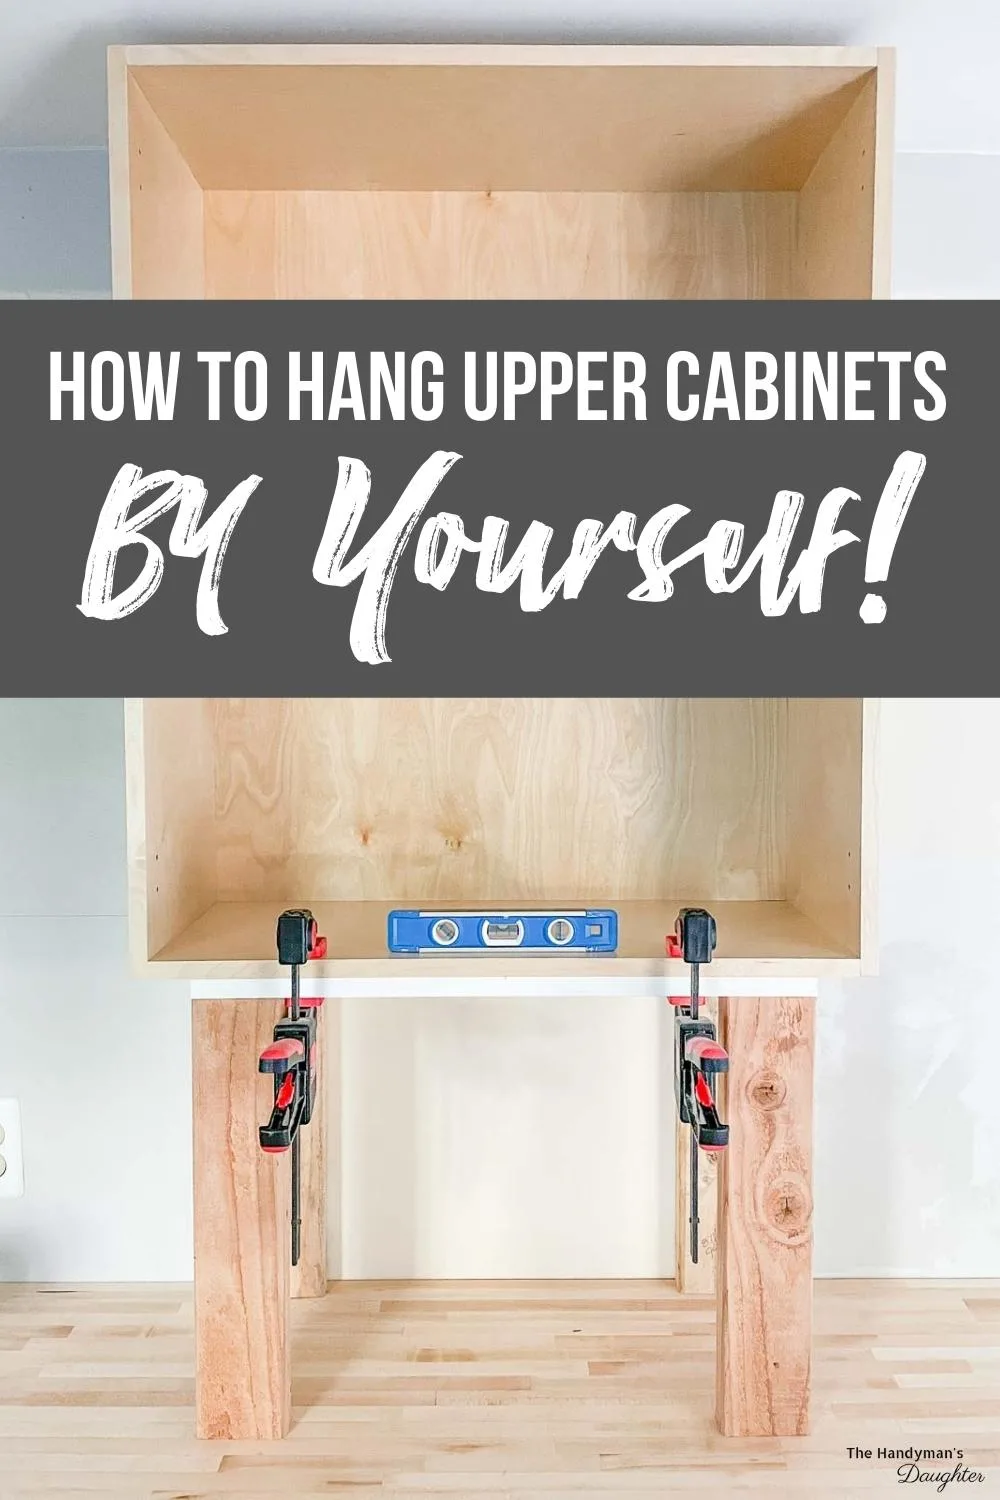
- Use the support rail to hold weight.
- Move slowly and check level often.
- Use clamps to secure cabinets temporarily.
- Don’t rush; safety matters.
If working alone, pre-set your screws in the back of the cabinet before lifting. This way, you can quickly fasten the cabinet once it’s in place, reducing the time you need to hold it up.
Another overlooked tip: use a stack of sturdy boxes or blocks to help support the cabinet while you adjust its position. This is especially useful for tall or heavy cabinets.
Common Mistakes And How To Avoid Them
- Missing studs: Always anchor into studs, never just drywall.
- Skipping level checks: Even small errors become obvious over time.
- Using short screws: Cabinet screws should be at least 2.5” long.
- Failing to use shims: Shims correct uneven walls and floors.
- Rushing the process: Take your time for best results.
Another common error is over-tightening screws, which can damage the cabinet back or strip the stud hole. Tighten until secure, but don’t force it.
Also, avoid loading cabinets with heavy items immediately after mounting. Give your installation a few hours to “settle” and check everything one more time.
Comparing Fastening Methods
Let’s compare fastening methods for wall cabinets:
| Method | Strength | Ease of Use | Recommended For |
|---|---|---|---|
| Cabinet Screws into Studs | High | Moderate | All wall cabinets |
| Mounting Rail (French Cleat) | High | Easy | Heavy cabinets |
| Drywall Anchors | Low | Easy | Light shelves only |
| Toggle Bolts | Medium | Moderate | Where studs not available |
Cabinet screws and mounting rails are best for long-term strength. French cleats are especially useful if you want to remove or adjust cabinets in the future, as they allow for easy changes without damaging the wall.
Credit: comestayawhile.com
How To Mount Corner Cabinets
Corner cabinets demand special care:
- Mark both walls for alignment.
- Use shims to balance uneven corners.
- Attach to studs on both walls.
- Clamp to adjacent cabinets for stability.
- Check level on both axes.
Corner cabinets are heavier and often hold more weight. Double-check everything before finishing. It helps to dry-fit the cabinet (set it in place without screws) to make sure it fits perfectly before drilling any holes. The back of the cabinet may need to be notched or trimmed if your walls are not perfectly square.
Adjusting Cabinets After Installation
Sometimes, cabinets don’t sit perfectly after mounting. To adjust:
- Loosen screws slightly.
- Add shims where needed.
- Retighten screws.
- Check level again.
If doors are misaligned, adjust hinges. Most modern hinges have screws for horizontal and vertical movement. If your cabinet face frames don’t align, loosen the connector screws, realign, and retighten. Patience here can make a big difference in the final appearance.
Cleaning Up And Final Inspection
After mounting:
- Fill any wall holes with wood filler.
- Touch up paint where needed.
- Wipe cabinets with a damp cloth.
- Check doors and shelves for smooth operation.
A final inspection ensures safety and a professional look. Run your hand along the bottom and top of the cabinets to feel for any rough edges or gaps. Check that all screws are flush with the surface and not protruding.
Small finishing touches, like caulking gaps at the wall, can give a truly custom, built-in appearance.
When To Hire A Professional
Mounting cabinets is a big job. Consider hiring a pro if:
- You have very heavy or custom cabinets.
- Your walls are concrete or brick.
- Plumbing or electrical lines are in the way.
- You lack the tools or confidence.
A professional can ensure safety and quality, saving you money in the long run. They also know local building codes, which can be important for kitchen remodels.
Data: Cabinet Mounting Failures And Repairs
According to recent home improvement reports:
- Over 20% of DIY cabinet installations require adjustments within the first year.
- The average repair cost for failed cabinets is $300–$500.
- Most failures are due to improper stud anchoring or uneven walls.
Planning and careful installation prevent these problems. Spending extra time on the measuring and mounting stages is often less costly than fixing a mistake later.
Selecting The Right Cabinet Mounting Hardware
Choosing the right hardware is crucial:
- Use cabinet screws (#10 or #12, 2.5–3” long).
- Consider a mounting rail for extra support.
- Avoid drywall anchors for anything heavier than 20 lbs.
Here’s a quick hardware comparison:
| Hardware Type | Load Capacity | Best For | Cost (average) |
|---|---|---|---|
| Cabinet Screw | 150 lbs | Wall cabinets | $0.10 per screw |
| Mounting Rail | 250 lbs | Heavy cabinets | $10–$25 |
| Drywall Anchor | 20 lbs | Light shelves | $0.20 per anchor |
| Toggle Bolt | 50 lbs | Limited situations | $0.50 per bolt |
Always match hardware to cabinet weight and wall type. For special situations—like mounting into tile or stone—use hardware recommended for those materials, and take extra care to avoid cracking surfaces.
Real-life Example: Kitchen Cabinet Installation
Let’s look at a real-life scenario. Sarah, a homeowner, installed wall cabinets in her kitchen:
- She measured carefully but missed marking the studs.
- Her cabinets started to sag after a month.
- A professional fixed the issue by moving screws into studs and adding shims.
Sarah learned that stud anchoring is essential, and now her cabinets are secure.
A similar story: Mark, a DIYer, tried to save time by using regular wood screws instead of proper cabinet screws. After a few months, the cabinet started pulling away from the wall. Cabinet screws are thicker, stronger, and designed not to shear under heavy loads—another important lesson for future projects.
Practical Tips For A Safe Installation
- Always wear safety goggles.
- Don’t overload cabinets after installation—wait 24 hours.
- Use a helper if cabinets are heavy.
- Keep children and pets away during installation.
These small steps can prevent injuries and accidents. Also, keep your work area clean and free of clutter. A dropped screw or tool can cause you to lose your balance while on a ladder.
How To Mount Wall Cabinets On Concrete Or Brick
Mounting cabinets on concrete or brick requires special tools:
- Use masonry drill bits.
- Insert wall plugs or anchors rated for heavy loads.
- Use long screws (at least 3”).
- Check alignment carefully; concrete is unforgiving.
If unsure, consult a professional for best results. For very hard surfaces, a hammer drill makes the process much easier and faster. Always vacuum out dust from drilled holes before inserting anchors to ensure a tight fit.
Dealing With Uneven Walls
Many homes have uneven walls. Shims are your best tool:
- Place shims behind cabinet at screw points.
- Adjust until cabinet is level.
- Trim excess shim material after installation.
Proper shimming ensures cabinets look straight and operate smoothly. For large gaps, you may need to use wider shims or stack several together. Always finish by trimming shims flush with a utility knife.
Preparing For Cabinet Lighting
If you plan to add under-cabinet lighting, consider wiring before mounting cabinets. Drill holes for wires and plan outlets. This prevents extra work after installation.
LED strip lights are a popular choice—they’re easy to install and energy efficient. If you’re not comfortable with electrical work, hire a licensed electrician to ensure safety and code compliance.
Environmental Factors And Long-term Care
Humidity and temperature affect cabinets. Wood expands and contracts, so leave a small gap between cabinet sides and walls. Use moisture-resistant screws in kitchens and bathrooms.
To maintain cabinets:
- Clean with mild soap and water.
- Tighten screws yearly.
- Inspect for signs of sagging or damage.
Proper care increases cabinet lifespan. If you notice doors sticking or closing unevenly, check for seasonal expansion or contraction and adjust as needed.
Credit: www.thehandymansdaughter.com
How To Remove Wall Cabinets Safely
If you need to remove cabinets:
- Empty all contents.
- Remove doors and shelves.
- Unscrew mounting screws.
- Gently lift cabinets off the wall.
- Patch holes and repaint.
Removing cabinets carefully prevents wall damage and injury. Have a helper ready, as cabinets can be heavier than expected, especially after years of use.
Using A Cabinet Mounting Rail (french Cleat)
A mounting rail (or French cleat) spreads cabinet weight across the wall. It’s ideal for heavy or long cabinets. Install the rail level, anchor into studs, then hang cabinets on the rail.
This method is popular in commercial kitchens and workshops. It makes it easy to adjust cabinet position after installation. French cleats also let you remove cabinets for cleaning or repairs without unscrewing from the wall.
Cabinet Alignment And Joining
For a seamless look:
- Clamp cabinets together before screwing.
- Use connector bolts for joining sides.
- Adjust face frames for perfect alignment.
Small gaps can be fixed with wood filler and sanding. Finish by touching up paint or finish for a truly built-in look.
Final Checklist Before You Finish
Before calling your project complete:
- Check all screws are tight.
- Ensure all cabinets are level.
- Doors open and close smoothly.
- No gaps between cabinets and wall.
- Touch up paint or filler if needed.
A final check prevents small issues from becoming big problems. Take a step back and view the cabinets from different angles to ensure everything looks perfect.

Credit: www.youtube.com
Frequently Asked Questions
How High Should Wall Cabinets Be Mounted Above Countertops?
Standard height is 18 inches above countertops. This gives enough space for appliances and workspace. Some kitchens use 15 inches for a modern look, but 18 is most common.
If you have tall appliances, check their height and adjust cabinet placement as needed. Always measure before drilling.
Can I Mount Wall Cabinets Without Studs?
It’s not recommended. Studs provide strong support. If studs are not in the right place, use a mounting rail anchored to nearby studs. Drywall anchors are not strong enough for heavy cabinets.
In rare cases, special toggle bolts can be used, but only for very light cabinets or shelves.
What Screws Should I Use For Wall Cabinets?
Use cabinet screws (#10 or #12, 2.5–3” long). These are designed for heavy loads. Avoid short or thin screws; they can fail under weight.
Cabinet screws have a flat washer head that pulls the cabinet tight to the wall without damaging the wood.
What Is A French Cleat, And How Does It Help?
A French cleat is a mounting rail cut at an angle. It lets you hang cabinets securely and spread weight across several studs. It’s ideal for heavy or long cabinets.
French cleats also make it easy to align cabinets perfectly, as you can slide them left or right before securing.
How Do I Fix Uneven Cabinet Doors After Mounting?
Adjust hinges using the screws provided. Most hinges allow for horizontal, vertical, and depth adjustments. If doors still won’t align, check if the cabinet itself is level and shim as needed.
Sometimes, seasonal changes can cause minor misalignment. A quick hinge adjustment usually fixes this.
Mounting wall cabinets is a task anyone can learn with careful planning, the right tools, and patience. It’s more than just attaching boxes to the wall—it’s about safety, durability, and creating a space you’ll enjoy. Take your time, follow each step, and double-check your work. For extra guidance, visit Family Handyman for expert advice and detailed instructions. With these tips, your wall cabinets will look great and stay secure for years.