Setting Up a Mesh Network With Old Routers: A Practical Guide
Imagine getting strong, fast Wi-Fi in every room of your house—without buying an expensive mesh kit. If you have old routers collecting dust, you may be able to build your own mesh network for almost no extra cost. While it’s true that most consumer routers aren’t designed for mesh by default, with the right steps, you can link them together to create a network that covers dead zones and boosts your wireless experience. This guide walks you through the process, explains the challenges, and shares pro-level tips for making the most of your old devices.
Why A Mesh Network Matters
Most people use a single router for their home Wi-Fi. The problem? Wi-Fi signals weaken as you move away from the router. Concrete walls, floors, or even microwaves can block signals, leading to annoying dead spots. A mesh network uses several devices (called nodes) to spread Wi-Fi evenly. Each node talks to the others, handing off your connection as you move.
Modern mesh systems (like Google Nest, Eero, or Netgear Orbi) are simple to set up but cost $200 or more. But if you already have old routers, you can build a budget-friendly mesh-like network. This method won’t have all the features of a commercial mesh system, but it can still offer seamless coverage for most homes.
Can Old Routers Really Work As Mesh?
Let’s be clear: Most old routers aren’t true mesh devices. They can’t automatically switch connections or self-heal if one node fails. But you can set up a network called “wired backhaul” (using Ethernet cables) or a “pseudo-mesh” (using wireless links and careful settings). With the right firmware and planning, this setup can:
- Expand Wi-Fi coverage
- Reduce dead spots
- Support more devices in different rooms
However, you’ll need to handle a few things manually (like updating firmware and configuring IP addresses). If you’re comfortable with basic router settings, this project is very doable.
What You Need Before You Start
Before you begin, gather the right tools and information. Here’s what you’ll need:
- Two or more old routers (ideally from the same brand, but not required)
- Ethernet cables (at least one per router)
- Access to router admin pages (username and password)
- A computer or phone for setup
- Basic networking knowledge (how to log in, change settings, etc.)
- Optional: Open-source firmware like DD-WRT or OpenWrt (for advanced features)
Not every old router will work well. Older 802.11b/g models may be too slow. Look for routers that support at least 802.11n (Wi-Fi 4) or newer, and check that the firmware can be updated.
Comparing Commercial Mesh Vs. Diy Mesh With Old Routers
Let’s see how a DIY mesh using old routers compares with a typical commercial mesh system:
| Feature | Commercial Mesh | Old Routers (DIY Mesh) |
|---|---|---|
| Automatic device handoff | Yes | No (manual switching or sticky connections) |
| Self-healing network | Yes | No |
| Cost | $200+ | Free (if you have old routers) |
| Setup difficulty | Easy (plug & play) | Medium/Advanced |
| Customizability | Low | High |
Choosing The Best Old Routers For Mesh Setup
Not every router is a good candidate. Performance, stability, and compatibility matter. Here’s what to look for:
- Dual-band support: Lets you separate backhaul (router-to-router communication) from client traffic.
- Gigabit Ethernet ports: For faster wired connections.
- Custom firmware compatibility: Some routers can run DD-WRT, OpenWrt, or Tomato, unlocking advanced features.
- Stable hardware: Avoid routers that drop connections or overheat.
Good Router Models For Diy Mesh
Some popular models for repurposing include:
- TP-Link Archer C7
- Netgear Nighthawk R7000
- Linksys WRT54GL (with open firmware)
- Asus RT-N66U
If you aren’t sure about your router, check online forums or the router’s support site for mesh, WDS, or repeater mode support.

Credit: www.youtube.com
Understanding Networking Terms For Mesh Setup
You’ll see terms like Access Point (AP), Repeater, Bridge, and WDS (Wireless Distribution System). Here’s what matters for DIY mesh:
- Access Point (AP): Creates a new Wi-Fi signal, connected to your main router by Ethernet.
- Repeater/Extender: Receives Wi-Fi from your main router and rebroadcasts it. May cut speed in half.
- WDS Bridge: Connects routers wirelessly, sharing the same network.
- Backhaul: The link between mesh nodes (wired or wireless).
For best speed and reliability, use wired backhaul (Ethernet between routers). Wireless backhaul is possible but may be slower.
Step-by-step Guide To Setting Up A Mesh Network With Old Routers
Let’s get practical. Here’s how to set up your mesh network. We’ll cover both wired and wireless methods, so you can choose what fits your home.
1. Reset And Update Your Routers
Before starting, reset each router to factory settings. This removes old configurations that might cause problems.
- Find the reset button (usually a tiny hole).
- Hold it for 10 seconds.
- Log in to the router’s admin page (often 192.168.1.1).
- Update the firmware to the latest version for security and bug fixes.
If you plan to install custom firmware (like DD-WRT or OpenWrt), do this now. Be careful—flashing firmware incorrectly can “brick” the router.
2. Plan Your Network Layout
Decide where each router will go. Place the main router near your modem and in a central spot. Position secondary routers to cover weak signal areas, but not too far—ideally, they should still get a strong signal from the main router.
For wired backhaul, run Ethernet cables between routers. For wireless, make sure there’s a clear path (fewer walls).
3. Configure The Main Router
This is your primary connection to the internet.
- Connect the main router to your modem.
- Log in to the admin page.
- Set up Wi-Fi SSID (network name) and password.
- Enable DHCP (it assigns IP addresses to devices).
Choose a Wi-Fi channel with less interference (use an app like WiFi Analyzer). Pick WPA2 or WPA3 security.
4. Set Up Secondary Routers As Access Points
You want all routers to create the same network, not separate ones.
For wired backhaul:
- Connect the secondary router to the main router using Ethernet (plug into a LAN port, not WAN).
- Log in to the secondary router’s admin page.
- Disable DHCP (to avoid IP conflicts).
- Set a static IP for the secondary router (e.g., 192.168.1.2).
- Set Wi-Fi SSID and password to exactly match the main router. Use the same encryption type and channel width.
For wireless backhaul (Repeater/Bridge/WDS):
- Log in to the secondary router’s admin page.
- Look for “Repeater,” “WDS,” or “Bridge” mode.
- Enter the main router’s SSID and password.
- Match channel and security settings.
- Disable DHCP.
Example Wired Backhaul Diagram
Here’s how devices connect:
- Modem → Main Router (DHCP, Wi-Fi) → Ethernet Cable → Secondary Router (AP mode, same SSID)
5. Fine-tune Roaming And Performance
While DIY mesh networks can’t hand off devices as smoothly as commercial mesh, matching SSID and password on all routers lets devices switch automatically. Some devices “stick” to one router even when another signal is stronger; this is called sticky client behavior. You can improve roaming by:
- Placing routers’ coverage areas to slightly overlap.
- Lowering the transmit power on secondary routers (advanced option).
- Using custom firmware to enable features like 802.11r (fast roaming), if supported.
6. Test Your Mesh Network
Walk around your home with a phone or laptop. Run speed tests in different rooms. Move from one router’s coverage area to another and watch for drops or delays. If you see dead spots, adjust router placement.
Try the following:
- Check signal strength with Wi-Fi Analyzer apps.
- Test both upload and download speeds.
- See if devices switch between routers without manual reconnection.
7. Secure Your Network
Don’t overlook security. Use strong passwords and WPA2 or WPA3 encryption. Turn off WPS (Wi-Fi Protected Setup), which is a common hacking target. Change default admin passwords on all routers.
If using open-source firmware, update it regularly for security fixes.
Troubleshooting Common Problems
Even with careful setup, issues can pop up. Here’s how to solve the most common ones:
Devices Not Switching Between Routers
Sometimes, phones or laptops hold onto a weak signal instead of switching to the nearest router. Try these solutions:
- Turn Wi-Fi off and on again on the device.
- Lower the transmit power of distant routers (advanced).
- Use custom firmware with roaming assist features, if possible.
Slow Speeds On Secondary Routers
If speeds are much slower on a secondary router:
- Use wired backhaul if possible.
- Make sure routers are on the same Wi-Fi channel and band.
- Avoid double NAT (disable DHCP on all but the main router).
- Check for interference from neighbors or devices like microwaves.
Ip Address Conflicts
If devices can’t connect, check that only the main router has DHCP enabled. All others should have static IPs in the same subnet (e. g. , 192. 168. 1. 2, 192. 168. 1. 3, etc. ).
Firmware Flashing Fails
If a router stops working after a firmware upgrade, search for the “recovery mode” for your specific model. Some routers can be rescued using a special procedure from the manufacturer’s website.
Upgrading Old Routers With Open-source Firmware
For advanced users, installing custom firmware like DD-WRT or OpenWrt gives you more control. These firmwares add features such as:
- WDS bridging
- VLAN tagging
- Quality of Service (QoS)
- Roaming assist
Before flashing, check your router model on the firmware’s compatibility list. Follow the instructions closely—incorrect installation can permanently damage the router.
Pros And Cons Of Custom Firmware
| Advantage | Disadvantage |
|---|---|
| Advanced features (mesh, bridging) | Risk of “bricking” the router |
| Better security updates | Setup is more complex |
| More control over settings | Warranty is usually voided |
Custom firmware isn’t required, but it can make your DIY mesh more powerful.
Optimizing Your Diy Mesh For Speed And Reliability
Getting the best out of your mesh network isn’t just about setup. Here are some expert tips:
- Wired backhaul always beats wireless. If possible, run Ethernet cables.
- Avoid signal overlap. Place routers so their coverage just touches, not overlaps too much.
- Keep firmware up to date. Check for updates every few months.
- Check channels regularly. Wi-Fi environments change—scan for the least crowded channel.
- Reboot routers occasionally. Old routers may need a restart to stay stable.
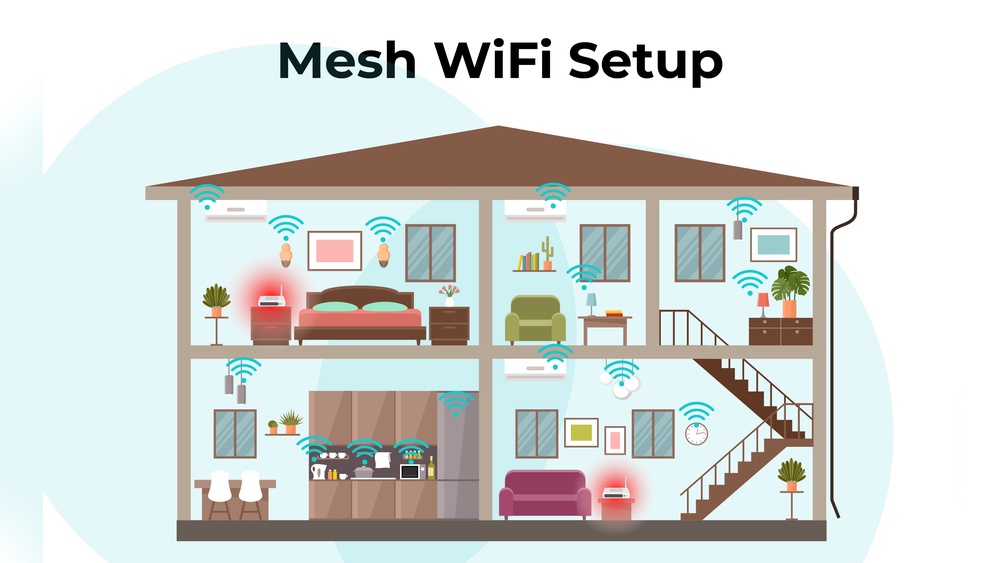
Example: Improving Coverage In A Two-story Home
Suppose your main router is downstairs, and you want Wi-Fi upstairs. Place the main router centrally downstairs and run an Ethernet cable to a secondary router upstairs. Set both to the same SSID and password. Now, devices upstairs connect to the closest router, with no speed loss from wireless repeating.
What Beginners Often Miss
Setting up a mesh network with old routers isn’t just about plugging them in. Here are two key insights:
- SSID and security settings must match exactly. Even a small typo means devices see two networks, not one.
- DHCP must be off on all but the main router. If not, you’ll have IP conflicts, and devices may not connect.
Many guides skip these points, but they are critical for a smooth network.
When A Diy Mesh May Not Be Enough
While this setup works well for many homes, there are some limits:
- Older routers may not support many devices. If you have dozens of smart home gadgets, a modern mesh system may be better.
- No automatic self-healing. If one router goes offline, you’ll need to fix it manually.
- Wireless backhaul cuts speed. Each “hop” halves bandwidth. If you stream 4K video or play online games, performance may suffer.
If you need more reliability or want features like parental controls and easy app setup, consider a commercial mesh system. For most users, though, repurposing old routers is a smart way to save money and reduce e-waste.
Real-world Examples
Example 1: Small Apartment
Maria had spotty Wi-Fi in her bedroom. She used an old TP-Link router as a wired access point in the hallway, matching SSID and password. Now, her laptop switches seamlessly as she moves around.
Example 2: Large House
John used three Netgear routers: one as the main router, two as wired access points (upstairs and in the garage). He ran Ethernet through the basement. Coverage improved, and family members stopped complaining about buffering.
These stories show that with a few old routers and some planning, you can solve most Wi-Fi headaches.

Credit: www.vsolcn.com
Environmental And Cost Benefits
Reusing old routers keeps electronics out of landfills and saves money. Instead of buying new gear, you’re making the most of what you have. According to the EPA, electronic waste is a growing problem, with millions of tons discarded each year. Extending the life of your routers is a small but meaningful step.
How To Tell If Your Mesh Network Is Working
Look for these signs:
- Devices show a strong Wi-Fi signal in all rooms.
- Internet speed is consistent throughout your home.
- Devices switch between routers without losing connection.
If you notice slowdowns or drops, revisit router placement and settings.

Credit: www.youtube.com
When To Upgrade To A True Mesh System
DIY mesh works for many, but sometimes it’s worth investing in a commercial system. Consider upgrading if:
- You need to cover a very large area (over 3,000 sq. Ft.).
- You want plug-and-play setup with app control.
- You need advanced parental controls, security, or guest networks.
Modern mesh systems use dedicated backhaul channels and smart algorithms for device handoff. For most homes, though, the DIY approach is more than enough.
Frequently Asked Questions
How Many Old Routers Can I Use In A Diy Mesh Network?
You can use as many routers as you need to cover your space, but practical limits exist. Most homes work well with two or three. Too many routers can cause interference or slowdowns, especially if using wireless backhaul.
Can I Mix Different Brands Or Models Of Routers?
Yes, but it’s easier if routers are the same brand and model. Different brands may use different settings or support features like WDS differently. Always match SSID, password, and security settings exactly.
Is A Wired Connection Between Routers Required?
No, but it’s highly recommended. Wired backhaul gives faster and more reliable connections. Wireless backhaul works, but each hop may cut your speed in half due to retransmission.
What’s The Difference Between An Access Point And A Repeater?
An access point connects to your main router via Ethernet and creates a new Wi-Fi signal. A repeater connects wirelessly and rebroadcasts the signal, but usually at reduced speed. Access points are better for speed and reliability.
Where Can I Learn More About Advanced Mesh Networking?
For deep dives into networking and open-source firmware, check out the official OpenWrt Project. They provide guides, compatibility lists, and community support for advanced setups.
Turning old routers into a mesh network is a rewarding project. With careful planning, you’ll enjoy strong, stable Wi-Fi without breaking the bank. Whether you’re covering a studio apartment or a large house, these steps can help you get the most from your gear.
Happy networking!