
It’s easy to feel stuck when searching for the best touch panel for Uno. Maybe you’ve tried a few displays, only to run into compatibility issues or limits with your project. If you’re unsure which panel fits your setup or your goals, you’re not alone.
Choosing a touch panel for Uno can be confusing. Many models look similar, but small differences in screen size, touch technology, and board compatibility can change how well they work for you. Some options offer advanced features, while others keep it basic.
It’s rarely clear which trade-offs matter most until you start building.
This guide will help you make sense of the choices. It’s meant to clarify what you should consider before picking a touch panel for your Uno-based project.
What Actually Matters When Choosing A Touch Panel
Most people focus on screen specs, but the real challenges are about compatibility and ease of use. Consider how the panel connects to your Uno, whether the touch interface is responsive enough, and if the display works with your preferred libraries.
Think about your intended project—simple interface, visual feedback, or something interactive. If you need advanced features or larger screens, expect to pay more and spend extra time on setup.
Common Mistakes Buyers Make
Many buyers overlook whether the touch panel works with their Uno board version. Some displays require extra wiring or drivers, which can be frustrating for beginners. Others assume bigger screens are always better, but large panels may need more power or software tweaks.
It’s easy to miss the importance of community support and tutorials, especially if you’re new to electronics.
The following product selections reflect the range of needs—from basic projects to more ambitious builds. Each option was chosen for its relevance, compatibility, and the variety it offers. Review these choices to find what fits your project best.
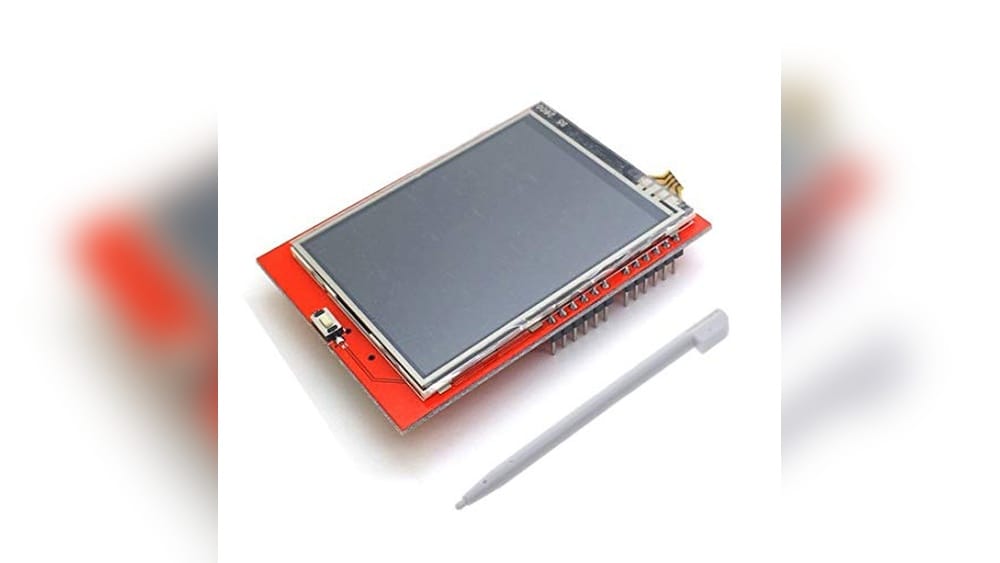
Hiletgo 2.4″ Tft Touch Panel For Uno
A solid pick as the Best Touch Panel for Uno, thanks to its easy integration and bright, responsive display.

This compact 2. 4″ touch panel is designed to connect directly with Arduino UNO or MEGA2560 boards. It solves the problem of adding interactive, colorful visual feedback to your projects without complex wiring or configuration. The bright backlit screen ensures that even in less-than-ideal lighting, your data and controls remain clear.
Using this panel feels straightforward—touch response is consistent, and colors are vibrant, making menus and controls easy to see and use. You’ll save time on setup, and the resistive touchscreen means you don’t have to worry about fingerprints or glare.
Overall, it gives confidence that your interface will work reliably every time you power up your project.
Why It Works For Arduino Uno Projects
- Simple connection with UNO or MEGA2560
- Bright display with adjustable backlight
- Touchscreen adds interactive capability
- Wide color range for clear visuals
- Compact and lightweight
- Direct digital control for custom UI
Potential Downsides To Consider
- Resistive touchscreen may not feel as smooth as capacitive types
- Small screen size limits detailed graphics
- No built-in enclosure—needs careful mounting
Where This Shines
If you’re building an Arduino project that needs a simple touch interface, this panel removes the hassle of complicated wiring and display setup. It’s best for quick prototypes, custom controls, or data displays where reliability matters and space is tight.
There’s no need to guess about compatibility—the straightforward interface and clear instructions keep things stress-free. For best results, connect the backlight control to a digital pin so you can dim or turn off the display when your project requires.
It’s a trustworthy pick for makers who want fewer surprises during builds and a touch panel that just works.
| Best for | Why |
|---|---|
| Arduino UNO projects | Direct compatibility and easy wiring |
| Custom control panels | Touchscreen support for interactive menus and buttons |
| Portable prototypes | Lightweight and small for compact builds |
| Visual feedback in devices | Bright, colorful screen improves readability |
Stayhome 2.8 Inch Tft Touch Shield
This Stayhome TFT shield offers the Best Touch Panel for Uno users looking for a compact display with resistive touch functionality.

The Stayhome 2. 8 Inch TFT LCD Shield is designed specifically for Arduino UNO users who want to add a touch panel interface to their projects. Its resistive touch panel lets you interact directly with the display, providing a simple solution for DIY electronics and development boards.
Using this shield feels straightforward and reliable, with a clear screen size that fits well on Arduino UNO setups. It offers consistent performance powered at 3. 3V and 300mA, making it a dependable choice for hobbyists and developers seeking precise control and ease of use.
Key Advantages For Arduino Projects
- Compact 2.8-inch display fits well on Arduino UNO boards
- Resistive touch panel enables direct input interaction
- Operates at 3.3V with moderate power consumption (300mA)
- High-quality integrated circuits enhance durability and performance
- DIY kit format suits custom project assembly and learning
- Shield design simplifies connection without extra wiring
Considerations Before Buying
- Resistive touch may be less sensitive than capacitive alternatives
- Display resolution and color depth details are not specified
- Requires some assembly and familiarity with Arduino shields
Who This Fits Best
This shield is ideal for Arduino UNO users who want a straightforward way to add a touch display without complex wiring or setup. It removes the guesswork around compatibility by being a shield designed for the UNO form factor.
To get the best results, ensure your project code is optimized for resistive touch input, which may feel different than modern capacitive screens. This approach helps maintain control accuracy and responsiveness.
With this shield, you gain peace of mind knowing your touch input and display are integrated cleanly, reducing hardware mishaps and compatibility issues often encountered with external modules.
| Best for | Why |
|---|---|
| Arduino UNO users | Shield fits UNO form factor, simplifying hardware integration |
| DIY electronics learners | Kit format encourages hands-on assembly and understanding |
| Projects needing touch input | Resistive panel allows direct touch control on small displays |
| Low-voltage setups | Operates at 3.3V with moderate current draw for safe usage |
Hczykya Uno R3 Board For Arduino
The Hczykya UNO R3 Board stands out as the Best Touch Panel for Uno by offering a user-friendly entry point for creative electronics projects.

The Hczykya UNO R3 Board for Arduino is a versatile microcontroller board designed to make experimenting with electronics easier. It is compatible with a range of sensors and modules, making it ideal for building interactive projects without much hassle. If you’re starting with Arduino or working on prototypes, this board gives you plenty of input/output options for flexibility.
In use, this board feels reliable for both simple and advanced projects. Its open-source design and broad compatibility with Raspberry Pi models let you connect and program without confusion. The consistent performance means you can focus on your ideas rather than troubleshooting hardware, which saves time and reduces frustration.
Why Makers Choose It
- Works smoothly with Arduino software and libraries
- Easy to connect with many sensors and modules
- Good for both beginners and experienced users
- Customizable thanks to open-source design
- Reliable microcontroller for consistent results
- Broad compatibility with Raspberry Pi models
What To Keep In Mind
- Not a standalone touch panel—requires additional components for touch input
- May need some basic coding knowledge to get started
- No onboard display; external modules required for advanced interfaces
Who This Fits Best
This board is a solid fit for students, makers, or hobbyists who want to explore interactive electronics with the Best Touch Panel for Uno setup. It removes the guesswork from picking compatible hardware and helps avoid the stress of starting from scratch, especially for those new to Arduino or microcontrollers.
The open-source design and extensive libraries let you quickly test ideas without technical roadblocks.
For best results, try using official Arduino resources and community support when connecting new sensors or modules. This ensures smooth setup and fewer surprises down the line. You can count on its stable performance for repeated prototyping or learning at your own pace—I found it straightforward for both quick tests and longer projects.
| Best for | Why |
|---|---|
| Learning Arduino basics | User-friendly and widely supported by tutorials |
| Prototyping touch panel interfaces | Ample I/O pins and module compatibility simplify setup |
| Integrating with Raspberry Pi | Seamless compatibility with multiple Pi models |
| Custom DIY electronics | Open-source design allows easy modification |
Arduino Uno Rev3 Microcontroller Board
The Arduino Uno REV3 is a solid pick as the Best Touch Panel for Uno projects, offering a reliable foundation for smooth integration and easy prototyping.

The Arduino Uno REV3 Microcontroller Board is a trusted development platform for anyone building touch panel interfaces or interactive electronics with Uno. Its 16MHz ATmega328P chip and flexible input/output setup make it simple to connect sensors, displays, and other components for DIY projects.
Using this board feels straightforward and reliable. The USB connectivity means you can upload sketches and debug without fuss, and compatibility with the Arduino IDE keeps the process familiar. The board is well-suited for both beginners learning the basics and experienced makers who want consistent results.
Why This Board Stands Out
- Widely compatible with touch panels and sensor modules
- Simple USB programming and debugging
- Plenty of I/O pins for flexible connections
- Full support from Arduino IDE and community resources
- Stable for both quick experiments and long-term use
- Lightweight and compact for easy mounting
Consider Before You Buy
- No built-in touch panel—additional modules required
- Limited memory compared to some advanced boards
- Basic power handling—external power may be needed for larger setups
Who This Fits Best
The Arduino Uno REV3 Microcontroller Board is ideal for those building Best Touch Panel for Uno projects in classrooms, hobby settings, or prototyping labs. It removes the hassle of compatibility checks and complex wiring, letting you focus on creating and testing your touch panel ideas.
One tip: use readily available Arduino libraries and example codes to speed up your first touch panel integration. This board’s reliability means fewer surprises and smoother project development, especially if you value a straightforward setup. I find the consistent performance offers real peace of mind for fast prototyping and learning environments.
| Best for | Why |
|---|---|
| Touch panel interface development | Easy connection and stable operation with sensor and display modules |
| Classroom learning kits | Beginner-friendly, widely supported, and safe for repeated student use |
| Prototyping interactive devices | Flexible I/O and USB connectivity make quick tests and changes simple |
| Arduino IDE users | Seamless integration and tons of code examples for rapid progress |
Arduino Giga Display Shield Touch Panel
The Arduino GIGA Display Shield stands out as the Best Touch Panel for Uno users who want seamless integration and advanced sensor features for their projects.

The Arduino GIGA Display Shield Touch Panel is designed to bring an intuitive touch interface to your Arduino GIGA R1 WiFi projects. With its clear 3. 97″ multi-touch display and easy connection, it solves the hassle of adding a responsive screen and sensor inputs in one step.
Having an integrated IMU and digital microphone means you can build more interactive devices without searching for extra modules.
Using this shield feels smooth and reliable, especially if you want all features in one place. The multi-touch gestures make navigation simple, and the included connectors open doors for camera integration. It’s easy to focus on your project ideas, not wiring or compatibility issues.
The shield helps you save time by letting you expand or customize without extra guesswork.
Why Makers Choose This Panel
- Effortless integration with Arduino GIGA R1 WiFi
- Bright, high-resolution 3.97” multi-touch display
- Built-in IMU for motion and orientation sensing
- Onboard digital microphone for sound input
- Camera connector for Arducam support
- Expandable with 54 extra pins
- Customizable with 3D printed cases
Consider Before Buying
- Designed specifically for Arduino GIGA R1 WiFi (not Uno-compatible without modifications)
- Physical size may not fit smaller enclosures
- No price advantage for basic touch-only needs
Who This Fits Best
This touch panel is best for makers using the Arduino GIGA R1 WiFi who want a feature-rich, all-in-one interface for advanced projects. It takes away the stress of sourcing and connecting separate sensors and display modules, letting you focus on creative development.
For the smoothest setup, follow Arduino’s case customization tutorial to keep your build neat and protected.
If you value reliable integration and want to save time on troubleshooting, this shield delivers a consistent experience. My tip: explore the multi-touch and sensor features early, so you can unlock new interaction methods. With this panel, you’ll have fewer surprises when expanding your project, and a professional feel to your finished device.
| Best for | Why |
|---|---|
| Projects using Arduino GIGA R1 WiFi | Designed for plug-and-play compatibility with this board |
| Interactive dashboards and handheld devices | Multi-touch, IMU, and microphone enable creative controls |
| Camera-based builds | Arducam connector simplifies camera integration |
| Rapid prototyping with custom cases | Easily design and print enclosures for unique projects |
Arduino Uno R4 Wifi
The Arduino UNO R4 WiFi offers the Best Touch Panel for Uno users seeking advanced wireless connectivity and precise analog control.

The Arduino UNO R4 WiFi is a powerful single board computer that combines dual-core processing with wireless features, designed for advanced IoT and embedded projects. It solves the need for reliable Wi-Fi and Bluetooth connectivity alongside flexible analog controls, making it suitable for diverse applications.
Using this board feels seamless thanks to its modern USB-C port and integrated 12×8 LED matrix for real-time feedback. It simplifies wiring with the Qwiic connector, helping you save time and maintain consistency when building wireless or sensor-based projects.
Key Advantages For Embedded Projects
- Dual-core processing with Renesas RA4M1 and ESP32-S3 for multitasking and wireless control
- Robust Wi-Fi and Bluetooth 5.0 connectivity for seamless IoT integration
- USB-C port enables fast programming and efficient power delivery
- 12-bit DAC and OP-AMP provide precise analog output for sensor interfacing
- Built-in 12×8 LED matrix offers immediate visual feedback without extra components
- Qwiic connector simplifies adding I2C sensors and peripherals
- CAN support expands use to industrial and automotive communication systems
Considerations Before Choosing
- May be more complex than basic UNO models for beginners
- Physical size is larger than standard Arduino boards, which might affect compact builds
- Advanced features require familiarity with both Renesas and ESP32 architectures
Who This Board Works Best For
This board suits developers who need reliable wireless control and precise analog outputs in their Uno projects, especially for IoT or industrial use. It removes the hassle of managing separate wireless modules and complex wiring setups.
For best results, leverage the Qwiic connector for quick sensor integration and use the LED matrix to monitor status during development. This approach reduces guesswork and ensures you catch issues early, providing peace of mind during deployment.
| Best for | Why |
|---|---|
| IoT project developers | Built-in Wi-Fi and Bluetooth 5.0 enable easy cloud and device communication |
| Embedded system engineers | Dual-core processing supports complex real-time applications |
| Analog signal projects | High-precision 12-bit DAC and OP-AMP allow accurate analog control |
| Prototypers needing fast setup | Qwiic connector and USB-C simplify wiring and programming |
Elegoo Uno R3 Arduino-compatible Board
If you need the Best Touch Panel for Uno, this board offers reliable compatibility and clear labeling for smooth prototyping.
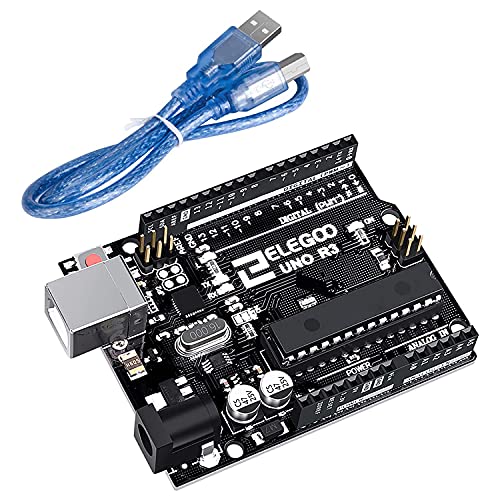
The ELEGOO UNO R3 Arduino-Compatible Board is a dependable single board computer for electronics projects and prototyping. It helps users quickly build and test circuits with clear header labeling, making wiring more straightforward. The board uses an ATmega328P chip and supports USB connectivity, addressing common compatibility needs for Arduino users.
Using this board feels familiar and consistent, especially for those used to the Arduino ecosystem. Setup is simple, and the precise header prints reduce mistakes. You can confidently connect components without second-guessing pin locations, which saves time and boosts reliability in repeated builds.
Decisive Features For Makers
- Clear header labeling reduces wiring errors
- Faster data transfer with 16U2 chip upgrade
- Full Arduino IDE compatibility
- RoHS compliant for safety
- Easy USB connectivity
- Consistent performance for prototyping
Points To Consider Before Buying
- No touch panel included—board only
- Limited onboard features compared to advanced models
- Requires external modules for extended functionality
Who This Fits Best
This board is ideal for hobbyists and students who want a reliable base for touch panel projects with the Uno platform. It removes the hassle of unclear wiring and compatibility issues, making first-time setup much less stressful.
If you’re starting with Arduino or need a straightforward prototyping board, this model gives peace of mind through its clear labeling and proven compatibility. A quick tip: always double-check header prints before connecting touch panels to avoid miswiring. You’ll enjoy smooth, repeatable results and fewer surprises as you build and test new ideas.
| Best for | Why |
|---|---|
| Touch panel prototyping | Clear header prints streamline wiring and reduce errors |
| Arduino learners | Full IDE compatibility ensures easy programming |
| Safe electronics projects | RoHS compliance means safer material standards |
| Quick circuit builds | Precise connectors and easy USB setup save time |
Arduino Uno Q Hybrid Board
Best Touch Panel for Uno users who want advanced AI, vision, and IoT features in a familiar UNO form factor.

The Arduino UNO Q Hybrid Board brings together powerful processing and real-time control, making it ideal for complex robotics or IoT projects. This board solves the problem of balancing advanced AI capabilities with the flexibility of classic Arduino shields, all in a familiar UNO layout.
Its hybrid design lets you run Linux for high-level applications while keeping real-time tasks on a low-power microcontroller.
In daily use, you get the confidence of reliable connectivity and smooth project expansion. Coding with Python and Arduino Sketches side by side saves time and avoids headaches for both beginners and advanced users. The board’s compatibility with display and audio peripherals means you can prototype interactive systems quickly.
You’ll notice less frustration when integrating vision or voice features—everything just fits together.
Noteworthy Advantages
- Hybrid design supports both high-level and real-time applications
- Runs Linux Debian OS for advanced coding and rapid prototyping
- UNO form factor keeps shield compatibility simple
- Built-in Wi-Fi 5 and Bluetooth 5.1 for versatile connectivity
- Expandable with Qwiic connector and Modulino nodes
- Supports AI vision, sound processing, and robotics tasks
- USB-C power and connectivity for modern convenience
Things To Consider
- Not the best fit for absolute beginners due to its advanced features
- Requires Linux familiarity to unlock all functions
- Larger size than basic UNO boards may limit compact builds
Who This Fits Best
If you’re building smart projects that mix AI, vision, or voice with classic Arduino reliability, this board is a natural fit. It removes the guesswork from integrating multiple technologies and reduces the time spent troubleshooting compatibility issues. For those who want to step into advanced robotics or IoT without switching platforms, it’s a stress-saver.
You get reliable performance and flexible expansion, so unexpected surprises are rare. For best results, use the Arduino App Lab for a quick start and keep your projects modular with Qwiic and shield add-ons. Personally, I appreciate how it bridges new and classic development styles—making it easier to try ambitious ideas with fewer hassles.
| Best for | Why |
|---|---|
| Prototyping advanced robotics | Dual processors handle AI and real-time control together |
| Developing IoT solutions | Wi-Fi 5, Bluetooth, and expansion options simplify connectivity |
| Interactive vision/sound projects | AI acceleration supports object recognition and voice commands |
| Upgrading classic UNO builds | Maintains shield compatibility while adding modern features |
Elegoo Uno Super Starter Kit
The ELEGOO UNO Super Starter Kit stands out as the Best Touch Panel for Uno, making electronics projects easier for those starting out.

This kit provides everything needed to get started with Arduino-based projects. It is designed for beginners who want to learn the basics of electronics and programming without the hassle of sourcing individual parts. The included LCD1602 module with pin headers makes display integration straightforward, saving time and avoiding soldering.
Using the ELEGOO UNO Super Starter Kit feels organized and approachable, thanks to the detailed PDF tutorial with over 22 lessons. The step-by-step guidance helps you build projects with confidence, reducing guesswork and mistakes. Having all compatible components together means you spend more time experimenting and less time troubleshooting missing parts.
Why Choose This Kit
- Complete bundle for Arduino learners
- Easy-to-follow PDF tutorials included
- No soldering needed for the LCD module
- Compatible with several Arduino boards
- Clear parts listing in a neat package
- Power supply module and 9V battery included
Consider Before You Buy
- Not for advanced users needing specialized sensors
- Project lessons are beginner-focused
- No touch panel included, just LCD module
What I’d Tell A Friend
If you’re new to Uno projects and want a straightforward way to learn, this kit is a practical starting point. It takes away the stress of finding compatible parts and gives you a clear learning path. You’ll appreciate not having to solder the LCD screen—just plug and go.
This kit is ideal for anyone who values clear instructions and a hassle-free setup. For best results, start with the PDF lessons and work step by step. You’ll build confidence with every project, and you’ll be less likely to run into surprises along the way.
| Best for | Why |
|---|---|
| Arduino beginners | All essential parts and lessons included |
| Classroom or group learning | Organized kit, easy to share and follow |
| DIY electronics hobbyists | Compatible with multiple Arduino models |
| No-solder projects | LCD module comes pre-assembled |
Arduino Uno R4 Minima
The Arduino UNO R4 Minima offers the Best Touch Panel for Uno users seeking a next-generation, compact board for diverse projects.

The Arduino UNO R4 Minima is a single board computer from the well-known Arduino brand, representing the next generation in the Uno family. It is designed for developers and hobbyists who need a reliable and compact board for a variety of electronics projects.
Using this board feels straightforward and dependable, providing a consistent platform that supports creativity without unnecessary complexity. Its size and build make it easy to integrate into many setups, helping users save time and avoid guesswork during development.
Key Advantages For Electronics Projects
- Next generation Arduino Uno with updated features
- Compact and lightweight design for flexible use
- Trusted Arduino brand ensuring quality and support
- Versatile for a wide range of prototyping tasks
- Simple to use for beginners and experienced users alike
Considerations Before Buying
- No built-in touch panel included with this board
- Limited detailed specs available for advanced users
- Not bundled with accessories or starter kits
When This Board Makes Sense
This Arduino UNO R4 Minima is ideal for makers who want a trusted and compact development board without added complexity. It removes the hassle of compatibility worries by following the familiar Arduino Uno family design.
To get the best results, pair it with compatible touch panels or sensors suited to your project needs. This approach ensures fewer surprises and smooth integration in your builds.
For anyone who values reliability and ease, this board fits well into your electronics toolkit.
| Best for | Why |
|---|---|
| Hobbyists and beginners | Simple and trusted platform for learning and prototyping |
| Compact project builds | Small size and light weight fit into tight spaces |
| Arduino Uno family users | Next generation model with familiar design and support |
| Custom touch panel integration | Flexible base board to connect compatible touch panels |
What To Consider When Choosing An Arduino-compatible Board Or Display
Project Goals First
Decide what you want to build before selecting hardware. Simple educational projects may only need a basic Uno board, while advanced AI or IoT projects require more powerful models.
Compatibility And Expansion
Check if the board or display works with your existing shields, sensors, and libraries. Some newer boards add features but may need updated code or adapters.
Connectivity Needs
Consider if you need Wi-Fi, Bluetooth, or advanced interfaces like CAN or Qwiic. Not all boards offer wireless features out of the box.
Display Type And Interaction
Touch screens differ in size, resolution, and touch technology. For basic feedback, a simple LCD is enough. For rich interfaces, look for higher resolution and multi-touch.
Common Mistakes To Avoid
- Assuming all shields fit every board—double-check pin layouts and voltage levels.
- Overlooking library support for new hardware—some advanced boards or displays need updated code.
- Ignoring power requirements—some boards or displays may need external power for stable operation.
- Choosing more features than necessary—extra complexity can slow learning for beginners.
Who Should Avoid These Products
- If you need ready-to-use consumer devices, not DIY kits.
- If you are uncomfortable with basic wiring or code uploads.
- If you expect detailed documentation or support for every feature—community help is common but not guaranteed.
Setup And Usage Tips
- Start with official tutorials when possible, especially for complex boards.
- Install recommended drivers and IDE versions before connecting hardware.
- Test new displays with example sketches to confirm wiring and compatibility.
- Keep connections organized to avoid short circuits or miswiring.
Care And Maintenance
- Store boards and displays in anti-static bags when not in use.
- Avoid bending pins or flexing PCBs.
- Disconnect power before making wiring changes.
- Clean screens gently with a microfiber cloth if needed.
Frequently Asked Questions
Can I Use All Shields With The Latest Arduino Boards?
No. Some new boards change pin layouts or voltage. Check compatibility before connecting shields.
Is A Touch Display Required For Most Projects?
Not always. Touchscreens help with interactive projects but are not needed for simple sensing or control tasks.
Do I Need To Solder Anything?
Most boards and shields are solder-free, but some kits or displays may require basic soldering skills.
What Operating Systems Are Supported For Programming?
The Arduino IDE runs on Windows, macOS, and Linux. Some advanced boards support Python or Linux directly.
Are These Products Suitable For Children?
With adult supervision, basic kits are safe for older children. Advanced boards may need more experience and care.
Will My Old Code Work On Newer Boards?
Simple sketches usually work. For advanced features, check for updated libraries and hardware definitions.
Final Thoughts
Choosing the right Arduino board or display depends on your experience, goals, and compatibility needs. Focus on what you want to create, start with simple hardware if you are new, and upgrade as your projects grow. Take your time to match features with your skills and plans.