
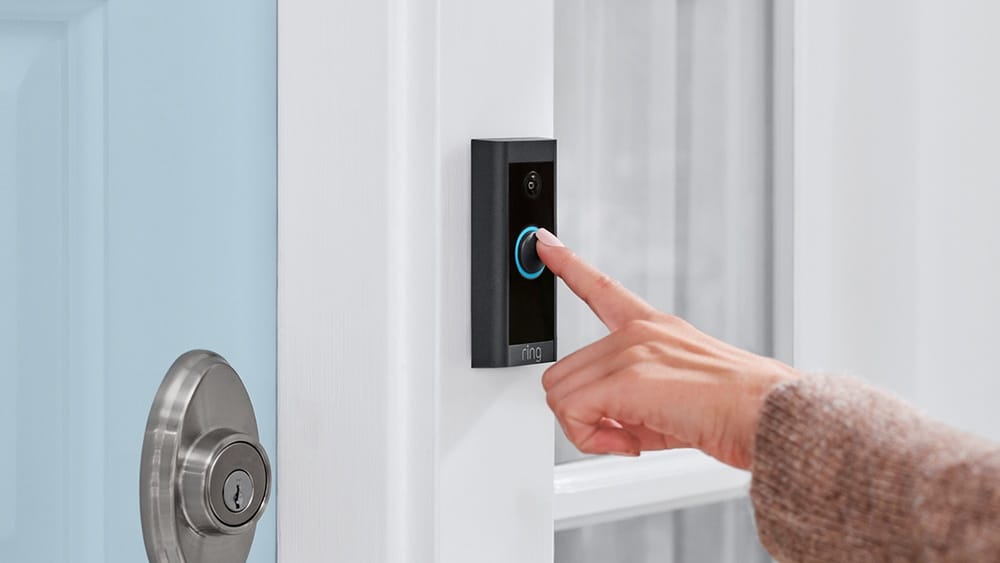
When people think about home security today, video doorbells like the Ring are often the first solution that comes to mind. These smart devices don’t just let you see who’s at your door—they help protect your family, receive packages safely, and even deter crime. But one question many homeowners face is: How high should you install your Ring Video Doorbell? The answer is more important than most realize. Height affects everything, from camera coverage to motion detection and even ease of use.
This guide will walk you through everything you need to know about installing your Ring Video Doorbell at the right height. We’ll go beyond the basics, covering real-world scenarios, practical tips, and common mistakes. Whether you live in a house, apartment, or condo, by the end of this article, you’ll be confident about how high to mount your device for the best results.
Why Installation Height Matters For Ring Video Doorbells
Most people believe installing a video doorbell is simple: just place it near the door where you can reach it. But the installation height is critical for several reasons:
- Camera Angle and Field of View: The position affects what the camera can see—too high, and you might miss faces; too low, and you get too much ground.
- Motion Detection Accuracy: Ring doorbells use motion sensors with specific detection zones. Height changes what’s detected and what’s ignored.
- Accessibility: The button should be reachable for all visitors, including children and people with disabilities.
- Legal and Privacy Issues: Placing the device too high might record areas you shouldn’t, like a neighbor’s property.
Understanding these factors helps you avoid frustration, improve security, and stay on the right side of privacy laws.
The Recommended Mounting Height
Ring, the manufacturer, suggests a specific mounting height for most of its video doorbells: about 48 inches (4 feet) above the ground. This is not an arbitrary number. It’s based on years of research and real-world data.
Why 48 Inches?
- Facial Recognition: At this height, the camera is at chest to face level for most adults, making it easy to capture clear images of visitors.
- Motion Sensor Optimization: Ring doorbells use PIR (Passive Infrared) sensors, which work best when they scan across, not up or down. Mounting at 48 inches helps the device sense movement across the walkway, not just at the feet.
- Accessibility: A button at 4 feet is easy for most people to reach, including children and wheelchair users.
- Package Monitoring: Many users want to see packages left on the ground. 48 inches provides a good angle to monitor both faces and parcels.
Variations For Different Ring Models
Different Ring models may have slight differences in recommended height due to lens placement or field of view. Here is a quick comparison:
| Ring Model | Recommended Height | Field of View |
|---|---|---|
| Ring Video Doorbell (2nd Gen) | 48 inches | 155° horizontal, 90° vertical |
| Ring Video Doorbell Pro | 48 inches | 160° horizontal, 90° vertical |
| Ring Video Doorbell 4 | 48 inches | 160° horizontal, 84° vertical |
| Ring Doorbell Elite | 48 inches | 160° horizontal, 90° vertical |
| Ring Peephole Cam | At eye level of peephole | 155° horizontal, 90° vertical |
Note: Always check your specific Ring model’s manual for the manufacturer’s latest recommendations.
Credit: ring.com
Measuring The Correct Height
Getting the mounting height right means more than just guessing. Here’s a step-by-step approach:
- Start From the Threshold: Measure from the ground directly below where the doorbell will be placed. If you have stairs or a raised porch, measure from the highest step leading to the door.
- Mark at 48 Inches: Use a tape measure and mark exactly 48 inches on the wall or doorframe. Use painter’s tape or a pencil mark.
- Check for Obstacles: Ensure there are no obstacles (like door frames, lighting, or trim) blocking the view at that height.
- Test With Your Phone: Before drilling, hold the doorbell or your phone at the marked spot and use its camera to simulate the view. This helps you see what the Ring will capture.
- Adjust for Slope: If the ground slopes or if you have a high porch, adjust the height slightly so the camera points toward the average visitor’s face.
Factors That May Affect Installation Height
Most homes can use the standard 48-inch recommendation. However, some unique factors may require you to adjust:
1. Steps Or Raised Entryways
If your front door is at the top of stairs or a raised porch, the effective height from the walkway can be much higher than 48 inches. In these cases:
- Measure from the landing where visitors stand.
- If the doorbell will be higher than 48 inches from that spot, consider using an angled mounting wedge to tilt the camera downward.
2. Tall Or Short Door Frames
Some doors have unusual trim or narrow frames. If 48 inches puts the device in a bad spot (like behind a storm door or blocked by a mailbox), you may need to move slightly up or down. Always prioritize:
- Clear view of faces
- Unblocked camera lens
- Easy reach for visitors
3. Ada Accessibility
For homes with ramps or frequent wheelchair visitors, you might need to install slightly lower—between 36 and 48 inches—to meet accessibility guidelines.
4. Apartment Or Condo Installations
If you live in a building with strict rules about hardware on doors or walls, or where peephole placement is required, follow building codes. Some buildings only allow peephole cameras or restrict mounting on shared walls.
5. Weather And Sunlight
Direct sunlight or heavy rain can affect camera quality and device lifespan. If possible, choose a height and location with some protection (like under a porch roof). Avoid mounting just above steps where water can splash directly on the device.
6. Package Visibility
If you get frequent deliveries, check that the camera can see the area where packages are left. Sometimes, mounting a little lower (44–46 inches) helps capture both faces and ground-level packages.
Using Mounting Wedges And Corner Kits
Not every entryway is flat and straightforward. Many homes have doors set back from the sidewalk, or at an angle. That’s where mounting wedges and corner kits come in.
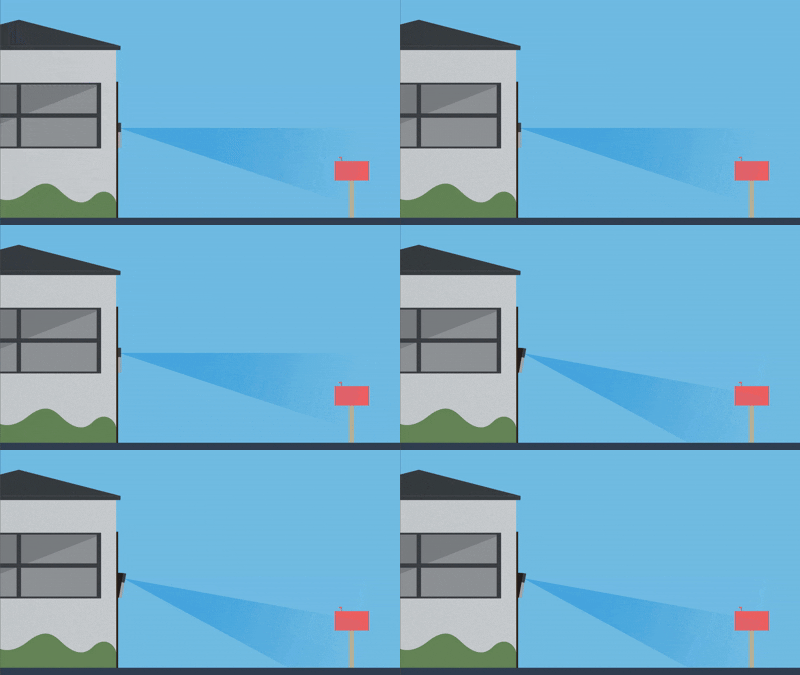
- Mounting Wedges: These tilt the doorbell up, down, left, or right by a few degrees. They help if your camera view misses part of the walkway or faces only the sky/ground.
- Corner Kits: These allow the doorbell to be angled more sharply, for doors set at odd angles to the street.
| Accessory | Main Purpose | Typical Angle | When to Use |
|---|---|---|---|
| Mounting Wedge | Tilts up/down or left/right | 5°–15° | Porch steps, angled walls |
| Corner Kit | Rotates left/right sharply | 25°–45° | Side walls, corner doors |
Pro Tip: Test the view with your phone before final installation. Most Ring devices let you preview the camera angle in real time using the app.
Step-by-step Guide To Installing Your Ring Doorbell At The Right Height
1. Gather Your Tools
- Ring Video Doorbell and included hardware
- Power drill (if mounting on brick, stucco, or concrete)
- Screwdriver
- Tape measure
- Level
- Pencil or painter’s tape
- Mounting wedge or corner kit (if needed)
2. Choose The Spot
Pick a spot that is:
- 48 inches from the ground (or adjusted as discussed earlier)
- Near your doorbell wiring (for wired models) or within Wi-Fi range
- Not blocked by walls, lights, or mailboxes
3. Mark The Height
Measure up from the ground and make a clear mark at the desired height. Double-check the spot lines up with the door frame and is easy to reach.
4. Test The Camera Angle
Before drilling, hold the doorbell up to the mark and use the Ring app’s live view to check the coverage. Make sure you can see a visitor’s face and the area in front of your door.
5. Attach Mounting Plate
- For wood or siding, use the included screws.
- For brick, stucco, or concrete, use wall anchors.
- If using a wedge or corner kit, attach this first, then add the mounting plate.
6. Wire And Secure The Doorbell
- For wired models, connect the power wires as shown in the manual.
- For battery-powered models, install the battery and attach the device to the mounting plate.
7. Final Camera Check
Before finishing, check the live video feed again. Make sure the button is easy to press and the camera gets a clear view.
8. Secure And Test
Tighten all screws, snap on any covers, and test the doorbell button and video feed. Adjust settings in the Ring app for motion zones and alerts.

Credit: ring.com
Common Mistakes To Avoid
Even with clear instructions, people make some frequent errors when installing their Ring doorbells. Avoid these to get the best performance:
- Mounting Too High: Many think higher is better for coverage, but this often means the camera misses faces and motion detection is less accurate.
- Blocking the Camera: Installing behind a screen door, mailbox, or porch railing can block the view and trigger false alerts.
- Ignoring Sun and Rain: Mounting in direct sunlight may cause glare or heat damage. Exposed positions can lead to water damage.
- Not Using Angled Mounts: If your door is set back or at an angle, a flat mount won’t capture the walkway properly.
- Forgetting Package Area: Some users focus only on faces and miss the spot where packages are left.
- Poor Wi-Fi Signal: Placing the device where Wi-Fi is weak causes video lag or missed alerts. Test signal strength before finalizing the spot.
Expert Insight: Many beginners overlook the importance of testing the video feed before mounting. Always check the camera’s view with a live preview—this simple step can save you a lot of trouble later.
Installation Height In Special Scenarios
Installing On Metal, Brick, Or Stucco
Ring doorbells can be mounted on most surfaces, but each one has different requirements:
- Metal: Use self-tapping screws. Pre-drill holes to avoid stripping.
- Brick or Stucco: Use wall anchors and masonry drill bits. Double-check the height, as it’s harder to move after drilling.
- Vinyl Siding: Mount on a flat section. If the siding is angled, use a wedge to keep the device upright.
Smart Doorbells In Apartment Buildings
Some apartment buildings restrict doorbell installations, especially if they involve drilling into common walls or doors. Here’s what to do:
- Ask your building manager about policies.
- Consider a peephole camera if drilling is not allowed.
- Use adhesive mounts designed for temporary use (but check if they’re strong enough).
- Always mount at the peephole or door frame level for best results.
Installing For Seniors Or People With Disabilities
For accessibility, lower the doorbell to 36–44 inches. This makes it easier for people in wheelchairs or with limited reach to use the button. The video function still works well at this height, but check the camera’s view to ensure faces are visible.
Real-world Examples
Standard House Entry
Sarah, a homeowner in Texas, installed her Ring Video Doorbell at the recommended 48 inches. She used a mounting wedge because her porch faces sideways to the street. Her camera now sees the full walkway, and she gets clear images of every visitor.
Raised Porch With Steps
James lives in a home with five steps leading to his front door. If he measured from the top step, the doorbell would be almost 60 inches above where most visitors stand. He measured from the bottom step, placed the device at 48 inches from that point, and used a 15-degree wedge to angle the camera down.
Now, the camera captures faces and packages at the perfect angle.
Apartment With Strict Rules
Maria lives in a New York apartment where drilling is not allowed. She used a Ring Peephole Cam, installing it at the peephole’s height—about 54 inches. This lets her see visitors clearly without breaking any rules.
How Height Affects Motion Detection
Ring doorbells use motion zones to detect activity. The PIR sensor is most sensitive to movement across the camera, not directly toward or away from it. If you mount the device too high, you may miss people approaching, or only capture the tops of heads.
Practical Example: If you mount your Ring at 60 inches, it may detect cars on the street but miss people walking up your path. At 48 inches, the motion zones line up better with the average person’s movement.
Beginner Insight: Some users think increasing sensitivity in the app will fix poor motion detection. In reality, correct height and angle matter much more than sensitivity settings.
Privacy And Legal Considerations
It’s important to respect privacy when installing a video doorbell. In the US, you can record your property and entryway, but not areas like a neighbor’s home or a shared hallway in an apartment.
- Install at a height and angle that covers only your property.
- Avoid pointing the camera directly at a neighbor’s window or door.
- Check local laws or HOA rules—some require notice or restrict what you can record.
For more information on privacy and video doorbell rules, see this FTC guide.
Troubleshooting: If The Height Isn’t Right
What if you’ve already installed your Ring and the camera view isn’t perfect? Here’s how to fix common problems:
- Too much ground, not enough face: Use a wedge to tilt the camera up, or remount slightly higher.
- Can’t see packages: Lower the device a few inches or add a downward-tilt wedge.
- Button hard to reach: Lower the doorbell to 44–46 inches.
- Camera blocked: Move the device out from behind obstructions and retest the view.
Pro Tip: Most installation mistakes can be fixed with small adjustments in height or angle, without major reinstallation.
Comparing Ring Video Doorbell Height With Other Brands
While 48 inches is the standard for Ring, other brands may suggest slightly different heights. Here’s a quick look at how Ring compares to other popular video doorbells:
| Brand/Model | Recommended Height | Notes |
|---|---|---|
| Ring Video Doorbell | 48 inches | Standard for most models |
| Nest Doorbell | 48–50 inches | Similar to Ring |
| Arlo Video Doorbell | 48 inches | Same as Ring |
| Eufy Video Doorbell | 48–52 inches | Slightly higher range |
| August Doorbell Cam | 48 inches | Matches Ring recommendation |
Insight: If you ever switch brands, you probably won’t need to move your doorbell unless the new device has a different lens position or field of view.
Maintenance Tips After Installation
After installing your Ring Video Doorbell at the right height, keep it working at its best with these tips:
- Clean the lens regularly to avoid blurry or dirty images.
- Check for loose screws or mounts every few months, especially after storms.
- Update your Ring app to get new features and security improvements.
- Test the button and camera view after any major weather event or if you move furniture/obstructions near the door.
- Recharge or replace batteries as needed for wireless models.
Extra Insight: Many people forget that spider webs or dirt can block the camera. A quick wipe every month prevents false motion alerts and keeps images clear.

Credit: service.eufy.com
Frequently Asked Questions
What Is The Ideal Height To Install A Ring Video Doorbell?
The best height is 48 inches (4 feet) above the ground, measured from where a visitor stands. This height gives the camera a clear view of faces and packages, and the button is easy to reach for most people.
Can I Install My Ring Video Doorbell Higher Than 48 Inches?
It’s possible, but not recommended. Mounting higher may miss faces, reduce motion detection accuracy, and make the button harder to reach. Only mount higher if you have unique entryway features, and use a wedge to angle the camera as needed.
Should I Use A Mounting Wedge Or Corner Kit?
Use a mounting wedge if your door is set back, raised, or angled—this helps point the camera at the right spot. A corner kit is best for doors facing sideways or on angled walls. Always test the camera view before final installation.
What If My Door Is On A Raised Porch Or Stairs?
Measure from the spot where visitors stand, not from your door threshold. If the doorbell ends up above 48 inches, use a wedge to tilt the camera downward. The goal is to capture faces and the area in front of your door.
Is The Ring Installation Height Different From Other Brands?
Most top brands, including Nest and Arlo, recommend a similar height—around 48 inches. Always check your specific device’s manual, but following the 48-inch rule is usually safe for all major video doorbells.
—
Getting the height right when installing your Ring Video Doorbell can make the difference between a secure, useful device and one that’s more frustrating than helpful. Take your time with measurements, test the camera’s view, and consider any unique features of your entryway.
Remember, the best installation is one that works for your home and your family’s needs. Proper height means better security, clearer video, and fewer false alerts—giving you true peace of mind every time someone comes to your door.