
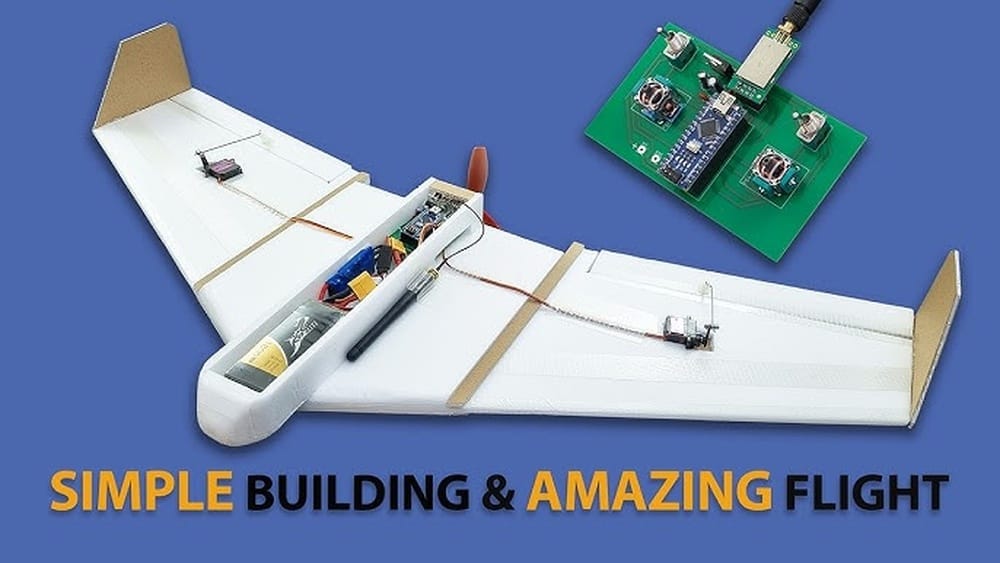
Building a remote control (RC) airplane from scratch is a rewarding journey that blends engineering, creativity, and a passion for flight. For many enthusiasts, the process offers more satisfaction than simply buying a ready-made model. You learn how every part works, you solve problems hands-on, and you get to see your plane take off, knowing you built it yourself.
However, building an RC airplane can feel overwhelming for beginners. There are many choices—materials, electronics, design, and assembly steps. Mistakes can be costly, and even experienced builders sometimes overlook small details that make a big difference in performance and safety.
The good news is, with the right guidance and planning, you can avoid common pitfalls and achieve a successful maiden flight.
This guide covers the full process: choosing the right type of RC airplane, gathering materials, understanding key components, building and assembling, installing electronics, troubleshooting, and making your first flight. You’ll also find practical tips, non-obvious insights, and clear explanations for every stage. Whether you’re a student, a hobbyist, or someone who loves challenges, this is your roadmap to building a reliable, high-flying RC airplane.
Choosing The Right Rc Airplane Design
Before buying materials or starting assembly, you need to pick the right airplane design. The design you choose shapes the entire building process, the flight performance, and how easy or hard the project will be. Let’s look at the factors that matter most.
Purpose Of Your Plane
Ask yourself: Why do I want to build this plane? The answer will help you decide between different types:
- Trainer planes: Best for beginners. Stable, easy to fly, and can survive minor crashes.
- Sport planes: For intermediate builders. Faster, more agile, but need more skill to control.
- Scale models: Replicas of real aircraft, often built for looks. More complex and less forgiving.
- Gliders: No motor or very small one; fly using wind and thermals. Good for learning aerodynamics.
If this is your first build, a high-wing trainer is ideal. The wing sits above the fuselage, giving more stability and self-correction in flight.
Ready-to-fly Vs. Scratch-build
- Ready-to-fly (RTF): All parts included and mostly assembled. Good for learning, but not true building.
- Almost-ready-to-fly (ARF): Some assembly needed. Less control over materials or customization.
- Kit/Scratch-build: You cut, shape, and assemble every part. Maximum learning and customization, but more time and effort.
For this guide, we’ll focus on the kit or scratch-build approach—the most educational and satisfying way.
Popular Materials Compared
Which material should you use? Here’s a quick comparison:
| Material | Pros | Cons | Best For |
|---|---|---|---|
| Balsa Wood | Light, strong, easy to shape | Can break in crashes, needs covering | Traditional builds, trainers |
| Foam (EPP/EPO/Depron) | Lightweight, crash-resistant, easy to repair | Less durable long-term, can warp | Beginners, park flyers |
| Plywood | Very strong, holds hardware well | Heavy, harder to cut | Motor mounts, high-stress areas |
| Composite (Fiberglass/Carbon) | Very strong and light | Expensive, harder to work with | Advanced builds, competition |
Foam is often the best choice for a first project: cheap, forgiving, and easy to shape. Balsa wood is excellent if you want a classic look and don’t mind more careful work.
Non-obvious Insight
Many beginners choose the wrong design for their skill level. A sleek, low-wing jet looks cool but is much harder to fly. Start with high-wing, slow-flying planes. You’ll learn much faster and crash much less.
Essential Tools And Materials
Gathering the right tools and materials saves time and frustration. Here’s what you’ll need for a typical foam or balsa wood RC airplane build.
Basic Tools
- Sharp hobby knife (X-Acto or similar) – For cutting and trimming material.
- Ruler and measuring tape – For accurate cuts.
- Cutting mat – Protects your work surface and blades.
- Sanding block and sandpaper (various grits) – For smoothing edges and fitting parts.
- Small screwdrivers (Phillips and flat-head) – For assembling hardware and electronics.
- Small pliers and wire cutters – For bending and cutting wires, pushrods.
- Drill and small bits – For making holes for control horns and hardware.
- Hot glue gun or foam-safe CA glue – For quick, strong bonding.
Materials For The Airframe
- Foam board or sheets (EPP, Depron, or Dollar Tree foam)
- Balsa wood (if you choose a wooden build)
- Plywood (1–3 mm for motor mounts or reinforcement)
- Carbon fiber rods/tubes (optional, for extra strength)
- Packing tape or reinforced tape – To add strength and durability
- Lightweight covering film (for balsa models)
Hardware And Small Parts
- Control horns
- Pushrods (metal rods for moving control surfaces)
- Clevises (small connectors for pushrods)
- Small screws and nuts
- Hinges (or make your own from tape)
- Wheels (if you want landing gear)
Electronics
- Brushless motor
- Electronic speed controller (ESC)
- Propeller (size matched to motor)
- Lithium polymer (LiPo) battery
- Radio receiver (matched to your transmitter)
- Servos (usually 9g micro servos for small planes)
- Transmitter (radio controller)
Non-obvious Insight
Always buy spare props, wheels, and servo arms. These are the first parts to break or get lost, especially during testing.

Credit: maker.pro
Understanding The Main Components
Each part of an RC airplane has a purpose. Understanding them helps you build better and solve problems faster.
Airframe
The airframe is the structure of the plane. It includes the fuselage (body), wings, tail, and control surfaces (elevator, rudder, ailerons).
- Fuselage: Holds everything together. Houses electronics, battery, and sometimes landing gear.
- Wings: Create lift. The size and shape affect stability and flight speed.
- Tail (Empennage): Balances the plane and helps it turn and climb/descend.
- Control Surfaces: Move to make the plane pitch, roll, and yaw.
Power System
- Motor: Spins the propeller. Most modern RC planes use brushless motors for better power and efficiency.
- ESC: Controls power from the battery to the motor.
- Propeller: Converts motor power into thrust. The right size and pitch are critical.
Radio System
- Transmitter: What you hold in your hands. Sends signals to the receiver.
- Receiver: Mounted in the plane. Receives signals and tells servos what to do.
- Servos: Small motors that move the control surfaces.
Battery
Most RC planes use LiPo batteries. They are light and powerful but require careful handling.
Control Surfaces Explained
Here is a quick summary of what each control surface does:
| Control Surface | Location | Movement | Effect |
|---|---|---|---|
| Elevator | Horizontal tail | Up/Down | Pitch (climb/dive) |
| Rudder | Vertical tail | Left/Right | Yaw (turn left/right) |
| Ailerons | Wing trailing edge | Up/Down (opposite each side) | Roll (bank left/right) |
Tip: Many trainers only use elevator and rudder (3-channel control). Adding ailerons (4-channel) gives more precise control but is slightly harder to learn.
Planning Your Build
Careful planning saves time and prevents mistakes. Here’s how to organize your build:
1. Pick A Detailed Plan
Find a free or paid airplane plan online that matches your chosen design and skill level. Plans show you where every part goes, what size to cut, and where electronics fit. Beginners should choose well-documented designs with lots of build logs and support forums.
2. Study The Plan Thoroughly
Don’t start cutting right away. Read all instructions. Watch build videos for your chosen design if available. Identify any unclear steps or parts you might need to improvise.
3. Lay Out Your Workspace
A clean, well-lit area helps avoid lost parts and mistakes. Organize tools, materials, and electronics before you begin.
4. Make A Build Sequence
Decide the order of building: usually, fuselage first, then wings, then tail surfaces. Pre-fit parts before gluing to check alignment.
5. Safety Precautions
- Wear safety glasses when cutting or sanding.
- Work in a ventilated area when using glue.
- Keep batteries away from metal or water.
Pro Tip: Label each part as you cut it out, especially for complex builds. This prevents mixing up left and right parts or confusing wing pieces.
Building The Airframe
Now comes the hands-on part. Steps may vary depending on your plan, but these are the core stages for most foam or balsa builds.
Cutting Out Parts
- Use your plan as a template. Tape it to the foam or balsa, and cut carefully with a sharp knife.
- For wings, cut two identical pieces if building a symmetrical design.
- Sand all edges smooth for better fit and finish.
Assembling The Fuselage
- Dry-fit all sides and bulkheads first, then glue them together.
- Use square blocks to keep the fuselage straight. Twist or bends here will cause flight problems.
- Reinforce high-stress areas (like the nose and landing gear mount) with extra plywood or carbon rods.
Building The Wings
- For simple foam wings, tape and glue top and bottom pieces together.
- Add a spar (wood or carbon rod) for strength. The spar runs lengthwise, usually at the thickest part of the wing.
- If making a balsa wing, pin the pieces over the plan, glue ribs and spars, then cover with film after assembly.
Mounting The Tail Surfaces
- Attach the horizontal stabilizer and vertical fin to the back of the fuselage.
- Check that both are perfectly square (use a ruler and triangle).
- Hinge the elevator and rudder using small tape strips or commercial hinges.
Control Surfaces
- Cut control surfaces (elevator, rudder, ailerons) free from the main part, leaving a thin “live hinge” or using tape as a flexible hinge.
- Install control horns in the right position for best leverage.
Common Beginner Mistake: Rushing the wing or tail assembly. Even small misalignments can make the plane fly badly. Take your time to get everything straight and strong.
Installing Electronics And Hardware
This step brings your plane to life. Take care to route wires neatly and secure everything against vibration.
Mounting The Motor And Propeller
- Attach the motor mount (plywood or plastic) to the front of the fuselage. It must be secure and aligned with the plane’s centerline.
- Bolt the motor to the mount.
- Add the propeller after all electronics are installed (for safety).
Installing The Esc And Battery
- Place the ESC close to the motor, with its wires neatly routed.
- Leave enough airflow for cooling; hot ESCs fail easily.
- The battery should be mounted near the plane’s center of gravity (CG). Use Velcro straps or foam to secure it.
Placing The Receiver
- The receiver needs to be away from strong motor wires to avoid radio interference.
- Secure it with double-sided tape or foam.
- Route antenna wires according to the manual for best range.
Setting Up Servos And Linkages
- Glue or screw servos in place (elevator, rudder, ailerons).
- Connect pushrods from servos to control horns.
- Adjust linkage length so control surfaces are centered when sticks are neutral.
Wiring And Power Connections
- Double-check polarity of all wires (red to red, black to black).
- Secure loose wires with tape or zip ties.
- Don’t connect the battery until all checks are complete.
Extra Tip: Mark your battery and ESC connectors. Wrong connections can destroy electronics in seconds.

Credit: www.youtube.com
Balancing And Testing
A well-built RC airplane must be balanced and tested before its first flight. Skipping this step is a common cause of crashes.
Center Of Gravity (cg)
The CG is the point where the plane balances front-to-back. Most plans show the recommended CG location.
- Place the plane on your fingertips at the CG marks. It should balance level or slightly nose-down.
- Move the battery or add small weights to adjust.
Control Surface Direction
- Power up the radio and move each stick.
- Confirm that elevator, rudder, and ailerons move in the correct direction (e.g., pulling stick back moves elevator up).
- Reverse servo direction in the transmitter if needed.
Range Check
- Walk 30–50 meters away with the transmitter on and the plane powered.
- Move controls and make sure the servos respond smoothly. This checks for radio interference.
Power System Test
- With the plane secure (held or weighted down), gently run the motor.
- Check for vibration, strange noises, or loose parts.
- Confirm the propeller is installed correctly (air should blow back over the plane, not forward).
Ground Taxi Test
- If you have landing gear, try rolling the plane gently on a flat surface.
- Practice steering and stopping before trying to fly.
Hidden Pitfall: Many crashes happen because the CG is too far back (tail-heavy). Always start with a slightly nose-heavy plane—it’s more stable and easier to control.
First Flight And Trimming
Your hard work is about to pay off. The first flight is both exciting and nerve-wracking. Follow these steps for a safe and successful launch.
Pre-flight Checklist
- Battery fully charged
- All screws and connectors secure
- Control surfaces centered and moving correctly
- Propeller tight and undamaged
- Range check completed
Maiden Flight Tips
- Choose a calm, open field—no trees, power lines, or buildings nearby.
- Have a helper if possible to launch or recover the plane.
- Stand upwind so the plane takes off into the breeze.
Hand Launch Or Takeoff
- For planes without landing gear, launch by holding the fuselage, throttle up, and give a gentle, level toss.
- For wheeled planes, advance throttle smoothly and steer straight until airborne.
Basic Flight Controls
- Climb gently, don’t pull steeply on the elevator
- Use small stick movements—over-control causes more crashes than under-control
- Make wide turns and avoid sharp maneuvers
Trimming The Plane
After takeoff, observe if the plane climbs, dives, or rolls by itself:
- If it climbs or dives without input, adjust the elevator trim on your transmitter.
- If it turns left or right, trim the rudder.
- If it rolls, adjust the aileron trim.
Make small changes, one at a time, and fly straight to see the effect.
Landing
- Reduce throttle and glide gently in for landing.
- Keep the nose level and let the plane settle on its wheels or belly.
Non-Obvious Insight: Most first flights fail because the pilot “over-controls” out of nervousness. Keep your hands relaxed and make only small corrections. Trust the plane to fly itself—good trainers are very stable.
Troubleshooting And Common Problems
Not everything goes smoothly the first time. Here’s how to diagnose and fix frequent issues.
Problem: Plane Won’t Take Off
- Check CG: Is the plane nose-heavy or tail-heavy?
- Check power: Is the propeller installed backward? Is the battery fully charged?
- Check field: Is the grass too long or the surface too rough for the wheels?
Problem: Plane Veers Strongly Left Or Right
- Control surface alignment: Are the rudder and ailerons centered?
- Motor thrust angle: Is the motor pointing straight ahead? Some planes need slight right or down thrust.
Problem: Short Flight Time
- Battery size: Is the battery too small for your motor?
- Motor/propeller mismatch: Are you drawing too much current? Check motor and prop specs.
- Drag or weight: Is the airframe too heavy or has too much tape?
Problem: Control Surfaces Flutter
- Loose linkages: Tighten all screws, pushrods, and control horns.
- Weak hinges: Reinforce with tape or replace if needed.
Problem: Radio Glitching
- Receiver placement: Is it too close to the ESC or motor wires?
- Antenna orientation: Route as per the manual, away from carbon or metal.
- Transmitter batteries: Are they low?
Quick Fix: Always carry spare props, screws, glue, and tape to the field for fast repairs.
Maintenance And Upgrades
Taking care of your RC airplane extends its life and keeps it safe. Here’s how to maintain and improve your build over time.
After Each Flight
- Disconnect the battery immediately
- Check for broken or loose parts
- Clean dirt and grass from the airframe and propeller
Weekly Checks
- Inspect all control surfaces and linkages for wear
- Check servo operation for jitter or slowness
- Examine the battery for swelling (a sign of damage)
Upgrades To Consider
- Stronger servos for better control
- Larger battery for longer flight time (if the plane can handle the weight)
- Brushless motor with higher efficiency
- Lightweight wheels or retractable landing gear
- Onboard telemetry (to monitor battery, altitude, etc.)
Pro Tip: Keep a build log with notes on repairs and upgrades. This helps you spot patterns and avoid future problems.

Credit: www.plattar.com
Safety And Legal Considerations
Building and flying RC airplanes is fun, but you must follow safety rules and local laws.
Safety First
- Never fly near people, animals, or property
- Stay away from roads, power lines, and airports
- Always do a pre-flight check
Legal Rules
- Many countries require RC pilots to fly below 400 feet (120 meters)
- Registration may be needed for larger or more powerful planes
- Some areas require insurance or membership in a flying club
Check your local regulations at the Academy of Model Aeronautics or your country’s equivalent. For more on RC flight safety, see the FAA’s official guide.
Hidden Risk: Ignoring local laws can lead to fines or having your plane confiscated. Always check rules before your first flight.
Frequently Asked Questions
How Much Does It Cost To Build A Remote Control Airplane?
The cost depends on size, materials, and electronics. A basic foam trainer can be built for $80–$150 using budget electronics. Balsa or larger models with quality gear may cost $200–$500 or more. Buying used parts or kits can save money but check condition carefully.
Is Building An Rc Airplane Harder Than Flying One?
For beginners, building is often less stressful than flying. Building is a step-by-step process at your own pace. Flying requires quick reactions and practice. Start with a simple trainer and practice on a simulator if possible before your first real flight.
Can I Use Parts From An Old Rc Plane In A New Build?
Yes, many parts like motors, ESCs, servos, and receivers can be reused if they are in good condition. Always check for wear, broken wires, or stripped gears before installing old parts in a new airframe.
What’s The Best Way To Learn Rc Airplane Building?
Follow a detailed online build log or video for your chosen design. Join an RC club or online forum—experienced builders are often happy to answer questions and give advice. Practice building small sub-assemblies (like tail or wing sections) before attempting a full plane.
How Do I Know If My Plane Is Ready For Its First Flight?
Do a final pre-flight check: CG balance, control surface movement, radio range, battery charge, and all screws and connectors tight. If anything looks or feels wrong, fix it before flying. Having another experienced pilot check your plane is a smart move.
Building a remote control airplane is a true test of patience, skill, and curiosity. By following each step carefully, paying attention to details, and seeking help when needed, you’ll enjoy not just your first flight but many more to come.
The sky’s the limit—happy building and safe flying!