
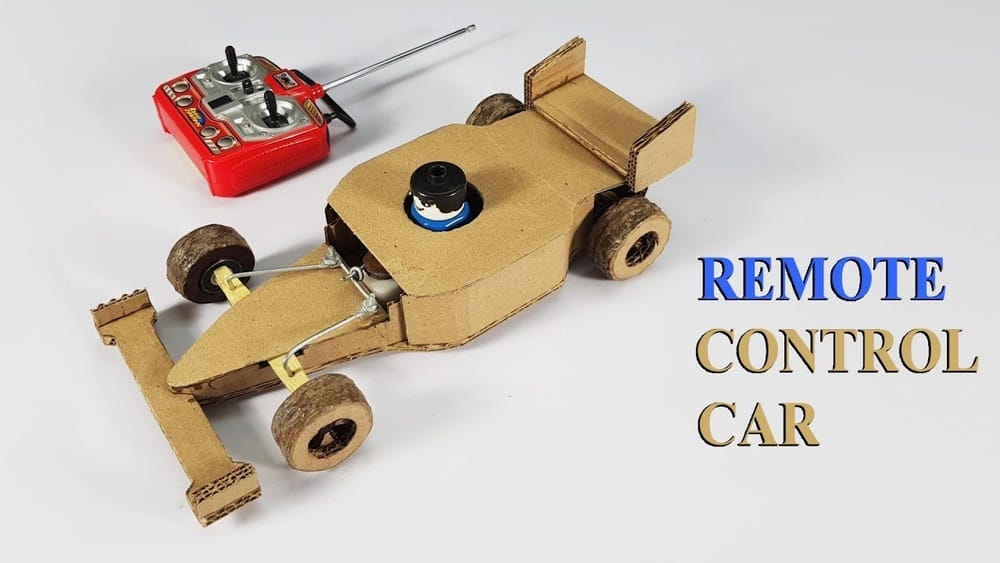
Building your own remote control (RC) car is an exciting journey. It’s not just about assembling parts, but about understanding how things move, how electronics work, and how creativity can shape a project from start to finish. For hobbyists, students, or anyone who loves hands-on experiences, making a custom RC car is a powerful way to learn, have fun, and create something unique.
Many people think you need advanced technical skills or expensive equipment to build an RC car. That’s not true. With careful planning, basic tools, and a bit of patience, you can make a great RC car at home. This guide will walk you through every step, from choosing parts to testing your finished car.
You’ll also get tips that most beginners overlook, practical advice for solving problems, and comparisons to help you make smart choices. Whether you want to race, experiment, or just enjoy building, this article will give you all the knowledge you need to succeed.
Understanding Rc Car Basics
Before you start building, it’s important to know how an RC car works. Every RC car has a few main systems: the chassis, motor and drivetrain, steering, electronics, and power. Each system needs the right parts to work together smoothly.
Main Components Overview
- Chassis: This is the base frame. It holds everything together. Chassis can be made from plastic, metal, or carbon fiber.
- Motor: The motor provides power. You can choose between brushed and brushless motors. Brushless motors are faster but cost more.
- Drivetrain: This system transfers power from the motor to the wheels. Common types are 2WD (two-wheel drive) and 4WD (four-wheel drive).
- Steering System: Usually uses a servo to turn the front wheels.
- Electronics: Includes the transmitter (remote controller), receiver (inside the car), Electronic Speed Controller (ESC), and wiring.
- Batteries: Most RC cars use rechargeable LiPo or NiMH batteries.
- Wheels and Tires: The type of tires affects grip and speed.
Types Of Rc Cars
There are several kinds of RC cars, each built for different uses. Here’s a quick comparison:
| Type | Speed | Terrain | Complexity |
|---|---|---|---|
| On-Road | High | Smooth, paved | Low |
| Off-Road/Buggy | Medium | Dirt, grass, gravel | Medium |
| Monster Truck | Lower | Rough, uneven | High |
| Crawler | Low | Rocks, steep climbs | High |
Think about where you want to drive your car. If you want speed on smooth surfaces, choose an on-road car. If you want to climb obstacles, a crawler or monster truck is better.
Essential Tools And Workspace
You don’t need a fancy workshop to start. But having a dedicated space helps you keep track of small parts and stay organized. Essential tools include:
- Screwdrivers (Phillips and flat-head)
- Needle-nose pliers
- Soldering iron (for wiring)
- Wire cutters and strippers
- Small wrench set
- Hobby knife
- Ruler or caliper (for measurements)
- Double-sided tape or glue
Keep a notebook nearby. Jot down measurements, part numbers, and settings. This habit saves time when troubleshooting.
Planning Your Rc Car Build
Jumping in without a plan leads to mistakes, wasted money, and frustration. Planning is the most important step for a smooth project.
Define Your Purpose
Ask yourself:
- Where will I drive this car? (Indoor, outdoor, mixed)
- Do I want speed, power, or both?
- Is this car for learning, racing, or just for fun?
- Do I want to buy most parts or make them from scratch?
Your answers shape every decision, from chassis size to motor type.
Set A Realistic Budget
RC car builds can be as cheap as $60 or over $500 for advanced projects. Setting a clear budget helps avoid overspending. Remember to include:
- Main parts (chassis, motor, electronics)
- Tools you may need to buy
- Batteries and charger
- Paint or decorations
Many beginners forget to budget for batteries and a charger. These can add $20–$60 to your total cost.
Choose Between Kit Or Custom Build
You have two main options:
- Build-from-scratch: Source every part yourself. Gives maximum control and learning.
- Buy a kit: All main parts in one box. Easier for beginners but less customizable.
Tip: If this is your first build, consider starting with a kit. If you like to tinker or want a special design, go custom.
Sourcing Parts
Parts can be bought from hobby shops, online stores, or second-hand markets. For electronics, always choose reputable brands. Cheap, unbranded electronics often fail quickly.
Some reliable sources:
- Local RC shops (great for advice and spare parts)
- Major online stores (e.g., Amazon, HobbyKing, Banggood)
- RC forums and groups (for used parts, troubleshooting)
Check part compatibility before buying. For example, not all ESCs work with brushless motors.

Credit: www.amazon.com
Selecting The Right Parts
Choosing the right parts is where your car’s performance, reliability, and safety come together.
Chassis And Frame
The chassis is the backbone. Common materials:
- Plastic: Cheap, light, but less durable.
- Aluminum: Strong, heavier, good for off-road.
- Carbon fiber: Very light and strong, but expensive.
Chassis length and width affect stability. Wider cars are less likely to tip over but turn slower. Shorter cars are nimbler but less stable at high speeds.
Motor And Drivetrain
A key choice is between brushed and brushless motors:
| Motor Type | Pros | Cons |
|---|---|---|
| Brushed | Cheap, simple, easy to repair | Wears out faster, less power |
| Brushless | High speed, efficient, lasts longer | More expensive, needs special ESC |
For most beginners, a brushed motor is fine. If you want more speed and efficiency, invest in a brushless setup.
Drivetrain: Decide between 2WD (cheaper, lighter, easier to build) or 4WD (better grip and handling, but more parts).
Steering And Suspension
- Servo: This small motor turns the wheels. A standard 3–5 kg torque servo is enough for most cars.
- Suspension: Off-road and monster trucks need good shock absorbers. On-road cars can use simpler setups.
Pay attention to servo size and output shaft compatibility with your steering mechanism. Some beginners buy servos that don’t fit their chassis.
Electronics: Esc, Receiver, And Transmitter
- ESC (Electronic Speed Controller): Manages motor speed and direction. Must match your motor type (brushed or brushless).
- Receiver: Gets signals from your remote.
- Transmitter: Your handheld controller. 2.4 GHz systems are standard—less interference, better range.
If you plan to upgrade later, buy a receiver/transmitter with extra channels.
Battery Selection
Two main choices:
- NiMH (Nickel Metal Hydride): Safer, easier for beginners, but heavier and less powerful.
- LiPo (Lithium Polymer): Lighter, more power, but needs careful handling.
Tip: Never charge LiPo batteries unattended. Store them in a fireproof bag. Overcharging or physical damage can cause fires.
Wheels And Tires
Choose tires for your terrain:
- Slicks: Best on smooth, paved surfaces.
- Knobby: Good for dirt, grass, rough ground.
- All-terrain: Decent grip everywhere but not the best in any one condition.
Wheel diameter affects top speed and acceleration. Larger wheels = higher top speed, but slower start.
Body Shell And Aesthetics
The body shell protects your electronics and adds style. Clear polycarbonate shells let you paint any design. Make sure the body fits your chassis size and wheelbase.
Many beginners forget to check body mounting holes. Always check before buying.
Step-by-step Rc Car Assembly
Now, let’s put everything together. Take your time with each step. Rushing leads to mistakes.
Building The Chassis
- Lay out all parts. Check you have every screw, bracket, and part needed.
- Attach the main frame pieces. Use the right screws—over-tightening can strip plastic holes.
- Install suspension arms and shocks. Make sure they move freely without binding.
If using a kit, follow the included instructions carefully.
Installing The Drivetrain
- Mount the motor onto its bracket. Align gears correctly. Too tight causes friction, too loose causes gear skipping.
- Install the drive shaft(s) and connect to the differential(s) if using 4WD.
- Attach axles and wheels. Spin the wheels by hand to check for smooth movement.
A common mistake: forgetting to add grease to gears. Dry gears wear out fast.
Steering System Setup
- Mount the servo in its slot. Secure with screws.
- Connect the servo horn to the steering linkage.
- Test full left/right movement by hand. No binding should occur.
If steering feels stiff, check for misaligned rods or overtightened screws.
Electronics Installation
- Secure the ESC and receiver using double-sided tape or zip ties. Keep them away from moving parts.
- Solder or connect wires from the motor to the ESC. Make sure polarity matches.
- Connect the ESC to the battery (but do not turn on yet).
- Plug the servo and ESC wires into the receiver (usually channels 1 and 2).
Tip: Route wires neatly and avoid sharp bends. Messy wires can snag and break during a crash.
Mounting The Battery
- Install the battery holder or tray in the chassis.
- Secure the battery with straps or clips. It should not move during driving.
- Connect the battery plug (often Deans, Tamiya, or XT60 connectors).
Always check battery fit before closing the chassis.
Wheels And Body Shell
- Push wheels onto axles and secure with nuts or pins.
- Test for free spinning and adjust if there’s rubbing.
- Trim and paint the body shell. Use masking tape for sharp lines.
- Fit the shell onto the chassis. Mark and drill mounting holes if needed.
Non-obvious tip: Leave small ventilation holes in the body shell to let heat escape, especially if using a brushless motor.
First Power-on And Testing
- Check all connections again.
- Turn on the transmitter first, then the car.
- Test steering and throttle without wheels on (to avoid accidents).
- Put wheels on and test at low speed.
If the car moves backward when you push forward, reverse the motor wires or use the transmitter’s reverse switch.
Troubleshooting And Tuning
No build is perfect on the first try. Testing, tuning, and fixing small issues are key parts of the process.
Common Problems And Solutions
- Car doesn’t move: Check battery charge, ESC connection, and transmitter pairing.
- Steering is weak or stuck: Inspect servo connections and linkages for binding or loose screws.
- Motor overheats: Use a lower gear ratio or improve ventilation.
- Car pulls to one side: Adjust steering trim on the transmitter or check for uneven suspension.
Tuning For Performance
- Change gear ratios for more speed or torque.
- Adjust suspension stiffness for better handling on different terrains.
- Try different tires for more grip.
Keep a log of changes and how they affect driving. This helps you learn what works best.
Upgrades And Customization
Once you’re comfortable, try upgrades:
- Higher-capacity batteries for longer run times
- Upgraded servos for faster, stronger steering
- Aluminum or carbon parts for less weight and more strength
- LED lights for night driving
But upgrade one thing at a time. Too many changes at once can make troubleshooting hard.
Safety Tips For Rc Car Builders
RC cars may seem harmless, but they have powerful motors and batteries. Safety matters.
- Always turn off power before working on electronics.
- Never charge LiPo batteries unattended.
- Keep fingers clear of spinning wheels and gears during testing.
- Test in a safe area—not near pets, small children, or busy streets.
- Wear eye protection when cutting or soldering parts.
Experienced builders keep a small fire extinguisher nearby when charging batteries, especially LiPo types.

Credit: www.youtube.com
Example: Building A Simple Off-road Rc Car
Let’s walk through a basic example. Here’s a typical parts list and steps for an off-road buggy:
Parts List
- Plastic chassis kit: $25
- Brushed 540-size motor: $15
- 2WD drivetrain: $10
- Standard servo (5 kg): $8
- ESC for brushed motor: $12
- 2.4 GHz transmitter/receiver: $18
- 7.2V NiMH battery and charger: $20
- Off-road tires and wheels: $10
- Polycarbonate body shell: $12
Total: Around $130
Build Steps
- Assemble the chassis and drivetrain according to the kit instructions.
- Mount the motor and install gears.
- Set up suspension and steering, install the servo.
- Install ESC and receiver. Route wires neatly.
- Test electronics before mounting the body.
- Attach wheels and tires.
- Paint and mount the body shell.
- Test drive and adjust steering trim, gear mesh, and suspension as needed.
Beginner insight: Many new builders forget to check the transmitter’s range before driving outside. Test range in a safe area—some cheap remotes have limited distance.
Cost And Time Estimates
Building an RC car takes time and patience. Here’s what to expect:
| Stage | Time Required (approx.) | Cost (basic build) |
|---|---|---|
| Planning & Parts Selection | 3–5 hours | $0 |
| Chassis Assembly | 2–3 hours | $25–$50 |
| Electronics Installation | 2 hours | $40–$80 |
| Testing & Tuning | 1–2 hours | $0 |
A first-time builder should plan for at least 8–12 hours spread over a week. Rushing leads to mistakes.
Credit: www.rcsuperstore.com
Maintenance And Long-term Care
A well-built RC car can last for years with basic care.
- Clean after every run: Remove dirt and debris, especially from gears and suspension.
- Check screws and nuts: Tighten loose hardware before each run.
- Lubricate gears and moving parts every few runs.
- Inspect electronics and wiring: Look for wear or damage.
- Store in a cool, dry place: Avoid leaving the car in direct sunlight or damp areas.
- Charge batteries correctly: Follow the manufacturer’s instructions for best battery life.
Non-obvious tip: Rotate tires front-to-back every few runs for even wear, especially on 2WD cars.
Learning Resources And Communities
RC car building is more fun when you connect with other enthusiasts. Online forums, YouTube channels, and local clubs are great places to learn, ask questions, and share progress.
- RC Groups: Large online forum for all skill levels.
- YouTube: Channels like “RC Saylors” and “RC Sparks” have detailed tutorials.
- Reddit r/rccars: Helpful for troubleshooting and inspiration.
- Local hobby shops: In-person advice and events.
For further reading and in-depth guides, the Wikipedia RC car page is a reliable resource.
Frequently Asked Questions
What Is The Best Motor Type For Beginners?
For most beginners, a brushed motor is the best choice. It’s cheaper, easier to use, and requires less maintenance. Once you’re comfortable, you can upgrade to a brushless motor for more speed and efficiency.
How Far Can I Drive My Rc Car From The Transmitter?
Modern 2.4 GHz transmitters usually have a range of 100–300 feet (30–90 meters) in open areas. Obstacles like walls or trees can reduce this range. Always test your transmitter before driving in large spaces.
Can I Use Household Batteries For My Rc Car?
It’s not recommended. RC cars need high power, which standard AA or AAA batteries can’t provide. Use NiMH or LiPo rechargeable batteries designed for RC vehicles for the best performance and safety.
How Can I Make My Rc Car Faster?
You can increase speed by upgrading to a brushless motor, using a higher voltage battery (if safe for your ESC), or changing to a smaller gear on the motor (higher gear ratio). Always check if your electronics and drivetrain can handle extra power before upgrading.
What Is The Most Common Mistake Beginners Make?
The most common mistake is not checking part compatibility, especially between motors, ESCs, and batteries. Always read specs and ask for advice if unsure. Rushing assembly and skipping the manual are other frequent errors.
Building an RC car is a journey, not just a project. Take your time, enjoy the process, and don’t be afraid to ask the RC community for help. Soon, you’ll not only have a car that drives—you’ll have a custom creation that reflects your effort and learning.