
Changing motor mounts may sound intimidating, but with the right preparation and knowledge, it’s a task many car owners can handle themselves. Motor mounts play a crucial role in your vehicle’s performance and comfort. They keep the engine securely in place and reduce vibrations felt inside the cabin. Over time, motor mounts wear out, leading to shaking, odd noises, and even damage to other components. Replacing them at the right time can save you from expensive repairs down the road.
This guide will walk you through the entire process of changing motor mounts, from understanding their purpose to selecting the right tools, identifying symptoms, and performing the replacement step by step. Whether you’re a beginner or have some mechanical experience, you’ll learn practical tips and avoid common mistakes that can make the difference between a smooth job and a frustrating one.
Understanding Motor Mounts
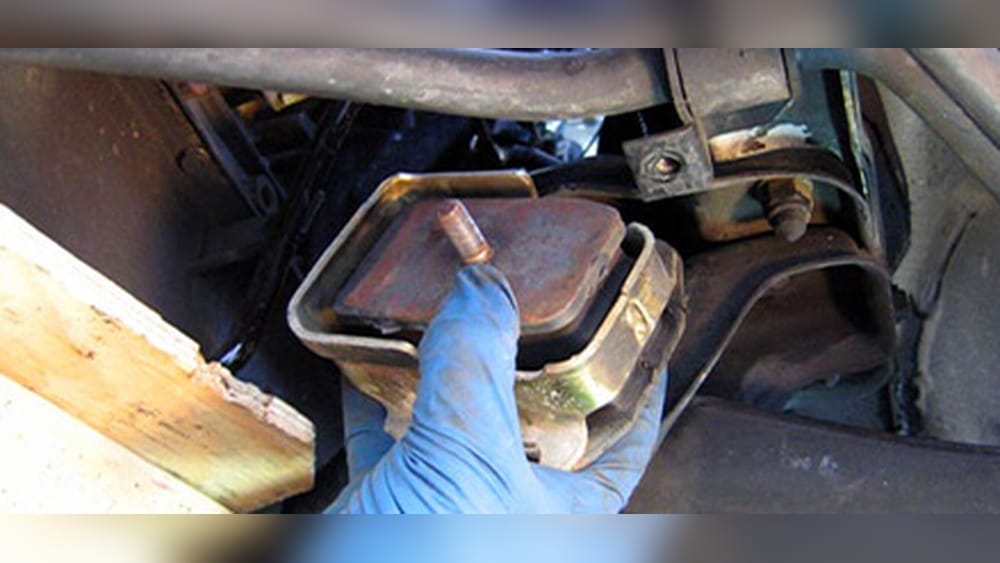
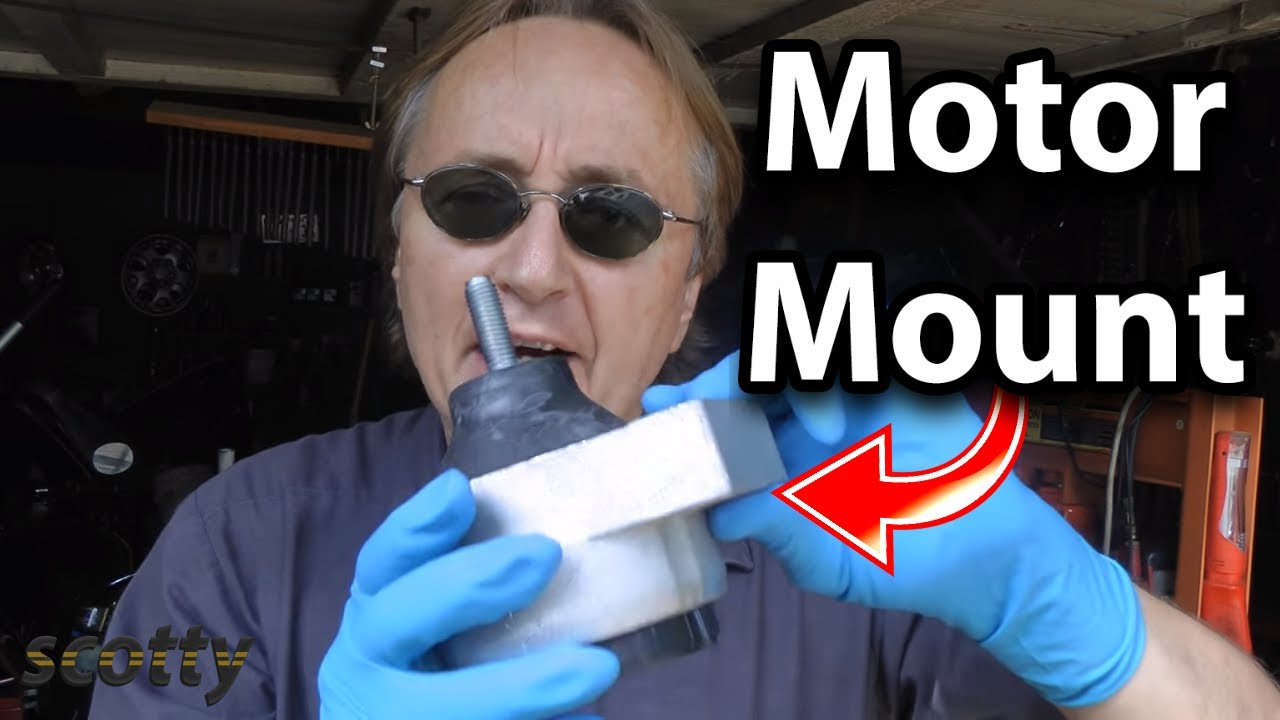
Motor mounts, also called engine mounts, are brackets that secure your vehicle’s engine to the frame or subframe. They’re usually made of metal and rubber. The metal provides strength, while the rubber absorbs vibrations and prevents metal-on-metal contact.
There are several types of motor mounts:
- Solid rubber mounts – Most common, used in many cars.
- Hydraulic mounts – Filled with fluid for extra vibration control.
- Active mounts – Electronic, found in luxury or high-performance vehicles.
A typical car has three to four motor mounts, depending on the engine layout. Some vehicles use extra mounts for transmission or torque control.
Why Do Motor Mounts Matter?
Worn motor mounts can cause:
- Vibration inside the cabin
- Engine movement when accelerating
- Clunking or banging noises
- Misalignment of other components (like exhaust or axles)
Ignoring bad mounts can lead to exhaust leaks, damaged hoses, or even axle failure. Replacing them restores smooth operation and protects your engine and transmission.
Signs You Need To Change Motor Mounts
Identifying worn motor mounts early can prevent further damage. Here’s what to watch for:
- Excessive vibration: If you feel strong vibrations when the car is idling or accelerating, worn mounts may be the cause.
- Clunking noises: Banging or clunking sounds when shifting gears or accelerating can signal a loose or broken mount.
- Engine movement: If you open the hood and see the engine shifting noticeably when revving, the mounts might be failing.
- Visible wear or cracks: Cracked, collapsed, or oily rubber on the mount means it’s time for replacement.
- Leaking hydraulic fluid: For hydraulic mounts, any sign of fluid leaking out is a clear sign of failure.
Non-obvious insight: Sometimes, worn mounts cause minor symptoms that mimic transmission or exhaust problems. Always check the mounts if you notice new vibrations or noises before assuming larger repairs are needed.

Credit: www.youtube.com
Preparing For Motor Mount Replacement
Before you start, make sure you have the right tools, replacement parts, and a safe workspace.
Tools And Supplies Needed
- Socket set (with extensions and universal joints)
- Wrenches (metric and standard)
- Floor jack and jack stands
- Engine support bar or block of wood
- Pry bar
- Torque wrench
- Screwdrivers
- Penetrating oil
- Work gloves and safety glasses
- Replacement motor mounts (make, model, and engine specific)
Tip: Some mounts are easier to change with an engine support bar, especially in front-wheel-drive cars. If you don’t have one, use a jack with a block of wood under the oil pan—but never place the jack directly on the pan.
Choosing The Right Motor Mounts
Not all motor mounts are the same. Here’s what matters:
- OEM vs. aftermarket: OEM mounts are made by your car’s manufacturer. Aftermarket mounts may be cheaper, but quality varies.
- Hydraulic or solid: Replace with the same type as original unless you want to upgrade for performance.
- Fit: Double-check the part numbers for your specific year, make, and engine.
Common mistake: Don’t buy “one size fits all” mounts—small differences can cause big problems.
Safety Precautions
Motor mounts support a heavy engine, so safety is key:
- Work on a flat, solid surface.
- Use jack stands—never rely on a hydraulic jack alone.
- Disconnect the battery before starting (removes risk of accidental starts).
- Let the engine cool completely before working.
Step-by-step Guide: How To Change Motor Mounts
Every car is a bit different, but the general process follows these steps. Check your owner’s manual or a repair manual for your car’s details.
1. Locate The Motor Mounts
Open the hood and find the mounts. Usually, you’ll see:
- One mount on each side of the engine (left and right)
- One at the front or rear (depending on layout)
- Transmission mounts nearby
Some mounts are easy to spot; others are hidden under intake parts or brackets.
Pro tip: Take a few photos with your phone before starting. This helps you remember how everything fits back together.
2. Raise And Secure The Vehicle
- Park on a level surface.
- Put the transmission in Park (automatic) or Gear (manual), and set the parking brake.
- Place wheel chocks behind rear wheels.
- Jack up the front of the car and support it with jack stands under the frame.
- If access is tight, remove the front wheels.
3. Support The Engine
You must support the engine before removing any mounts:
- Place a floor jack under the oil pan, using a thick block of wood to spread the load.
- Lift gently until you feel the engine’s weight supported. Don’t lift too high—just enough to take tension off the mounts.
- If you have an engine support bar, set it up across the top of the engine bay.
Non-obvious insight: Supporting the engine incorrectly is the number one reason for oil pan dents. Always use wood and lift slowly.
4. Remove Any Obstructions
Many mounts are blocked by air boxes, battery trays, or brackets.
- Unbolt and move any parts in the way.
- Label bolts and keep them organized.
- Take photos to help with reassembly.
5. Unbolt The Old Motor Mount
- Spray penetrating oil on bolts if they look rusty.
- Use the right size socket or wrench to remove all fasteners.
- Some mounts have nuts on both ends—hold one side with a wrench while turning the other.
- Carefully slide the mount out. You may need to lift or lower the engine slightly with the jack.
6. Compare New And Old Mounts
Before installing, set the new and old mounts side by side.
- Check that bolt holes, size, and shape match exactly.
- If they look different, double-check your part number.
7. Install The New Motor Mount
- Slide the new mount into position.
- Start all bolts by hand to avoid cross-threading.
- Tighten bolts evenly.
- Lower the engine slowly so its weight rests on the new mount.
Tip: Use a torque wrench to tighten to your vehicle’s specifications. Overtightening can damage the mount; undertightening can cause movement.
8. Reinstall Removed Parts
- Put back any brackets, trays, or air boxes you took out.
- Double-check all connections.
- Reconnect the battery.
9. Lower The Car And Test
- Remove the jack and jack stands.
- Start the engine. Let it idle and rev gently while watching for excess movement or vibration.
- Take a short drive and listen for any new noises.
If you notice extra vibration or clunks, recheck the torque on the bolts and make sure the mount is seated properly.
Real-world Example: Changing A Motor Mount On A Honda Accord
Let’s look at a typical job on a 2007 Honda Accord with a 4-cylinder engine.
- The main right-side mount is under the timing cover, above the wheel well.
- You’ll need to remove the air intake box and battery for access.
- Use a floor jack and wood block under the oil pan.
- Unbolt the mount from the frame and engine.
- Swap in the new mount, tighten bolts to 47 ft-lbs (check your manual).
- Put everything back and test.
Time needed: About 2-3 hours for a beginner.
Cost: $30–$80 for a mount, $10–$20 for tools if you don’t have them.
Motor Mount Replacement: Diy Vs Professional
While many people can replace motor mounts at home, some situations call for a mechanic.
When Diy Makes Sense
- You have basic tools and some experience.
- The mount is easily accessible (not buried under complex parts).
- You want to save on labor costs.
When To Hire A Pro
- The mount is deep in the engine bay (requires dropping the subframe or removing the exhaust).
- You don’t have a jack or engine support.
- The car uses active mounts (require recalibration).
Typical shop labor cost: $150–$400 per mount, depending on difficulty and location.
Common Mistakes To Avoid
Even experienced DIYers make errors. Here’s what to watch for:
- Not supporting the engine: Removing a mount without support can cause major damage.
- Mixing up bolts: Some mounts use different length bolts. Keep them organized.
- Using the wrong torque: Overtightening or undertightening can cause the mount to fail early.
- Forgetting to reconnect sensors or ground wires: Some mounts have attached sensors.
- Buying cheap mounts: Low-quality rubber can degrade quickly, costing more in the long run.
Motor Mount Materials: Comparison Table
To help you choose the right mount for your needs, here’s a comparison of common materials:
| Type | Vibration Control | Durability | Cost | Common Use |
|---|---|---|---|---|
| Solid Rubber | Good | High | Moderate | Most passenger cars |
| Hydraulic | Excellent | Medium | High | Luxury/sport models |
| Polyurethane | Fair | Very High | Moderate | Performance/racing |
| Active/Electronic | Best | Medium | Very High | High-end vehicles |
Credit: www.youtube.com
Cost Breakdown: Diy Vs Professional Replacement
Here’s an overview of the typical costs for changing motor mounts yourself compared to hiring a mechanic:
| Expense | DIY | Professional Shop |
|---|---|---|
| Motor Mount (each) | $30–$100 | $60–$250 (parts markup) |
| Labor | $0 | $150–$400 per mount |
| Tools (if needed) | $20–$100 | $0 |
| Total (per mount) | $50–$200 | $210–$650 |
Note: Actual costs vary by vehicle make, model, and local labor rates.
How Long Do Motor Mounts Last?
Most motor mounts last 5–7 years or about 60,000–100,000 miles. However, several factors can shorten their lifespan:
- Driving style: Aggressive driving and hard acceleration stress mounts.
- Road conditions: Rough roads, potholes, and off-roading speed up wear.
- Engine leaks: Oil or coolant leaks degrade rubber quickly.
It’s smart to inspect mounts every 30,000 miles or when you service the transmission or timing belt.
Upgrading Motor Mounts For Performance
Some drivers—especially those who race or modify their vehicles—choose to upgrade to polyurethane or solid mounts. These offer more precise engine control but transmit more vibration to the cabin.
Pros:
- Less engine movement under load
- Better throttle response
- Increased mount lifespan
Cons:
- More vibration and noise
- Can feel harsh in daily driving
For most daily drivers, stick with OEM or quality aftermarket rubber or hydraulic mounts.
Troubleshooting After Replacement
Sometimes, new mounts don’t solve vibration or noise issues. Here’s what to check:
- Torque: Make sure all bolts are tightened to spec.
- Alignment: The engine should sit level in the bay.
- Other mounts: If one mount failed, others may be weak.
- Related parts: Check exhaust hangers, axles, and transmission mounts.
If the problem continues, consult a trusted mechanic to rule out other causes.
Environmental Impact Of Used Motor Mounts
Motor mounts contain metal, rubber, and sometimes hydraulic fluid. Don’t throw old mounts in the trash.
- Recycle metal parts at a scrap facility.
- Dispose of hydraulic mounts at an auto parts store or hazardous waste site.
- Never pour hydraulic fluid down the drain.
Recycling helps reduce environmental impact and supports responsible car maintenance.
Additional Tips For Success
- Label everything: Use masking tape on wires and hoses you disconnect.
- Take breaks: If the job gets frustrating, step away for a few minutes.
- Check for service bulletins: Some vehicles have improved mount designs. Ask your dealer or check online forums for updates.
- Inspect other parts: While the engine is lifted, check belts, hoses, and the oil pan for leaks or damage.

Credit: www.carparts.com
When To Replace All Motor Mounts
If one mount fails, the rest are usually close behind. Consider replacing all mounts at once if:
- Your car has over 100,000 miles.
- You notice more than one worn or cracked mount.
- You drive in harsh conditions.
Replacing them as a set can save labor time and prevent repeated repairs.
Step-by-step Summary
To recap, here are the main steps to change motor mounts:
- Gather tools and replacement mounts.
- Locate the mounts in your engine bay.
- Safely raise and support the vehicle.
- Support the engine with a jack and wood block.
- Remove any parts blocking access.
- Unbolt and remove the old mount.
- Compare new and old mounts for a match.
- Install the new mount and hand-tighten bolts.
- Torque bolts to specification.
- Reinstall removed parts and lower the car.
- Test drive and listen for issues.
Comparison: Motor Mount Failure Symptoms Vs Other Problems
Motor mount failure can feel like other car issues. Here’s a quick comparison:
| Symptom | Motor Mount Problem | Other Possible Cause |
|---|---|---|
| Vibration at idle | Very common | Misfire, bad spark plug |
| Clunk on acceleration | Common | Bad CV joint, loose exhaust |
| Engine shifts in bay | Common | Broken subframe, loose bolts |
| Noise when shifting gears | Possible | Transmission issue |
Tip: Always rule out worn mounts before looking for deeper engine or transmission problems.
Resources For Further Learning
If you want more detailed instructions or diagrams for your specific vehicle, check out reputable online resources like Haynes Manuals. These guides offer step-by-step repair procedures for almost every car.
Frequently Asked Questions
How Do I Know If My Motor Mounts Are Bad?
Common signs include excessive vibration, clunking noises when shifting or accelerating, and visible cracks or damage on the mount. You may also see the engine moving excessively when you rev it in Park.
Can I Drive With Bad Motor Mounts?
Driving with worn mounts is not recommended. While you may be able to drive short distances, bad mounts can lead to engine misalignment, damaged exhausts, or even axle problems. Replace them as soon as possible.
How Long Does It Take To Change Motor Mounts?
For most vehicles, it takes 1 to 3 hours per mount, depending on accessibility and your mechanical experience. Some complicated jobs can take longer if the mounts are hard to reach.
Do I Need Special Tools To Replace Motor Mounts?
No special tools are required for most cars. A socket set, wrenches, a floor jack, and jack stands are usually enough. Some mounts are easier with an engine support bar, but a block of wood and a jack can work.
Will Changing Motor Mounts Improve Performance?
New mounts will not increase horsepower, but they do restore smooth operation and reduce unwanted vibration. This can make your car feel newer and prevent damage to other parts.
Changing motor mounts is a practical job that can save you money and improve your driving experience. With careful preparation and attention to detail, you can complete this project confidently and keep your vehicle running smoothly for years to come.