
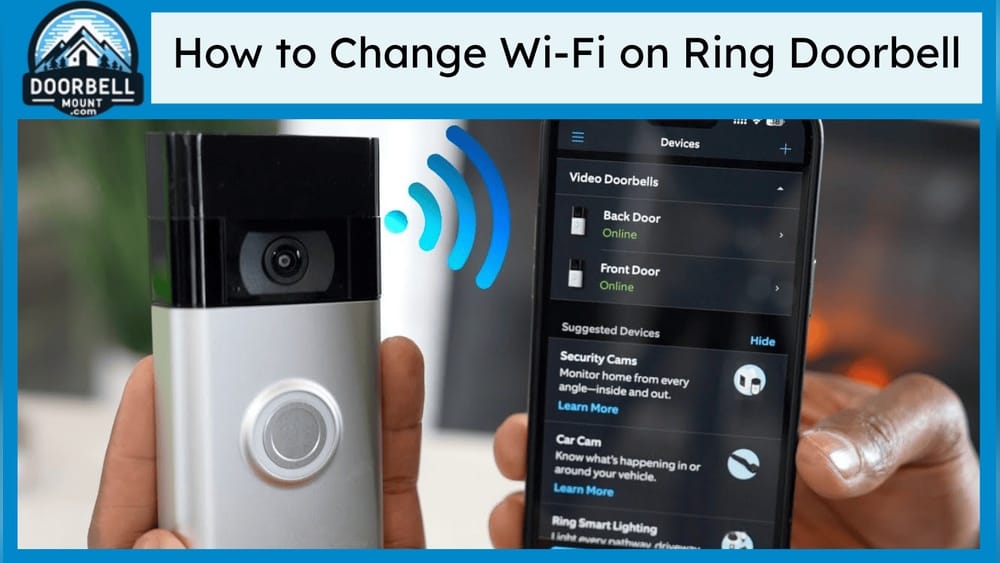
Changing the WiFi network on your Ring Video Doorbell seems simple, but it often raises questions, especially if you’re new to smart home devices. A stable WiFi connection is essential for getting live video, alerts, and recordings from your doorbell. If you change your home router, move to a new place, or want to switch to a faster network, you’ll need to connect your Ring device to the new WiFi. This process involves both the Ring app and the doorbell hardware, with steps that can vary depending on your Ring model.
This guide breaks down the process in clear steps, covering preparation, troubleshooting, and special situations. You’ll also find tips that most beginners miss, practical examples, and answers to common questions. By the end, you’ll know exactly how to reconnect your Ring Video Doorbell and avoid common mistakes.
Understanding Why Wifi Matters For Ring Video Doorbell
Your Ring Video Doorbell relies on a strong WiFi connection to send video and alerts to your phone or computer. Without WiFi, you lose live streaming, notifications, and recordings. Many users don’t realize that even a small WiFi issue (like weak signal or interference) can cause missed alerts or laggy video.
How Ring Doorbell Uses Wifi
- Live video streaming: Lets you see and talk to visitors in real time.
- Motion alerts: Sends notifications when movement is detected.
- Cloud recording: Uploads video clips to the Ring cloud for later viewing.
- Device updates: Downloads security updates and new features automatically.
If your WiFi changes or weakens, your Ring device may disconnect or work poorly. That’s why changing the WiFi setup correctly is important.
Common Reasons To Change Wifi
- New router installed: Most routers have unique network names (SSID) and passwords.
- Moved to a new home: The old WiFi no longer exists.
- Changing internet providers: The new provider gives you a different WiFi.
- Improving connection: Switching from 2.4 GHz to 5 GHz or to a faster network.
- Network security: Upgrading to a more secure password or hiding your SSID.
Preparing To Change Your Ring Doorbell’s Wifi
A little preparation makes the process smoother. Skipping these steps is a common mistake.
What You Need
- Your smartphone or tablet (with the Ring app installed and updated)
- Your new WiFi network name (SSID) and password
- Physical access to the Ring Video Doorbell
- Phillips screwdriver (for battery or wired models if you need to remove the device)
- Internet access for your phone
Important Pre-checks
- Check your WiFi signal where the doorbell is installed. Weak signal means possible issues later.
- Charge your Ring device (for battery models). The setup might drain the battery.
- Update the Ring app to the latest version for best compatibility.
- Write down your new WiFi password. Typos are a common source of connection failure.
- Know your Ring account credentials. You may need to log in again.
Backup Video Recordings
If you have a subscription and want to keep old recordings, make sure they’re saved. Changing WiFi doesn’t delete them, but if you remove the device from your account by mistake, you could lose access.
Step-by-step Guide: How To Change Wifi On Ring Video Doorbell
Different models (Ring Video Doorbell 2, 3, 4, Pro, Wired) follow a similar process but may have small differences. The Ring app will guide you, but these steps cover the essentials and highlight what beginners often overlook.
1. Open The Ring App
- Launch the Ring app on your phone or tablet.
- Sign in if prompted.
2. Select Your Device
- From the home screen, tap the menu icon (three lines) in the top left.
- Tap Devices.
- Choose your Ring Video Doorbell from the list.
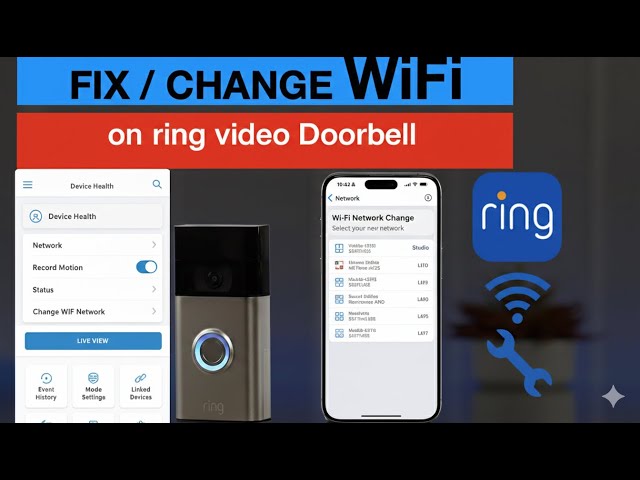
3. Access Device Settings
- Tap the Device Health option. This shows battery, signal, and network info.
- Look for Change WiFi Network or Reconnect to WiFi.
4. Put The Doorbell In Setup Mode
- For most models, press and hold the setup button (often orange) on the doorbell.
- For Ring Video Doorbell 2/3/4: Button is on the side or back.
- For Ring Video Doorbell Pro: Button is on the side.
- For Ring Wired: Button is on the front or side, depending on version.
- The light will spin or flash, indicating setup mode.
Common Beginner Mistake
Many users skip setup mode, thinking the app alone can change WiFi. Without pressing the physical button, your device won’t show up in WiFi search.
5. Connect To The Ring Device’s Temporary Wifi
- The app will prompt you to connect your phone to a Ring temporary WiFi network (usually named “Ring-xxxxxx”).
- Go to your phone’s WiFi settings and select this network.
- Return to the Ring app.
6. Choose Your New Wifi Network
- The app will now scan for available WiFi networks.
- Select your new WiFi name (SSID) from the list.
- Enter your WiFi password carefully.
- Tap Continue.
7. Wait For Connection
- The Ring device will attempt to connect to the new WiFi.
- This may take 1–2 minutes.
- The app will confirm success or show an error.
8. Test The Connection
- Once connected, check the Device Health screen for signal strength.
- Try a live view to confirm video works.
- Test the doorbell by pressing the button—do you get a notification?
9. Finish Setup
- If everything works, your doorbell is now on the new WiFi.
- If you have a Ring Chime or other linked devices, check their connection too.
Troubleshooting Common Wifi Change Issues
Even with careful steps, problems can happen. Here’s how to solve the most common ones.
Doorbell Won’t Enter Setup Mode
- Make sure the device has power (charged battery or wired).
- Hold the setup button for at least 15 seconds.
- If unresponsive, try a reset: Hold the button for 20 seconds, then try again.
Can’t Find The Ring Temporary Wifi
- Move your phone closer to the doorbell.
- Turn off your phone’s mobile data during setup.
- If you still can’t see it, restart your phone and the doorbell.
Wrong Wifi Password Error
- Double-check for uppercase/lowercase letters.
- Some symbols may cause issues; try a simpler password if possible.
- Forget the network on your phone and try entering the password again.
Poor Signal Or Connection Fails
- Place your router closer to the doorbell, or use a WiFi extender.
- Avoid thick walls or metal between the router and doorbell.
- If you have both 2.4 GHz and 5 GHz bands, use 2.4 GHz for better range.
Device Not Responding After Wifi Change
- Power cycle the doorbell: Remove the battery or turn off power for 1 minute, then restore.
- Check your network settings—some routers block new devices.
- Restart your router if other devices also have trouble connecting.
Model-specific Differences: What To Watch Out For
The main steps are similar, but each Ring Video Doorbell model has small differences. Here’s a comparison to make things clearer:
| Model | Setup Button Location | WiFi Bands Supported | Power Source |
|---|---|---|---|
| Ring Video Doorbell 2 | Back | 2.4 GHz | Battery/Wired |
| Ring Video Doorbell 3/4 | Back (under cover) | 2.4 & 5 GHz | Battery/Wired |
| Ring Video Doorbell Pro/Pro 2 | Side | 2.4 & 5 GHz | Wired only |
| Ring Video Doorbell Wired | Front or Side | 2.4 GHz | Wired only |
Non-obvious Insight
Many users don’t realize their older Ring model may only support 2. 4 GHz WiFi, while newer routers default to 5 GHz. If your network is 5 GHz only, your doorbell may not see it. You may need to enable 2.
4 GHz in your router’s settings.
How Wifi Strength Affects Your Ring Doorbell
A strong WiFi signal means faster video, fewer missed notifications, and a more reliable device. Here’s how signal strength compares:
| RSSI (Signal Value) | Signal Quality | Typical Experience |
|---|---|---|
| -40 to -60 | Strong | Fast video, reliable alerts |
| -61 to -70 | Good | Minor delays possible |
| -71 to -80 | Weak | Laggy video, missed notifications |
| -81 or lower | Poor | Frequent disconnects |
You can find your device’s RSSI value in the Device Health section of the Ring app. Lower (closer to zero) is better. If your value is -70 or worse, consider moving your router, using a WiFi extender, or switching networks.
Special Situations: What If You Can’t Access The Old Wifi?
Sometimes, the old WiFi is gone—maybe you moved, or the old router is broken. Here’s what to do:
No Access To Previous Network
- Go straight to setup mode by pressing the setup button.
- The Ring app will treat it as a new device setup. Follow the same steps to connect to the new WiFi.
New House, Old Owner’s Device
If you bought a house and the previous owner didn’t remove the device from their account, you must do a factory reset:
- Hold the setup button for 20–30 seconds.
- The device will reboot and enter setup mode.
- Add it to your own Ring account and connect to your WiFi.
If you can’t remove the old owner, contact Ring Support for help.
Practical Tips For Reliable Wifi Changes
Changing WiFi isn’t just about following steps—it’s about ensuring long-term reliability.
Place Your Router Strategically
- Keep the router away from large metal objects or microwaves.
- The fewer walls between the router and doorbell, the better.
- If possible, place the router on the same wall or room as the doorbell.
Use A Wifi Extender
If your doorbell is far from the router, a WiFi extender can boost signal. Some users prefer mesh WiFi systems for even coverage.
Pick The Right Wifi Band
- 2.4 GHz: Longer range, better through walls, but slower speeds.
- 5 GHz: Faster speeds, but shorter range and struggles with obstacles.
Most Ring devices work well on 2. 4 GHz, especially if the signal must travel far.
Update Your Firmware
Outdated firmware can cause connection bugs. The Ring app will prompt you if an update is needed, but you can also check manually in Device Health.
Avoid Network Names With Special Characters
Some Ring devices have trouble connecting to WiFi networks with spaces or unusual symbols in the SSID. Stick with letters and numbers if possible.
Credit: ypark-lab.com
What To Do If Your Device Won’t Reconnect
Sometimes, even after following all steps, your doorbell won’t join the new WiFi. Here’s a deeper troubleshooting guide.
Check Your Router Settings
- Make sure SSID broadcast is enabled (network isn’t hidden).
- Disable MAC address filtering unless you add your Ring device.
- Ensure your router uses WPA2 security (not WPA3 only—some older devices won’t connect).
- Limit the number of connected devices if your router has a cap.
Power Cycle Everything
- Turn off the router, wait 30 seconds, then turn it on.
- Power cycle the Ring device (remove battery or power for 1 minute).
- Retry setup.
Factory Reset As A Last Resort
- Hold the setup button for 20 seconds until the light flashes.
- Start the setup process as if it’s a new device.
Note: Factory reset removes all settings but not your cloud recordings.
Advanced: Changing Wifi Without Removing Your Device
Some guides suggest removing your Ring device from the app and adding it again. This is usually not needed and can erase settings or integrations.
Instead, always use the Change WiFi Network or Reconnect to WiFi feature in Device Health. Only remove the device if all else fails.

Credit: fornoallegro.com
Keeping Your Home Secure During Wifi Changes
During the WiFi change, your doorbell will be offline for several minutes. Here’s how to stay secure:
- Let family members know when you’re doing the switch.
- If you have a backup camera or security system, keep it active.
- Complete the process quickly to minimize downtime.
How Changing Wifi Affects Linked Devices
If you use Ring Chime, Alexa integration, or other smart home systems, you may need to check their connection after the WiFi change.
- Ring Chime: Follow the same steps to connect to new WiFi.
- Alexa: Usually reconnects automatically if on the same account and WiFi.
- Third-party integrations: May need to be re-authorized.

Credit: www.amazon.com
Keeping Your Settings And History
Changing WiFi does not delete video history or settings like motion zones. However, if you remove the device from your account, you may lose access to old recordings. Always use the “Change WiFi Network” option, not “Remove Device,” unless you’re moving out or selling the device.
Example Scenario: Real-life Wifi Change
Maria recently upgraded her internet and got a new router. Her Ring Video Doorbell 3 stopped sending notifications. She followed these steps:
- Opened the Ring app, tapped Devices, and selected her doorbell.
- Went to Device Health, tapped Change WiFi Network.
- Pressed the setup button on the doorbell (found under the cover).
- Connected her phone to “Ring-xxxxxx” WiFi.
- Entered her new WiFi name and password.
- Waited until the app confirmed the connection.
- Checked live view and pressed the button to test notifications.
Maria noticed her RSSI was -75 (weak). She moved her router closer, and the signal improved to -60. Now, her doorbell works smoothly, and she never misses a visitor.
Data: Average Wifi Change Success Rate
According to Ring’s support data, over 85% of users successfully change WiFi on their first try when following app instructions. Most failures are due to:
- Incorrect WiFi password
- Weak signal
- Skipping setup mode
When To Contact Ring Support
If you’ve tried all troubleshooting and your device still won’t connect, it’s time to contact Ring Support. They can check for device-specific issues or walk you through advanced fixes.
You can reach them via the Help section of the Ring app or on the Ring official support site.
Frequently Asked Questions
How Long Does It Take To Change Wifi On A Ring Video Doorbell?
Most users complete the WiFi change in 5 to 10 minutes. The process is quicker if you have your new WiFi password ready and the device is fully charged.
Will I Lose My Video Recordings If I Change Wifi?
No, changing WiFi does not delete your recordings as long as you don’t remove the device from your account. Cloud videos remain tied to your Ring subscription and account.
What If My New Router Only Has 5 Ghz Wifi?
Some Ring models only support 2.4 GHz networks. If your router doesn’t broadcast 2.4 GHz, enable it in your router settings or set up a dedicated 2.4 GHz guest network.
Do I Need To Reconnect My Ring Chime Or Other Devices?
Yes, you’ll need to reconnect Ring Chime, Chime Pro, and other Ring accessories to the new WiFi. Follow similar steps in the Ring app.
Can I Change Wifi On Ring Doorbell Remotely?
No, you need to be physically near your doorbell to press the setup button and connect it to the new WiFi. Remote changes aren’t possible for security reasons.
Changing your Ring Video Doorbell’s WiFi may seem technical, but with clear steps and a little patience, it’s a smooth process. Always double-check your WiFi details, follow the app’s prompts, and use the troubleshooting tips here if you run into trouble.
With a strong connection, your Ring device will keep your home secure and connected—no matter how often your network changes.