
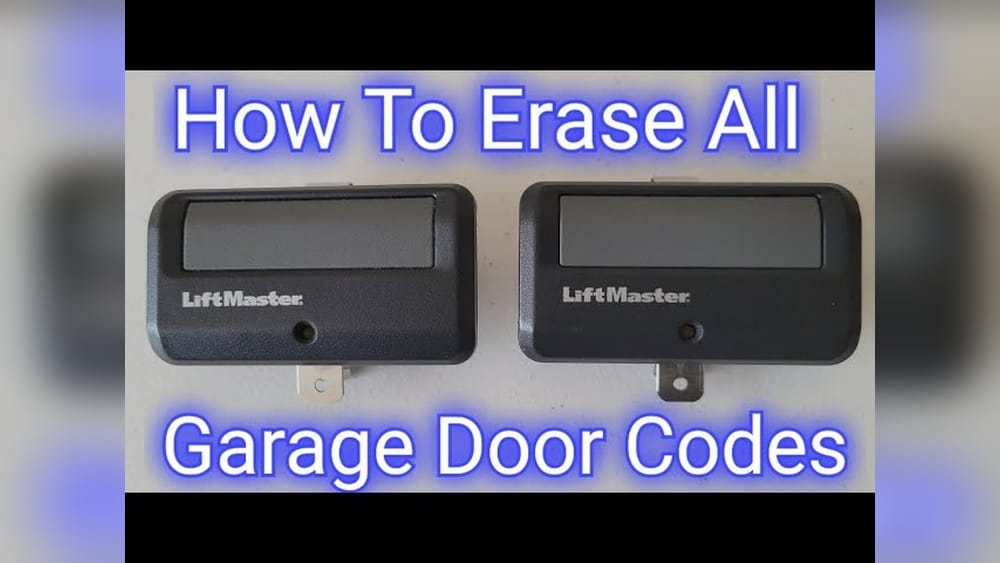
Erasing a Liftmaster remote control is not just about deleting a code. It is an important step for security, proper system maintenance, and avoiding accidental access. Many homeowners and business owners use Liftmaster for their garage doors and gates, but few know how to erase remotes correctly. If you recently moved into a new home, lost a remote, or want to update your system, erasing old remotes is essential.
This guide will help you erase your Liftmaster remote control step by step. You will learn about the reasons behind erasing remotes, the exact process for different models, common mistakes, and troubleshooting tips. Each section is designed to be clear, practical, and easy to follow—even if English is not your first language.
By the end, you’ll have the confidence to erase any Liftmaster remote and keep your property safe.
Why Erasing Liftmaster Remote Controls Matters
Most people think garage door remotes are simple devices. But they can be a security risk if not managed well. Old remotes, lost remotes, or remotes given to previous owners might still work with your system. This means anyone with an old remote could access your garage.
Erasing remotes removes all codes from your garage door opener’s memory. This ensures only new remotes you program will work. If you lose a remote, erase it immediately. If you buy a new house, erase all previous remotes before programming yours.
Here are some reasons to erase your Liftmaster remote:
- Security concerns: Prevent previous owners or tenants from accessing your property.
- Lost or stolen remotes: Block lost devices from opening your door.
- System upgrade: Start fresh when adding new remotes or changing openers.
- Troubleshooting: Solve issues with remotes not working or interfering with each other.
Did you know? Many people forget to erase remotes after moving. Studies show that up to 30% of new homeowners never reset their garage opener, leaving them open to unwanted access.
Understanding Liftmaster Remote Controls And Openers
Before erasing a remote, it’s important to know what type of Liftmaster system you have. Liftmaster makes several models, each with different features and erase methods. The main types are:
- Standard garage door openers: Wall-mounted or ceiling-mounted units.
- Gate openers: Used for driveway gates, often with more complex programming.
- Smart openers: Connected to Wi-Fi and controlled via smartphone apps.
Remotes vary in shape and button layout, but most use the same basic erase process. If you’re unsure about your model, check the serial number or consult the user manual.
Liftmaster Remote And Opener Comparison
To help you identify your system, here is a quick comparison:
| Model Type | Remote Appearance | Erase Method | Common Features |
|---|---|---|---|
| Standard Garage Opener | Rectangular, 1-3 buttons | Learn button, hold | Basic, wireless |
| Gate Opener | Small, single button | Learn button, specific timing | Long-range, robust |
| Smart Opener | App or remote | App interface or learn button | Wi-Fi, voice control |
Knowing your model will help you follow the correct steps. If you have a smart opener, the erase process may involve an app.
Step-by-step Guide: How To Erase Liftmaster Remote Control
Erasing a remote from your Liftmaster opener is not difficult, but you must follow the steps carefully. The process varies slightly depending on the model and year. Most Liftmaster openers have a Learn button—this is the key part of the erase process.
Step 1: Locate The Learn Button
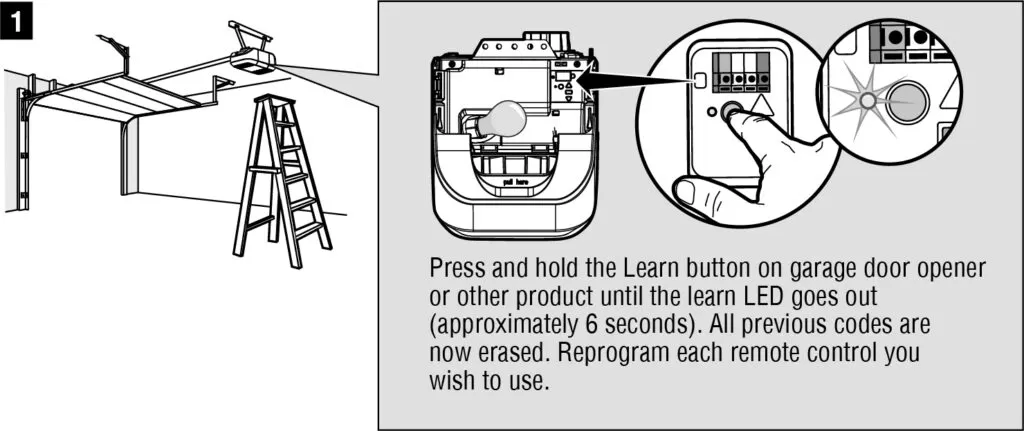
The Learn button is usually found on the garage door opener unit. It may be behind a light cover or near the wiring terminals. The button is often colored (yellow, red, orange, or purple) and labeled “Learn. “
- On ceiling-mounted openers, the button is on the back or side.
- On wall units, look near the control panel.
Tip: If you can’t find the Learn button, check your manual or look for a small square or circle labeled “Learn.”
Step 2: Prepare For Erasure
Make sure you have access to the opener and can reach the Learn button safely. Clear the area around the opener to avoid accidents. You do not need to unplug the unit.
Important: All remote codes will be erased. You must reprogram remotes after erasing.
Step 3: Press And Hold The Learn Button
- Press and hold the Learn button for about 6-10 seconds.
- The indicator light will turn off or blink, showing that memory is cleared.
- Release the button.
This step erases all remote controls and keypads from the system.
Step 4: Test The System
After erasing, try using your remote. It should no longer open the garage door. This means the erase was successful.
Step 5: Reprogram Your Remotes
To use your remotes again, you must program them back into the opener.
- Press the Learn button once (do not hold).
- Within 30 seconds, press the button on your remote.
- The opener light will blink, or you’ll hear a click. This means programming is successful.
Repeat this process for each remote or keypad.
Example: Erasing And Reprogramming A Standard Liftmaster Remote
Suppose you have a Liftmaster 3-button remote and a standard opener with a yellow Learn button.
- Remove the light cover and find the yellow Learn button.
- Hold the button for 10 seconds. The LED turns off.
- Try your remote—it does not work.
- Press Learn again (once), then press the remote button. The LED blinks.
- Your remote is now programmed.
Erasing Liftmaster Remotes On Smart Openers
If your Liftmaster opener connects to Wi-Fi, the erase process can be done using the app or the Learn button.
Using The Liftmaster App
- Open the myQ app (Liftmaster’s official app).
- Go to “Device Settings” and select your opener.
- Find “Erase Remote” or “Remove Device.”
- Confirm the action.
- The app will erase all programmed remotes and keypads.
This method is fast and does not require physical access to the opener.
Using The Learn Button
Smart openers still have a Learn button. Follow the standard steps:
- Hold the Learn button for 6-10 seconds.
- Wait for the indicator light to turn off.
- Remotes are erased.
Insider tip: Sometimes, app erasure does not remove older physical remotes. Always test after erasing.
Erasing Remotes On Liftmaster Gate Openers
Gate openers have a similar process, but timing can be more sensitive.
- Locate the Learn button (often inside the control box).
- Hold the button for 10 seconds.
- Indicator light will blink or turn off.
- All remote codes are erased.
Some gate openers require you to turn off power before erasing. Check your model’s instructions.
Practical example: For a Liftmaster SL595 gate opener, open the control box, press the Learn button, and wait for the LED to blink three times.
Common Mistakes When Erasing Liftmaster Remotes
Many users make errors during the erase process. Here are the most frequent problems and how to avoid them:
- Not holding the button long enough: The erase command requires 6-10 seconds. If you release too soon, nothing happens.
- Pressing instead of holding: A quick press programs remotes. Hold for erasing.
- Forgetting to reprogram remotes: After erasing, remotes need to be added again.
- Missing the correct button: Some openers have multiple buttons. Use the one labeled “Learn.”
- Not checking for success: Always test remotes after erasing.
Non-obvious insight: Older Liftmaster models may have a different erase sequence—sometimes needing two presses. If your opener does not respond, check the manual or Liftmaster website.
Troubleshooting: What To Do If Erasing Fails
Erasing a remote does not always work the first time. Here’s what you can do:
- Check power: Make sure the opener is plugged in and has power.
- Inspect the Learn button: Dirt or damage may block the button.
- Try again: Wait 10 seconds, then repeat the erase process.
- Look for firmware updates: Smart openers may need app updates.
- Contact Liftmaster support: For older or unusual models, call Liftmaster or visit their website.
Liftmaster Support Options
Liftmaster offers help through manuals, phone support, and online guides. Visit Liftmaster Customer Support for official assistance.
Safety Tips When Erasing Liftmaster Remotes
Garage door openers are electrical devices. Always follow safety rules:
- Do not unplug the opener while erasing.
- Keep children and pets away from the opener.
- Use a ladder safely if you need to reach the unit.
- Wear gloves if working near wiring.
Extra tip: If your opener is mounted high, ask someone to hold the ladder or assist.
Credit: utahgaragedoors.net
When Should You Erase Liftmaster Remotes?
Timing matters. Here are situations where erasing remotes is smart:
- After moving: Always erase remotes when moving into a new home.
- When losing a remote: Erase codes immediately if a remote is lost or stolen.
- After a break-in: Reset remotes to prevent future access.
- Before selling a property: Protect new owners by erasing all codes.
- When upgrading hardware: Start with a clean slate for new remotes.
Statistics: Over 25% of garage break-ins involve old or lost remotes still programmed to the opener.
Comparison: Erasing Vs. Replacing Liftmaster Remotes
Some people think replacing a remote is enough for security. But erasing is safer.
| Action | Security Level | Cost | Effort |
|---|---|---|---|
| Erasing Remotes | High | Free | Low |
| Replacing Remotes | Medium | $20–$50 per remote | Medium |
| Doing Nothing | Low | None | None |
Erasing remotes is the best way to block old devices. Replacing is useful if your remote is broken, but always erase codes first.

Credit: www.youtube.com
How Long Does It Take To Erase A Liftmaster Remote?
The process is quick. Most users finish in less than 5 minutes.
- Finding the Learn button: 1–2 minutes
- Erasing codes: 10 seconds
- Testing remotes: 1 minute
- Reprogramming remotes: 1–2 minutes per device
Total time: Usually under 10 minutes, even for multiple remotes.
Non-obvious insight: If you have many remotes or keypads, plan to spend extra time on reprogramming.
Erasing Multiple Liftmaster Remotes
When you erase codes, you erase all remotes at once. There is no way to erase a single remote. If you want to remove one remote, you must erase all, then reprogram only the remotes you want to keep.
Practical advice: Make a list of remotes you want to keep. After erasing, reprogram only those.
Erasing Keypads Alongside Remotes
Liftmaster systems often include wireless keypads. The erase process removes keypad codes too.
- After erasing, keypads will not work.
- Reprogram keypads using the Learn button and keypad instructions.
Example: For Liftmaster 877MAX keypad:
- Press Learn button.
- Enter new PIN on keypad, press Enter.
- Light blinks, keypad is programmed.
What To Do After Erasing Liftmaster Remotes
After erasing, take these steps:
- Reprogram remotes and keypads: Add back only trusted devices.
- Update access records: Note which remotes are programmed.
- Store remotes securely: Keep extras in a safe place.
- Check battery levels: Weak batteries can cause programming issues.
Extra tip: If you use the myQ app, update device access permissions after erasing.
Real-life Examples: Why Erasing Remotes Matters
Consider these real stories:
- John moved into a new house. He forgot to erase remotes. Six months later, the previous owner’s remote still opened his garage.
- Maria lost her remote. She erased all codes, reprogrammed her remotes, and prevented unauthorized access.
- A business owner upgraded his opener. He erased all old remotes to avoid interference and programmed new ones for staff.
These examples show why erasing remotes is a smart, simple step.
The Risks Of Not Erasing Liftmaster Remotes
If you skip erasing, you face several risks:
- Security breaches: Old remotes may work for strangers.
- Access confusion: Too many programmed devices can cause malfunctions.
- Privacy issues: Previous tenants or owners could enter your garage.
Expert recommendation: Always erase remotes after changes in ownership or loss.
Advanced Tips For Liftmaster Remote Erasure
For more complex systems or high-security needs, try these tips:
- Use two-factor authentication: With smart openers, enable extra security in the app.
- Regularly audit remote access: Check which remotes are programmed every year.
- Combine erasure with battery replacement: Fresh batteries make reprogramming easier.
- Label remotes: Mark which remote belongs to which user for easy tracking.
Frequently Asked Questions
How Do I Erase A Single Liftmaster Remote Without Erasing All?
You cannot erase just one remote. Liftmaster openers erase all codes at once. After erasing, reprogram only the remotes you want.
What Happens If I Press The Learn Button By Mistake?
A quick press will not erase anything. It just prepares the opener to program a new remote. Only holding the button for 6–10 seconds erases codes.
Can I Erase Liftmaster Remotes From The Myq App?
Yes, for smart openers. Open the app, go to device settings, and use the erase/remove option. Always test after erasing to confirm success.
How Often Should I Erase My Liftmaster Remote Codes?
Erase codes after major events: moving, losing a remote, or system upgrades. For security, some experts suggest erasing annually.
Is Erasing Remotes Safe For My Opener?
Yes, it’s completely safe. It does not harm the opener or affect its performance. Just remember to reprogram remotes and keypads after erasing.
—
Erasing your Liftmaster remote control is a simple but powerful step for security and peace of mind. Whether you’re moving, upgrading, or just want to protect your home, following these steps ensures only trusted devices can access your property. Remember to check your opener model, follow the correct process, and reprogram your remotes afterward. If you run into trouble, Liftmaster support and the user community are always there to help. Making this a habit can prevent break-ins, lost access, and confusion—keeping your garage and home safe for years to come.

Credit: allsecurityequipment.com