
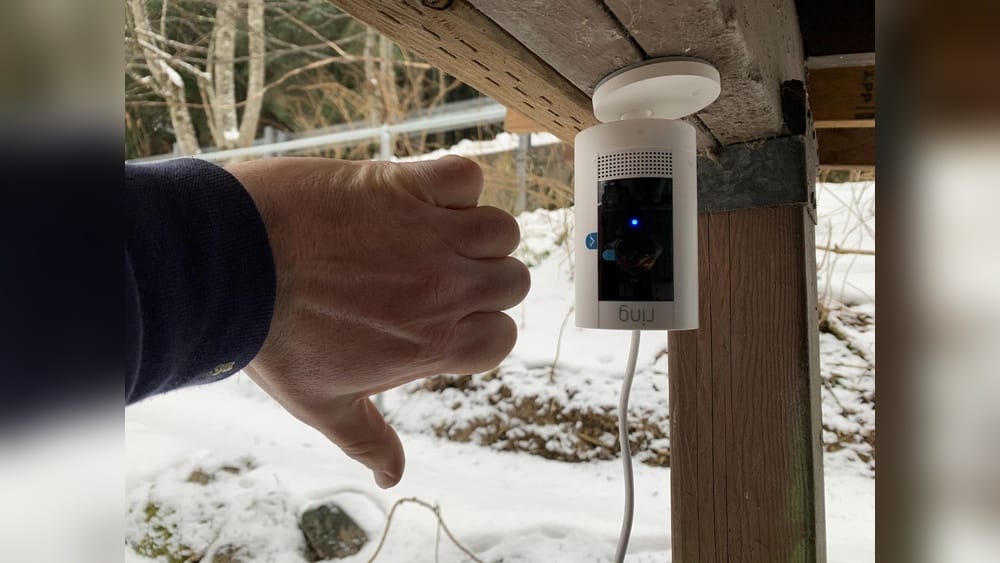
When you install a Ring camera outdoors, getting the right view is very important. Sometimes, after putting up the camera, you might notice the live video looks upside down or sideways. This can happen because of the way you mounted the device. If you are seeing people walking on the ceiling or the street looks like it’s on the wall, you probably need to flip the Ring camera view. Fixing this problem can make your video clear, help you recognize faces, and improve your home’s security.
Many people believe they can just press a button to flip the video, but the solution is not always so direct. Some Ring cameras allow you to flip the view easily in the app, but others need a physical change in how you install the device.
Let’s look at why this happens, how to fix it for different Ring camera models, what to consider for outdoor setups, and how to avoid common mistakes when flipping your camera view.
Why Flipping The Ring Camera View Is Needed
When you mount your Ring camera outdoors, you might attach it to a wall, ceiling, or even an eave (the bottom edge of your roof). Depending on where you put it, the camera’s built-in orientation might not match your setup. This can cause the video to appear inverted or rotated.
Several reasons make it important to flip the camera view:
- Recognize faces and details: An upside-down image makes it hard to identify people or packages.
- Accurate motion detection: Wrong orientation can confuse the motion sensors, causing missed alerts.
- Professional appearance: A correct view looks better if you need to share footage with police or neighbors.
Non-obvious insight: Sometimes, even if the camera seems to work, the orientation affects features like motion zones and privacy zones in the Ring app. These zones won’t line up with real-world areas if the image is upside down.
Understanding Ring Camera Models And Their View Options
Not all Ring cameras are the same. Some have built-in software features to flip or rotate the image, while others do not. Knowing your model helps you choose the right method.
Here is a quick comparison of popular Ring outdoor cameras and their flip/rotate options:
| Ring Camera Model | Can Flip Video in App? | Best Mounting Position | Notes |
|---|---|---|---|
| Ring Stick Up Cam (Battery/Solar) | Yes | Wall/Ceiling | Image Rotation available in app |
| Ring Stick Up Cam (Wired) | Yes | Wall/Ceiling | Image Rotation available in app |
| Ring Spotlight Cam | No | Wall | Physical rotation required |
| Ring Floodlight Cam | No | Wall/Eave | Physical rotation required |
| Ring Video Doorbell (All Models) | No | Vertical Surface | Cannot flip view |
| Ring Outdoor Cam (Battery/Plug-In) | Yes | Wall/Ceiling | Image Rotation available in app |
Many users do not realize that Ring Video Doorbells do not support image flipping in any way. This is because the design expects doorbells to always be upright on a vertical wall.
For cameras that do support flipping, the feature is usually called Image Rotation or Rotate Video in the Ring app settings. For others, you need to physically change how the camera is mounted.

Credit: www.youtube.com
How To Flip Ring Camera View In The Ring App
If your Ring camera supports digital flipping, the process is quick and does not require tools. Here’s how to do it:
- Open the Ring app on your smartphone or tablet.
- Tap the menu icon (three lines) in the top left corner.
- Select Devices and choose the camera you want to flip.
- Tap Device Settings.
- Go to Video Settings or Advanced Settings (the name may vary).
- Look for an option called Rotate Video, Rotate Image, or Image Rotation.
- Toggle the setting to flip the video 180 degrees.
The video feed should update instantly, showing the correct orientation.
Important Details And Tips
- Only specific models (like Stick Up Cam and Outdoor Cam) have this software option.
- If you do not see the rotation feature, your camera model does not support digital flipping.
- After flipping, check your motion zones and privacy settings—they may need to be re-adjusted to fit the new view.
- Some older Ring cameras may need a firmware update before the rotation feature appears.
Non-obvious insight: If you use shared users (family members or roommates), ask them to check the video too. In rare cases, app caches might show the old orientation until refreshed.
Flipping The View By Physically Adjusting The Camera
If your camera does not support flipping in the app, you need to physically rotate it. This method works for models like the Ring Spotlight Cam and Ring Floodlight Cam.
Steps To Flip The View Physically
- Turn off power to the camera (for wired models) or remove the battery (for battery models) to avoid any risk.
- Remove the camera from its mount using a screwdriver or the included tool.
- Rotate the camera body 180 degrees so the lens is now facing upright.
- Reattach the camera to the mount, making sure the view is correct.
- Turn the power back on or reinsert the battery.
- Check the live view in the Ring app to confirm the orientation.
Outdoor Mounting Tips
- For eave installations (under the roof edge), use special mounts that let you angle the camera downward while keeping the image upright.
- Make sure the camera is secured tightly. Outdoor cameras face wind and rain—loose mounting can cause the camera to slip and flip the view again.
- Avoid mounting the camera upside down unless the design and mounting bracket support it.
Example: Fixing A Floodlight Cam’s Upside-down View
Let’s say you install a Ring Floodlight Cam under an eave, and the video is upside down. Here’s how you fix it:
- Unscrew the camera from its bracket.
- Rotate the camera so the lights are above the lens (not below).
- Tighten the bracket so the camera does not move.
- Open the Ring app and check the live view. If still upside down, adjust the bracket further.
Some users do not realize that if you mount the Floodlight Cam with the lights below the lens, rainwater can pool in the lens area, causing blurry video or damage. Always install it as designed.
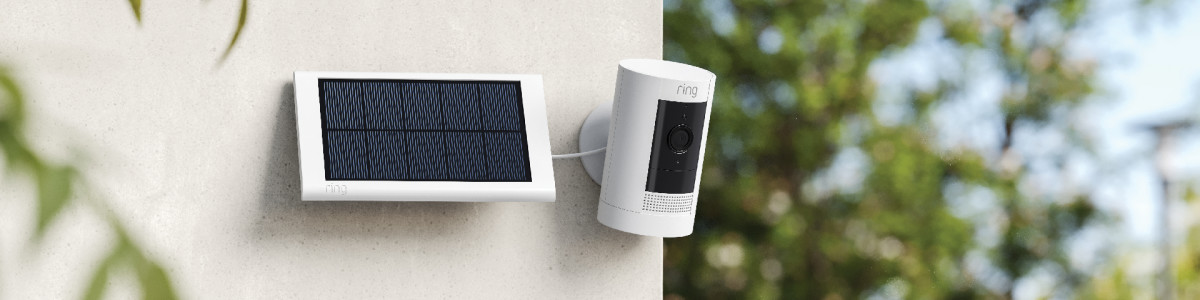
Credit: ring.com
Using Mounting Accessories To Help With Camera Orientation
If your mounting location makes it hard to get the right angle, consider using accessories. Ring and third-party brands offer brackets and mounts to help you flip or angle your camera.
Popular Mounting Accessories
- Wedge kits: These let you angle the camera up or down by 5–15 degrees. Useful for wall or eave mounting.
- Corner kits: These allow you to angle the camera left or right to cover a wider area.
- Gutter mounts: Attach the camera to a gutter for a higher viewpoint without drilling into walls.
- Adjustable mounts: Some offer 360-degree rotation, letting you flip and aim the camera in almost any direction.
Here’s a quick look at how these mounts compare:
| Accessory Type | Main Use | Supports Flipping? | Weather Resistant? |
|---|---|---|---|
| Wedge Kit | Tilting up/down | Yes (partially) | Yes |
| Corner Kit | Angling left/right | No | Yes |
| Gutter Mount | High placement | Yes (with adjustable head) | Depends on brand |
| Adjustable Bracket | Full rotation | Yes | Usually |
Accessories can make the difference if your wall, eave, or ceiling does not give you the angle you want. Make sure any accessory you use is weather resistant for outdoor use.
Troubleshooting Common Problems After Flipping The View
After you flip your Ring camera view, sometimes new issues appear. Here’s what to check if things do not look right:
Blurry Or Distorted Image
- Check lens orientation: Sometimes flipping the camera can cause the lens hood to block part of the image.
- Clean the lens: Outdoor cameras get dirty quickly. After handling, wipe the lens gently with a microfiber cloth.
- Check for water droplets: If flipped incorrectly, rainwater can collect on the lens.
Motion Detection Not Working Properly
- Re-adjust motion zones: The camera’s view changed, so your old zones may not match the real area anymore.
- Test with a walk-through: Walk through the camera’s field of view and watch if alerts trigger in the app.
- Check for glare: If the camera now faces a light source (like the sun), motion detection can fail.
Night Vision Issues
- IR lights blocked: After flipping, the infrared lights for night vision might be blocked by the mount or nearby objects.
- Reflections: If the camera is too close to a wall or eave, IR light can reflect back, causing a white haze at night.
Audio Issues
- Microphone position: After rotating, the mic might point away from where you want to capture sound.
- Wind noise: Outdoor placement can increase wind noise, especially if the camera is now higher or more exposed.
Non-obvious insight: If you use multiple Ring cameras, flipping one can change how you set up Linked Devices (where one camera’s motion triggers another to record). Double-check these settings after any change.
Credit: www.youtube.com
Best Practices For Outdoor Ring Camera Placement
To avoid having to flip the view later, plan your camera placement with these tips:
- Mount at head height: For most homes, 7–9 feet above the ground is ideal.
- Angle slightly downward: This gives the best face view and reduces false alerts from cars or animals.
- Avoid direct sunlight: Sunlight can wash out the video or cause glare.
- Use the correct mount: Always use a mount that matches your installation surface (wall, eave, or ceiling).
- Test before final install: Temporarily hold the camera in place and check the live view in the app. Only drill holes once you are sure.
Many beginners forget to test the view before drilling. Taking five minutes to check the live feed can save hours of rework later.
Advanced Tips For Flipping And Optimizing Your Outdoor Ring Camera
Flipping your camera view is just one part of getting the best performance. Here are some extra strategies to make your outdoor Ring camera work even better:
Use Camera Previews In The App
- The Ring app lets you see a snapshot preview of each camera. Use this to quickly spot if any camera is upside down or aimed wrong.
- If the image looks off, check the orientation before you miss important events.
Set Up Motion Schedules
- After flipping the camera, your motion alerts might increase or decrease.
- Use the Motion Schedule feature to ignore alerts during busy times (like when kids play in the yard).
- Adjust sensitivity if you now see too many or too few alerts.
Combine With Smart Lighting
- Pair your flipped camera with Ring Smart Lights or other outdoor lights.
- Better lighting means clearer video, especially at night or in low-light conditions.
Regularly Check For Firmware Updates
- Some flipping issues are fixed in software updates.
- Open the Ring app, go to Device Health, and check for updates.
Use Two-factor Authentication
- Flipping your view sometimes means resetting or reconnecting the camera.
- Make sure your Ring account is protected with two-factor authentication so only you can change important settings.
Safety And Security Considerations
When working with outdoor cameras, especially wired ones, safety is very important.
- Turn off power: Before adjusting a wired camera, switch off the power at the breaker.
- Use ladders safely: Always have someone hold the ladder if you’re working high up.
- Weatherproof connections: Make sure all cables and connections are sealed against rain and dust.
- Check for local laws: In some places, there are rules about where you can point cameras. Avoid aiming at neighbors’ windows or private areas.
Non-obvious insight: Flipping a camera view may affect your privacy zones—the areas you block from recording (like a neighbor’s yard). Review your privacy settings after any orientation change.
Comparing Ring’s Flipping Options With Other Brands
If you are thinking about other camera brands, it helps to know how Ring compares. Here’s a quick comparison:
| Brand | Flip/Rotate in App? | Physical Flip Needed? | Outdoor Models |
|---|---|---|---|
| Ring | Some models | Yes for others | Stick Up, Spotlight, Floodlight, Outdoor Cam |
| Arlo | Yes (most) | Rarely | Pro, Essential, Ultra, Go |
| Google Nest | No | Yes | Outdoor Cam, Nest Cam IQ |
| Wyze | Yes | No | Wyze Cam Outdoor |
| Reolink | Yes (via app or NVR) | Rarely | Argus, E1 Outdoor, Go |
Ring’s software rotation feature is not as universal as some competitors like Wyze or Reolink. If you expect to flip cameras often, consider this in your buying decision.
For more on differences in smart camera features, the Wikipedia article on surveillance cameras gives a good overview.
Frequently Asked Questions
How Do I Know If My Ring Camera Supports Flipping The Video In The App?
Check your camera’s settings in the Ring app. Go to Device Settings > Video Settings and look for Rotate Video or Image Rotation. If you do not see this option, your model only supports flipping by physical rotation.
What Should I Do If The Video Is Still Upside Down After Flipping In The App?
First, restart the Ring app and refresh the live view. If the problem remains, try rebooting your camera by removing and reinserting the battery or unplugging and plugging back in. If this does not fix the issue, contact Ring support for help.
Can I Flip The View On My Ring Video Doorbell?
No, Ring Video Doorbells do not support image flipping in any way, either in the app or by physical rotation. They must be mounted upright on a vertical surface for correct operation.
What If Flipping My Camera View Changes My Motion Zones?
After flipping, open the Ring app and go to Motion Settings. Redraw your motion zones to match the new orientation. Test the zones by walking through your camera’s field of view to confirm alerts work correctly.
Is It Safe To Mount A Ring Camera Upside Down Outdoors?
Mounting a camera upside down is only safe if the design and bracket support it and the camera is weatherproof in that position. For most models, it’s better to use a bracket or mount that allows upright installation and then use the app to flip the view (if supported).
Flipping your Ring camera view outdoors is not just about fixing an upside-down image—it’s about getting the best security, clear video, and reliable alerts. By knowing your camera model, using the right tools, and checking your app settings, you can make sure your outdoor camera works perfectly in any position. If you plan ahead and use the right accessories, you’ll rarely need to flip the view after installation. But if you do, now you know how to do it safely and effectively, so your home stays protected and your video always looks right.