
Installing a Ring Video Doorbell can make your home safer and smarter, but many people want to avoid recharging batteries or worrying about power running out. Hardwiring your Ring Video Doorbell gives you constant power and connects it directly to your existing doorbell wiring. This means fewer interruptions and more reliable protection. But hardwiring isn’t just about plugging in a few wires. Doing it correctly helps your device last longer and work better. This guide will take you through everything you need to know, from preparation to troubleshooting, using simple language and practical advice.
Why Hardwire Your Ring Video Doorbell?
Choosing to hardwire your Ring Video Doorbell comes with several benefits. For one, you never need to worry about charging the battery. This is especially useful if you live in a busy area where the doorbell is triggered often. Hardwiring also lets you use your existing chime, so you hear a sound inside your home when someone presses the button. Finally, a hardwired connection can make your doorbell more reliable during extreme temperatures, as batteries can struggle in very hot or cold weather.
But there are a few things to consider. Not all homes have existing doorbell wiring, and older wiring can sometimes cause problems. It’s important to check your setup before starting.
Understanding How Ring Video Doorbells Are Powered
Before you start, it helps to know how Ring Video Doorbells get power. Most models can run on a rechargeable battery or be connected to wires that provide a small, steady flow of electricity (usually 16-24 volts AC). This is called low-voltage wiring and is common for traditional doorbells in North America.
Older homes sometimes use lower voltage, or the wiring may be worn out. If the voltage is too low, your Ring might not charge properly or could behave strangely. Some newer homes, or apartments, might not have any doorbell wires at all.
In these cases, you’ll need to use the battery, install new wiring, or get a plug-in transformer.
Tools And Materials You Need
To hardwire your Ring Video Doorbell, you’ll need the right tools and materials. Having everything ready makes the process smoother and safer.
- Ring Video Doorbell (model compatible with hardwiring)
- Screwdriver (included in the box or a standard Phillips-head)
- Drill (if you’re mounting on brick, stucco, or concrete)
- Level (included with most Ring kits)
- Wire stripper (for older or painted wires)
- Voltage tester (to check if wires are live and the voltage range)
- Mounting screws and anchors (provided in the box)
- Existing doorbell wires (or a compatible transformer if wiring is not available)
- Wire connectors (often included, but extras are helpful)
- Smartphone or tablet (to set up the app and test the device)
Safety tip: Always turn off power at the breaker before working with electrical wires. Even low-voltage wires can be dangerous if not handled correctly.
Checking Compatibility With Your Home
Not every home is ready for hardwiring a Ring Video Doorbell. Here’s how to check compatibility.
Existing Doorbell System
- Remove your old doorbell button.
- You should see two thin wires behind it. These are your low-voltage power wires.
- Use a voltage tester to check the voltage. It should read between 16-24 volts AC.
- If you see thick wires or no wires, you may need a professional or a plug-in transformer.
Transformer
The transformer is usually found near your main electrical panel, in the basement, or in a closet. It changes the high-voltage power from your home into low-voltage power for doorbells.
- Check the transformer’s label for the output voltage.
- If it’s less than 16 volts, your Ring may not work well.
- Upgrading a transformer is possible, but if you’re unsure, ask an electrician.
Chime Box
If you want to use your existing chime, it must be a mechanical chime (with moving parts) or a compatible digital chime. Some digital chimes do not work with Ring without a special adapter.
- Remove the chime cover and look inside. Mechanical chimes have metal bars and moving parts.
- If you see a speaker or circuit board, it’s digital.
- The Ring support site has a list of compatible chimes.
Step-by-step Guide To Hardwiring A Ring Video Doorbell
With preparation done, you’re ready to start. The steps below apply to most Ring Video Doorbell models, but always check your specific manual for details.
1. Turn Off Power
Before touching any wires, switch off power at the circuit breaker that controls your doorbell. Test the wires with a voltage tester to make sure there is no current.
2. Remove Your Old Doorbell
- Unscrew the old doorbell button from the wall.
- Gently pull it out to reveal the wires.
- Loosen the screws holding the wires and remove the button.
If the wires are short or stiff, use needle-nose pliers to pull them out slightly. If they are covered in paint or corrosion, carefully strip off a small section to get clean copper.
3. Prepare The Mounting Area
- Hold the mounting bracket of your Ring Video Doorbell against the wall.
- Use the included level to make sure it’s straight.
- Mark the screw holes with a pencil.
- If mounting on wood or siding, use the included screws. For brick, stucco, or concrete, drill holes and insert the anchors.
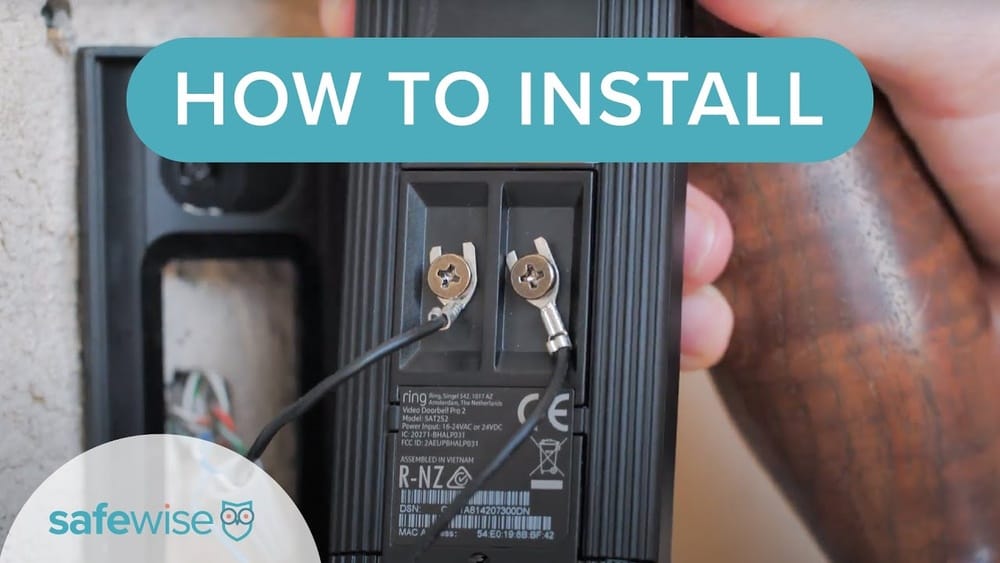
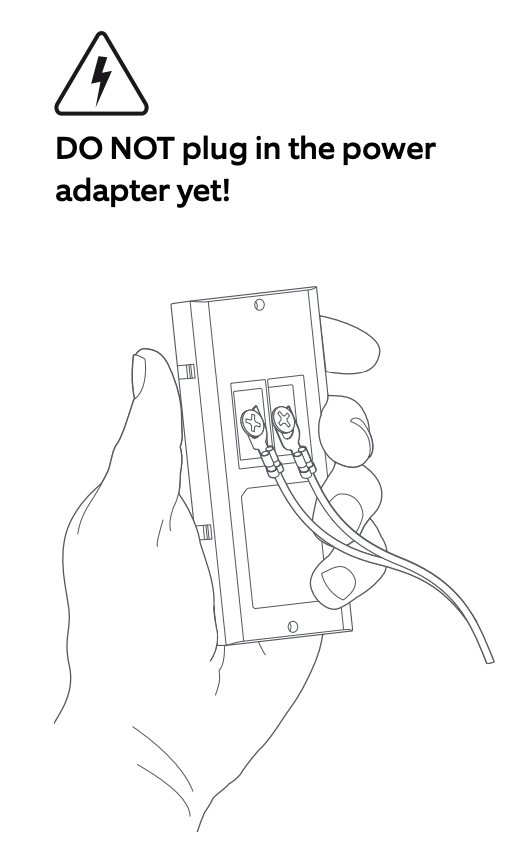
4. Attach The Wires
- Loosen the two terminal screws on the back of the Ring device.
- Wrap one doorbell wire around each screw (either wire can go on either screw, as there’s no polarity).
- Tighten the screws securely.
- Make sure no copper is exposed outside the terminals.
If the wires are very thin or frayed, twist them together for a better connection. You can also use the included wire extension kits if needed.
5. Mount The Doorbell
- Carefully tuck any extra wire into the wall.
- Line up the mounting holes and attach the doorbell to the bracket.
- Secure it with the screws provided.
- Attach the faceplate.
6. Turn Power Back On
Go back to your breaker box and switch the power back on. Your Ring Video Doorbell should light up and begin the setup process.
7. Set Up With The Ring App
- Download the Ring app (iOS or Android).
- Follow the instructions to create an account or log in.
- Add a new device and scan the QR code on your doorbell or in the box.
- Connect the device to your home Wi-Fi network.
- Test the live video and chime function.
If your chime doesn’t ring, check the app settings to enable the mechanical chime option.
What To Do If You Don’t Have Existing Doorbell Wires
Not every home comes with existing doorbell wiring. If that’s your situation, you still have options.
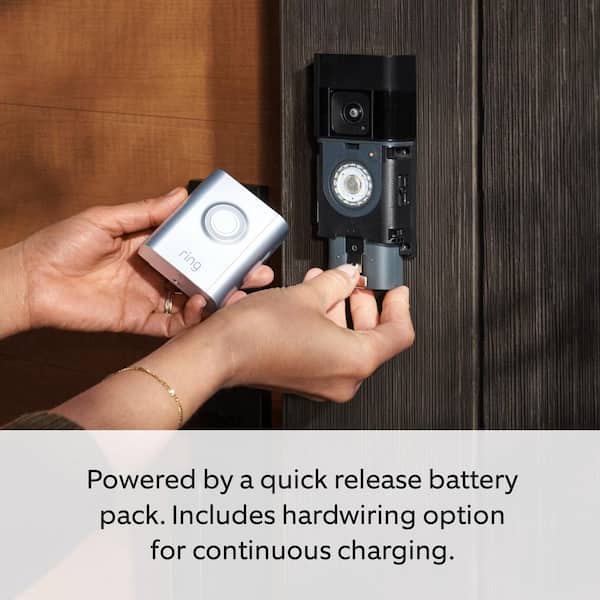
- Use Battery Power: Most Ring models have built-in rechargeable batteries. You’ll need to remove the doorbell to recharge every few months, depending on usage.
- Install a Plug-in Transformer: You can buy a plug-in power adapter (often called a plug-in transformer) that connects to any standard outlet. These supply the correct voltage and can be run through a wall or window to the Ring device.
- Hire an Electrician: If you want permanent wiring, a licensed electrician can install new low-voltage wiring and a transformer.
Here is a simple comparison of powering options:
| Power Source | Installation Difficulty | Maintenance | Reliability |
|---|---|---|---|
| Existing Doorbell Wiring | Easy to Medium | Low | High |
| Battery Only | Very Easy | Medium (recharging) | Medium |
| Plug-in Transformer | Medium | Low | High |
| Professional Installation | Hard (DIY), Easy (pro) | Low | High |
Common Mistakes People Make
Hardwiring a Ring Video Doorbell is not too difficult, but some mistakes are easy to make. Avoiding these will save you time and trouble.
- Skipping the Voltage Check: Not all doorbell transformers supply enough power. Always test before installation.
- Leaving Power On: This can cause a shock or damage your Ring device.
- Loose Connections: Wires that aren’t tightly attached can cause the doorbell to lose power or not charge.
- Wrong Chime Settings: Not selecting the correct chime type in the app can stop your chime from working.
- Poor Wi-Fi Signal: The doorbell needs a strong Wi-Fi connection. Install close to your router if possible, or use a Wi-Fi extender.
Non-obvious insight: Many people don’t realize that a weak transformer can cause the Ring to restart often or not record properly. If you see these problems, check the transformer rating.
Tips For A Cleaner, Safer Installation
Making your installation look good and work well is worth the extra effort.
- Use Cable Clips: These hold wires neatly against the wall and prevent snags.
- Seal Outdoor Holes: Use weatherproof caulk to keep water and bugs out.
- Test Before Final Mounting: Connect wires and power up the device to make sure it works before attaching everything tightly.
- Label Breaker Switches: Mark which switch controls your doorbell for easy access in the future.
Non-obvious tip: If your wires are very short, you can use Ring’s wire extension kit or standard 18-gauge bell wire from a hardware store. Just be sure to use secure connectors.
Credit: ring.com
Troubleshooting Power And Chime Problems
Even after a careful install, issues can come up. Here’s how to solve the most common ones.
Doorbell Not Powering On
- Double-check that the breaker is on.
- Make sure wire connections are tight and copper is exposed.
- Test the voltage at the wires.
- If voltage is too low, consider upgrading your transformer.
Chime Not Ringing
- Open the Ring app and go to device settings.
- Select the right chime type (mechanical or digital).
- Check the chime box for loose wires.
- Some digital chimes need a Ring Pro Power Kit or adapter.
Doorbell Shows “poor Power” In App
- Confirm the transformer is rated 16-24 volts AC, 30 VA or higher.
- Replace old or corroded wires.
- If the doorbell is far from the transformer, voltage can drop. Consider moving the transformer closer or running new wire.
Poor Wi-fi Signal
- Move your router closer, or use a Wi-Fi extender.
- Avoid mounting the doorbell on metal or near large electrical boxes, which can block signal.
Here’s a table showing common issues and solutions:
| Problem | Possible Cause | Solution |
|---|---|---|
| Device won’t turn on | No power at wires | Check breaker, test voltage, re-tighten wires |
| Chime doesn’t ring | Incorrect chime setting | Select correct chime in app, check chime box wiring |
| Poor power warning | Weak transformer | Upgrade transformer to 16-24V, 30VA |
| Poor Wi-Fi signal | Distance, obstacles | Move router, use Wi-Fi extender |
Comparing Ring Video Doorbell Models For Hardwiring
Not every Ring Video Doorbell is the same. Some models are easier to hardwire, or come with extra features. Here’s a side-by-side comparison of popular models:
| Model | Hardwired Power | Supports Chime | Video Quality |
|---|---|---|---|
| Ring Video Doorbell (2nd Gen) | Yes | Yes (mechanical/digital) | 1080p HD |
| Ring Video Doorbell Pro 2 | Yes (required) | Yes | 1536p HD+ |
| Ring Video Doorbell Wired | Yes (required) | Yes (with Ring Chime only) | 1080p HD |
| Ring Video Doorbell 4 | Yes (optional) | Yes | 1080p HD |
Experience-based tip: The Ring Video Doorbell Pro 2 offers the best video quality and advanced features but requires hardwiring. If you want the easiest install, the standard model works well with both battery and wired power.
Safety Advice And When To Get Help
Most people can safely hardwire a Ring Video Doorbell, but electrical work always carries risks. If you are unsure about any step, or if you see thick wires, old wiring, or feel uncomfortable, hire a licensed electrician.
- Never work on live wires. Always turn off the breaker.
- Don’t use a damaged transformer. This can be a fire hazard.
- Don’t force wires into the device. If wires are too short, use an extension kit.
If you live in an apartment or rental, check with your landlord before making any changes to wiring.
Maintaining Your Hardwired Ring Doorbell
Once your doorbell is installed, it’s almost maintenance-free. But a few simple habits can keep it working its best.
- Clean the camera lens every few months with a soft cloth.
- Check wiring and screws once a year to make sure nothing is loose or corroded.
- Update the app regularly for new features and security fixes.
- Test the chime and video feed after big storms or power outages.
If you live in a cold climate, remember that even hardwired Ring devices use the battery as a backup. Extreme cold can slow charging, so make sure your device is up to date.
The Real-world Benefits Of A Hardwired Setup
A hardwired Ring Video Doorbell isn’t just about convenience. It can add real value to your home. According to a 2021 survey by SafeHome.org, 62% of homeowners said a video doorbell made them feel safer, and homes with visible cameras are less likely to be targeted by thieves.
With a hardwired setup, you get:
- Instant alerts and live video, 24/7
- Consistent chime function inside your home
- No downtime from dead batteries
- Peace of mind knowing your home is always watched
Plus, the cost of hardwiring is usually much less than a professional security system, and you can add other smart devices over time.
Smart Integrations And Advanced Features
Modern Ring devices do more than just show video. When hardwired, you can unlock features such as:
- Pre-roll video: See what happened before someone rang the bell (available on some models).
- Linked devices: Automatically turn on Ring lights or cameras when motion is detected.
- Alexa integration: Announce visitors or show the video feed on Echo devices.
- Advanced motion detection: Smarter alerts and fewer false alarms.
Setting up these integrations can be done in the Ring app or Alexa app. For more advanced smart home setups, check compatibility with your existing devices.
Credit: www.youtube.com
What To Do If You Move Or Upgrade
If you move to a new home or upgrade your doorbell, you can remove your Ring device and patch the holes with caulk or filler. The wiring will remain for the next doorbell or owner.
- Reset the device to factory settings before selling or giving away.
- Update your address in the Ring app after moving.
- Save your videos if you have a Ring Protect plan.
Frequently Asked Questions
How Long Does It Take To Hardwire A Ring Video Doorbell?
Most people can complete the installation in 30 to 60 minutes if they have existing wiring. If you need to drill into brick or run new wires, it may take longer.
Is It Safe To Hardwire The Doorbell Myself?
Yes, if you follow basic safety steps like turning off the breaker and using a voltage tester. If you’re unsure about your wiring or transformer, it’s always safest to ask a professional.
Will Hardwiring Charge The Ring’s Battery?
Yes, for most models, hardwiring charges the internal battery, so you rarely (or never) need to remove it. Some models, like the Pro series, have no battery and run only on wired power.
Can I Use My Old Chime With Ring?
You can use most mechanical chimes. Some digital chimes work, but may need a special adapter. Check the Ring website for compatible models or ask support.
Where Can I Find More Help Or Support?
The official Ring Support Center offers videos, guides, and live chat to answer most questions.
Making your Ring Video Doorbell hardwired is a smart upgrade that pays off in daily convenience, security, and peace of mind. With clear steps, a few tools, and attention to detail, you’ll enjoy a reliable, always-on smart doorbell for years to come.
Credit: nicolettarestaurant.com