
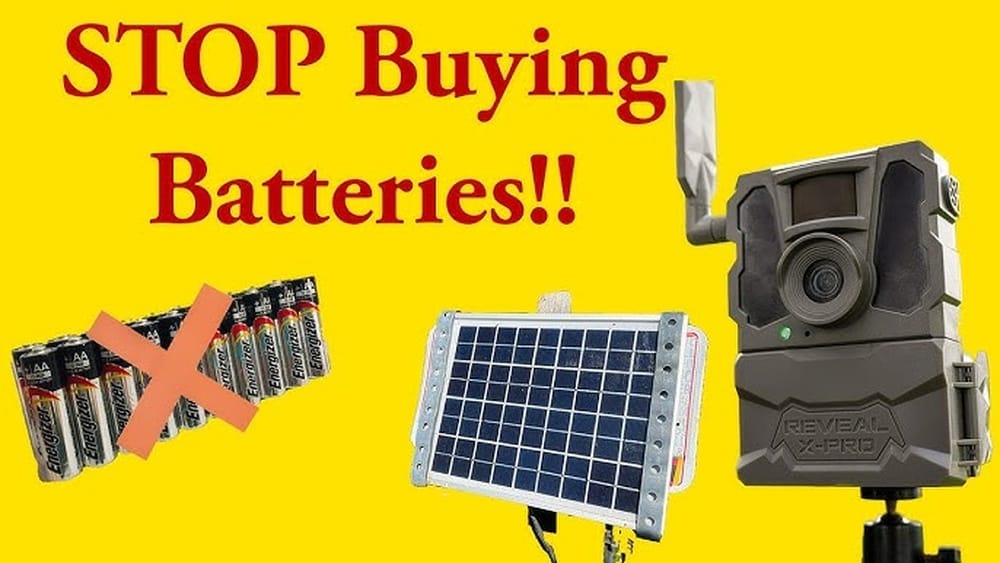
Hooking up a solar panel to a game camera is a smart way to keep your camera running for months without changing batteries. Many hunters, wildlife researchers, and outdoor enthusiasts want to monitor animal activity in remote locations. But replacing batteries is hard, especially if your camera is in a distant spot. Solar panels solve this problem, but only if you connect them correctly and choose the right setup. This guide will show you, step by step, how to hook up a solar panel to your game camera, avoid common mistakes, and get the most from your outdoor camera system.
Why Use A Solar Panel For Your Game Camera?
Game cameras, or trail cameras, are often left outside for long periods. They need power to take photos, record videos, and send notifications. Most use AA or other batteries, but these drain quickly, especially in cold weather or with frequent use.
A solar panel provides several advantages:
- Continuous power: Your camera keeps working, even during long deployments.
- Lower cost: You save money by not buying disposable batteries.
- Less maintenance: Fewer trips to check or replace batteries.
- Eco-friendly: Solar energy is renewable and clean.
But not every solar panel works with every game camera. Matching the right panel and connecting it properly is key.
Understanding Your Game Camera’s Power Needs
Before you buy or connect a solar panel, you need to know what your game camera requires for power. Game cameras vary widely by model, brand, and features.
Voltage And Amperage
Check your camera’s specifications. Look for:
- Input voltage: Most game cameras use 6V or 12V DC. Some use 9V or other values.
- Current draw (amperage): This tells you how much power the camera uses. It may be listed as “mA” or “A” (e.g., 0.5A means 500mA).
- Connector type: Game cameras usually have a round barrel plug, but sizes differ.
Power Consumption Example
A typical 12V game camera draws about 0. 2A (200mA) when active. If it takes a photo every 10 minutes, it uses about 50-100mAh per day. If your solar panel produces 300mAh per hour in sunlight, just a few hours of sun can keep your camera charged.
Internal Vs. External Power
Some cameras only use internal batteries. Many have an external port for solar or other external power. Check your camera’s manual to see if it supports external input, and if so, what voltage and connector it requires.
Non-obvious insight: Not all “solar ready” cameras can handle solar panels directly. Some need a battery in between for power regulation.
Choosing The Right Solar Panel For Your Camera
Selecting the correct solar panel is crucial. Don’t just buy any small panel; match it to your camera’s needs.
Key Factors
- Voltage: Must match your camera’s input (usually 6V or 12V).
- Wattage and Current: Higher wattage gives more power, but too much won’t damage the camera as long as voltage is correct.
- Size and Mounting: Bigger panels catch more sun but are harder to hide.
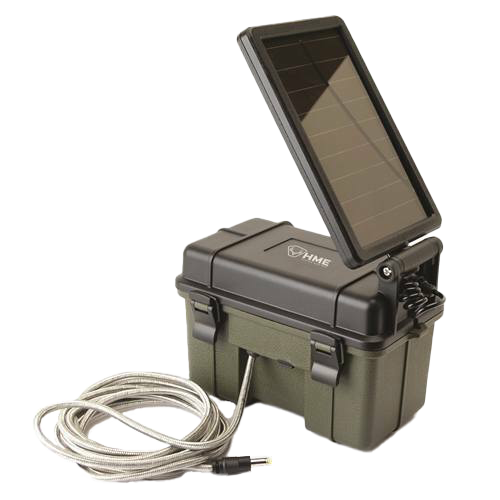
- Built-in Battery: Some panels have a built-in rechargeable battery, which stores energy and provides power at night or in shade.
Comparing Solar Panel Types
Here’s a comparison of common panels for game cameras:
| Solar Panel Type | Voltage | Built-in Battery | Typical Use |
|---|---|---|---|
| Basic Solar Panel | 6V or 12V | No | Direct connection, sunny locations |
| Solar Panel with Battery Pack | 6V or 12V | Yes | Most reliable, works in shade/clouds |
| USB Solar Panel | 5V | Sometimes | For cameras with USB input only |
Pro tip: A solar panel with a built-in battery is best for most users. It stores power during the day and delivers steady voltage to your camera.
How Much Power Do You Need?
Estimate the total daily power your camera uses (in mAh or Wh). Choose a panel that generates 2-3x that amount per day, to allow for clouds and short winter days.
Example: If your camera uses 200mAh per day at 12V, get a panel that can generate at least 400-600mAh per day at 12V.
What You’ll Need: Tools And Parts Checklist
Before starting, gather these items:
- Solar panel (matched to your camera’s voltage, with or without built-in battery)
- Compatible connector cable (often a barrel plug, but check your camera’s manual)
- Mounting hardware (brackets, screws, or straps)
- Multimeter (to check voltage, optional but highly recommended)
- Weatherproof box (if connecting wires or battery packs exposed to weather)
- Zip ties or clips (for cable management)
- Optional: Diode (prevents battery drain at night, often built into panel)
Some game cameras come with a matching solar kit. If so, use the parts supplied.
Insight: Many connection problems happen because the cable or plug is the wrong size or polarity. Always check before connecting.

Credit: safariclub.org
Step-by-step Guide: Hooking Up A Solar Panel To Your Game Camera
Let’s walk through the process, from setup to testing.
1. Check Camera And Solar Panel Compatibility
First, make sure your camera and solar panel are matched:
- Confirm the voltage and connector size.
- Look for polarity markings (+ and –). Most cameras use center-positive plugs.
- Check the camera’s manual for solar recommendations.
Never force a connector that doesn’t fit. Wrong voltage or polarity can damage your camera.
2. Mount The Solar Panel
Choose a location that gets several hours of direct sunlight each day. The panel should face south (in the northern hemisphere) or north (in the southern hemisphere) for the best results. Tilt the panel at an angle equal to your latitude for maximum year-round exposure.
Mount the panel securely using:
- Brackets screwed to a tree, post, or wall
- Adjustable mounts for fine-tuning angle
- Straps for temporary or non-destructive mounting
Keep the panel away from heavy branches, animal trails, and vandal-prone spots.
Tip: Clean the panel face regularly. Dust, leaves, or snow can block sunlight.
3. Connect The Solar Panel To The Camera
Follow these steps for a safe connection:
- Turn off the camera (if possible) before connecting power.
- Plug the solar panel’s output cable into the camera’s external power port.
- Double-check the fit. The plug should go in easily, not forced.
- If using a panel with a built-in battery, make sure it’s charged (some need to be charged in full sunlight before first use).
If your panel’s plug doesn’t fit, use an adapter or cable with the right size and polarity. Some panels come with multiple adapter tips.
4. Secure And Protect Cables
Run cables along tree trunks or posts. Use zip ties or clips to secure them. Avoid letting cables dangle, which can attract animals or get caught.
If possible, use weatherproof connectors or a small waterproof box to keep connections dry. Electrical tape can help seal connections but is less reliable in the long term.
5. Test The System
Once connected:
- Turn on the camera.
- Check the camera’s display or power indicator.
- If your camera has a battery indicator, confirm it shows external power connected.
- Take a test photo or video to ensure normal operation.
Use a multimeter to check voltage at the camera’s input if things don’t work. You should see voltage matching your camera’s requirements.
Troubleshooting: If the camera doesn’t power on, check for loose connections, wrong polarity, or low sunlight.
6. Monitor Performance
Check your camera after a few days. Make sure:
- The camera is still operating.
- The solar panel is getting enough sun.
- The battery (if present) is charging.
If you notice missed photos or the camera shutting off, try moving the panel to a sunnier spot.
Common Mistakes And How To Avoid Them
Many users run into problems when connecting solar panels to game cameras. Here are the most common issues and how to solve them.
Wrong Voltage Or Polarity
Supplying the wrong voltage can damage your camera. Always match the voltage and check the polarity (center positive or negative). Use a multimeter if unsure.
Insufficient Sunlight
Panels in deep woods, north-facing slopes, or under thick leaves won’t get enough sun. If possible, mount the panel in a clearing, or use a longer cable to reach sun.
Cheap Or Weak Solar Panels
Low-quality panels may not deliver enough power, especially on cloudy days. Choose panels from reputable brands, and read reviews before buying.
Poor Connections
Loose or exposed connections can cause intermittent power, corrosion, or shorts. Use weatherproof connectors and secure all cables.
Ignoring Cold Weather
Solar panels work in cold weather, but batteries lose capacity. If your panel has a built-in battery, check that it’s rated for low temperatures.
Non-obvious insight: Even with a solar panel, it’s wise to leave backup batteries in the camera. Some cameras switch automatically if solar power fails.
Credit: www.stealthcam.com
How Solar Charging Works: The Technical Basics
A solar panel takes energy from sunlight and converts it to DC electricity. If the sun is bright, the panel generates more; if it’s cloudy or dark, less.
Most solar panels for game cameras include a charge controller or circuit. This device:
- Regulates voltage and current to protect the camera and battery
- Prevents overcharging and battery damage
- Stops current from flowing back at night (diode function)
If your panel doesn’t have a built-in controller, buy one separately—especially for larger panels.
Example: A 12V, 3-watt panel can produce up to 250mA in full sun. Over 5 hours, that’s 1.25Ah (1250mAh), enough for most cameras.
Solar Panel And Game Camera Compatibility Table
Here’s a quick look at popular camera brands and the solar panel types they support:
| Game Camera Brand | Typical Input Voltage | Solar Panel Type | Connection Notes |
|---|---|---|---|
| Browning | 12V | 12V panel with battery | Barrel plug, center positive |
| Stealth Cam | 12V | 12V panel or 6V panel (model specific) | Check manual for polarity |
| Spypoint | 12V | Spypoint solar panel kit | Proprietary connector |
| Moultrie | 6V or 12V | Moultrie solar panel | Use matching voltage and plug |
| Wildgame Innovations | 6V or 12V | 6V/12V solar panel | Check for correct adapter tip |
Always check your specific camera model for voltage and connection details.

Credit: www.youtube.com
Optimizing Your Solar-powered Game Camera Setup
Getting the most from your solar setup is about more than just plugging things in. Here’s how to maximize performance.
Panel Placement
- Place the panel where it gets direct sunlight for at least 4-6 hours per day.
- Avoid shadows from trees, leaves, or buildings.
- Point the panel south (in the northern hemisphere) or north (in the southern hemisphere).
- Adjust the tilt angle for your location. In winter, a steeper angle helps catch low sun.
Cable Management
- Use weatherproof cable extensions if needed.
- Avoid running cables along the ground where animals or people may trip on them.
- Use black or green cables for better camouflage.
Battery Backup
- If your camera supports it, use both internal batteries and solar at the same time.
- This ensures the camera keeps working during long cloudy periods.
Weather Protection
- Use silicone or weatherproof tape to seal all connections.
- Clean the panel face every few weeks to remove dust, pollen, or debris.
Monitoring And Maintenance
- Check the system after storms or high winds.
- Replace cables or connectors if you see corrosion or damage.
- If your camera has a power status feature, check it regularly.
Non-obvious insight: Solar panels can attract unwanted attention. Camouflage the panel with paint or natural materials, but don’t cover the cells.
Real-world Example: Installing A Solar Panel On A Remote Game Camera
Let’s look at a step-by-step example from the field.
John is a wildlife enthusiast who monitors deer activity on his property. His camera is 1 mile from the nearest road, so changing batteries is a hassle. He uses a Browning 12V camera and a 12V/3W solar panel with a built-in 2Ah battery.
Here’s what John does:
- Checks the camera’s voltage and plug size.
- Mounts the solar panel on a south-facing tree, using a bracket and screws.
- Runs the power cable along the trunk, using zip ties.
- Connects the panel’s output to the camera’s external port.
- Seals the connector with weatherproof tape.
- Leaves AA batteries inside the camera for backup.
- After two weeks, the camera’s battery indicator stays full, and he has over 1,000 photos.
John’s lesson: spending a bit more on a quality panel and battery pack saved him countless trips and gave him more reliable data.
Advanced Tips For Solar-powered Game Cameras
If you want to get more from your system, consider these strategies.
Using Larger Panels For Multiple Cameras
You can power several cameras from one large solar panel and battery pack, using a splitter cable. Add up the total power needs of all cameras and choose a panel and battery that can support them.
Remote Monitoring
Some high-end cameras send images via cellular or Wi-Fi. These use more power, so a larger panel and battery are needed. Look for panels rated at 5W or higher for these setups.
Diy Solar Panel Kits
You can build your own solar kit using off-the-shelf panels, a small 12V battery (such as a sealed lead-acid or lithium), and a charge controller. This lets you customize size and power for unique situations.
Cold Weather Performance
In freezing climates, use lithium batteries for both the camera and the panel’s storage battery. Lithium performs better in the cold than lead-acid or alkaline.
Security
Solar panels are visible and can be targets for theft. Use camo paint or mount the panel high in a tree, out of easy reach. Lock the camera to the tree if possible.
Key insight: Always test your setup at home before deploying it in the field. This avoids surprises and wasted trips.
Cost Breakdown: What To Expect
A basic solar panel kit for a game camera costs between $20 and $80, depending on features and quality. Here’s a rough breakdown:
- Small 6V/12V panel without battery: $20-$35
- Panel with built-in battery: $35-$60
- Panel, battery, mounting hardware, and cables: $50-$80
DIY kits can be cheaper if you already have some parts.
Compared to buying new batteries every few weeks, most solar setups pay for themselves in one season.
Environmental Impact
Using solar energy instead of disposable batteries reduces waste and pollution. Each AA battery takes over 100 years to decompose in a landfill. With a solar panel, you can avoid using dozens or even hundreds of batteries per year.
Solar-powered cameras also have a lower carbon footprint. If you care about wildlife, using solar is a way to help protect their habitat.
When Not To Use Solar Power
While solar is great for most users, it’s not perfect for every situation. Don’t use a solar panel if:
- Your camera is in deep shade all day (e.g., dense forest)
- You need a very hidden camera (solar panels can be visible)
- The camera is deployed for just a few days (batteries are fine)
In these cases, consider high-capacity lithium batteries instead.
Where To Learn More
For more technical details about solar panels and battery storage, you can check out Wikipedia’s solar panel page.
Frequently Asked Questions
How Big Of A Solar Panel Do I Need For My Game Camera?
For most game cameras, a 3-5 watt panel is enough if it gets several hours of sunlight daily. Higher power is better for cameras with cellular or Wi-Fi features. Always match the panel voltage to your camera and, if possible, use a panel with a built-in battery for best results.
Can I Use Any Solar Panel With My Game Camera?
No, you must match the voltage and connector type. Using the wrong voltage can damage your camera. Some brands require proprietary panels or connectors, so always check your camera’s manual before buying.
Will My Camera Work At Night With A Solar Panel?
Yes, if your solar panel has a built-in rechargeable battery. The battery stores energy during the day and powers the camera at night. A panel without a battery will not work in the dark.
Do I Still Need Batteries In My Camera If I Use A Solar Panel?
It’s a good idea to leave batteries in the camera as a backup. If the solar panel is shaded or fails, your camera can switch to battery power and keep working.
How Do I Protect My Solar Panel And Camera From Theft Or Animals?
Mount the panel out of easy reach, use camouflage paint, and secure cables tightly. Some users use lockboxes for cameras. Avoid placing panels where large animals or people are likely to pass.
Connecting a solar panel to your game camera can save time, money, and hassle. With the right setup, you can capture wildlife photos for months without worry. Take time to match the correct panel to your camera, install everything securely, and monitor performance for best results. With just a little planning, you’ll enjoy a reliable, eco-friendly power source for all your outdoor camera needs.