
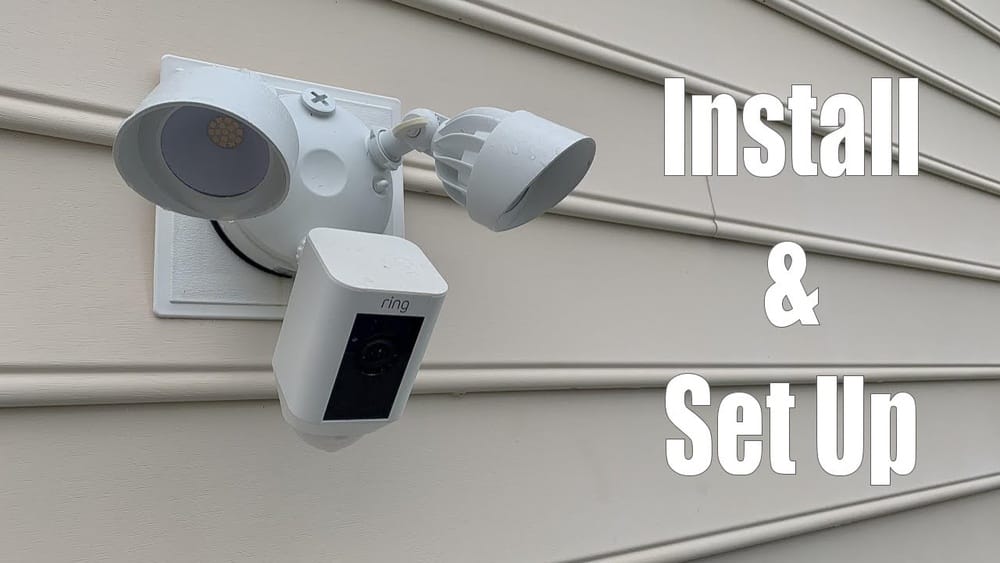
Setting up a security camera can feel overwhelming, but the Ring Floodlight Camera makes it easier than you might think. If you want to protect your home, see who’s outside, or just light up your driveway, this camera is a strong choice. It combines motion-activated floodlights, a high-definition camera, and a siren—all controlled through your smartphone.
Many people worry about installing smart devices themselves. Will you need special tools? Is it safe to work with wires? What if something goes wrong? This guide will walk you through every step, from checking your current wiring to connecting your camera to Wi-Fi.
You’ll learn what to expect, what tools you need, and how to avoid the mistakes that often frustrate beginners.
By the end, you’ll know exactly how to install a Ring Floodlight Camera, test it, and get the most out of its features. Let’s get started and bring some peace of mind to your home.
Understanding The Ring Floodlight Camera
The Ring Floodlight Camera is more than just a camera. It’s a combination of security lighting, surveillance, and smart home technology. Knowing its main features and how it works will help you get the most from your installation.
Key Features
- 1080p HD camera: Clear video, day or night.
- Motion detection: Lights and camera activate when someone approaches.
- Two-way audio: Talk and listen through the app.
- 110 dB siren: Scare off intruders with a loud alarm.
- Smartphone app control: View video, adjust settings, and receive alerts.
- Customizable motion zones: Only get alerts for the areas you care about.
- Works with Alexa: Use voice commands or link to your smart home system.
How It Works
The camera is designed to replace an existing outdoor light, like a porch or driveway fixture. When motion is detected, the two LED floodlights turn on and the camera starts recording. You get a notification on your phone and can open the app to see a live video.
If needed, you can use the siren or speak through the built-in speaker.
Why Choose A Ring Floodlight Camera?
Here’s a quick comparison of the Ring Floodlight Camera with a traditional outdoor floodlight:
| Feature | Ring Floodlight Camera | Traditional Floodlight |
|---|---|---|
| Video Recording | Yes (1080p HD) | No |
| Remote Viewing | Yes (App) | No |
| Motion Alerts | Yes | Lights Only |
| Siren | Yes (110 dB) | No |
| Two-Way Talk | Yes | No |
| Price | $$$ | $ |
The Ring Floodlight Camera offers much more than just light. It’s a full security system in one device.
What You Need Before You Start
Before you can install your Ring Floodlight Camera, you need to prepare a few things. Taking the time to check these steps will make your installation much smoother.
1. Electrical Requirements
The Ring Floodlight Camera is designed to replace an existing outdoor light fixture. You cannot plug it into a standard outlet—it must be wired into a junction box connected to your home’s power (100-240V AC).
- If you don’t have a junction box, you’ll need to install one or hire an electrician.
- The device is not battery powered.
- Turn off power at the breaker before starting any wiring.
2. Wi-fi Network
A strong Wi-Fi connection is crucial. The camera needs a 2.4 GHz wireless network. If your Wi-Fi signal is weak where you want to install the camera, consider using a Wi-Fi extender.
- Download the Ring app (iOS or Android) on your phone before you start.
3. Tools And Materials
The Ring Floodlight Camera comes with most parts you’ll need, but a few extra tools can help:
- Screwdriver (Phillips and flathead)
- Power drill (optional, for new holes)
- Ladder (for high installations)
- Voltage tester (to check that wires are not live)
- Electrical tape
- Wire strippers (if wires need trimming)
- Safety glasses and gloves
4. Installation Location
Choose a spot where the camera can cover the area you want to monitor. Common places:
- Garage entrance
- Driveway
- Back yard
- Front porch
The camera should be mounted 9 feet (about 2. 7 meters) above the ground for the best view and motion detection.
5. Account Setup
You’ll need a Ring account to use the app and access your camera. You can create one during the setup process or at ring. com.
Credit: support.ring.com
Step-by-step Installation Guide
Now that you’re prepared, it’s time to install the Ring Floodlight Camera. If you’re replacing an old light, this project can take about 30–60 minutes. If you need to add new wiring, it may take longer or require professional help.
Step 1: Turn Off The Power
Safety first. Go to your electrical panel and switch off power to the outdoor light fixture you’ll be replacing. Use a voltage tester to double-check that the wires are not live before you touch them.
- Label the breaker with tape if you’re worried about someone turning it back on.
- Don’t skip this step—shocks can be dangerous.
Step 2: Remove The Old Fixture
Carefully take down your existing floodlight or light fixture:
- Unscrew the light from the wall or junction box.
- Support the fixture as you disconnect the wires. You’ll usually see a black (hot), white (neutral), and possibly a green or bare copper (ground) wire.
- Remove any old mounting bracket if it’s not compatible with the Ring camera.
Keep the wires separated and pointed away from each other.
Step 3: Prepare The Junction Box
Check that the box is sturdy and weatherproof. If you see corrosion or damage, fix or replace it before installing the new camera.
- Clean out any debris or old sealant.
- Ensure the wires are about 1/2 inch exposed at the ends for easy connection.
Step 4: Install The Mounting Bracket
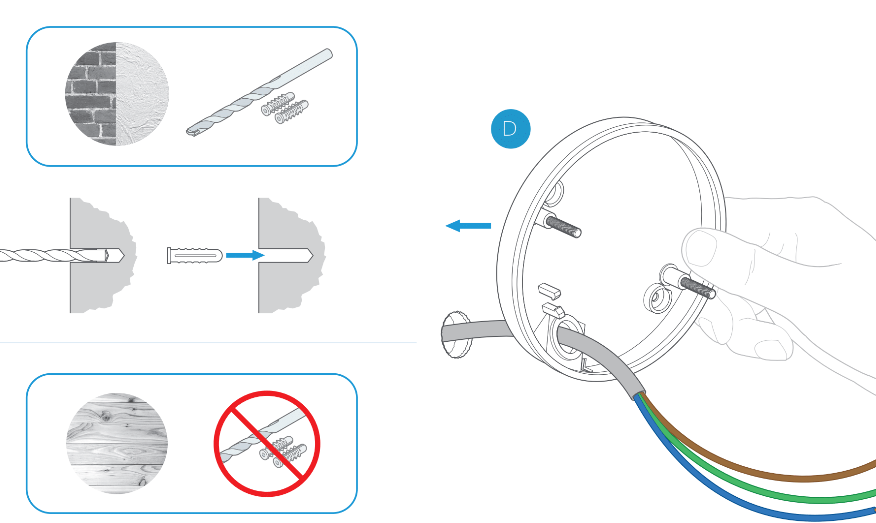
The Ring Floodlight Camera includes a mounting bracket that fits most round or square junction boxes.
- Hold the bracket to the box and line up the holes.
- Use the provided screws to secure it tightly.
- Make sure the bracket is level—the camera should not tilt.
If you’re not sure which holes to use, check the diagram in the Ring manual.
Step 5: Wire The Camera
This is the most important step. Take your time and double-check your connections.
- Connect the ground wire (green or bare copper) from the junction box to the green screw or wire on the bracket/camera.
- Connect the black (hot) wire from your house to the black wire on the camera.
- Connect the white (neutral) wire from your house to the white wire on the camera.
Twist wires together with a wire nut, making sure no copper is exposed. Wrap with electrical tape for extra safety.
If your wiring colors are different, look for markings or consult a professional.
Step 6: Attach The Camera
Once the wires are safely connected:
- Tuck the wires into the junction box.
- Align the camera’s base with the bracket and attach it using the provided screws.
- Make sure the seal is tight to keep out water.
Adjust the camera and floodlights so they point where you want. Don’t aim them directly at your neighbor’s property.
Step 7: Turn The Power Back On
Go to your breaker panel and turn the power back on. The camera’s lights should flash or turn on briefly, indicating power is flowing.
- If nothing happens, turn off the power and recheck your wiring.
Step 8: Setup In The Ring App
Open the Ring app on your smartphone.
- Tap “Set Up a Device” and choose “Security Cams.”
- Scan the QR code on your camera or in the box.
- Follow the on-screen instructions to connect the camera to your Wi-Fi network.
- Name your device (like “Driveway Camera”).
- Set your motion zones and preferences.
The app will walk you through a firmware update if needed.
Step 9: Test The Camera
Walk through the area to see if the motion detection works. Adjust the camera and lights if needed.
- Check the live video feed in the app.
- Test the two-way audio and the siren.
If something isn’t working, consult the troubleshooting steps in the app or the manual.
Wiring And Safety Tips
Many first-time installers worry about electrical work. Here are tips to make your project safer and less stressful.
- Always test wires before touching. Even if you turned off the breaker, use a tester to confirm.
- If your wiring colors are different or confusing, take a photo before removing your old fixture.
- Don’t force wires into small spaces—gently fold them.
- Make sure all wire nuts are tight, but don’t overtighten and break the wires.
- Use outdoor-rated electrical boxes and covers for weather protection.
If you see frayed wires, rust, or water damage, stop and call an electrician. Sometimes, safety means knowing when to ask for help.

Credit: www.ojopez.cl
Setting Up The Camera Features
Once your camera is powered and connected, you can customize its features in the app. Many beginners miss these options, leaving their camera less effective than it could be.
Adjusting Motion Zones
The Ring app lets you draw custom motion zones. This means you can choose exactly where the camera will detect movement—like only your driveway, not the street.
- Open the app and tap your camera.
- Select “Motion Settings” and “Edit Zones.”
- Draw boxes over the areas you want to monitor.
This reduces false alerts from passing cars or waving trees.
Setting Motion Sensitivity
You can adjust how sensitive the camera is to motion. If you get too many alerts, lower the sensitivity. If you miss events, increase it.
- In the app, go to “Motion Settings” > “Sensitivity.”
Scheduling Alerts
If you only want to receive alerts at certain times (for example, at night), set a motion schedule.
- Tap “Motion Schedule” in the app and choose your times.
Linking With Other Devices
If you have other Ring devices (like a doorbell), you can link them. For example, you can have your driveway camera start recording when your doorbell detects motion.
- In the app, go to “Linked Devices” to set this up.
Using Two-way Audio
To speak to someone through your camera:
- Open the live view in the app.
- Tap the microphone icon to talk.
This is helpful for talking to delivery people or warning intruders.
Troubleshooting Common Problems
Sometimes things don’t work perfectly the first time. Here are solutions to the most common problems people face with the Ring Floodlight Camera:
Weak Wi-fi Signal
If your video is choppy or the camera drops offline:
- Move your router closer, or install a Wi-Fi extender.
- Make sure your camera is on the 2.4 GHz network, not 5 GHz.
Camera Not Powering On
- Double-check your wiring connections.
- Make sure the breaker is fully ON.
- Test the outlet or junction box with another device, like a lamp.
Floodlights Won’t Turn On
- Check motion settings in the app—lights can be set to only come on at night.
- Make sure the bulbs are not damaged.
False Motion Alerts
- Redraw your motion zones to avoid trees, roads, or moving shadows.
- Lower the sensitivity in the app.
Poor Night Vision
- Clean the camera lens.
- Make sure there are no obstructions in front of the camera.
Firmware Or App Issues
- Restart your camera by turning power off and on.
- Update the Ring app.
- Reset the camera following the manual instructions if all else fails.
If you’re still stuck, Ring’s support at support.ring.com has detailed guides and live chat.

Credit: www.youtube.com
Comparing Ring Floodlight Camera To Other Security Cameras
Choosing the right camera can be confusing with so many options. Here’s a comparison of the Ring Floodlight Camera with some popular alternatives:
| Model | Power Source | Resolution | Floodlights | Siren | Audio | Price Range |
|---|---|---|---|---|---|---|
| Ring Floodlight Cam | Wired | 1080p | Yes | Yes | Two-way | $$$ |
| Arlo Pro 3 Floodlight | Battery | 2K | Yes | No | Two-way | $$$ |
| Google Nest Cam with Floodlight | Wired | 1080p | Yes | No | Two-way | $$$ |
| Traditional Security Light | Wired | N/A | Yes | No | No | $ |
Key insight: The Ring Floodlight Camera stands out for its built-in siren and tight integration with the Ring ecosystem.
Maintenance And Upkeep
Once installed, the Ring Floodlight Camera needs little maintenance, but a few simple habits will keep it working well.
Cleaning The Camera
- Wipe the lens gently with a soft, dry cloth every month.
- Do not use harsh chemicals or spray water directly on the camera.
Checking The Lights
- Floodlight LEDs last for years, but if one burns out early, contact Ring for a replacement.
- Check for spider webs or dirt around the lights, which can affect motion detection.
Updating Software
- The camera updates itself, but keep your Ring app updated on your phone.
- Check for new features or settings after big updates.
Testing Features
- Test motion detection and two-way audio every few months.
- If you notice a drop in video quality, check your Wi-Fi signal.
Practical Tips For A Smooth Installation
Many new users make small mistakes that are easy to avoid. Here are some practical tips from experience:
- Take a photo of your wiring before you disconnect the old light.
- Label wires with tape if you’re not sure which is which.
- Use a friend or family member to help—one person can hold the camera, the other can connect wires.
- Do the installation during the day for better visibility.
- If the camera wobbles, add a weatherproof gasket or check that the bracket is tight.
Non-obvious tip: Sometimes, bugs are attracted to the floodlights. If you notice insects causing false alerts, try adjusting the direction of the lights or adding a yellow bug light nearby.
Security And Privacy Considerations
Installing a smart camera means thinking about privacy and security, too.
Camera Placement
- Aim the camera only at your property—avoid pointing it at neighbor’s windows or private areas.
- Check local laws about video recording and privacy.
Securing Your Account
- Use a strong password for your Ring account.
- Enable two-factor authentication in the app.
- Review who has shared access to your camera.
Data Protection
- Videos are encrypted, but you can delete recordings at any time.
- You can choose to subscribe to Ring Protect for longer video storage.
When To Hire A Professional
While most people can install a Ring Floodlight Camera themselves, sometimes it’s better to hire an electrician:
- If you don’t have an existing outdoor light or junction box.
- If you’re not comfortable working with electrical wiring.
- If your breaker panel or wiring is old or confusing.
A professional can install the box, handle any wiring updates, and ensure everything is safe and up to code.
Real-world Examples And User Stories
Hearing from people who have installed a Ring Floodlight Camera can help you know what to expect.
- Homeowner in Texas: “I replaced my garage light in under an hour. The hardest part was getting up on the ladder. The camera works well even in heavy rain.”
- New parent in California: “The motion alerts give me peace of mind when I’m home alone with the baby. I caught a raccoon on video the first night!”
- Landlord in Florida: “I installed cameras on all my rental units. Tenants appreciate the extra security, and I get fewer complaints about break-ins.”
Surprising fact: Many people report a drop in package theft and trespassing just from having a visible Ring Floodlight Camera. Sometimes, the presence of the camera is enough to deter crime.
Frequently Asked Questions
How Hard Is It To Install A Ring Floodlight Camera Myself?
Most people can install it in about an hour if they are replacing an existing wired light. You need basic tools and should feel comfortable turning off power at the breaker. If you need to add new wiring or a junction box, it’s best to call an electrician.
Can The Ring Floodlight Camera Work With Alexa Or Other Smart Home Systems?
Yes, the camera works with Amazon Alexa. You can view the live feed on Echo Show devices and use voice commands. Integration with other systems like Google Home is limited, but Ring continues to add new features.
Is The Ring Floodlight Camera Weatherproof?
Yes, the camera is rated for outdoor use in rain, snow, and heat. It should be installed under an eave or on an exterior wall, using a weatherproof junction box for best results.
Does The Camera Record All The Time?
The camera records when it detects motion. If you subscribe to Ring Protect, those videos are saved so you can review them later. You can also view a live feed anytime through the app.
What Should I Do If My Wi-fi Signal Is Weak Where I Want To Install The Camera?
Try moving your router closer or using a Wi-Fi extender. The camera only works on 2. 4 GHz networks, which travel farther than 5 GHz. You can check Wi-Fi strength in the app during setup.
Installing a Ring Floodlight Camera is a smart way to boost your home security. With good preparation and a careful approach, you can have it up and running in an afternoon. If you follow these steps and tips, you’ll enjoy peace of mind, clear video recordings, and bright floodlights for years to come. For more details on wiring and electrical codes, check the National Electrical Code.