
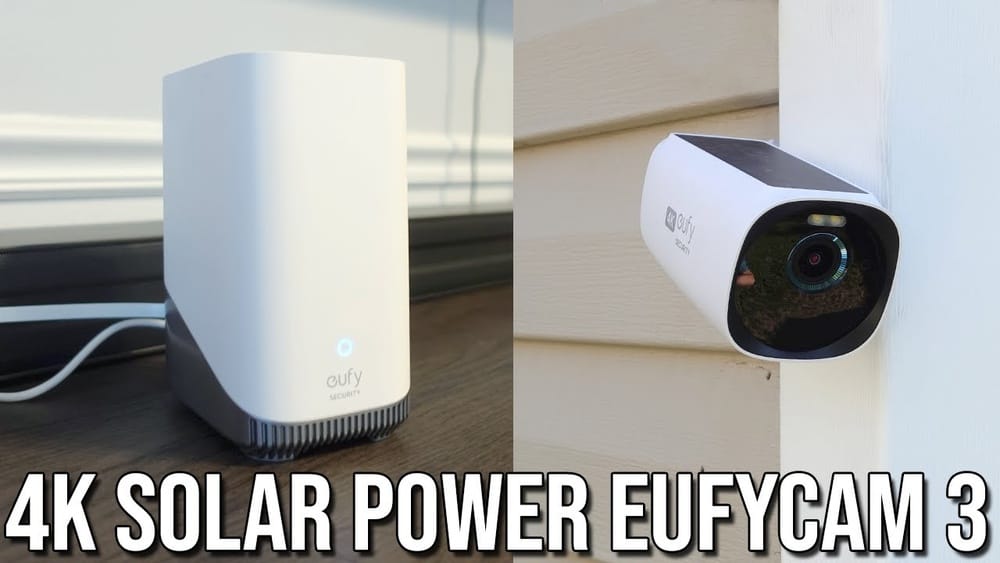
Getting started with a Eufy solar camera is easier than many people think, but a clear guide can save you hours and headaches. Whether you want to secure your home or keep an eye on your garden, installing a solar camera from Eufy combines convenience with reliable performance. Many beginners worry about wiring, Wi-Fi issues, or mounting problems, but most of these concerns can be solved with simple steps and a bit of preparation.
This guide will walk you through every stage of installation, from picking the best location to connecting your camera to the app. You’ll learn about the tools you need, how to avoid common mistakes, and ways to get the best performance from your solar-powered security camera.
Along the way, you’ll find helpful tables, real-life examples, and practical advice. Let’s make your Eufy solar camera work for you, step by step.
Understanding The Eufy Solar Camera
Before you start installation, it helps to know exactly what a Eufy solar camera is and why it’s different from regular security cameras. Eufy, a popular brand by Anker, offers smart home cameras that use solar panels to recharge their batteries. This means you don’t need to run power cables or change batteries often.
Key features of Eufy solar cameras:
- Solar-powered charging: Uses sunlight to keep the battery full.
- Wireless installation: No need for wired power or data connections.
- HD video quality: Usually 1080p or higher.
- Night vision: Clear images even in low light.
- Motion detection: Alerts you when something moves in the camera’s view.
- Smartphone app control: View footage and change settings from your phone.
Eufy Solar Camera Models
Eufy offers several models, but the installation steps are similar for most. Here’s a quick comparison of popular models:
| Model | Resolution | Battery Life | Solar Panel Included | Wi-Fi |
|---|---|---|---|---|
| EufyCam 2 Pro | 2K | Up to 12 months | Optional | Yes |
| EufyCam S40 | 2K | Solar-powered | Integrated | Yes |
| Eufy SoloCam S40 | 2K | Solar-powered | Integrated | Yes |
Most users pick the SoloCam S40 or EufyCam S40 for easy solar setup and reliable battery life.
Preparing For Installation
Good preparation makes the rest of the installation much smoother. You’ll need to gather a few tools and check your Wi-Fi signal.
Tools And Materials Needed
For a typical Eufy solar camera installation, you’ll need:
- Drill and drill bits
- Screwdriver
- Mounting screws (included with camera)
- Wall anchors (for concrete or brick)
- Ladder (if mounting high)
- Smartphone (for app setup)
- Measuring tape
Check the camera box for all parts. Most Eufy cameras include mounting brackets, screws, and a manual.
Checking Your Wi-fi Signal
A strong Wi-Fi signal is crucial. Solar cameras rely on wireless connections to send video and alerts. Use your phone to test the signal at the spot where you plan to install the camera. If the signal is weak, consider moving your router or using a Wi-Fi extender.
Tip: Download a Wi-Fi analyzer app. Look for at least 2 bars of signal at the installation spot.
Choosing The Right Location
Picking the right place for your camera is more important than many people realize. Here are three key points to consider:
- Sunlight exposure: Solar cameras need direct sunlight, ideally 3–6 hours daily.
- Field of view: Choose a spot with a clear view of the area you want to monitor.
- Height and angle: Mount the camera at least 7 feet off the ground, tilted slightly downwards.
Avoid locations with too much shade or obstructions like large trees. Also, make sure the camera is close enough to your Wi-Fi router.
Step-by-step Installation Guide
Now let’s walk through the full process to install your Eufy solar camera.
1. Unboxing And Inspecting Your Camera
Carefully open the box and check that all parts are included. You should see:
- Camera unit
- Solar panel (if separate)
- Mounting bracket
- Screws and anchors
- Quick start guide
Inspect the camera for any damage. If something is missing or broken, contact Eufy support.
2. Setting Up The Eufy App
Download the Eufy Security app from the App Store or Google Play. Create an account or log in if you already have one. The app is your main tool for connecting and controlling the camera.
Tip: Make sure your phone is connected to the same Wi-Fi network you plan to use for the camera.
3. Connecting The Camera To Wi-fi
Plug in the camera (if it needs to be charged first) and turn it on. Follow the app instructions:
- Press the sync button on the camera.
- Open the app and select “Add Device.”
- Choose your camera model.
- Scan the QR code on the camera or box.
- Enter your Wi-Fi network name and password.
Wait for the camera to connect. This usually takes less than 2 minutes. If it fails, move the camera closer to the router and try again.
4. Mounting The Camera
Once the camera is connected, pick your installation spot. Mark the holes for the mounting bracket using a pencil.
Mounting steps:
- Drill holes for the screws.
- Insert wall anchors if needed.
- Attach the bracket with screws.
- Snap the camera onto the bracket.
For solar panels that are separate, mount them nearby and angle them toward the sun.
Tip: Use the app’s live view to adjust the angle before tightening the screws.
5. Adjusting Solar Panel Placement
If your model has a separate solar panel, place it where it gets maximum sunlight. The panel connects to the camera with a cable. Make sure the cable is secured and not dangling.
Common mistake: Mounting the solar panel in shade or behind objects. Always check for clear sky above.
6. Finalizing Setup In The App
After mounting, return to the app and:
- Set motion detection zones.
- Adjust sensitivity.
- Choose notification settings.
- Enable recording options.
You can also set up smart alerts, like only sending notifications for people (not animals).
7. Testing Your Camera
Check the live view in the app. Walk around the camera’s field of view to test motion detection. If alerts don’t arrive or the video is blurry, adjust the angle or settings.
Tip: Record a short clip and review playback quality.
Practical Tips For Best Performance
Installing a Eufy solar camera is just the first step. Here’s how to get the most from your device:
- Clean the solar panel monthly: Dust and leaves can block sunlight.
- Update the firmware: Eufy releases updates to improve performance.
- Check battery status in the app: Make sure solar charging is working.
- Angle the camera away from direct sunlight: Too much sunlight on the lens can cause glare.
- Test notifications at different times: Morning and afternoon sunlight can affect detection.
Non-obvious insight: Many users don’t realize that Wi-Fi interference from microwaves or cordless phones can cause connection drops. Try to install the camera away from these devices.
Troubleshooting Common Problems
It’s normal to face some issues during or after installation. Here’s how to solve the most frequent problems:
Camera Won’t Connect To Wi-fi
- Check password: Make sure you enter the correct Wi-Fi password.
- Move closer to router: Weak signal is the most common cause.
- Restart router: Sometimes a simple restart fixes connection issues.
- Update app: Use the latest version for compatibility.
Solar Panel Not Charging
- Check cable: Make sure the panel cable is plugged in firmly.
- Clean panel: Dirt blocks sunlight.
- Move panel: If it’s in shade, relocate it.
Poor Video Quality
- Adjust angle: Sunlight glare can reduce clarity.
- Check Wi-Fi: Low bandwidth causes blurry video.
- Update camera firmware: New updates often improve quality.
Motion Detection Not Working
- Change sensitivity: Increase or decrease in the app.
- Set detection zones: Mark areas you want to monitor.
- Check for obstacles: Plants or decorations can block view.
Comparing Eufy Solar Cameras With Other Brands
It’s useful to see how Eufy solar cameras stack up against competitors. Here’s a quick comparison with other popular brands:
| Brand | Solar Charging | Battery Life | Video Quality | App Control | Price Range |
|---|---|---|---|---|---|
| Eufy | Integrated/Optional | 12 months or solar | 2K HD | Yes | $150–$250 |
| Arlo | Optional | 6 months | 2K/4K | Yes | $180–$350 |
| Reolink | Integrated | Solar | 1080p–4K | Yes | $120–$300 |
| Ring | Optional | 6–12 months | 1080p | Yes | $200–$350 |
Eufy is known for its long battery life, easy app setup, and strong privacy features. Unlike some brands, Eufy often does not require a monthly subscription for cloud storage, which saves money over time.

Credit: service.eufy.com
Security And Privacy Considerations
Smart cameras can raise privacy concerns. Eufy cameras are designed with local storage and end-to-end encryption, which means your video stays private. Still, there are a few steps you can take to protect your data:
- Change default passwords: Use strong, unique passwords.
- Enable two-factor authentication: Adds extra security in the app.
- Update firmware regularly: Prevents hacking.
- Check privacy zones: Mask areas you don’t want to record (like neighbor’s property).
Example: If your camera faces a street, you can use privacy masking to block out the road, so only your yard is monitored.
Weatherproofing And Maintenance
Eufy solar cameras are built for outdoor use, but extra care can help them last longer.
Weather Resistance Ratings
Most Eufy solar cameras have IP65 or IP67 ratings, which mean they can handle rain and dust. However, extreme weather can affect performance.
Tip: Check the camera’s rating in the manual before installation.
Maintenance Checklist
- Clean lens and solar panel every month.
- Inspect mounting bracket for rust or loose screws.
- Update app and firmware every 2–3 months.
- Check battery status at least once a week, especially in winter.
Non-obvious insight: Cold weather reduces battery efficiency. If you live in a cold climate, place the solar panel at a steeper angle to maximize winter sunlight.
Smart Features And Advanced Settings
Eufy solar cameras offer more than just video recording. Here are some advanced features you can use:
- Two-way audio: Speak to visitors through the app.
- Spotlight and siren: Turn on lights or alarm to scare off intruders.
- Cloud and local storage: Choose between SD card or cloud backup.
- AI detection: Only alerts you for people, not animals or cars.
Setting Up Smart Features
In the app, go to “Device Settings” and explore:
- Audio settings: Test microphone and speaker.
- Spotlight control: Set automatic or manual.
- Siren activation: Schedule or trigger remotely.
Common mistake: Forgetting to enable two-way audio. Many users miss out on this feature.
Real-life Example: Installing A Eufy Solar Camera In A Suburban Home
Let’s look at how a typical user, Mark, installed his Eufy SoloCam S40.
Mark wanted to watch his driveway and front porch. He chose a spot above his garage, which gets sunlight most of the day. He used a ladder and drill to mount the camera bracket, then attached the camera. Using the app, he connected the camera to his home Wi-Fi and set up motion zones for his porch and driveway.
After a week, Mark noticed the battery stayed full thanks to solar charging. He adjusted the camera angle to reduce glare in the morning. Mark also enabled two-way audio, so he could speak to delivery people. He set privacy zones to avoid recording his neighbor’s house.
Mark’s advice: “Test the camera’s live view before you drill. Also, clean the solar panel every month—dust builds up faster than you think.”

Credit: www.youtube.com
Data And Performance Statistics
Eufy solar cameras have good performance in most conditions, but actual data helps set expectations.
Battery life: Most models last 12 months on a full charge, but with solar charging, they can run indefinitely in sunny climates.
Detection range: Motion sensors typically work up to 26–30 feet.
Video storage: SD cards up to 128GB store about 20–30 days of video, depending on settings.
Solar panel efficiency: Average charging rate is 4–5 hours of sunlight per day for full battery maintenance.
Upgrading Or Expanding Your Eufy System
If you want more coverage, you can add extra cameras or accessories.
Adding More Cameras
The Eufy app lets you add multiple cameras. Each camera connects separately to Wi-Fi. For bigger properties, consider a mesh Wi-Fi system.
Using Eufy Homebase
Some models work with Eufy HomeBase, a central hub for managing cameras. HomeBase adds more storage and easier controls for multiple devices.
Integrating With Smart Home Systems
Eufy cameras can be linked with Amazon Alexa or Google Assistant. This lets you view footage on smart displays or use voice commands.
Tip: Enable integration in the app under “Smart Home Settings.”
When To Call Professional Help
Most installations are easy for DIY users, but you might need a professional if:
- You have a tall building or difficult mounting spot.
- Your Wi-Fi is weak and needs advanced setup.
- You want to install several cameras with a central hub.
Hiring a pro costs $100–$200 per camera, but ensures safe and secure installation.
Environmental Impact And Sustainability
Solar cameras are more eco-friendly than wired models. They reduce electricity use and can lower your carbon footprint.
Fact: A single Eufy solar camera saves about 15–20 kWh of electricity per year compared to a wired camera.
Tip: When upgrading, recycle old batteries and electronics according to local rules.
Comparing Wired Vs. Solar Cameras
You might wonder if solar is better than traditional wired cameras. Here’s a quick side-by-side:
| Feature | Solar Camera | Wired Camera |
|---|---|---|
| Power Source | Solar/Battery | Direct Electric |
| Installation | Easy, no wires | Complex, needs wiring |
| Maintenance | Clean panel, check battery | Check power supply |
| Eco-Friendly | Yes | No |
| Price | $150–$250 | $100–$300 |
| Flexibility | Can move easily | Fixed, hard to move |
Solar cameras are easier for most users, especially renters or people who want flexible installation.
Warranty And Support
Eufy offers a 1-year warranty on most solar cameras. If you face problems, you can:
- Contact Eufy support via their website or app.
- Use online chat for quick answers.
- Access manuals and troubleshooting guides.
If your camera fails within the warranty, Eufy usually replaces it free of charge.

Credit: www.eufy.com
Frequently Asked Questions
How Long Does The Eufy Solar Camera Battery Last?
Most Eufy solar cameras last up to 12 months on a full charge. With good sunlight, the battery can stay full indefinitely. Battery life depends on how often the camera records and local weather conditions.
Can I Install A Eufy Solar Camera Indoors?
Eufy solar cameras are designed for outdoor use, but you can use them indoors if there’s enough light for the solar panel. However, it’s more efficient outdoors where sunlight is stronger.
What Happens During Cloudy Days Or Winter?
Solar cameras will still work during cloudy days or winter, but charging may be slower. If sunlight is limited, the battery will drain faster. In areas with long winters, you may need to recharge the camera manually.
Is It Possible To Connect Eufy Cameras To Smart Home Systems?
Yes, Eufy solar cameras can connect to Amazon Alexa and Google Assistant. This lets you control the camera with voice commands and view footage on smart displays.
Where Can I Find Official Installation Guides Or Support?
You can visit the Eufy Support Center for official guides, troubleshooting, and warranty help.
Installing a Eufy solar camera is a smart choice for easy, reliable home security. With careful preparation and attention to sunlight and Wi-Fi, most users can finish installation in under an hour. Remember to clean the solar panel, update your app, and check battery status regularly.
Use advanced features for extra security, and don’t hesitate to ask for help if needed. With your new solar camera, you’ll enjoy peace of mind and sustainable security for years to come.