
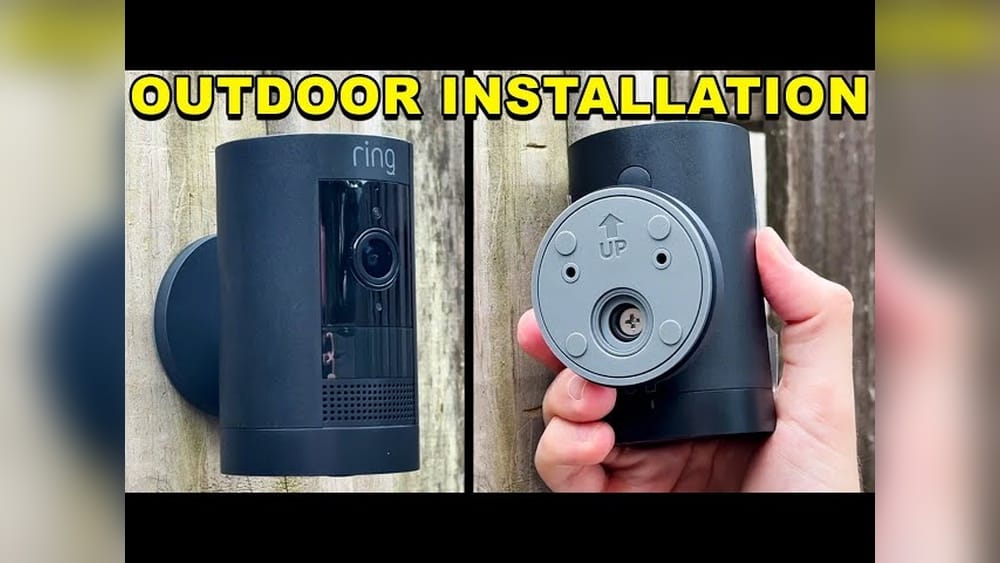
Installing a Ring Camera Outdoor can change the way you protect your home. You get to see visitors, deliveries, or any activity at your doorstep—even when you’re far away. Many people feel nervous about installing a smart camera outside, but the process is easier than you might think. With the right approach and some preparation, you can do it yourself, even if you’re not tech-savvy. This guide will help you from start to finish, making sure you avoid common mistakes and get the most from your investment.
Why Choose A Ring Outdoor Camera?
Ring Outdoor Cameras are popular for several reasons. They offer real-time video, motion detection, night vision, and two-way audio. These features make it easy to see and talk to anyone near your home. You can check on your property any time using your smartphone or computer.
Besides peace of mind, a visible outdoor camera can deter theft. According to the FBI’s Uniform Crime Reporting Program, homes without security are up to 300% more likely to be burglarized. With affordable options and simple installation, it’s no wonder more homeowners are choosing Ring.
Understanding Your Ring Outdoor Camera Options
Ring offers several outdoor camera models. Choosing the right one is important because each has different features, power needs, and price points. Here’s a quick comparison to help you decide:
| Model | Power Source | Resolution | Field of View | Price Range (USD) |
|---|---|---|---|---|
| Ring Stick Up Cam (Battery) | Battery | 1080p HD | 130° | $100–$130 |
| Ring Spotlight Cam | Battery/Plug-in/Hardwired | 1080p HD | 140° | $150–$200 |
| Ring Floodlight Cam | Hardwired | 1080p HD | 140° | $200–$250 |
| Ring Stick Up Cam (Wired) | Plug-in/PoE | 1080p HD | 130° | $100–$130 |
Key Considerations
- Power Source: Do you have an outdoor outlet? If not, a battery model may be better.
- Lighting: Floodlight models offer extra security lighting.
- Weather Resistance: All Ring Outdoor Cameras are designed for rain, snow, and heat.
- Budget: Prices vary, but entry-level models give strong basic protection.
Tools And Materials Needed
Before you start, gather these items:
- Ring Outdoor Camera (with included mounting hardware)
- Screwdriver (usually Phillips head)
- Drill with drill bits (for harder surfaces like brick, stucco, or concrete)
- Level (for straight installation)
- Tape measure
- Pencil or marker (for marking holes)
- Ladder (if mounting high up)
- Outdoor-rated extension cord (if using a plug-in model and no nearby outlet)
- Smartphone (for Ring app setup)
- Wi-Fi network (2.4 GHz recommended for better range)
Most Ring cameras include screws, anchors, and a simple user manual. Check the box before starting.
Picking The Best Location
Placement is key for maximum security and camera performance. Here’s what you should look for:
- Height: Install your camera 7–9 feet above the ground. This gives a wide view but is hard to tamper with.
- Angle: Point the camera slightly downward. Cover entry points like doors, driveways, or gates.
- Wi-Fi Signal: Check for a strong Wi-Fi signal at your chosen spot. Weak signal means laggy video.
- Power Access: For plug-in or wired cameras, make sure an outlet or power source is nearby.
- Lighting: Avoid pointing directly at bright lights or the sun, which can cause glare.
- Obstructions: Keep the view clear of tree branches, decorations, or walls.
Non-obvious tip: If you have motion-activated lights, position the camera so the lights don’t shine directly into the lens at night. This keeps your video clear.
Preparing For Installation
A little planning avoids big headaches later. Take these steps before drilling:
- Charge the Battery: For battery models, fully charge the battery using the supplied USB cable. It usually takes 5–10 hours.
- Test Wi-Fi: Bring your phone to the spot and check Wi-Fi strength. If you get slow speeds, consider a Wi-Fi extender.
- Download the Ring App: Available on iOS and Android. Register or sign in.
- Gather Your Tools: Place them within reach before climbing ladders.
Pro insight: Temporarily mount the camera with tape to preview the camera angle. Adjust until you’re happy, then mark your holes.
Step-by-step Installation Guide
Let’s break down the process for each power type. Most steps are similar, but power connection and weatherproofing differ.
Installing A Battery-powered Ring Outdoor Camera
- Remove the Battery: Slide open the battery compartment and insert the fully charged battery.
- Set Up in the App: Open the Ring app, tap “Set Up a Device,” and follow instructions. Scan the QR code on your camera.
- Choose Mounting Location: Use your phone as a live viewfinder through the app. Mark the screw holes.
- Drill Holes: If mounting on wood, you may not need anchors. For masonry or stucco, use a drill with the supplied anchors.
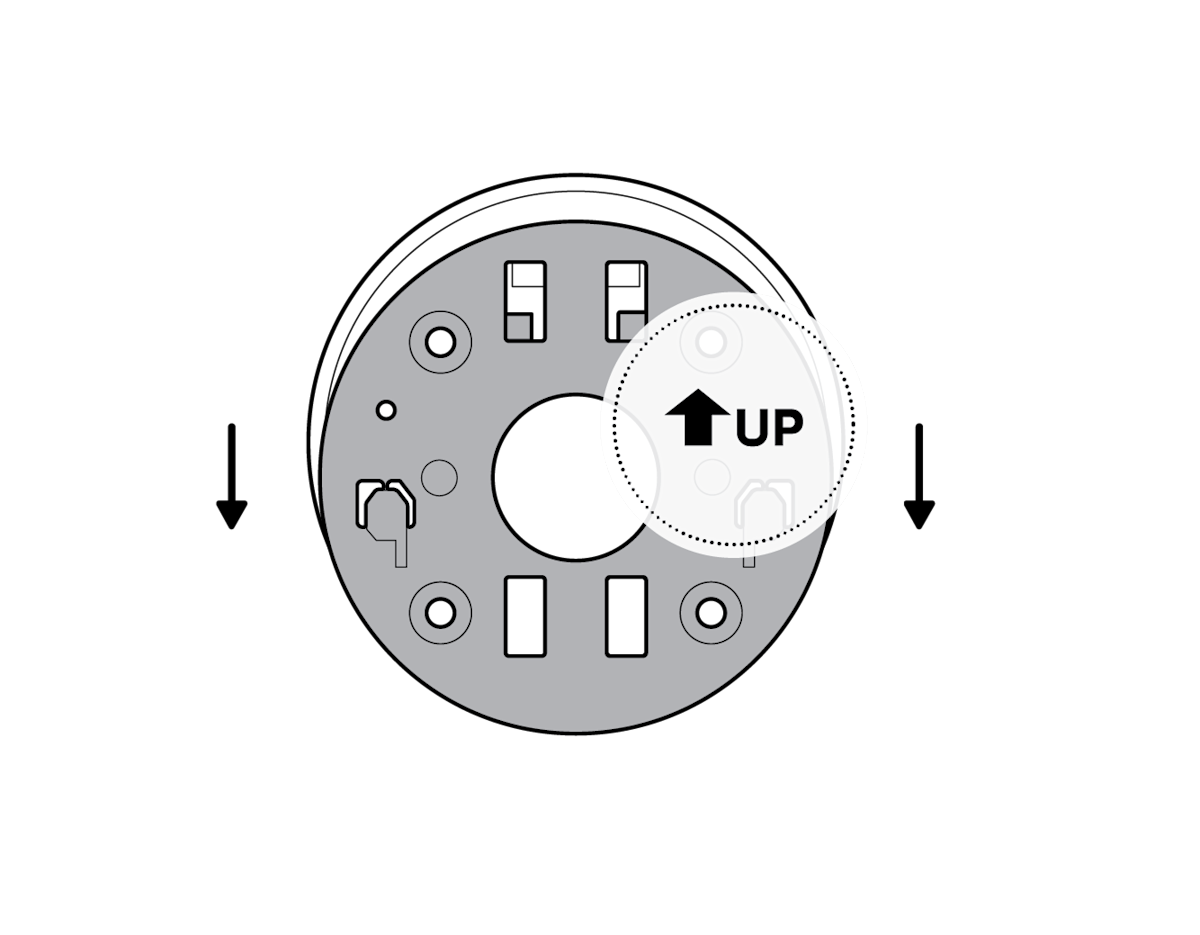
- Attach Mounting Bracket: Screw the bracket to the wall. Use a level for straight alignment.
- Mount the Camera: Slide or snap the camera onto the bracket.
- Test Live Video: Use the app to check the camera view. Adjust as needed.
Installing A Plug-in Or Wired Ring Camera
- Plan Power Route: Decide how to route the power cable. Avoid pinching the cord in windows or doors.
- Install Mounting Bracket: Mark and drill holes as above.
- Feed Power Cable: Plug in the camera, or connect the wires if hardwiring (turn off electricity first! ).
- Weatherproof the Connection: Use weatherproof covers for outdoor outlets.
- Mount the Camera: Attach it to the bracket.
- Connect in App: The setup process is similar—scan the QR code and join your Wi-Fi.
- Test Everything: Check video, sound, and motion alerts.
Installing A Floodlight Cam (hardwired)
This model is more advanced and replaces an existing outdoor light. If you’re not familiar with wiring, consider hiring an electrician.
- Turn Off Power: Switch off the breaker to your outdoor light.
- Remove Old Fixture: Take down your old light, exposing the wiring.
- Install Mounting Plate: Attach the supplied plate to your junction box.
- Connect Wires: Usually black (hot), white (neutral), and green (ground). Match colors and twist wire nuts securely.
- Attach the Camera: Secure the camera and floodlight to the plate.
- Restore Power: Turn the breaker back on.
- Set Up in the App: Scan, connect, and test.
Non-obvious tip: If your Wi-Fi router is far from the installation point, mount your camera closer, or use a Wi-Fi extender for best performance.
Setting Up Your Camera In The Ring App
The Ring app is the control center for your camera. Here’s how to get started:
- Download and Open: Find the app on the App Store or Google Play.
- Create or Log In: Use your email and a strong password.
- Add a Device: Tap “Set Up a Device,” choose “Security Cams,” and scan the QR code.
- Connect to Wi-Fi: Enter your Wi-Fi password. 2.4 GHz networks give better range than 5 GHz.
- Name Your Camera: Use a clear name like “Front Door” or “Driveway.”
- Test the Video: Check live view and talk features.
- Customize Settings: Adjust motion zones, alerts, and video quality.
Adjusting Camera Settings For Best Performance
After installation, fine-tune your camera for top results.
- Motion Zones: Set areas where you want alerts. Ignore busy streets to avoid false alarms.
- Motion Sensitivity: Increase for wide areas, decrease if you get too many alerts.
- Scheduling: Set times for alerts, like nighttime only.
- Shared Users: Let family see the camera or get alerts.
- Privacy Zones: Block out areas (like neighbors’ windows) for privacy.
Pro tip: Check video at different times—day, night, and bad weather. Adjust angle and settings as needed.
Integrating With Other Devices
Ring cameras can work with other smart devices for even better security.
- Alexa Integration: View live video on Echo Show or Fire TV.
- Ring Alarm System: Connect for all-in-one security.
- Smart Lights: Set lights to turn on with motion.
- Third-Party Apps: Some work with Google Home and IFTTT.
This integration makes your camera part of a smart home system.
Common Installation Mistakes To Avoid
Even simple setups can go wrong. Avoid these errors:
- Mounting Too High or Low: 7–9 feet is ideal.
- Ignoring Wi-Fi Strength: Weak signal means poor video.
- Skipping Weatherproofing: Use covers and seal cable entry points.
- Pointing at Sun or Lights: Causes glare and poor night vision.
- Not Testing Before Final Mounting: Always check the view and alerts.
Uncommon mistake: Some users forget to update their app or camera firmware, missing new features and security updates. Check for updates often.
Maintaining Your Ring Outdoor Camera
Outdoor cameras face sun, rain, and dust. Keep yours working smoothly:
- Clean the Lens: Wipe with a soft cloth every few months.
- Check Battery: Recharge every 3–6 months (or use solar panel accessory).
- Inspect Mounts: Make sure the camera is still tight and secure.
- Update Software: Regularly update the app and firmware.
- Test Alerts: Send test notifications to make sure you’re always connected.
Tip: If you get a lot of bugs or spiders on the lens, use a small dab of insect repellent on a cloth (not the lens) around the mounting area.
Comparing Ring Outdoor Camera Models
Choosing the best model for your needs can be confusing. Here’s a quick side-by-side to help:
| Feature | Stick Up Cam (Battery) | Spotlight Cam (Battery) | Floodlight Cam |
|---|---|---|---|
| Power | Battery | Battery/Plug-in | Hardwired |
| Lights | No | Yes | Ultra-bright Floodlights |
| Sirens | No | Yes | Yes |
| Best For | Flexible spots | Entryways, yards | Driveways, wide areas |
| Weatherproof | Yes | Yes | Yes |
Insight: Floodlight Cam is best for lighting up and protecting large areas. Stick Up Cam is easier for renters or places without wiring.
Privacy, Security, And Data Safety
Security cameras protect your home, but you should also protect your privacy:
- Password: Use a strong, unique password for your Ring account.
- Two-Factor Authentication: Turn it on for extra safety.
- Share Video Carefully: Only share clips with trusted people.
- Firmware Updates: Keep your device updated to fix bugs and add security patches.
Data fact: All video is encrypted and stored in the cloud. You can download clips or delete them at any time.
Troubleshooting Common Problems
Sometimes things don’t work as expected. Here’s how to solve common issues:
Camera Won’t Connect To Wi-fi
- Move your router closer or use a Wi-Fi extender.
- Check your password is correct.
- Restart your router and camera.
Poor Video Quality
- Clean the lens.
- Check for strong Wi-Fi at the camera location.
- Avoid pointing at bright lights.
Battery Drains Quickly
- Reduce motion alerts or recording time.
- Use a solar panel or plug-in model for heavy use.
Missed Motion Alerts
- Expand your motion zone.
- Increase motion sensitivity.
- Check notification settings on your phone.
Expert tip: If your camera keeps disconnecting, try changing your Wi-Fi channel or get a mesh network for better coverage.
Credit: ring.com
Costs And Subscriptions
Buying the camera is a one-time cost, but Ring offers extra features with a subscription called Ring Protect. It’s not required, but adds value.
| Plan | Video Recording | Review Period | Price (USD) |
|---|---|---|---|
| Free | No | — | $0 |
| Ring Protect Basic | Yes (1 device) | Up to 180 days | $3.99/mo |
| Ring Protect Plus | Yes (all devices) | Up to 180 days | $10.00/mo |
With a plan, you can save, share, and download video clips. Without a plan, you only get live view and notifications.
Special Tips For Different Home Types
Renters
- Use battery-powered models to avoid drilling.
- Mount with removable hooks or adhesive brackets.
- Check lease rules before installing.
Homeowners
- Hardwire for always-on power and lighting.
- Combine with smart locks, alarms, and sensors.
Businesses
- Use multiple cameras for wide coverage.
- Set up user roles for staff.
- Monitor from anywhere via app.
Outdoor Camera Legal And Ethical Considerations
Installing cameras brings responsibility. Respect privacy and local laws:
- Do Not Point at Neighbors: Aim only at your property.
- Check Local Laws: Some places need signs or permission.
- Audio Recording: Rules differ by state—know the laws.
- Post Signage: Let visitors know you have video surveillance.
For more on privacy laws, see this guide from the Federal Trade Commission.
Weatherproofing And Longevity
Ring cameras are built for the outdoors, but extra steps help them last longer:
- Seal Holes: Use silicone caulk around holes and cable entry points.
- Use Weatherproof Covers: For outlets and plugs.
- Regular Checks: Inspect for cracks, rust, or loose wires.
- Protect from Direct Rain: Under an eave or overhang is best.
Insight: If you live in a cold climate, check your camera’s operating temperature. Most work down to -5°F, but extreme cold can slow batteries.

Credit: www.youtube.com
Smart Home Integration Benefits
A Ring camera is just the start. Connect with other devices for even more control:
- Voice Control: Ask Alexa to show the camera feed.
- Automations: Turn on lights or lock doors when motion is detected.
- Security System: Build a complete home security setup.
This makes monitoring easier and more powerful.
Upgrading And Expanding Your System
Start with one camera, but you can add more as needed:
- Multiple Cameras: Cover all sides of your home.
- Video Doorbell: Add to your front entrance.
- Solar Panels: Reduce battery charging.
- Chimes: Get alerts indoors without a phone.
Pro tip: Plan your camera locations for future expansion—think about blind spots and power needs.
Credit: ring.com
Frequently Asked Questions
How Long Does Installation Take?
Most installations take 30–60 minutes. Battery models are fastest. Hardwired cameras take longer, especially if you need to replace a light fixture or drill into masonry.
Can Ring Cameras Work Without A Subscription?
Yes. You get live video, two-way talk, and motion alerts for free. A subscription adds video recording, sharing, and longer storage.
How Weatherproof Are Ring Outdoor Cameras?
All outdoor models are weather-resistant and work in rain, snow, and heat. Use weatherproof covers for plugs and seal holes for best results.
How Do I Improve Wi-fi For My Camera?
Place your router as close as possible or use a Wi-Fi extender. Avoid thick walls or metal barriers between the router and camera.
Do Ring Cameras Have Night Vision?
Yes. All Ring Outdoor Cameras use infrared LEDs for clear video in the dark. Adjust angles to avoid glare from windows or lights.
Installing a Ring Camera Outdoor is a smart step to protect your home and loved ones. By choosing the right model, planning your installation, and using the tips above, you’ll enjoy better security and peace of mind. Regular maintenance and smart integration can make your home even safer. With a little time and care, anyone can set up a professional-quality outdoor camera system.