
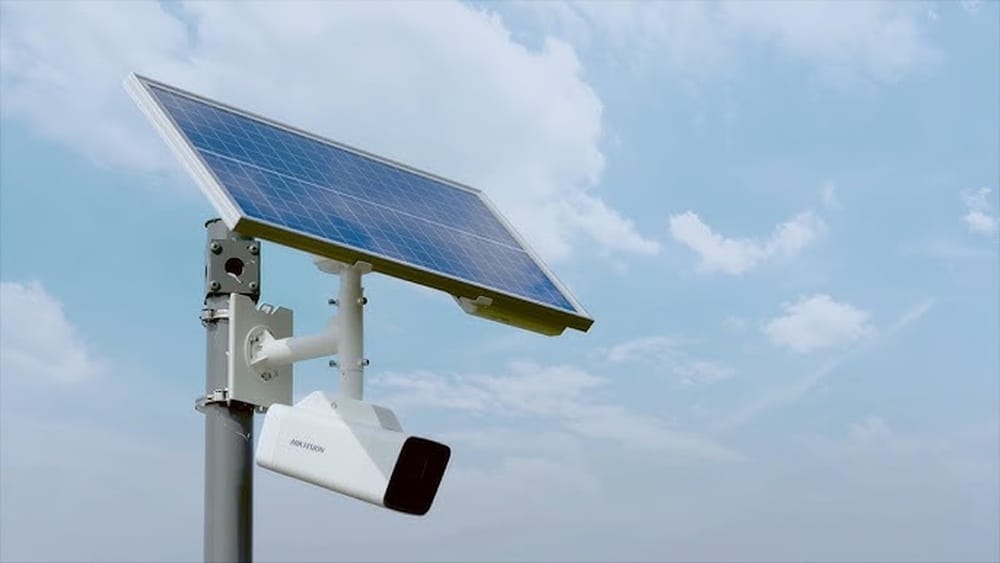
Installing a solar security camera is one of the smartest ways to protect your property while saving on electricity bills. These cameras are powered by sunlight, making them ideal for places where wiring is difficult or expensive. Whether you want to secure your home, business, or remote area, a solar security camera offers flexibility and reliability.
This guide will walk you through every step, from choosing the right camera to mounting it and troubleshooting common issues. With practical advice, real-world examples, and simple instructions, you’ll gain the confidence to complete the installation yourself—even if it’s your first time.
Understanding Solar Security Cameras
Solar security cameras are wireless surveillance devices powered by solar panels. They store energy in batteries, allowing them to operate day and night. Unlike traditional cameras, they don’t require external power sources or complex wiring. Most models connect to Wi-Fi, letting you view footage from your smartphone or computer.
How They Work
A solar panel collects sunlight and converts it into electricity. This electricity charges a rechargeable battery inside the camera. When sunlight is low or at night, the battery powers the camera. Modern cameras use efficient panels and batteries, so they can record even in cloudy weather.
Key Features
- HD video quality (typically 1080p or higher)
- Motion detection to trigger recording
- Night vision for 24/7 monitoring
- Cloud or local storage options
- Two-way audio in some models
- Weatherproof housing for outdoor use
Popular Use Cases
- Farms, gardens, or remote cabins
- Parking lots and garages
- Construction sites
- Outdoor entrances or gates
Solar cameras solve the problem of wiring in hard-to-reach places. They’re also eco-friendly, using renewable energy.
Choosing The Right Solar Security Camera
Picking the best camera is essential for a smooth installation and reliable performance. There are many brands and models, so consider these factors before buying.
Camera Comparison Table
Here’s a quick look at three popular options:
| Model | Resolution | Battery Life | Wi-Fi Range | Price (USD) |
|---|---|---|---|---|
| Reolink Argus 3 Pro | 2K | Up to 6 months | 250 ft | $120 |
| Arlo Go 2 | 1080p | Up to 4 months | 200 ft | $199 |
| Soliom S600 | 1080p | Up to 8 months | 300 ft | $129 |
Important Factors
- Resolution: Higher resolution gives clearer images. For most homes, 1080p is enough. For larger properties, consider 2K or 4K.
- Battery Capacity: Choose a camera with a battery that lasts at least a few weeks on a full charge. Larger batteries mean less frequent charging.
- Solar Panel Size: Bigger panels collect more sunlight, but may be harder to mount.
- Wi-Fi Range: Make sure your camera can connect to your network from its location.
- Weatherproof Rating: Look for IP65 or higher, which means protection from rain and dust.
- Storage: Decide if you want cloud storage (easy but may have monthly fees) or SD card (local and free).
- Audio Features: Some cameras allow you to listen and speak remotely.
Common Mistakes
- Ignoring battery life: If your camera’s battery is too small, it may stop working during cloudy days.
- Overlooking Wi-Fi signal: Placing cameras out of Wi-Fi range can cause video interruptions.
- Choosing cameras without proper weatherproofing: Regular cameras may fail outdoors.

Credit: www.cooau.com
Preparing For Installation
Preparation is key to a smooth installation. Gather your tools and plan before starting.
Tools And Materials Needed
- Solar security camera kit (with solar panel, battery, mount, and cables)
- Drill and drill bits
- Screwdriver
- Measuring tape
- Level (bubble or digital)
- Ladder (for high placements)
- Screws and wall anchors (usually included)
- Smartphone for setup and app installation
Checking The Site
- Check for direct sunlight. The solar panel must get at least 4-6 hours of sunlight daily.
- Avoid placing panels under trees, roofs, or anything that blocks the sun.
- Test Wi-Fi strength at the chosen location. Use your phone to check signal bars.
- Identify potential camera angles: Entrances, driveways, or areas with valuables.
Safety Precautions
- Use a sturdy ladder and gloves when working at heights.
- Turn off electrical circuits near the installation area.
- Wear safety glasses when drilling.
Installing The Solar Panel
The solar panel is the heart of your camera system. Proper placement ensures reliable power.
Step-by-step Solar Panel Installation
- Choose a sunny spot: South-facing walls or roofs are best. In the US, south gets the most sunlight.
- Mark the mounting holes: Use the bracket as a template. Mark spots with a pencil.
- Drill holes: Use the correct drill bit for your wall type (wood, brick, or concrete).
- Insert wall anchors: These help secure screws in soft materials.
- Attach the bracket: Screw the bracket tightly into place.
- Mount the solar panel: Slide or screw the panel onto the bracket.
- Adjust the angle: Tilt the panel for maximum sun exposure. Usually, a 30–45-degree tilt works well.
- Run the cable: Connect the panel to the camera using the provided cable. Avoid sharp bends or pinching.
- Secure loose wires: Use cable clips to keep wires neat and safe.
Practical Tips
- Clean the panel regularly. Dust or leaves can block sunlight and reduce charging.
- Leave room for future adjustments. Some panels can swivel or tilt after installation.
- If possible, install panels higher to avoid tampering.
Mounting The Security Camera
Proper placement gives you the best view and coverage.
Step-by-step Camera Mounting
- Find the right angle: Place the camera so it covers the main area you want to monitor.
- Mark holes for the camera mount: Use a pencil and the mounting plate.
- Drill holes: Match the drill bit to the wall type.
- Insert anchors: Only needed for drywall, brick, or concrete.
- Attach the mount: Screw the plate into place.
- Fix the camera: Attach the camera to the mount. Some cameras twist or snap into place.
- Adjust the field of view: Tilt and swivel the camera to cover entrances, driveways, or walkways.
- Connect the solar cable: Plug the camera into the solar panel.
- Check for obstructions: Make sure nothing blocks the lens or infrared sensors.
Mounting Height Table
Here’s a guide for ideal mounting heights:
| Location | Recommended Height | Reason |
|---|---|---|
| Main entrance | 7–9 feet | Clear face view |
| Driveway | 9–12 feet | Wide coverage |
| Backyard | 8–10 feet | Prevent tampering |
Hidden Insights
- Mounting too high can reduce detail in faces. Aim for a height that’s out of reach but not too high to lose clarity.
- Avoid pointing cameras directly at windows or light sources. This can cause glare and make footage hard to see.
Connecting To Wi-fi And Power
Once your camera is physically installed, it’s time for setup.
Wi-fi Setup Steps
- Download the camera app: Most brands have a free app for iOS and Android.
- Create an account: Register with your email.
- Power on the camera: Use the on/off button or connect the battery.
- Follow app instructions: The app will guide you through connecting the camera to Wi-Fi.
- Select your network: Choose your home Wi-Fi and enter the password.
- Wait for connection: The camera usually flashes a light when connected.
- Test video feed: Open the app and check live footage.
Common Wi-fi Problems
- Weak signal: Move your router closer or use a Wi-Fi extender.
- Wrong password: Double-check spelling and capitalization.
- Compatibility: Some cameras work only with 2.4 GHz Wi-Fi. If your router uses 5 GHz, switch to 2.4 GHz for setup.
Power And Charging
- The camera starts charging as soon as the solar panel gets sunlight.
- For first-time setup, fully charge the battery using a USB cable if possible.
- Monitor battery status in the app. Most apps show battery levels.

Credit: www.amazon.com
Configuring Camera Settings
Adjusting your camera settings helps you get the best performance.
Basic Settings
- Motion sensitivity: Increase for busy areas, decrease for quiet places.
- Recording mode: Choose between continuous or motion-triggered recording.
- Notification preferences: Set up alerts for movement, sound, or low battery.
- Storage options: Pick SD card or cloud storage.
Advanced Features
- Activity zones: Define areas to monitor, like front doors or walkways. Ignore places like streets to avoid false alerts.
- Night vision: Turn on infrared mode for low-light recording.
- Two-way audio: If your camera supports it, test the microphone and speaker.
Example: Adjusting Motion Detection
If you mount your camera near a busy road, reduce motion sensitivity to prevent unnecessary recordings. For a quiet backyard, raise sensitivity to catch every movement.
Useful Insight
Many users forget to update firmware. Check for updates in the app. Firmware upgrades fix bugs and improve performance.
Testing And Troubleshooting
Testing your camera ensures it works as expected. If you face problems, follow these steps.
Testing Steps
- Check video quality: Walk in front of the camera and view the footage on your phone.
- Test motion detection: Move around the monitored area and see if the app sends alerts.
- Try night vision: Test the camera after dark.
- Check battery charging: Monitor battery levels during sunny and cloudy days.
- Test audio (if available): Speak through the app and listen for clear sound.
Troubleshooting Table
Below are common issues and solutions:
| Problem | Possible Cause | Solution |
|---|---|---|
| No video feed | Wi-Fi disconnected | Reconnect to Wi-Fi |
| Battery drains fast | Poor sunlight | Move solar panel to sunnier spot |
| False motion alerts | Too much sensitivity | Lower motion sensitivity |
| Blurry images | Dirty lens | Clean camera lens |
| Camera won’t charge | Damaged cable | Replace cable |
Hidden Insight
- Sometimes, the camera fails to record at night because the battery is drained. If this happens, check for shade or adjust the solar panel tilt.
- After storms or heavy rain, check mounts and cables for damage. Water can affect performance if seals are broken.
Maintaining Your Solar Security Camera
Regular maintenance keeps your camera working well for years.
Cleaning And Care
- Clean the solar panel every 2–3 months. Use a soft cloth and water.
- Check mounts and brackets for rust or looseness.
- Inspect cables for wear or animal bites.
Battery Management
- Recharge batteries manually during long periods of cloudiness.
- Replace batteries every 2–3 years if performance drops.
Firmware Updates
- Install updates through the app. Updates often add new features or fix bugs.
Seasonal Checks
- In winter, snow or ice may cover the solar panel. Brush off snow regularly.
- In hot climates, check for overheating. Some panels can warp in extreme heat.
Real-world Example: Installing A Solar Camera On A Farm
Let’s look at an example from a farm owner in Texas. They installed a Reolink Argus 3 Pro to monitor their barn, which is far from any power outlet.
- The owner placed the solar panel on a south-facing wall, avoiding shade from nearby trees.
- The camera was mounted 9 feet above the ground, covering the main entrance.
- Wi-Fi signal was boosted with a Wi-Fi extender placed inside the barn.
- After setup, the app showed strong battery levels even during cloudy weeks.
- The camera caught several incidents of wildlife approaching the barn, proving the value of motion detection.
This example shows the importance of sunlight, proper mounting height, and strong Wi-Fi. It also highlights the need for regular checks after storms.
Extra Tips For Beginners
- Before drilling, double-check your measurements. Mistakes can leave ugly holes in walls.
- If you’re unsure about Wi-Fi strength, use a signal tester app on your phone.
- For homes with high fences, consider mounting cameras on fence posts for wider coverage.
- Use camera stickers or signs to deter intruders. Many burglars avoid homes with visible security.
Comparing Solar Security Camera Installation To Wired Cameras
Solar cameras are easier and faster to install compared to wired systems.
- No need for electrical wiring
- Lower installation cost (average $0–$50, vs $200+ for wired)
- Can be installed in remote locations
- Minimal maintenance
Wired cameras require professional installation, power outlets, and regular checks for cable wear.
Saving Money And Energy
Solar security cameras save on electricity bills. According to the US Department of Energy, solar panels can cut energy costs by up to 30% for outdoor devices. Over five years, a single camera can save $200–$500 compared to wired models.
Security And Privacy Considerations
- Change default passwords after setup to prevent hacking.
- Regularly check for firmware updates.
- Avoid pointing cameras at neighbors’ properties to respect privacy laws.
- If using cloud storage, pick a reputable provider to keep footage safe.

Credit: www.youtube.com
Frequently Asked Questions
How Long Does The Battery Last On A Solar Security Camera?
Battery life depends on the model, sunlight exposure, and recording activity. Most cameras last 4–8 months on a full charge with regular sunlight. Heavy recording or weak sunlight can shorten battery life.
Can Solar Security Cameras Work During Winter Or Rainy Days?
Yes, as long as the solar panel gets some daylight. Modern panels are efficient even in cloudy weather. However, you may need to clean snow or debris off the panel and manually recharge the battery during long periods of bad weather.
Do I Need Professional Help To Install A Solar Security Camera?
Usually, no. Most kits are designed for easy DIY installation. You only need basic tools like a drill and screwdriver. If you’re mounting on a high wall or roof, consider hiring a professional for safety.
Can Solar Security Cameras Record Without Wi-fi?
Some models record to SD cards even without Wi-Fi. You can review footage by removing the card. However, remote viewing and alerts require Wi-Fi.
Are Solar Security Cameras Secure From Hacking?
Security depends on your setup. Change default passwords, update firmware regularly, and avoid weak Wi-Fi passwords. Choose cameras from trusted brands. For more on camera security, visit Consumer Reports.
Installing a solar security camera is not only practical—it’s a smart investment. You get reliable security, lower costs, and eco-friendly operation. With careful planning and regular maintenance, your camera will work smoothly for years. By following these steps, you protect your property and enjoy peace of mind, all with the power of the sun.