
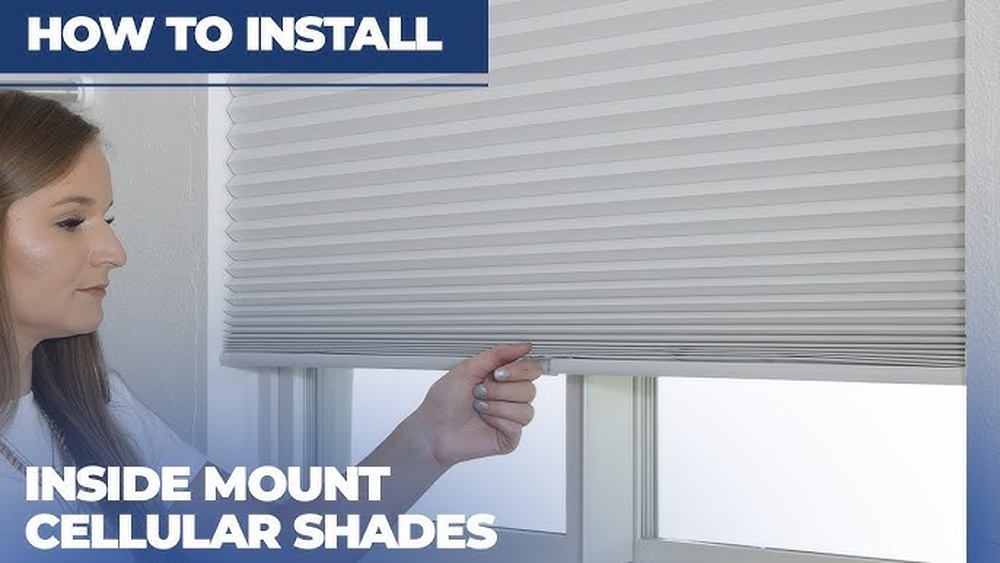
Installing window blinds inside the window frame is a smart way to make your home look tidy and modern. Many people choose inside mount blinds because they save space, offer a custom appearance, and allow you to use window sills for decor or plants. However, getting a perfect fit and smooth operation means you must follow careful steps. If you make mistakes, you might damage your window frame, end up with crooked blinds, or create light gaps that ruin privacy.
This guide will show you, step by step, how to install window blinds inside the frame the right way. You’ll learn what tools you need, how to measure and mark with accuracy, and how to avoid common problems that frustrate beginners.
Along the way, you’ll find practical tips that can save you time and money, plus real-world insights people often overlook. Whether you’re putting up blinds for the first time or want a better result than your last attempt, you’ll finish this article ready to get it right.
Why Choose Inside Mount Blinds?
Choosing inside mount blinds means you install the blinds inside the window frame, not on the wall above or around it. This installation style creates a neat, built-in look. The blinds sit flush with the window, so they don’t stick out into the room. This is especially helpful for smaller rooms or windows near furniture.
Some advantages include:
- Cleaner appearance: The blinds align with the frame, giving a sleek, tailored look.
- Space saving: Perfect for tight spaces; the blinds don’t get in the way of objects near the window.
- Layering options: You can easily add drapes or curtains outside the frame for style or extra privacy.
- Unobstructed window sill: You can still use the sill for plants, books, or decorations.
However, inside mount blinds require precise measuring and installation. Even small mistakes can cause issues, like blinds that don’t hang straight or won’t move smoothly. That’s why careful planning is key.
Tools And Materials You’ll Need
Before you begin, make sure you have all the necessary tools and materials. Missing one can slow you down or cause mistakes.
Essential tools:
- Tape measure (preferably steel for accuracy)
- Pencil
- Drill with suitable drill bits (usually 1/16” or 3/32” for pilot holes)
- Screwdriver (usually Phillips head)
- Level (small torpedo level works well)
- Step stool or ladder (if your window is high)
- Stud finder (optional, but useful if mounting into wood or drywall)
- Masking tape (optional, helps mark hard-to-see spots)
Materials:
- Blinds with all included hardware (brackets, screws, headrail, wand, valance, etc.)
- Mounting brackets (usually included with blinds)
- Screws (come with most blinds, but sometimes you may need stronger ones for certain materials)
- Wall anchors (for drywall or plaster installations)
Pro tip: Double-check the hardware kit that comes with your blinds. Sometimes, screws are too short for thick frames, or anchors are missing. It’s better to discover this before you start.
How To Measure For Inside Mount Blinds
Accurate measuring is the most important step. Even a small error can cause your blinds to fit poorly or not fit at all.
Step 1: Measure The Width
Use your tape measure to record the inside width of the window frame in three places:
- Top
- Middle
- Bottom
Window frames are rarely perfectly straight. Take all three measurements, then use the narrowest width as your final measurement. This ensures the blind will fit inside the frame, even if the window is slightly out of square.
Example:
- Top: 36.0 inches
- Middle: 35.9 inches
- Bottom: 35.7 inches
- Order blinds for 35.7 inches wide.
Step 2: Measure The Height
Next, measure the height from the top inside edge to the bottom inside edge, again in three places:
- Left
- Center
- Right
For blinds, use the longest height of the three. This makes sure your blinds will reach all the way to the bottom, even if the window isn’t perfectly straight.
Example:
- Left: 60.1 inches
- Center: 60.4 inches
- Right: 60.2 inches
- Order blinds for 60.4 inches high.
Step 3: Measure The Depth
The window frame needs to be deep enough to hold the mounting brackets. Check the minimum depth required for your blinds (usually listed in the instructions).
Measure from the glass to the edge of the frame. If your frame is too shallow, you may need to choose outside mount blinds instead.
Common minimum depth:
- For mini blinds: 1.5 inches
- For wood or faux wood blinds: 2–2.5 inches
- For cellular shades: 1–2 inches
Step 4: Double-check And Record
Write down all your measurements clearly. Consider labeling each window if you’re doing several at once.
Non-obvious tip: Always measure every window, even if they look the same. Old homes, especially, often have small differences from one window to the next.
Choosing The Right Blinds For Inside Mount
Not all blinds are suitable for inside mount. Some require more frame depth, or their hardware is designed for outside mount only. Here’s a comparison to help you select the right style:
| Blind Type | Minimum Depth Required | Light Control | Best For |
|---|---|---|---|
| Mini Blinds | 1.5″ | Moderate | Kitchens, offices |
| Faux Wood Blinds | 2.25″ | Good | Living rooms, bedrooms |
| Cellular Shades | 1.25″ | Excellent | Bedrooms, insulation needs |
| Vertical Blinds | 2.5″ | Excellent | Patio doors, large windows |
Key advice:
- For windows with shallow depth, mini blinds or cellular shades are better.
- For maximum privacy and insulation, cellular shades perform best.
- If your window frame is out of square, fabric shades are more forgiving than rigid blinds.
Credit: www.homedepot.com
Preparing For Installation
Once you’ve chosen your blinds and have the correct measurements, there are a few things to do before you start drilling.
- Clear the area: Remove curtains, old blinds, and anything on the window sill.
- Lay out your tools: Put all hardware and tools within easy reach.
- Read the instructions: Each blind model has small differences. Check the manual for any unique steps.
- Inspect your window frame: Look for any damage, loose paint, or obstacles that might get in the way of installation.
- Test fit the blind: Hold the blind inside the window frame to check for fit before mounting.
Practical tip: If your frame is painted, drill slowly to avoid chipping the paint. Cover drill spots with a small piece of masking tape before drilling for a cleaner hole.
Marking Bracket Positions Accurately
Precise bracket placement is crucial for blinds to operate smoothly and stay level.
Step 1: Position The Brackets
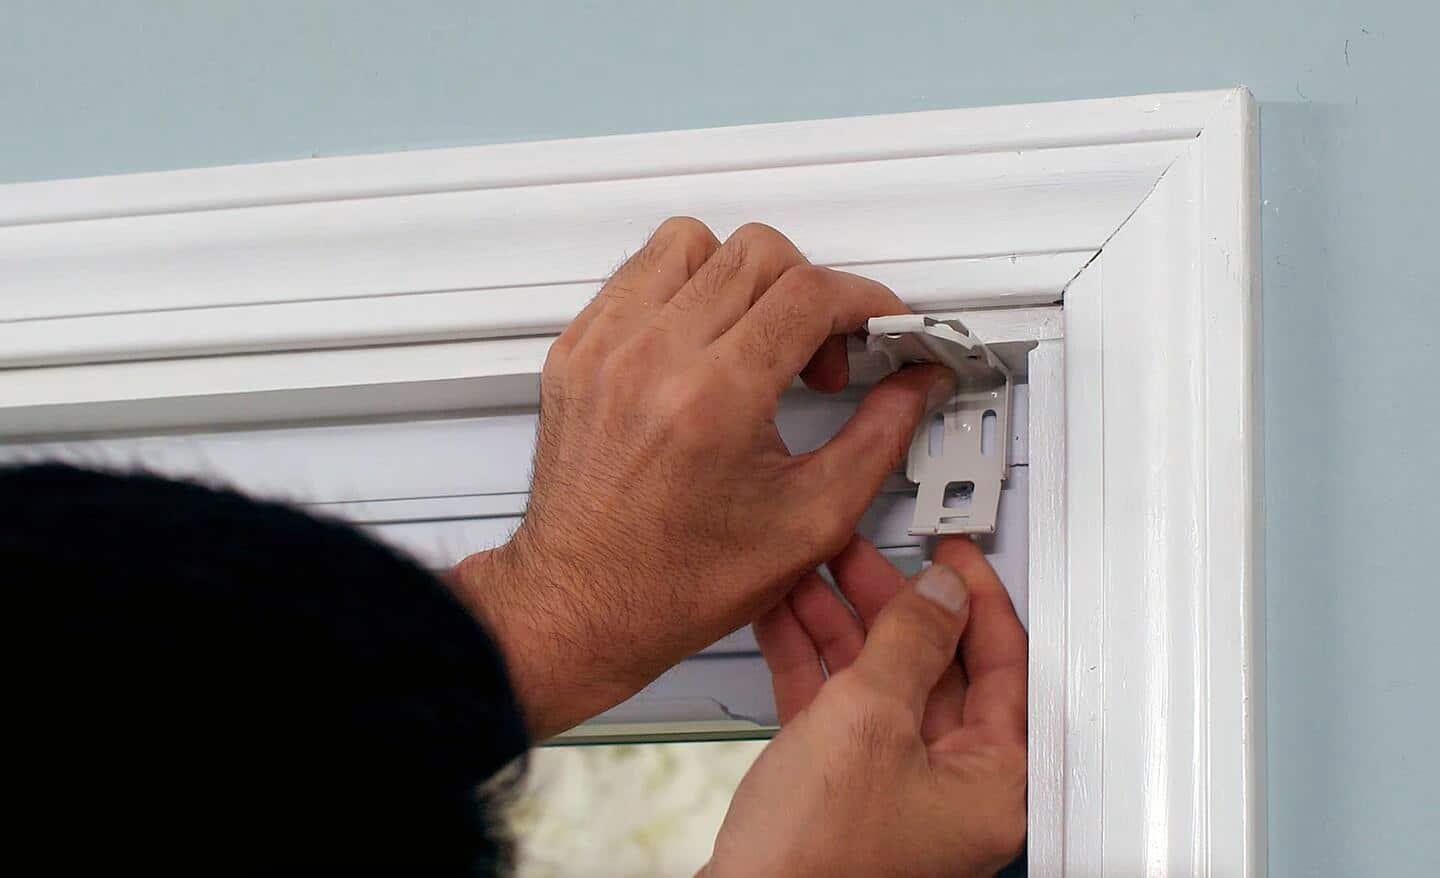
Hold the mounting brackets inside the top corners of the window frame.
- Place each bracket flush with the front edge, unless your blinds require them set back.
- Make sure the brackets are not blocking the window’s operation if it opens inward.
Step 2: Mark The Screw Holes
With a pencil, mark the location of each screw hole through the brackets.
Expert tip: Use a small level to check that both brackets are perfectly aligned with each other. Even a small tilt will cause your blinds to hang unevenly.
Step 3: Double-check Measurements
Measure the distance from the window edges to your marks. Both sides must be the same. This ensures the blinds are centered and level.
Common mistake: Rushing this step leads to crooked blinds. Taking two extra minutes now prevents hours of frustration later.
Drilling Pilot Holes And Installing Brackets
Drilling pilot holes makes it easier to drive screws and prevents wood or plaster from splitting.
Step 1: Drill Pilot Holes
Using a drill bit slightly smaller than your screws, drill at the spots you marked.
- If you’re drilling into hardwood, use a bit about 1/16” in diameter.
- For drywall, use wall anchors if no wood backing is present.
Safety tip: Always wear safety glasses when drilling, especially above eye level.
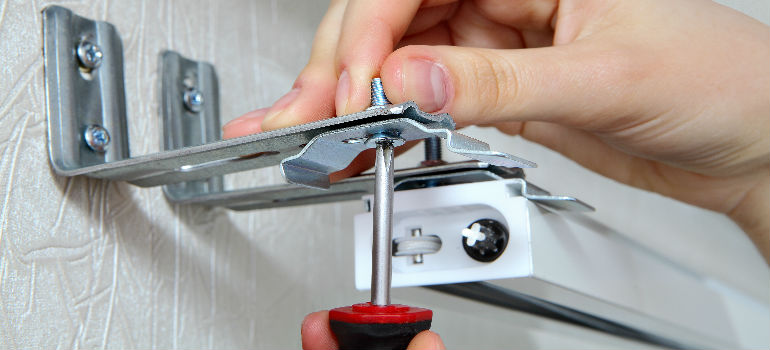
Step 2: Attach The Brackets
Hold the bracket in place and drive in the screws with your drill or screwdriver.
- Tighten until snug, but don’t over-tighten, as this can strip the hole or crack the bracket.
- Repeat for the other side.
Step 3: Test Fit The Headrail
Insert the blind’s headrail into the brackets to check alignment. It should snap or slide in easily, with both ends level.
If something feels off, check your bracket alignment before moving on.
Non-obvious insight: If the window frame material is very hard (like metal or old hardwood), pre-drill a slightly larger pilot hole, or use self-tapping screws. This reduces risk of hardware failure.
Securing The Headrail And Finishing The Installation
With the brackets installed, it’s time to secure the blinds and complete any finishing steps.
Step 1: Insert The Headrail
Slide or snap the headrail into the mounted brackets as directed in your blind’s instructions.
- You should hear a click or feel a snap when it’s secure.
Step 2: Lock The Brackets
Most brackets have hinged or sliding covers that snap over the headrail. Lock these in place to prevent the blinds from falling out.
Step 3: Attach The Wand Or Cord
If your blinds have a wand for tilting, attach it to the hook or gear on the headrail.
- For corded blinds, untie and hang the cords so they move freely.
Child safety tip: For homes with children or pets, install the cord cleat or safety device included with your blinds. This prevents accidental strangulation.
Step 4: Install The Valance (if Included)
Many blinds come with a valance—a decorative piece that covers the headrail.
- Clip or slide the valance into place as shown in the instructions.
Step 5: Test The Blinds
Lower and raise the blinds several times to check for smooth operation. Tilt slats (if applicable) to test light control.
If anything feels stiff or uneven, adjust the brackets or headrail as needed before finishing.
Common Problems And How To Fix Them
Even with careful installation, issues can arise. Here’s a quick troubleshooting guide:
| Problem | Possible Cause | Solution |
|---|---|---|
| Blinds don’t fit | Incorrect measurement | Order new blinds using correct, narrowest width |
| Blinds are crooked | Brackets not level | Reinstall brackets with level |
| Blinds don’t raise/lower smoothly | Headrail pinched or brackets too tight | Loosen bracket screws slightly |
| Light gaps on sides | Frame not square, or blinds too narrow | Add side channels or consider outside mount |
Practical insight: If your window is very out of square, consider adding a thin strip of weatherstripping or foam on the side with the gap. This blocks light and looks tidy.
Maintenance Tips For Long-lasting Blinds
Well-installed blinds should last for years. A little care goes a long way.
- Dust regularly with a microfiber cloth or vacuum with a brush attachment.
- Spot clean stains with a damp cloth and mild soap. Avoid harsh chemicals that can discolor the material.
- Check hardware every 6–12 months. Tighten loose screws or brackets.
- Lubricate moving parts if the blinds feel stiff. Use a small amount of dry silicone spray (never oil).
- Handle with care: Raise and lower gently. For corded blinds, avoid yanking the cord.
Non-obvious tip: If you plan to paint your window frames after installing blinds, remove the blinds first. Paint splatter is tough to clean off plastic or fabric slats.

Credit: www.youtube.com
Energy Efficiency And Light Control
Inside mount blinds can help with energy efficiency and light control, but only if installed correctly.
- Tight fit: Reduces drafts and blocks more sunlight, keeping rooms cooler in summer and warmer in winter.
- Blackout options: For bedrooms, choose blinds with a blackout lining or add side channels to block light leaks.
- Layering: Combine inside mount blinds with curtains for even better insulation and style flexibility.
Statistic: According to the U.S. Department of Energy, properly fitted window coverings can reduce heat loss through windows by up to 25% in winter and heat gain by up to 33% in summer.
Safety Considerations
Blinds with long cords can pose serious risks for children and pets. Many manufacturers now offer cordless or wand-controlled blinds as a safer alternative.
If you use corded blinds:
- Always install the cord cleat or tension device.
- Keep cords short and out of reach.
- Regularly check for damage to cords and replace if worn.
Pro tip: In some states, child safety devices are now required by law for all new blinds. Check local regulations before purchasing.
For more on blind safety, visit the U.S. Consumer Product Safety Commission.
Credit: www.fantastichandyman.co.uk
When To Call A Professional
DIY installation is possible for most people, but there are times when hiring a pro is worth it:
- Very large windows or sliding doors
- Unusual window shapes (arched, angled, etc.)
- Hard-to-reach windows (above stairs, vaulted ceilings)
- Unstable window frames or those needing repair
A professional can guarantee a perfect fit, install quickly, and handle any surprises. They also have the right tools for tricky materials like stone or metal.
Cost range: Professional installation usually costs $50–$100 per window, depending on complexity.
Environmental Impact And Disposal
If you’re replacing old blinds, consider their environmental impact. Many blinds are made from PVC, aluminum, or wood.
- Recycle aluminum blinds at a local metal recycling center.
- Donate gently used blinds to organizations like Habitat for Humanity.
- Dispose of old cords safely to prevent wildlife or pet hazards.
Eco-friendly tip: When buying new blinds, look for those made from recycled materials or sustainable wood certified by the Forest Stewardship Council (FSC).
Frequently Asked Questions
How Accurate Do My Measurements Need To Be For Inside Mount Blinds?
Accuracy is critical. Even a 1/8-inch error can make blinds too tight or too loose. Always use the narrowest width and the longest height. Double-check your tape measure and write measurements clearly.
Can I Install Inside Mount Blinds If My Window Frame Is Not Perfectly Square?
Yes, but expect small light gaps or uneven fit. Choose blinds with flexible edges, like fabric shades, or use side channels to block gaps. If the frame is very out of square, outside mount may look better.
What If My Window Frame Is Too Shallow For Inside Mount Blinds?
If the frame isn’t deep enough (less than the minimum required), you may need to switch to outside mount blinds, which install on the wall or molding around the window. Some very slim shades work with shallow frames—check product specs.
Are Cordless Blinds Safer And Easy To Install?
Cordless blinds are safer for kids and pets and are just as easy to install as corded types. The installation steps are nearly identical; just make sure to follow any special instructions for the cordless mechanism.
How Do I Fix Blinds That Are Stuck Or Uneven After Installation?
First, check that the headrail is seated properly and brackets are level. If the blinds are still stuck, remove and reinstall, checking for debris or tight spots. For corded blinds, make sure cords are untangled and moving freely.
Installing window blinds inside mount can make any room look more elegant and organized. With careful measuring, the right tools, and attention to detail, you can achieve a professional result at home. Remember, the most common mistakes happen during measurement and bracket alignment—take your time with these steps. Regular maintenance will keep your blinds working smoothly for years. And if you hit a snag, don’t be afraid to ask for help or call a pro. With this guide, you’re ready to transform your windows with confidence.