
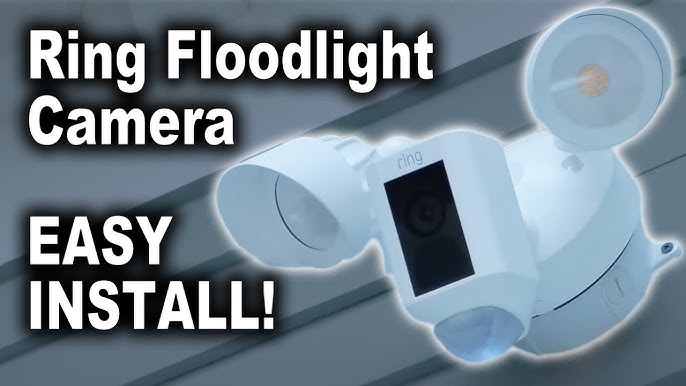
Installing a wired Ring Floodlight Camera is a smart move for anyone who wants to boost home security. You get strong lighting, real-time alerts, and clear HD video—all in one device. But many people worry: is the setup too difficult? Will you need an electrician? The good news is, with some basic tools and careful steps, you can install this camera yourself. Whether you’re a homeowner or just want to upgrade your outdoor security, this guide will walk you through everything you need to know.
We’ll cover planning, safety, wiring, mounting, connecting, and troubleshooting. By the end, you’ll feel confident about getting your Ring Floodlight Camera running smoothly. Let’s get started.
Understanding The Wired Ring Floodlight Camera
The Ring Floodlight Camera is more than just a camera. It combines bright LED floodlights with motion sensors and a high-definition camera that streams live video to your phone. The camera works with your home’s Wi-Fi and sends alerts if it detects movement. You can even talk to visitors using two-way audio.
This model is “wired,” meaning it connects directly to your home’s electrical system. That gives you reliable power—no batteries to change, and no worries about the camera shutting down unexpectedly.
Key features:
- 1080p HD video with night vision
- Two ultra-bright floodlights
- Motion-activated alerts
- 110-decibel siren
- Two-way talk
- Weather-resistant design
The wired version is ideal for locations where you already have outdoor power, like replacing an old floodlight or porch fixture.
Safety First: Preparing For The Installation
Before you begin, safety is the most important step. Working with electricity can be dangerous. If you feel unsure, call a professional. But if you follow these steps carefully, the job is manageable for most DIY homeowners.
Safety checklist:
- Turn off power at the circuit breaker before touching any wires.
- Use a voltage tester to confirm there’s no electricity.
- Wear rubber-soled shoes and avoid wet conditions.
- Make sure you have dry hands and a stable ladder.
Common mistakes:
- Forgetting to turn off the breaker (risk of electric shock)
- Using the wrong tools (can damage the camera or wiring)
- Rushing the job (can cause faulty connections)
Tools And Materials You Need
Before you start, gather these tools and materials. Having everything ready will save time and reduce mistakes.
Required tools:
- Phillips screwdriver
- Flathead screwdriver
- Drill with bits (for mounting holes)
- Voltage tester
- Wire stripper
- Ladder (for high locations)
- Electrical tape
- Wire nuts (often included with the camera)
Materials:
- Ring Floodlight Camera (wired version)
- Mounting bracket (comes in the box)
- Screws (included)
- Existing junction box (must be weatherproof and compatible)
If your junction box is old or damaged, replace it before installing the camera.
Planning The Camera Location
Choosing the right location is key for both security and proper installation. The camera works best when it covers entrances, driveways, or yards.
Consider these factors:
- The camera must be installed on a sturdy surface (wall or eaves).
- It needs to connect to an existing electrical box.
- The Wi-Fi signal should be strong—test with your phone first.
- Avoid spots with heavy tree cover (can block motion sensors).
Optimal height: Install the camera about 9 feet (2.7 meters) above the ground. This gives a wide view and lets the floodlights cover more area.
Angle matters: Tilt the camera downward, but not too much. You want to see faces, not just the tops of heads.
Removing Your Old Floodlight Or Fixture
If you’re replacing an old floodlight or porch light, start here. If you’re installing new, skip to the next section.
Step-by-step:
- Turn off power at the breaker.
- Use a ladder to reach the fixture.
- Remove the bulbs and any covers.
- Unscrew the fixture from the junction box.
- Carefully pull the fixture away. You’ll see three wires—black (hot), white (neutral), and ground (green or bare copper).
- Use a voltage tester to double-check there’s no power.
- Remove wire nuts and gently separate the wires.
Tip: Take a photo of the wiring before you disconnect. It helps during installation.
Installing A New Junction Box (if Needed)
If there’s no existing box or the old one is damaged, you need to install a new weatherproof junction box.
Steps:
- Choose a box that’s rated for outdoor use.
- Attach the box securely to the wall or eaves.
- Run electrical cable (14/2 or 12/2 gauge) from the breaker box to the new junction box.
- Seal around the box with waterproof caulk to prevent leaks.
Warning: If you need to run new wiring from inside your home, this can be complex. Consider hiring a licensed electrician for this step.
Mounting The Ring Floodlight Camera
With the power off and the junction box ready, it’s time to mount the camera.
Mounting steps:
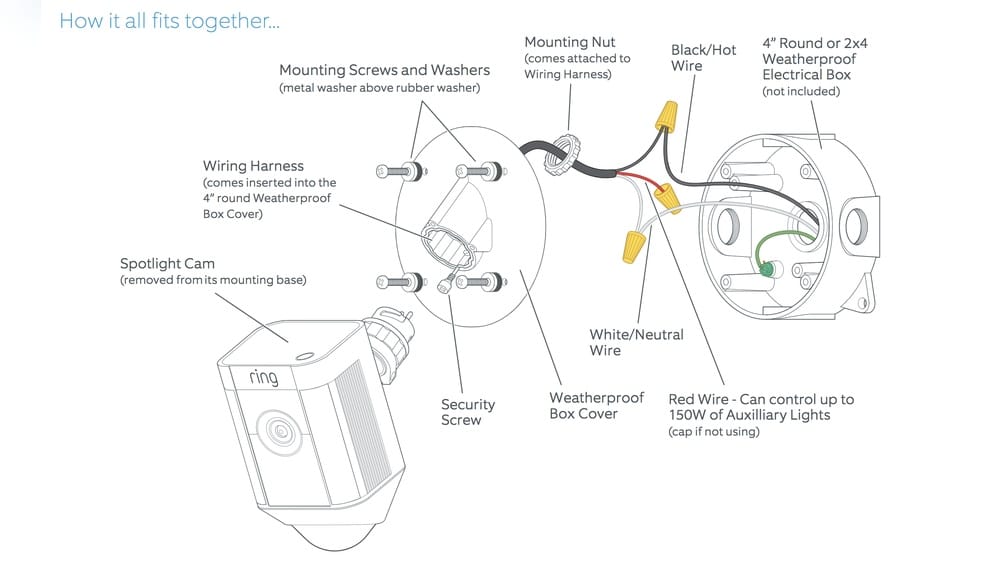
- Attach the mounting bracket to the junction box using the supplied screws.
- Pull the house wires through the center opening.
- Use the included hooks to hang the camera temporarily while connecting wires.
Practical tip: Don’t rush. Make sure the bracket is level and tight. Loose brackets can cause the camera to shake and affect video quality.
Wiring The Floodlight Camera
This is the most important part. Proper wiring ensures safety and reliable performance.
Typical wiring:
- Black wire (hot): Connects to the house’s black wire.
- White wire (neutral): Connects to the house’s white wire.
- Green wire (ground): Connects to the house’s ground wire (bare copper or green).
Step-by-step wiring:
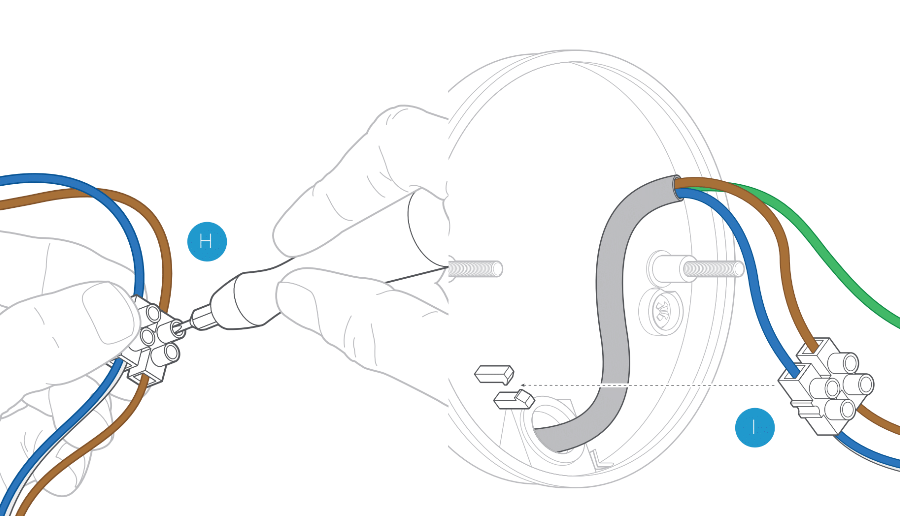
- Strip about 1/2 inch of insulation from each wire.
- Twist the matching wires together—black to black, white to white, ground to ground.
- Secure each connection with a wire nut.
- Wrap connections with electrical tape for extra safety.
- Tuck wires neatly into the junction box.
Common mistakes:
- Not connecting the ground wire (can cause electrical hazards)
- Using loose wire nuts (can lead to unreliable connections)
- Mixing up hot and neutral wires (can cause the camera not to work)
Non-obvious insight: Some homes have multiple wires in the box. Always match colors and use only one wire nut per connection.

Credit: www.youtube.com
Attaching The Camera And Floodlights
Once the wiring is complete, finish mounting the camera.
- Align the camera base with the mounting bracket.
- Use screws to secure the camera to the bracket.
- Adjust the floodlights and camera angle—point them where you want maximum coverage.
- Attach any covers or weatherproof seals.
Tip: Tighten screws firmly, but don’t over-tighten. Over-tightening can crack the housing.
Powering Up And Testing
Now you’re ready to restore power and test the camera.
- Turn the breaker back on.
- The floodlights should turn on briefly (a good sign).
- Download the Ring app on your phone (iOS or Android).
- Follow the in-app instructions to connect the camera to Wi-Fi.
- Test the motion sensor by walking in front of the camera.
Example: If the floodlights don’t turn on, check the wiring. If the camera doesn’t connect to Wi-Fi, move your router closer or use a Wi-Fi extender.
Credit: www.youtube.com
Connecting To Wi-fi And The Ring App
The Ring Floodlight Camera needs a strong Wi-Fi signal to work well. Here’s how to connect:
- Open the Ring app and create an account if needed.
- Select “Set Up a Device” and choose Floodlight Camera.
- Use the app to scan the camera’s QR code (found on the device or in the box).
- Follow the instructions to join your home Wi-Fi network.
- Name your camera (like “Front Yard” or “Driveway”).
Practical tips:
- Place your router within 30 feet for best signal.
- If signal is weak, consider using a Wi-Fi extender.
Non-obvious insight: Many users forget to update their Ring app before setup. Make sure you have the latest version for smooth installation.
Adjusting Settings For Best Performance
Once connected, you can tweak settings for maximum security and convenience.
Key settings:
- Motion zones: Set which areas trigger alerts (reduce false alarms).
- Light schedule: Choose when the floodlights turn on/off automatically.
- Sensitivity: Adjust how sensitive the motion sensor is.
- Alert preferences: Decide if alerts come to your phone, email, or both.
Example: If your camera faces a busy street, reduce motion sensitivity or adjust motion zones to avoid constant alerts.
Insight: You can link the Ring Floodlight Camera with other Ring devices, like doorbells or indoor cameras, for unified alerts.
Credit: support.ring.com
Comparing Wired Vs. Battery-powered Ring Cameras
Choosing between wired and battery-powered models depends on your needs. Here’s a quick comparison:
| Feature | Wired Floodlight Camera | Battery-Powered Camera |
|---|---|---|
| Power Source | Direct electrical wiring | Rechargeable battery |
| Lighting | 2 ultra-bright floodlights | Limited or no floodlight |
| Maintenance | Minimal (no battery changes) | Battery needs recharging every few months |
| Installation | Requires wiring skills | Easy, no wiring needed |
| Weather Resistance | IP65 rated | IP65 rated |
Insight: Wired models are ideal for permanent locations where you want strong lighting and reliable operation.
Troubleshooting Common Installation Issues
Even careful installers can hit problems. Here’s how to solve the most common issues:
Floodlights won’t turn on
- Check the breaker—make sure it’s on.
- Confirm wiring connections are tight and correct.
- Test with another device (like a lamp) to rule out electrical issues.
Camera won’t connect to Wi-Fi
- Move your router closer.
- Restart the camera and your phone.
- Check your Wi-Fi password (many typos happen here).
Motion sensor triggers too often
- Adjust motion zones in the app.
- Reduce sensitivity.
- Change the camera angle to avoid busy areas.
Video quality is poor
- Check Wi-Fi signal strength.
- Upgrade your internet speed if needed.
- Make sure the camera lens is clean.
Non-obvious insight: If your camera’s night vision isn’t working, make sure nearby lights aren’t shining directly into the lens—they can cause glare and reduce clarity.
Maintaining Your Ring Floodlight Camera
Once installed, keep your camera running smoothly with regular maintenance.
Maintenance tips:
- Clean the camera lens and floodlights monthly.
- Check wiring for signs of wear or corrosion.
- Update the Ring app and firmware regularly.
- Test the motion sensor and siren every few months.
Example: If you live in an area with heavy rain or snow, check the camera after storms for moisture or ice buildup.
Upgrading And Integrating With Other Smart Devices
The Ring Floodlight Camera works well with other smart home devices. For advanced security, consider these upgrades:
- Connect with Alexa for voice control.
- Link with smart locks for automatic unlocking when you see trusted visitors.
- Pair with indoor Ring cameras for full coverage.
Non-obvious insight: Many users don’t realize you can integrate Ring devices with IFTTT (If This Then That) to automate actions, like turning on porch lights when motion is detected.
Statistics: How Ring Floodlight Cameras Improve Security
Studies show that visible security cameras and floodlights can reduce break-ins by up to 30%. The combination of strong lighting and video evidence is a major deterrent for burglars.
Example: In a survey of US homeowners, 72% said they feel safer with smart cameras installed.
Data:
- Average response time for Ring alerts: 5 seconds
- Typical camera lifespan: 5–7 years
- Number of homes with Ring devices in the US: Over 2 million
Cost Comparison: Wired Vs. Professional Installation
Wondering if you should hire a pro? Here’s a quick cost comparison:
| Installation Method | Average Cost | Time Required |
|---|---|---|
| DIY Installation | $0 (excluding camera price) | 1–2 hours |
| Professional Installation | $150–$250 | 30–60 minutes |
Insight: DIY is cheaper, but pros can handle complex wiring and ensure code compliance.
Real-life Example: Homeowner Experience
Let’s look at a real example. Julia, a homeowner in Texas, replaced her old porch light with a wired Ring Floodlight Camera. She followed these steps:
- Turned off the breaker.
- Removed the old fixture and took a photo of the wiring.
- Mounted the camera using the supplied bracket.
- Connected wires carefully and checked each with a voltage tester.
- Used the Ring app to connect to Wi-Fi and set motion zones.
- Adjusted floodlights for maximum coverage.
Result: Julia reported fewer false alarms after adjusting sensitivity. She also noticed clear night video thanks to the floodlights. After two months, her camera was still running smoothly.
Non-obvious tip: Julia cleaned the lens every two weeks, which improved video clarity and reduced bugs on the floodlights.
Frequently Asked Questions
How Long Does The Installation Take?
Most homeowners finish the installation in about 1–2 hours. If you’re replacing an old fixture, it’s usually faster. New installations with extra wiring may take longer.
Is It Safe To Install The Camera Myself?
If you follow safety steps—turn off power, use a voltage tester, and connect wires correctly—DIY installation is safe. If you’re unsure about wiring, hire a professional.
Can I Install The Ring Floodlight Camera Without An Existing Junction Box?
No, the wired Ring Floodlight Camera needs a weatherproof junction box for mounting and wiring. If you don’t have one, you’ll need to install it, which may require running new electrical cable.
How Do I Improve Wi-fi Signal For My Camera?
Place your router within 30 feet of the camera, or use a Wi-Fi extender. Avoid thick walls or metal barriers, which can block the signal. Check your signal strength in the Ring app.
What Happens If The Camera Loses Power?
If power is lost (like during an outage), the camera and floodlights won’t work. Once power is restored, the camera will reconnect automatically. For backup, consider pairing with a battery-powered Ring camera.
Installing a wired Ring Floodlight Camera might seem daunting, but with careful planning and step-by-step guidance, it’s a practical project for most homeowners. You get powerful lighting, reliable alerts, and peace of mind—all in a single device. Remember to follow safety tips, double-check wiring, and use the Ring app for the best results.
With regular maintenance, your camera will help protect your home for years.
For more details on smart home security and device integration, visit the official Ring website.