
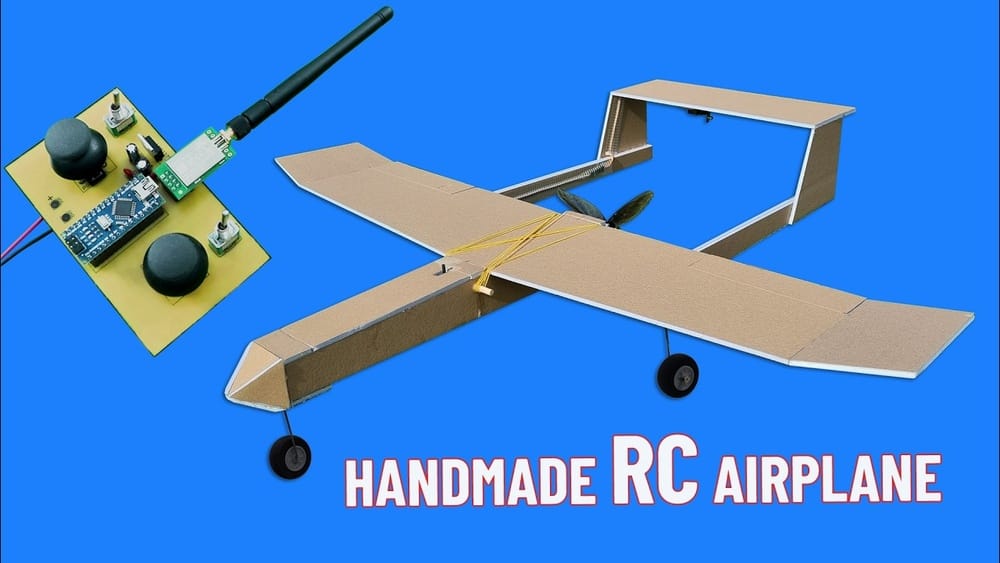
Building your own remote control aircraft is an exciting project that combines creativity, engineering, and hands-on learning. Whether you dream of piloting your plane across open fields or want to understand the science of flight, this guide will walk you through every step. Even for beginners, constructing an RC aircraft is possible with careful planning, the right materials, and patience. Along the way, you’ll gain practical skills and discover the satisfaction of seeing your plane take off, controlled by your own hands.
This article is designed for people who want a complete, clear explanation of how to make a remote control aircraft from scratch. You’ll learn about choosing the right components, building the airframe, installing electronics, and making your first flight safely.
Even if you have no experience, you’ll find the guidance and tips you need to succeed.
Understanding Rc Aircraft Basics
Before you begin building, it’s important to understand what makes a remote control aircraft fly and how the key parts work together. This knowledge will help you make better choices and avoid common mistakes.
What Is A Remote Control Aircraft?
A remote control (RC) aircraft is a small, powered plane that you control from the ground using a radio transmitter. It has moving control surfaces (like rudder, elevator, and ailerons) that allow you to change direction, climb, or descend. Most RC planes use an electric motor, although some advanced models use internal combustion engines.
Main Parts Of An Rc Aircraft
Every RC plane has a few essential parts:
- Fuselage: The main body, which holds the electronics and provides structure.
- Wings: Generate lift to keep the aircraft in the air.
- Tail: Includes the horizontal stabilizer (elevator) and vertical stabilizer (rudder).
- Power system: Usually an electric motor with a propeller and battery.
- Radio system: The transmitter (in your hand), receiver (on the plane), and servos (small motors that move the control surfaces).
- Landing gear: Wheels or skids that help the plane take off and land.
Understanding how each part works will help you as you build and troubleshoot.
How Rc Aircraft Fly
Flight depends on four main forces:
- Lift: The wings create lift by pushing air down as the plane moves forward.
- Weight: Gravity pulls the plane toward the ground.
- Thrust: The motor and propeller pull the plane forward.
- Drag: Air resistance slows the plane down.
Balancing these forces is key to stable flight. Beginners often overlook the importance of center of gravity (CG). If your plane’s CG is too far forward or back, it may not fly well or at all.
Types Of Rc Aircraft
There are several basic types. Here’s a comparison to help you choose:
| Type | Stability | Speed | Difficulty | Best For |
|---|---|---|---|---|
| Trainer | High | Low | Easy | Beginners |
| Glider | Very High | Low | Easy | Soaring & learning |
| Sport | Medium | Medium | Moderate | Intermediate pilots |
| Aerobatic | Low | High | Hard | Advanced pilots |
For your first build, choose a trainer or glider. They are stable, forgiving, and easier to repair if you crash.
Planning Your Project
A successful RC aircraft project starts with careful planning. Rushing in without a plan is a common beginner mistake.
Setting Goals
Decide what you want from your plane:
- Easy to fly or high performance?
- Long flight time or speed?
- Simple design or complex features (like flaps, retractable gear)?
Set realistic goals. For your first project, focus on getting your plane to fly smoothly and land safely.
Choosing A Design
You have three main options:
- Buy a kit: Kits come with all or most parts. Good for learning, but less customization.
- Build from plans: Download or buy plans and cut parts yourself. More work, but very rewarding.
- Scratch-build: Design your own from zero. Best for experienced builders.
For most beginners, building from plans is a good balance of learning and simplicity.
Selecting Materials
RC aircraft are made from materials like:
- Foam (EPS, EPP, Depron): Light, easy to cut, and cheap. Great for beginners.
- Balsa wood: Traditional, very light and strong, but more work to cut and glue.
- Plywood: Used for strong parts like motor mounts.
- Carbon fiber: Very strong and light, but expensive.
Foam is popular for first-time builders because it’s easy to work with and survives crashes better.
Tools You’ll Need
Gather these basic tools:
- Hobby knife or box cutter
- Hot glue gun or foam-safe CA glue
- Small screwdrivers
- Ruler and measuring tape
- Soldering iron (for wiring)
- Cutting mat
- Pliers
Having the right tools makes building easier and safer.
Budget Planning
Costs can add up quickly. Here’s a rough breakdown:
| Item | Price Range (USD) |
|---|---|
| Foam or wood (airframe) | $15 – $40 |
| Motor & propeller | $20 – $40 |
| ESC (speed controller) | $10 – $30 |
| Servos (3–4) | $15 – $35 |
| Battery & charger | $20 – $50 |
| Radio system | $40 – $100 |
| Glue, wires, misc. | $10 – $20 |
You can build a reliable trainer for under $200 if you shop carefully.

Credit: www.youtube.com
Gathering Components
Choosing the right components is crucial. Many beginners buy mismatched parts, causing crashes or poor performance.
Airframe
Pick foam sheets (like Depron or EPP) or balsa wood as your main material. For a basic trainer, you’ll need:
- Two main wing panels (each about 18–22 inches long)
- Fuselage sides and bottom
- Tail pieces (horizontal and vertical stabilizers)
- Control surfaces (elevator, rudder, ailerons if using)
Power System
Key elements are the motor, propeller, electronic speed controller (ESC), and battery.
- Motor: Choose a brushless outrunner motor. For a trainer, look for 1000–1200 kV (RPM per volt) and 100–200 watts.
- Propeller: Match the prop to the motor (e.g., 9×4.7 or 10×5 inches for a basic trainer).
- ESC: Must handle the motor’s current (20–30A is typical).
- Battery: Use a 3S LiPo (11.1V) with 1300–2200 mAh capacity.
Radio System
Consists of a transmitter, receiver, and servos.
- Transmitter: At least 4 channels (throttle, rudder, elevator, ailerons).
- Receiver: Must match your transmitter brand.
- Servos: Small 9g servos are common and cheap.
Other Items
- Pushrods and control horns (connect servos to surfaces)
- Wheels (for landings)
- Velcro strips (to hold battery)
- Heat-shrink tubing (insulates wires)
Where To Buy
Hobby shops, online stores (like HobbyKing, Banggood), and local RC clubs are good sources. Always check compatibility before buying.
Building The Airframe
Let’s move to the hands-on part: building the structure of your RC plane.
Cutting And Shaping Parts
- Print or draw plans for your chosen design. Tape plans to your foam or wood.
- Use a sharp hobby knife and a metal ruler for straight lines.
- Cut the fuselage sides and glue them together with a strong joint.
- Shape the wing with a gentle curve (“airfoil”) for better lift. Sand smooth if using wood.
- Cut the tail surfaces and test fit them.
Assembling The Fuselage
- Glue the sides, top, and bottom together. Reinforce with extra strips if needed.
- Leave openings for the battery and electronics.
- Attach the tail to the fuselage, making sure it’s straight. Misaligned tails cause poor flight.
Building The Wing
- Join the two halves (if any) with tape or glue.
- Add a spar (wooden or carbon rod) inside the wing for strength.
- Attach the wing to the fuselage with rubber bands, screws, or glue (rubber bands are best for beginners—they break free in a crash, saving your plane).
Adding Control Surfaces
- Cut hinges for the elevator, rudder, and ailerons (if used).
- Attach with a flexible tape or special plastic hinges.
- Make sure each surface moves freely.
Installing Landing Gear
- For foam planes, use light wire or plastic.
- Attach wheels with clips or glue.
- Make sure the plane sits level and rolls straight.
Installing Electronics
Correct installation is key to a reliable, responsive aircraft. Rushing or guessing here leads to frustrating problems.
Placing The Motor And Propeller
- Mount the motor at the front, using wood or plastic mounts.
- Make sure the propeller spins freely and is balanced.
- Secure all screws tightly, but don’t overtighten foam.
Wiring The Power System
- Connect the ESC to the motor wires (usually three small wires).
- Solder connections if needed, covering with heat-shrink tubing.
- Plug the battery into the ESC (but only when ready to test).
Installing The Radio Gear
- Place the receiver in the fuselage, away from metal or motor wires.
- Plug in the servos (rudder, elevator, ailerons if used).
- Test the system with your transmitter before gluing parts in place.
Mounting Servos And Pushrods
- Glue servos near each control surface.
- Attach pushrods (thin wire or carbon rods) to the servo arm and the control surface.
- Use control horns and small screws.
- Make sure the pushrods move smoothly and don’t bind.
Arranging Wires And Batteries
- Neatly route wires so they don’t block moving parts.
- Secure the battery with Velcro so you can adjust its position (to balance the plane).
- Leave enough space for the battery to be removed and charged easily.
Balancing The Aircraft
- Find the center of gravity (CG) location from your plans (usually 25–33% back from the wing’s leading edge).
- Place the battery or add small weights so the plane balances at this point.
- If the CG is wrong, your plane will be unstable.
Pre-flight Checks
Never skip these checks—they prevent crashes and costly repairs.
Control Surfaces
- Power on the radio and plane.
- Move each stick: Check that rudder, elevator, and ailerons move in the correct direction.
- Make sure there is no binding or delay.
Motor And Propeller
- Arm the ESC (follow manual instructions).
- Slowly advance the throttle and check that the motor spins smoothly.
- Hold the plane firmly—never let it go indoors.
Range Test
- Walk away from the plane with the transmitter. At 50–100 feet, the controls should still work perfectly. If not, check for interference or a faulty receiver.
Structural Strength
- Gently flex the wing and fuselage—there should be no cracks or loose joints.
- Double-check that the landing gear is secure.

Credit: www.amazon.com
First Flight: Launching And Flying Safely
The first flight is exciting, but also the most risky. Many planes crash here due to poor preparation or nerves.
Picking A Flying Field
- Choose a large, open area—soccer fields, parks, or official RC airfields.
- Avoid trees, power lines, and crowds.
- Check local laws about flying RC planes.
Weather Conditions
- Fly only in light winds (under 10 mph) and clear weather.
- Avoid gusty or rainy conditions—small planes are easily blown off course.
Flight Assistance
- Bring a friend, especially for your first flight. They can help spot problems or retrieve your plane.
- If possible, ask an experienced RC pilot to help trim your plane or take the first flight.
Launching
- Hold the plane level, facing into the wind.
- Apply half throttle, then gently throw the plane forward and slightly upward.
- Let go smoothly—never jerk or twist.
Initial Flight Maneuvers
- Keep your first flight simple: Fly straight, make gentle turns, and avoid sharp climbs or dives.
- Use small stick movements.
- Stay calm. If the plane drifts, use the trim buttons on your transmitter to correct.
Landing
- Fly a low, straight approach into the wind.
- Gradually reduce throttle.
- Pull back on the elevator just before touchdown to flare and land gently.
- Don’t panic if you bounce or roll off—most planes survive.
After The Flight
- Disconnect the battery immediately.
- Check for damage or loose parts.
- Record any problems so you can fix them before next time.
Troubleshooting And Common Problems
Even careful builders face issues. Here’s how to handle the most frequent ones.
Plane Won’t Take Off
- Check that the motor is spinning in the right direction.
- Make sure the propeller is on correctly.
- Confirm the battery is fully charged.
- Verify the plane is not nose-heavy or tail-heavy.
Plane Veers To One Side
- Recheck that the wings and tail are straight.
- Adjust the pushrods or trims.
- Wind can also push light planes off course.
Control Surfaces Don’t Move
- Confirm all servo wires are plugged in.
- Test servos individually.
- Replace any faulty components.
Short Flight Time
- Use a larger battery.
- Reduce throttle during flight.
- Make sure the motor and propeller are matched.
Crash Damage
- Foam planes can often be glued back together.
- Replace or straighten bent pushrods.
- Always check that the airframe is strong before flying again.
Improving Your Aircraft
Once your plane flies well, you may want to make upgrades for better performance or style.
Adding Ailerons
- Ailerons give you full control for rolls and sharper turns.
- Cut out small sections of the wing’s trailing edge.
- Install two extra servos or use Y-connectors.
Installing A Camera
- Small FPV (first-person view) cameras let you see from the plane’s perspective.
- Mount the camera securely and keep wires away from the receiver.
Upgrading Electronics
- Higher capacity batteries increase flight time.
- More powerful motors boost speed, but check the airframe can handle extra weight.
Painting And Decals
- Use foam-safe spray paints or markers.
- Add bright colors or stripes to make your plane easier to see.
Joining Rc Clubs
- Clubs offer help, advice, and safe flying fields.
- You’ll learn faster and have more fun.
Safety Tips And Legal Considerations
RC planes are not toys. Safety must always come first.
General Safety
- Never fly near people, animals, or roads.
- Always check for damage before flight.
- Keep hands and tools away from the propeller.
Battery Handling
- Charge LiPo batteries with the correct charger, never unattended.
- Store batteries in a fireproof bag.
- Dispose of damaged batteries safely.
Local Laws
- In the US, register your plane if it weighs over 0.55 lbs (FAA rules).
- Fly below 400 feet.
- Stay away from airports.
For more details on RC aircraft rules and safety, visit the FAA’s official site.

Credit: www.hawks-work.com
Frequently Asked Questions
How Long Does It Take To Build A Remote Control Aircraft?
The time depends on your design and experience. A simple foam trainer can be built in 6–10 hours over a few days. More complex planes with detailed features may take 20 hours or more. Don’t rush—steady progress leads to better results.
What Is The Easiest Type Of Rc Plane For Beginners?
A high-wing trainer made from foam is the easiest to build and fly. Trainers are stable, forgiving, and can survive minor crashes. Avoid low-wing or aerobatic models for your first project.
How Far Can A Remote Control Aircraft Fly?
Most beginner radio systems have a range of 1,000–1,500 feet (300–500 meters). Always keep the plane in sight and follow local rules. Upgraded systems and FPV gear can extend this range, but require more skill and legal awareness.
What Tools Do I Need To Build An Rc Aircraft?
Basic tools include a hobby knife, hot glue gun, screwdrivers, ruler, soldering iron, and a cutting mat. You may need more advanced tools for custom designs, but most foam or balsa trainers only require these essentials.
Can I Repair My Rc Plane After A Crash?
Yes! Foam planes are especially easy to repair with glue and tape. Even wood planes can be fixed if the damage isn’t too severe. Always check the airframe, control surfaces, and electronics before flying again.
—
Building a remote control aircraft is both a challenge and a joy. The process teaches patience, problem-solving, and creativity. Your first flight—no matter how short—will give you a sense of achievement hard to match. Remember, every skilled pilot started with a simple plane and learned by doing. Stay patient, keep safety in mind, and enjoy the journey into the world of RC aviation.