
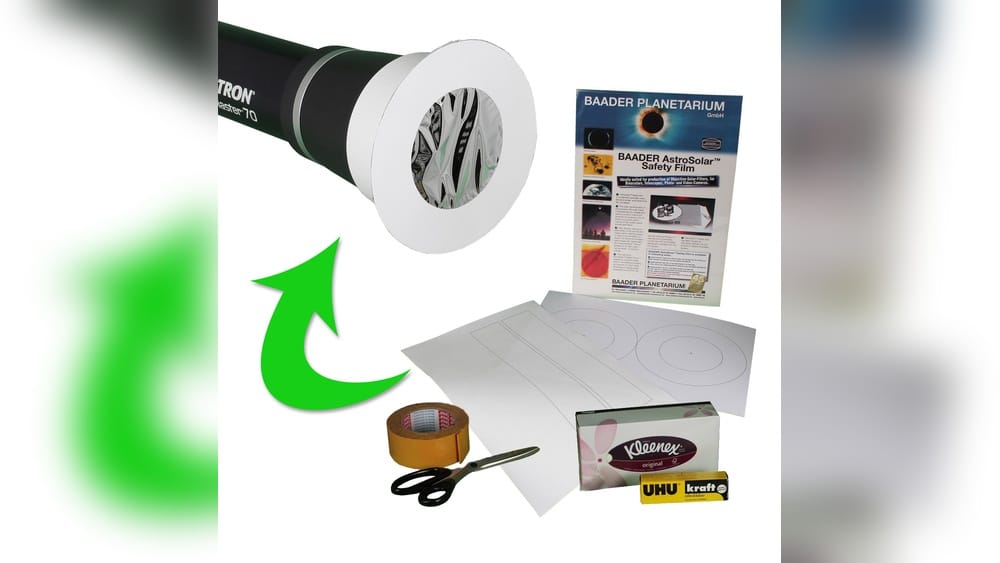
Making your own solar camera filter is a rewarding project. It lets you capture stunning images of the sun—solar eclipses, sunspots, or sunsets—without damaging your camera or eyes. Most people don’t realize that photographing the sun without a proper filter can ruin a camera sensor in seconds and even cause permanent eye injury. But professional solar filters can be expensive or hard to find, especially before big solar events when demand spikes.
This guide walks you through everything you need to know about building a safe, effective solar camera filter at home. You’ll learn about the science behind solar filters, the materials you’ll need, step-by-step assembly, safety checks, and practical tips for great solar photography.
If you’re a beginner, you’ll also discover common mistakes to avoid and how to test your filter before risking your camera.
Why You Need A Solar Camera Filter
Photographing the sun is not like shooting a sunset or sunrise. The sun’s brightness is dangerously intense. Without a solar filter, sunlight can:
- Burn your camera’s sensor instantly
- Melt internal camera parts
- Blind you if you look through the viewfinder
A proper solar camera filter blocks 99. 999% or more of visible and infrared light. This allows safe photography and lets solar features—like sunspots, prominences, and eclipses—be captured in detail.
It’s important to understand that regular sunglasses, ND filters, or welding glass are not safe for solar photography. Only specialized solar film or glass certified for direct solar viewing should ever be used. This is one of the biggest mistakes beginners make.
How Solar Camera Filters Work
A solar camera filter is a piece of optical film or glass that attaches to the front of your lens. Its job is to cut down the sun’s intensity by a factor of 100,000 or more. Most solar filters use a neutral density (ND) factor of 5.0, which means they transmit just 0.001% of incoming light.
There are two main types:
- Solar film filters (like Baader AstroSolar Safety Film): Thin, metallic-coated plastic film that blocks visible, infrared, and ultraviolet light.
- Glass solar filters: Optical glass with metal or dielectric coatings. Durable, but heavier and more expensive.
For DIY projects, solar film is the best choice. It’s light, affordable, and easy to work with.
Below is a comparison of solar filter types for cameras:
| Filter Type | Material | Transmission | Pros | Cons |
|---|---|---|---|---|
| Solar Film | Metalized Plastic | 0.00001 (ND 5.0) | Lightweight, Cheap, Easy to Cut | Less Durable, Prone to Scratches |
| Glass Solar Filter | Coated Glass | 0.00001 (ND 5.0) | Durable, Rigid, Reusable | Expensive, Heavy, Fragile if Dropped |
Materials You Will Need
Making your own solar camera filter doesn’t require advanced tools. Most items are easy to find online or at a hardware store. Here’s what you’ll need:
- Solar safety film (e.g., Baader AstroSolar Safety Film, ND 5.0). Buy only certified solar viewing film.
- Stiff cardboard (or thin plastic sheet) for the filter frame
- Craft knife or scissors
- Ruler
- Pencil or marker
- Double-sided tape or non-acidic glue
- Black electrical tape (for light sealing)
- Elastic bands or velcro straps
- Soft cloth or gloves (to avoid fingerprints)
- Camera lens cap (optional, for sizing)
- Measuring tape
Never substitute solar film with regular plastic, CD cases, or welding glass shade lower than #14. These are not safe and can cause permanent damage.
Choosing The Right Solar Film
This is the most critical part. Only use solar safety film designed for direct solar viewing. The most trusted brand is Baader AstroSolar Safety Film ND 5.0. Other reputable brands include Thousand Oaks Optical and Rainbow Symphony. Always check for certification: the film should meet the ISO 12312-2 safety standard for solar viewing.
A piece 8×10 inches (20×25 cm) is enough for several filters. Store extra film flat, in a sealed bag, away from light and sharp objects.
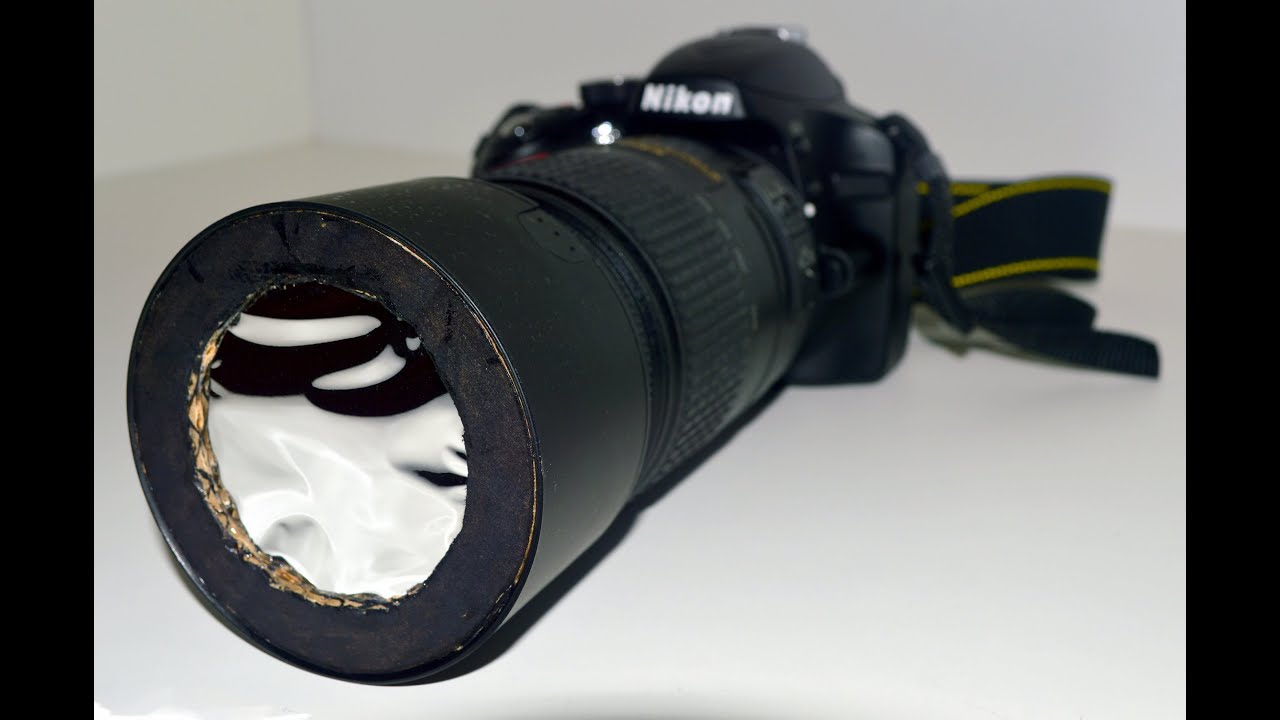
Credit: www.youtube.com
Measuring Your Lens
Before building, you must know the exact outside diameter of your camera lens. This is not the filter thread size (usually marked as Ø58mm, Ø72mm, etc.), but the actual outside width, including the lens barrel.
To measure:
- Remove any lens hood or cap.
- Use a soft measuring tape or ruler to measure across the front of the lens barrel.
- Add 5–10mm (about 0.25–0.5 inch) to your measurement for a secure fit.
This ensures your filter will cover the entire lens and block all stray sunlight.
Planning Your Filter Design
There are two main DIY filter designs:
- Slip-on (cap-style): Like a lens cap, the filter slips over the end of the lens.
- Clamp-on (holder-style): The filter sits in a frame, held with velcro or rubber bands.
Slip-on filters are simplest for most people. They’re easy to make and remove, and they can be adapted for telescopes or binoculars as well.
Below is a comparison of the two designs:
| Design | Ease of Construction | Security | Adaptability |
|---|---|---|---|
| Slip-on Cap | Easy | Good | Works for most lenses |
| Clamp-on Holder | Moderate | Excellent | Best for big lenses/telescopes |
For most camera lenses, a slip-on cap design is the best starting point.
Step-by-step Guide To Making A Solar Camera Filter
Follow these steps closely for a safe and effective solar camera filter.
1. Prepare Your Workspace
Choose a clean, dust-free area with good lighting. Wash your hands or use clean gloves. Lay out all your materials. Solar film is delicate—avoid touching it with bare fingers.
2. Cut The Filter Frame
- Place your lens cap on the cardboard and trace a circle slightly larger than your lens’ outside diameter.
- Draw a second circle, 1–2 cm (0.4–0.8 in) larger than the first, to create a “lip” that will hold the filter on your lens.
- Cut out the outer circle. Then cut out the inner circle, creating a cardboard ring.
- Repeat to make a second ring—one for the front, one for the back.
3. Cut The Solar Film
- Place the cardboard ring on the solar film. Trace a circle about 1 cm (0.4 in) wider than the ring’s inner opening.
- Use scissors to cut the solar film, handling only the edges. Do not crease or scratch the film.
- Inspect for any pinholes, scratches, or damage. If you see any, cut a new piece.
4. Assemble The Filter Sandwich
- Place one cardboard ring on a flat surface.
- Lay the solar film over the opening, ensuring it’s flat but not stretched tight.
- Place the second ring on top, sandwiching the film between the two rings.
- Use double-sided tape or a thin bead of glue around the edge (not on the film) to seal the rings together.
- Press gently and allow to dry if using glue.
5. Light Sealing
- Once dry, wrap the edge with black electrical tape. This blocks any stray sunlight and strengthens the filter.
- Check for any gaps between the rings. Patch with extra tape as needed.
6. Fitting The Filter To Your Lens
- Slip the filter over the front of your lens. It should fit snugly but not so tight that it’s hard to remove.
- If it’s loose, add extra tape layers inside the ring or use elastic bands to secure it.
- For large lenses, attach velcro straps for extra security.
7. Final Inspection
- Hold the filter up to a bright lamp (not the sun) to check for pinholes or leaks. Any bright spots mean you need to patch or replace the film.
- Check that the filter fully covers the lens and blocks all side light.
- Never use a filter with tears, creases, or pinholes.
Safety Testing Your Filter
Safety is your top priority. Before using your filter on a camera, do these tests:
- Visual test: Hold the filter at arm’s length and look through it at a 100-watt light bulb. You should see only a faint glow. No pinholes or bright spots should be visible.
- Paper test: Shine a flashlight through the filter onto a white sheet of paper in a dark room. Check for even illumination and no pinpoints of light.
- Camera test: Place the filter on your camera and take a photo of a bright lamp. The image should be very dim and show no color distortion.
If your filter fails any test, do not use it. Even a tiny hole can let in enough sunlight to destroy your camera sensor or harm your eyes.
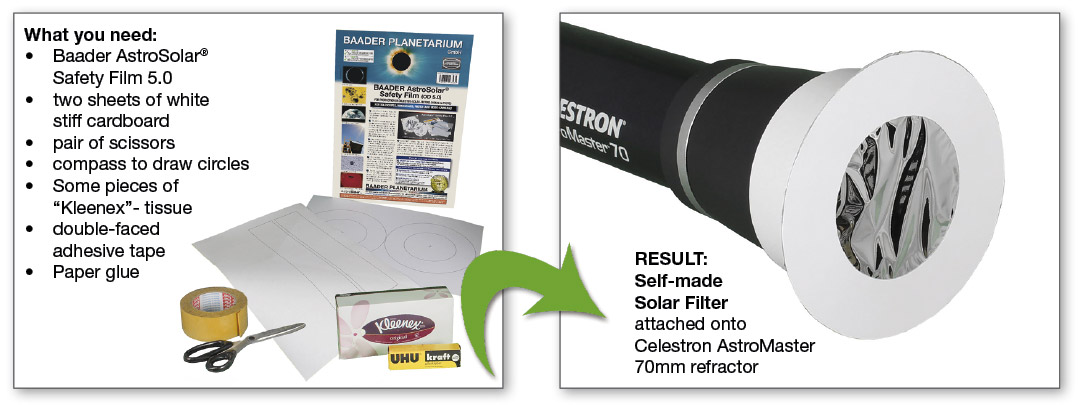
Credit: astrosolar.com
Using Your Diy Solar Camera Filter
With your filter built and tested, you’re ready to shoot the sun safely. Here’s how to use it:
- Always attach the filter before pointing your camera toward the sun.
- Never look through the optical viewfinder at the sun, even with the filter on. Use live view or an electronic viewfinder.
- Keep the filter on at all times during solar photography. Remove only after you’ve turned the camera away from the sun.
Camera Settings For Solar Photography
- Manual mode gives the most control.
- Start with ISO 100, aperture f/8–f/16, and shutter speed between 1/1000 and 1/4000 second.
- Adjust exposure so the solar disk is bright but not overexposed.
- Use a tripod for stability.
- Focus manually, as autofocus often struggles with the filtered sun.
Shooting Tips
- Use a remote shutter or self-timer to prevent vibrations.
- Try different white balance settings to get a natural solar color.
- Keep exposures short to avoid motion blur from Earth’s rotation.
- During eclipses, bracket exposures for both the bright and dim phases.
Troubleshooting Common Issues
Even with a well-made filter, problems can happen. Here’s what to watch for:
- Image too dark: Increase ISO or open aperture, but do not remove the filter.
- Blurry sun: Clean your filter and lens; use a tripod; avoid shooting through window glass.
- Uneven exposure: Check for wrinkles or uneven tension in the solar film.
- Filter falls off: Add more tape, or use velcro/elastic for a tighter fit.
A non-obvious tip: Sometimes, haze or thin clouds can actually improve solar detail by acting as a natural diffuser—don’t pack up if conditions aren’t perfect.
Enhancing Your Solar Photos
After capturing solar images, simple editing can help reveal more detail:
- Increase contrast to highlight sunspots or eclipse features.
- Use sharpening carefully to bring out edges.
- Crop tightly to focus attention on the sun.
- Try stacking multiple images to reduce noise and boost detail.
Never attempt to brighten a solar photo by removing the filter or using a lighter shade—this is unsafe and unnecessary.
Taking Care Of Your Solar Filter
Proper care ensures your DIY filter stays effective and safe:
- Store the filter in a rigid box when not in use.
- Never press or fold the solar film.
- Clean dust with a soft brush or blower—never with liquid or cloth.
- Inspect before every use for damage.
Solar film is easily scratched or torn. Replace your filter at the first sign of wear.
When To Use A Solar Camera Filter
- Solar eclipses: Essential for capturing partial or annular phases.
- Sunspot photography: Best when sunspots are visible on the solar disk.
- Testing camera gear: Practice with the sun before big events.
Remove the filter only during totality in a total solar eclipse, and only when the sun is fully covered by the moon. Reattach the filter as soon as the sun’s edge reappears.
Solar Photography Examples
Solar filters open up a world of astrophotography. Here are some creative ideas:
- Photograph an annular eclipse “ring of fire”
- Capture sunspots using a telephoto lens
- Shoot the partial phases of a solar eclipse as a time-lapse
- Try wide-angle shots of a landscape with the sun as a tiny, detailed disk
For inspiration, check NASA’s solar image gallery or browse astrophotography forums.

Credit: www.ericteske.com
Cost Comparison: Diy Vs. Commercial Filters
Building your own filter can save money, especially if you have multiple lenses. Here’s a cost breakdown:
| Item | DIY Filter Cost | Commercial Filter Cost |
|---|---|---|
| Solar Film (8×10″) | $25–$40 (enough for 3–4 filters) | N/A |
| Filter for 58mm Lens | $10–$15 | $50–$90 |
| Filter for 77mm Lens | $12–$18 | $60–$120 |
Note: Prices as of 2024. DIY is much cheaper, especially for large or odd-sized lenses.
Common Mistakes And How To Avoid Them
- Using the wrong material: Only certified solar film is safe. Never use sunglasses or ordinary ND filters.
- Not sealing the edges: Gaps let in stray sunlight, which can damage your sensor.
- Reusing damaged filters: Even a tiny scratch or hole is dangerous.
- Looking through the viewfinder: Always use live view or an electronic viewfinder.
- Testing filter with the sun immediately: Always check with a bright lamp first.
Beginners often try to “double up” regular ND filters or welders’ glass. This is not safe—the IR and UV light can pass through and cause harm.
Advanced: Making A Solar Filter For A Telephoto Or Telescope
For large lenses (over 90mm diameter) or telescopes, the process is similar but requires a sturdier frame:
- Use foam board or thin plywood instead of cardboard.
- Secure with several velcro straps.
- Add a felt lining for a snug fit.
Test the filter’s fit and strength before using it outdoors. Wind or vibration can dislodge lightweight filters.
Legal And Safety Warnings
- Never point your camera or eyes at the sun without a certified filter.
- Always supervise children during solar filter use.
- Do not sell homemade filters unless you can certify them to ISO standards.
- Remember that camera sensors can still be damaged if the filter is removed, even briefly.
For more information on solar viewing safety, visit the NASA Eye Safety page.
Frequently Asked Questions
Can I Use Welding Glass As A Solar Camera Filter?
No. Only welding glass shade #14 blocks enough harmful light, but it can still transmit unsafe levels of infrared and UV. Also, welding glass can cause green color casts and is not made for photography. Certified solar film is much safer and gives better results.
How Do I Know If My Solar Film Is Genuine?
Buy only from reputable astronomy retailers. Check for certification to ISO 12312-2. Genuine solar film usually comes with a protective tissue layer and a branded label. If in doubt, contact the manufacturer.
Can I Stack Nd Filters To Photograph The Sun?
No. Even stacking many ND filters does not block enough infrared and ultraviolet light. This can damage both your camera and eyes. Only use solar filters designed and certified for direct solar observation.
How Long Does A Homemade Solar Filter Last?
With careful use, a DIY filter can last for years. However, inspect it before every use. Any scratch, pinhole, or crease means you should replace the filter immediately.
Is It Safe To Use A Solar Filter For Both Viewing And Photography?
Yes, if you use a certified solar film filter (ND 5. 0 or ISO 12312-2). Never use a homemade filter for direct eye viewing unless you are 100% sure it is undamaged and securely attached to binoculars or telescopes.
Capturing the sun with your camera is an amazing experience. With careful preparation, the right materials, and attention to safety, your homemade solar camera filter will open up a new world of photography—without risking your camera or your vision.