
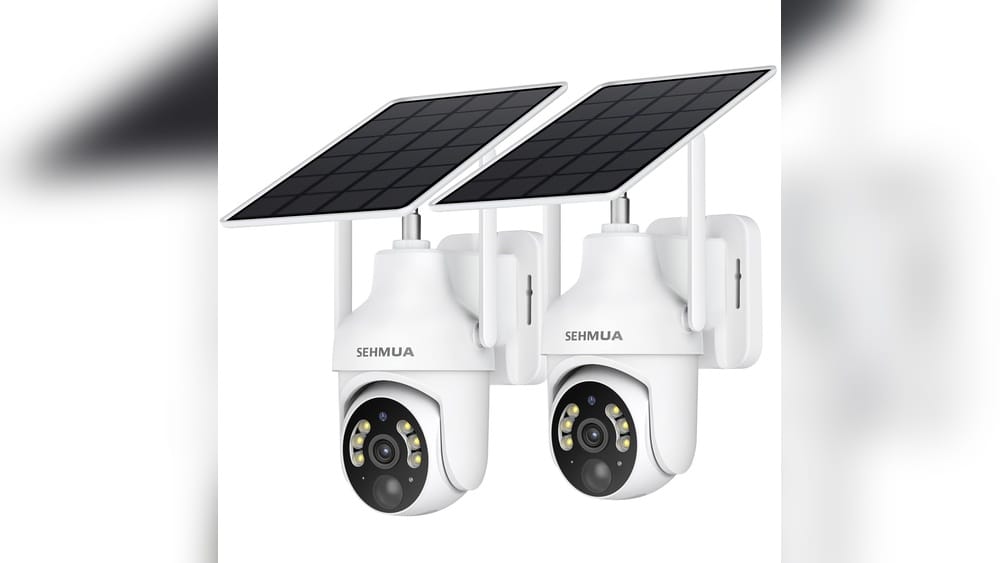
Building your own solar powered security camera can protect your property without worrying about power outages or high electricity bills. It’s also a smart solution for places where wiring is hard, like gardens, remote gates, or construction sites. Many people think solar systems are complicated or expensive, but with the right approach, you can make one that works reliably and fits your budget.
This guide explains everything you need to know: choosing the right camera and solar panel, wiring the system, installing the setup, and making sure it works day and night. You’ll learn how to avoid common mistakes, how to calculate power needs, and how to create a system that lasts for years. Whether you want a simple camera for your backyard or a more advanced system for a business, this article will give you practical, step-by-step advice.
Understanding Solar Powered Security Cameras
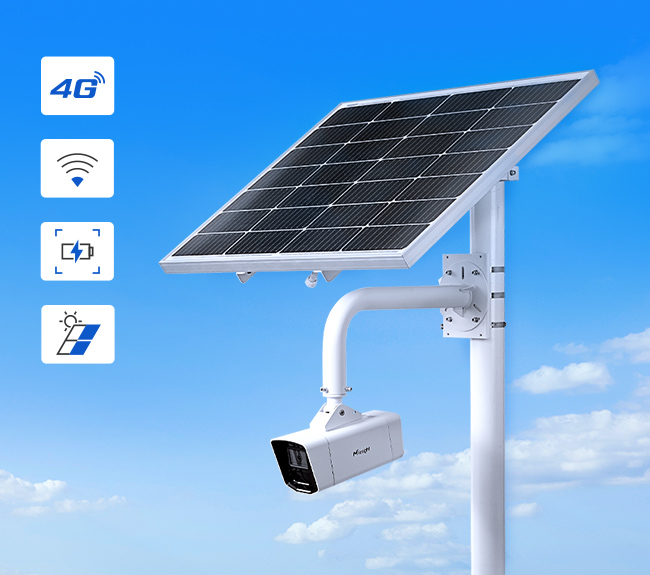
Solar powered security cameras use solar panels to convert sunlight into electricity. This energy powers the camera directly or charges a battery, which keeps the camera running at night or during cloudy days. These systems usually include:
- A security camera (wired or wireless)
- One or more solar panels
- A battery for energy storage
- A charge controller (protects battery from overcharging)
- Necessary wiring and mounting hardware
The main benefit is independence from the power grid. You can install these cameras almost anywhere, as long as they receive enough sunlight.
Why Use Solar Power For Security Cameras?
- No wiring needed: Avoid digging trenches or running cables.
- Works during power outages: Keeps monitoring even when the grid fails.
- Environmentally friendly: Uses renewable energy, reducing your carbon footprint.
- Flexible placement: Install cameras in remote or off-grid locations.
Common Types Of Security Cameras
Security cameras come in several forms. The best choice depends on your needs.
- IP Cameras: Connect to WiFi, often used for remote monitoring. Some work with cloud storage.
- Analog Cameras: Older type, require DVR (digital video recorder) and physical cables.
- PTZ Cameras: Pan-Tilt-Zoom, can move and zoom for wider coverage.
- Wireless Cameras: Easy to install, but need strong WiFi.
For solar setups, wireless IP cameras are most popular due to easy installation and remote access. However, you must ensure the camera’s power consumption matches your solar system.
What Makes Solar Security Cameras Different?
Traditional cameras need constant power from the grid. Solar cameras rely on sunlight, so you need to plan for cloudy days, battery backup, and proper placement. Many beginners forget to size the panel and battery correctly, leading to cameras shutting off at night or in bad weather.
Planning Your Solar Security Camera System
Careful planning saves money and prevents problems. The most important steps are:
1. Decide Where To Place The Camera
- Pick a spot with maximum sunlight for the solar panel.
- Make sure the camera covers important areas (doors, gates, driveways).
- Avoid placing panels under trees or near walls that block sunlight.
2. Choose The Right Camera
Look for cameras with low power consumption. Typical values:
- Mini wireless cameras: 2–5 watts
- Standard IP cameras: 5–10 watts
- PTZ cameras: 10–15 watts
Check if your camera supports motion detection. This feature saves power by recording only when movement is detected.
3. Calculate Power Needs
Estimate how much electricity your camera needs each day. Here’s a simple formula:
- Camera power (watts) × Hours per day = Daily energy (watt-hours)
For example:
- A 5-watt camera running 24 hours: 5 × 24 = 120 watt-hours per day
Add extra for battery charging and efficiency losses (about 20%). So, plan for 144 watt-hours per day.
4. Select Solar Panel And Battery
Size your solar panel so it produces enough energy even in winter or cloudy days. If you get 5 hours of good sunlight per day:
- Needed watt-hours / Sun hours = Panel size (watts)
- 144 / 5 = 29 watts (round up to 40 watts for safety)
Choose a battery that can store at least 2 days of energy:
- 144 × 2 = 288 watt-hours
- For a 12V battery: 288 / 12 = 24 amp-hours
Include a charge controller to protect the battery.
5. Plan For Connectivity
If your camera needs WiFi or cellular, check signal strength at your location. For remote areas, consider a camera with a SIM card for cellular data.
Choosing The Components
Each part of your solar security camera system plays a key role. Here’s what you need and how to choose:
Security Camera
Pick a camera that meets your needs:
- Resolution: At least 1080p for clear images.
- Night vision: Infrared LEDs for nighttime monitoring.
- Motion detection: Saves power and storage.
- Weatherproof: Rated IP65 or higher for outdoor use.
- Wireless: Easier installation.
Solar Panel
Choose a monocrystalline or polycrystalline panel. Monocrystalline panels are more efficient but usually cost more.
| Panel Type | Efficiency | Cost | Durability |
|---|---|---|---|
| Monocrystalline | 18–22% | Higher | Longer |
| Polycrystalline | 15–17% | Lower | Medium |
| Thin Film | 10–12% | Lowest | Shorter |
For a security camera, a monocrystalline panel is usually best, especially in limited space.
Battery
Most systems use deep cycle batteries. Lead-acid is cheaper, but lithium-ion batteries last longer and are lighter.
| Battery Type | Cycle Life | Weight | Cost |
|---|---|---|---|
| Lead-acid | 300–500 | Heavy | Lower |
| Lithium-ion | 2000+ | Light | Higher |
Lithium-ion batteries are recommended for reliability and long life.
Charge Controller
This device regulates charging and prevents battery damage. Look for:
- Automatic cutoff: Stops charging when the battery is full.
- Over-discharge protection: Keeps battery from draining too much.
MPPT controllers (Maximum Power Point Tracking) are more efficient, but PWM controllers (Pulse Width Modulation) are cheaper.
Mounting Hardware
You’ll need:
- Panel mounts (adjustable for angle)
- Camera brackets
- Weatherproof cable covers
- Screws and anchors
Cables And Connectors
Use outdoor-rated cables. Make sure connectors are waterproof.
Step-by-step Assembly Guide
Putting your system together isn’t hard, but you must follow each step carefully. Here’s how to build your solar powered security camera.
1. Prepare Your Materials
Gather everything:
- Security camera
- Solar panel (with mounts)
- Battery (with housing)
- Charge controller
- Cables and connectors
- Mounting hardware
- Tools: Drill, screwdriver, wire cutters, multimeter
2. Mount The Solar Panel
- Find a spot with direct sunlight (south-facing in North America).
- Attach the panel securely. Tilt it at an angle equal to your latitude.
- Make sure there’s no shade during peak sun hours.
3. Install The Battery And Charge Controller
- Place the battery in a weatherproof box near the panel.
- Connect the solar panel to the charge controller.
- Connect the charge controller to the battery.
- Use the multimeter to check voltage and connections.
4. Mount The Security Camera
- Choose a position with a clear view of your target area.
- Attach the camera using a solid bracket.
- Run the power cable from the battery to the camera.
- If using WiFi, make sure the signal is strong.
5. Connect Everything
- Wire the camera to the battery or charge controller (depending on your camera’s power input).
- Use waterproof connectors and cable covers.
- Double-check all connections.
6. Test The System
- Turn on the camera. Check the live feed on your phone or computer.
- Test the camera during day and night.
- Make sure the battery charges during sunlight and keeps the camera running after sunset.
7. Adjust Settings
- Enable motion detection or power-saving modes.
- Set up alerts or cloud storage if your camera supports it.
Key Tips For Reliable Performance
Most problems with solar security cameras come from poor planning or incorrect installation. Here are expert tips to help you avoid trouble:
- Oversize your solar panel and battery. Weather changes and cloudy days can reduce power.
- Clean solar panels regularly. Dust, bird droppings, or leaves block sunlight.
- Protect your battery from extreme temperatures. Heat and cold can shorten battery life.
- Check connections every few months. Loose wires cause failures.
- Update camera firmware. Manufacturers fix bugs and improve performance.
Non-obvious Insights For Beginners
Many beginners miss these points:
- Panel angle matters: A flat panel loses efficiency. Adjust it seasonally for best results.
- Battery age affects runtime: Old batteries store less energy. Replace every few years.
- WiFi signal can drop: Trees, walls, or weather can affect wireless connectivity. Use a signal booster if needed.
Advanced Options: Improving Your System
As you get comfortable, you may want to upgrade your solar security camera setup. Here are some advanced ideas:
Multiple Cameras
You can run several cameras from one solar panel and battery, but you need to size your system for total power. Add up all cameras’ wattage and adjust panel and battery size.
Smart Features
Many modern cameras support:
- Cloud storage: Saves footage online for easy access.
- AI detection: Identifies people, cars, or animals.
- Remote control: Move the camera or zoom from your phone.
Check compatibility before buying.
Backup Power
Some users add a grid charger or extra batteries. If sunlight fails, the camera switches to grid power or backup batteries.
Weatherproofing
Extreme weather can damage your system. Use:
- Sealed battery boxes
- UV-resistant panel mounts
- Surge protectors
Data Table: Example System Cost
Here’s a sample budget for a single solar powered security camera system:
| Component | Example Cost | Notes |
|---|---|---|
| Camera | $80 | 1080p, WiFi, night vision |
| Solar panel | $45 | 40W monocrystalline |
| Battery | $90 | 30Ah lithium-ion |
| Charge controller | $25 | MPPT, 10A |
| Mounting hardware | $20 | Brackets, screws |
| Cables/connectors | $15 | Outdoor-rated |
| Weatherproof box | $30 | Battery housing |
| Total | $305 | Approximate |
You can spend less or more depending on your needs and the camera’s features.
Common Mistakes And How To Avoid Them
Even the best plans can go wrong. Here are frequent mistakes and how to fix them:
- Undersizing the solar panel: If your panel is too small, the battery won’t charge fully. Always add extra capacity.
- Ignoring battery quality: Cheap batteries fail quickly. Invest in a reliable battery.
- Poor camera placement: If the camera can’t see what you want, it’s useless. Test views before mounting.
- Bad wiring practices: Use waterproof cables and connectors. Don’t leave wires exposed.
- Skipping maintenance: Dust, leaves, or snow on panels reduce efficiency. Clean panels monthly.
Real-world Example
John, a homeowner in Texas, installed a solar security camera for his shed. He used a 20-watt panel, but the camera stopped working after two cloudy days. After upgrading to a 40-watt panel and a larger battery, the system worked without interruptions—even during storms.
Maintenance And Troubleshooting
Solar systems need regular care to keep working well.
Cleaning
- Wipe panels every 2–4 weeks.
- Remove leaves, snow, or dust.
Checking Connections
- Inspect cables for damage.
- Tighten loose connectors.
Battery Care
- Check voltage monthly with a multimeter.
- Replace batteries every 2–5 years.
Camera Updates
- Update firmware via app or website.
- Check for new features or bug fixes.
Troubleshooting Tips
- If the camera stops at night, check battery charge.
- If the camera fails during cloudy days, panel size may be too small.
- If WiFi drops, check signal strength or router settings.

Credit: www.amazon.com
Solar Powered Security Cameras Vs Traditional Cameras
It’s helpful to see how solar security cameras compare with traditional, wired cameras.
| Feature | Solar Powered | Traditional Wired |
|---|---|---|
| Installation | Easy, no wiring | Requires power cables |
| Power source | Sunlight, battery | Electric grid |
| Placement | Flexible, remote areas | Near power outlets |
| Running cost | Zero electricity | Monthly bill |
| Reliability | Depends on sunlight | Grid-dependent |
| Maintenance | Panel cleaning, battery care | Minimal |
Solar cameras are great for off-grid use or places with frequent outages. Wired cameras are better indoors or where power is stable.
Installing A Solar Powered Security Camera: Practical Example
Let’s walk through a simple scenario. Imagine you want to secure your backyard with a solar camera.
- Choose a wireless IP camera with motion detection and night vision.
- Pick a 40W monocrystalline solar panel and a 30Ah lithium-ion battery.
- Mount the panel on your shed roof, facing south.
- Install the battery and charge controller inside a waterproof box.
- Attach the camera to your fence, run power cable from battery.
- Connect WiFi (check signal with your phone).
- Test the system: Make sure the camera works day and night.
This setup can run for years with minimal maintenance. You can check footage from your phone and get alerts if someone enters your yard.

Credit: nightowlsp.com
How To Expand Your System
If you want to cover more areas or add extra features, here’s how:
- Add more cameras: Increase panel and battery size.
- Install a signal booster: If WiFi is weak.
- Use cellular cameras: For places without WiFi.
- Add a larger battery bank: For longer backup.
- Integrate smart sensors: Motion, temperature, or smoke detectors.
Always recalculate power needs before expanding.
Safety And Legal Considerations
Installing security cameras involves some legal and safety issues:
- Respect privacy: Don’t point cameras at neighbors’ property.
- Check local laws: Some areas require signs or permits for cameras.
- Secure mounting: Loose panels or cameras can fall and cause injury.
- Use proper insulation: Prevent short circuits or fire.
If unsure, consult a local installer or electrician.
Credit: www.milesight.com
Real-world Uses
Solar powered security cameras are used in many situations:
- Farms: Monitor livestock and equipment.
- Construction sites: Watch expensive tools and materials.
- Parking lots: Protect vehicles, even in remote areas.
- National parks: Wildlife monitoring without disturbing nature.
- Remote cabins: Keep an eye on property when away.
Their flexibility and independence make them ideal for places regular cameras can’t reach.
Where To Learn More
If you want to study solar energy or security cameras in detail, visit Wikipedia. It offers technical information, history, and links to research papers.
Frequently Asked Questions
What Happens If There’s No Sunlight For Several Days?
Most systems use a battery to store energy for 2–3 days. If bad weather lasts longer, the camera may shut down. You can add a larger battery or a backup charger to reduce risk.
Can I Use A Solar Camera Indoors?
Solar panels need direct sunlight. Indoor use isn’t practical unless you place the panel outside and run a cable indoors. Otherwise, consider a wired camera for inside spaces.
How Long Do Solar Security Cameras Last?
Quality cameras and batteries can last 3–5 years or more. Lithium-ion batteries have a longer lifespan than lead-acid. Regular maintenance extends system life.
Is It Difficult To Install A Solar Powered Security Camera?
Installation is simple if you follow steps carefully. Mount panels in sunlight, use waterproof connectors, and check battery and camera placement. Beginners can complete most setups in a few hours.
Do Solar Security Cameras Work At Night?
Yes, the battery powers the camera after sunset. Night vision or infrared LEDs let you see in the dark. Make sure your battery stores enough energy for nighttime operation.
Creating your own solar powered security camera gives you freedom and peace of mind. With careful planning, the right components, and proper installation, you’ll have a system that works reliably for years—no matter where you live. It’s a smart investment in security and sustainability, and even beginners can succeed by following the steps in this guide.