
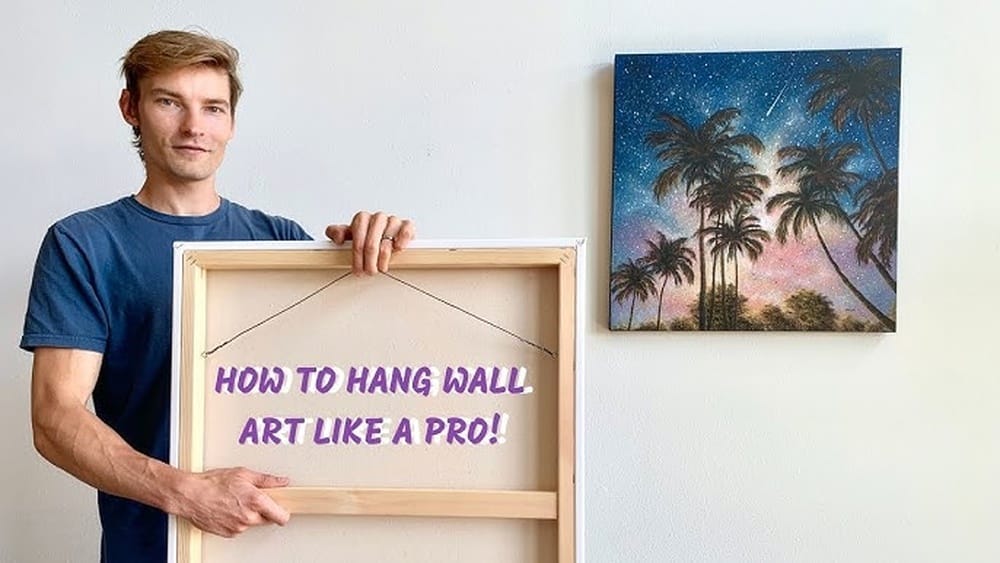
Mounting a canvas on a wall can completely transform a room. The right placement and method can make your artwork stand out, protect it from damage, and even reflect your personal style. Many people think you just hammer a nail and hang the canvas.
But the truth is, there are several techniques, tools, and details that make a big difference in how your canvas looks and lasts on your wall. Whether you’re displaying a single painting or creating a gallery wall, getting this process right can save you time, prevent frustration, and ensure your art stays safe and beautiful for years.
This guide takes you through every key aspect of mounting a canvas on a wall. You’ll learn about the essential tools, choosing the best hanging method, measuring and spacing, and even the small details that make your display look professional.
By the end, you’ll have the confidence and know-how to mount any canvas securely and attractively—without damaging your wall or your art.
Why Proper Canvas Mounting Matters
Mounting a canvas may sound simple, but the way you do it affects both the appearance and the safety of your artwork. A poorly mounted canvas can fall, warp, or even tear. Worse, using the wrong hardware can leave unsightly holes or marks on your wall.
When you use the right approach, your canvas sits flush and even, with no risk of slipping or tilting.
A well-mounted canvas also makes cleaning and rearranging easier. You can dust around the frame, move it if you redecorate, and avoid having to patch or repaint your walls every time you change your mind. For renters, this is especially important—many landlords deduct from security deposits for wall damage.
Another often-missed point: mounting your canvas at the correct height and alignment can change how the art is perceived. Museums and galleries use specific standards for a reason—the right placement draws the eye naturally and creates a balanced look in the room.
Understanding Your Canvas And Wall Type
Before you start, it’s important to know both your canvas and your wall. Not all canvases are the same, and not all walls respond the same to nails or adhesive hooks.
Types Of Canvas
- Stretched canvas: Fabric stretched over a wooden frame (stretcher bars). Most common.
- Gallery-wrapped canvas: Stapled at the back, with thick edges. No frame needed.
- Framed canvas: Canvas mounted inside a wood or metal frame.
- Rolled canvas: Unstretched, often shipped in tubes. Needs to be stretched or framed before mounting.
Wall Types
- Drywall: Most common in homes. Easy to nail or screw.
- Plaster: Found in older buildings. Harder and more brittle—needs care.
- Brick or concrete: Very sturdy. Requires special masonry hardware.
- Wood paneling: Easy to screw into, but may split if not careful.
Identifying your wall type is crucial because the wrong hardware can cause cracks, crumbling, or loose mounts. If you’re unsure, tap the wall. Drywall sounds hollow, plaster is hard, and brick/concrete is solid.
Tools And Supplies You’ll Need
Having the right tools at hand saves time and prevents mistakes. Here’s a list of what you’ll likely need:
- Measuring tape: For precise placement.
- Pencil: Marking the spot on the wall.
- Level: Ensures your canvas is straight.
- Hammer: For nails or sawtooth hangers.
- Screwdriver/drill: For screws, anchors, or masonry walls.
- Wall anchors: For heavy canvases on drywall.
- Nails or screws: Match the weight of your canvas.
- Picture wire or D-rings: For canvases without built-in hangers.
- Adhesive hooks/strips: For lightweight canvases or rental walls.
- Painter’s tape: To test placement and protect walls.
- Stud finder: (Optional) For heavy canvases.
Not all supplies are necessary for every method. Choose based on your canvas weight, wall type, and whether you want a permanent or temporary mount.
Comparing Hanging Methods
Different canvases and wall types need different mounting methods. Below is a comparison to help you pick the best for your situation.
| Method | Best For | Pros | Cons |
|---|---|---|---|
| Nails | Lightweight canvases, drywall/wood | Simple, cheap, minimal wall damage | Not for heavy canvases, leaves holes |
| Screws + Anchors | Medium to heavy canvases, drywall/plaster | Very secure, handles weight well | More wall damage, needs tools |
| Adhesive Hooks | Lightweight, rental walls, temporary | No holes, easy to remove | Weight limits, may fail on rough surfaces |
| Picture Wire + Hooks | Wider canvases, flexible placement | Even weight, easy adjustments | Needs extra hardware, wire may stretch |
| Masonry Anchors | Brick/concrete walls | Very strong, long-lasting | Needs drilling, hard to patch holes |
Pro tip: For valuable or irreplaceable art, avoid adhesive hooks or anything that could fail over time. Always check the weight rating of any hardware you use.
Deciding The Right Height And Placement
One of the most common mistakes is hanging art too high or too low. Professionals use a simple guideline: the center of the artwork should be about 57 to 60 inches from the floor, which is average eye level.
To find the right spot:
- Measure the height of your canvas.
- Divide by 2 (this gives the center).
- Add the distance from the top of the canvas to the hanging hardware (wire or D-rings).
- Subtract this number from 57–60 inches (choose based on your wall height).
For example, if your canvas is 24 inches tall, and the wire stretches 4 inches from the top when hanging:
- Center is 12 inches.
- Add 4 inches = 16 inches.
- 60 – 16 = 44 inches from the floor to the hanging point on the wall.
If you’re creating a gallery wall (multiple canvases), lay the arrangement on the floor first. Use painter’s tape on the wall to outline the positions before making any holes.
Step-by-step: How To Mount A Canvas Using Nails
This is the most common method for lightweight and medium canvases on drywall.
- Measure and mark: Find the right height, mark the spot lightly with a pencil.
- Level your marks: Use a level for wide canvases—mark both ends.
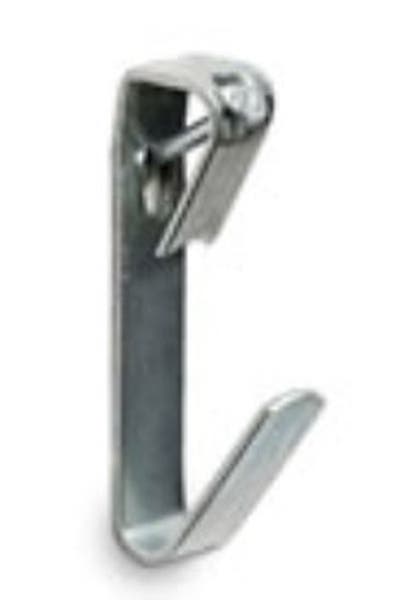
- Install hardware: Most canvases come with a sawtooth hanger or D-rings. If not, attach one to the back.
- Hammer the nail: Gently tap a picture nail or finishing nail into the wall at a slight upward angle.
- Hang the canvas: Place the hanger over the nail. For D-rings, use two nails for better balance.
- Adjust for level: Step back and check straightness. Adjust as needed.
- Check stability: Gently pull down to ensure it’s secure.
Non-obvious insight: Don’t hammer the nail in all the way—leave about 1/4 inch sticking out for the hanger to catch. This prevents the canvas from being too flush, which can cause scuff marks on the wall or uneven hanging.

Credit: www.wikihow.com
Step-by-step: Using Screws And Wall Anchors
For heavier canvases (over 10 lbs) or for plaster walls, screws with anchors are much stronger.
- Choose the anchor: Plastic anchors for drywall, masonry anchors for brick/concrete.
- Mark the spots: Use a level to mark where both D-rings or hangers will go.
- Drill pilot holes: Use a drill bit slightly smaller than the anchor.
- Insert anchors: Push or tap them into the holes until flush.
- Screw in the screws: Leave the heads sticking out 1/4 inch.
- Hang the canvas: Use the D-rings or wire over the screws.
- Test for strength: Gently pull down to check security.
Extra tip: Always check the packaging for the weight rating of your anchors. Going over the limit can cause the anchor to pull out of the wall, damaging both the wall and your canvas.
Step-by-step: Mounting With Adhesive Hooks Or Strips
Great for renters or thin walls, but only for lightweight canvases (under 6 lbs). Always use strips rated for more than the canvas weight.
- Clean the wall: Wipe with rubbing alcohol and let dry.
- Mark placement: Use painter’s tape to test the spot.
- Attach strips/hooks: Follow the package instructions exactly. Usually, you stick one side to the wall, one to the canvas.
- Wait before hanging: Most adhesives need an hour to set.
- Mount the canvas: Press firmly into place for 30 seconds.
Beginner mistake: Skipping the wait time or mounting on a dusty wall can cause strips to fail. Always clean and wait.
Credit: www.youtube.com
Hanging Canvases On Special Walls
Plaster Walls
Plaster is hard but brittle. Use picture hooks or screws with anchors—never regular nails, as they can crack the plaster.
- Drill a small pilot hole first.
- Use a molly bolt or heavy-duty picture hook.
- Go slowly—avoid hammering hard.
Brick Or Concrete Walls
You’ll need a masonry drill bit, plastic anchors, and masonry screws.
- Mark your spots.
- Drill into the mortar, not the brick, if possible (easier to patch later).
- Insert anchors and screws.
- Hang the canvas as usual.
Less-known insight: If you rent and can’t drill, try super-strong adhesive hooks rated for outdoor use, but always check with your landlord first.
Using Picture Wire And D-rings
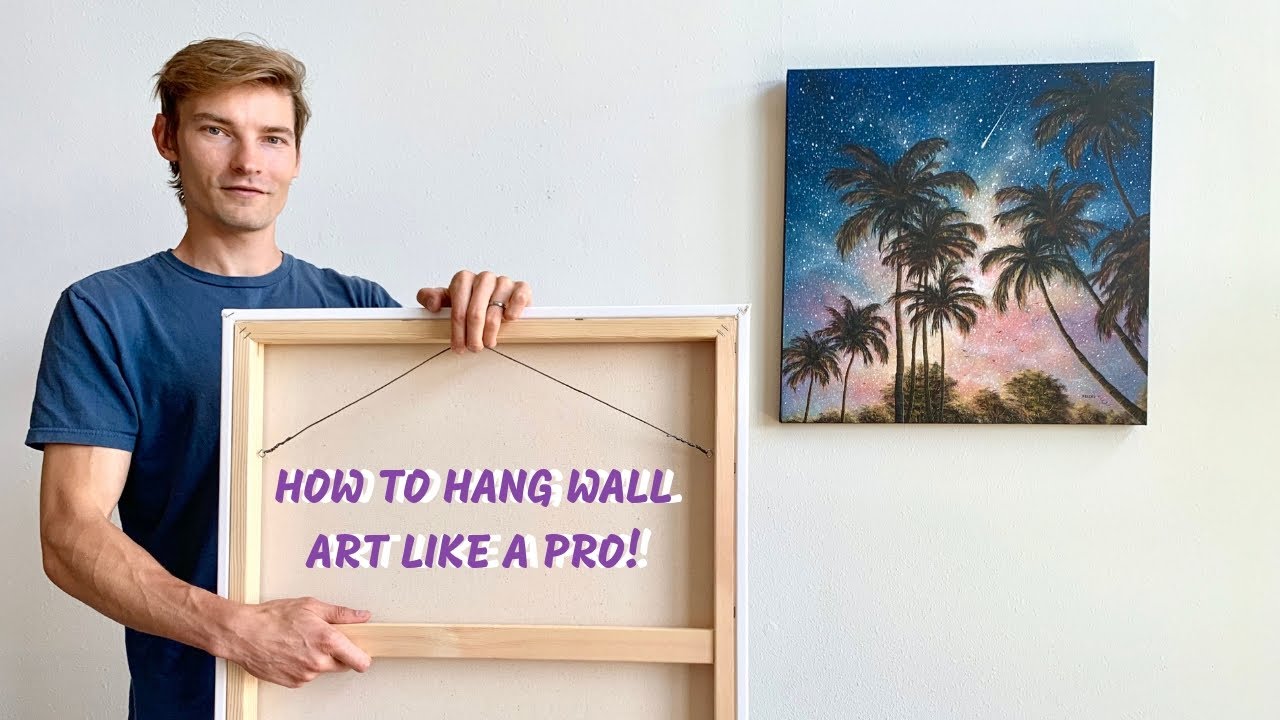
Many artists and galleries prefer picture wire because it spreads the weight across two points and allows for tiny adjustments.
- Attach D-rings: Screw into the left and right sides of the stretcher bars, about 1/3 from the top.
- Thread picture wire: Cut wire about 8–10 inches wider than the canvas. Thread through the D-rings, pull tight, and twist securely.
- Hang on hooks or screws: Use a level to make sure the canvas hangs straight.
Tip: Don’t make the wire too tight—leave a little slack so it forms a gentle arc when hung.
Planning A Gallery Wall
Arranging multiple canvases is more complex but creates a bold visual effect.
- Lay out all canvases on the floor first to test arrangements.
- Space canvases 2–5 inches apart for a unified look.
- Use painter’s tape to mark outlines on the wall.
- Hang the center canvas first, then work outward.
For perfect alignment, use a laser level or a long ruler. If canvases are the same size, a grid or straight line works well. For mixed sizes, balance large and small pieces across the arrangement.
Table: Hardware Weight Ratings
Selecting hardware with the right weight rating prevents accidents. Here’s a quick reference:
| Hardware Type | Weight Limit | Best Use |
|---|---|---|
| Small picture nail | Up to 10 lbs | Small canvases |
| Medium anchor/screw | 10–25 lbs | Medium canvases |
| Heavy-duty anchor | 25–50 lbs | Large/heavy canvases |
| Adhesive strip | Up to 6 lbs | Lightweight, temporary |
| Masonry screw | Up to 100 lbs | Concrete/brick |
Advice: Always go one rating higher than your canvas’s actual weight for safety.
Fixing Common Canvas Hanging Problems
Even with care, issues can arise. Here’s how to solve the most common problems:
Canvas Hangs Crooked
- Check if the hardware is aligned.
- Use a small rubber bumper on the lower corner.
- Adjust the wire length if using picture wire.
Canvas Tilts Forward
- If the top leans away from the wall, use bumpers or felt pads on the bottom corners.
- Make sure the hanger or wire isn’t too loose.
Canvas Won’t Stay On Hook
- Use a deeper hook or a screw with a larger head.
- For D-rings, make sure the ring is resting, not just the screw.
Canvas Damages The Wall
- Use bumpers or pads on all corners.
- Clean the wall before mounting.
Advanced Tips For A Professional Look
If you want your canvas display to look like a gallery, consider these often-overlooked details:
- Lighting: Add a dedicated picture light or angle a lamp to reduce shadows and highlight color.
- Wall color: Neutral backgrounds (white, gray) help art stand out; bold colors can create a dramatic effect.
- Spacing: For multiple canvases, keep spacing even—use a ruler or cut a spacer from cardboard.
- Framing: Even unframed canvases can look more finished with a simple floating frame.
- Security hardware: If the canvas is in a public place or high-traffic area, use anti-theft hardware or locking brackets.
Table: Pros And Cons Of Diy Vs. Professional Installation
When is it worth hiring a pro? Here’s a quick comparison:
| Factor | DIY | Professional |
|---|---|---|
| Cost | Low | High |
| Time | Flexible | Quick, scheduled |
| Skill needed | Basic tools/knowledge | Expertise, tools included |
| Wall damage | Possible mistakes | Often guaranteed |
| Results | Good with care | Consistent, museum-quality |
If your canvas is very valuable, or if your walls are old or delicate, a professional might be worth the extra cost.
Mistakes To Avoid When Mounting A Canvas
Even experienced art lovers make mistakes. Watch out for these:
- Ignoring wall type: Using nails in plaster or brick can cause cracks.
- Wrong hardware: Overloading nails or hooks can lead to falls.
- Skipping the level: Even a slight tilt is obvious on a blank wall.
- Not cleaning the wall: Dust and grease can weaken adhesives.
- Hanging too high or low: Follow the 57–60 inch rule for best results.
- Forgetting to check weight: Always check if your hardware supports the canvas weight.
- Placing over heat sources: Heat can warp canvas or fade colors.
- Not using bumpers: This can cause canvas to scratch the wall or hang unevenly.
Credit: www.easycanvasprints.com
Cleaning And Maintaining Your Mounted Canvas
Once your canvas is up, a little care keeps it looking good:
- Dust with a soft, dry brush every few weeks.
- Avoid sprays or cleaning products near the canvas.
- Check hardware every few months—tighten or replace if loose.
- Keep canvas out of direct sunlight to prevent fading.
- If you need to move it, patch nail holes with spackle and repaint for a clean finish.
When To Use A Frame
Some canvases are designed to be unframed, especially gallery-wrapped. But a frame can protect edges and give a finished look. If you plan to change décor often or move the canvas, a frame also adds extra support.
- Floating frames are popular for modern art.
- Traditional frames suit classic paintings.
Choose a frame style that complements both your art and your room.
What To Do If You Can’t Make Holes In The Wall
Some spaces—offices, rentals, dorms—don’t allow nails or screws. You still have options:
- Lean the canvas: On a shelf, mantle, or against the wall.
- Use adhesive strips: Make sure to check the weight rating and wall compatibility.
- Hang from molding or rail: Some old homes have picture rails for this purpose.
- Standing easels: Can display canvases without touching the wall.
Pro tip: Test adhesive strips on a hidden area first, especially on painted walls, to ensure they don’t peel paint.
Eco-friendly And Safe Hanging Practices
Environmentally conscious choices can help both your art and your home:
- Use recycled or FSC-certified wood frames.
- Choose hardware that can be reused.
- Avoid single-use adhesive hooks unless necessary.
- Donate unused hardware or tools to schools or art clubs.
- Always recycle packaging.
Where To Find More Guidance
If you want more detailed advice on specific wall types or large installations, many art museums and galleries publish their own hanging guides. For technical advice and professional standards, check resources like the Metropolitan Museum of Art.
Frequently Asked Questions
How Much Weight Can A Nail Or Adhesive Hook Hold?
A small nail can usually support up to 10 pounds, but this depends on wall type and angle. Adhesive hooks vary—always check the package, but most hold 4–6 pounds. For heavy canvases, use anchors or screws.
Can I Hang A Canvas Without Making Holes In The Wall?
Yes! For lightweight canvases, use adhesive strips or hooks. You can also lean canvases on shelves or use easels. Just remember, adhesive options are not suitable for heavy or valuable art.
What Is The Best Height To Hang A Canvas On A Wall?
The center of your canvas should be 57 to 60 inches from the floor. This matches average eye level and creates a balanced look. Adjust slightly for very tall or short rooms, or if you’re hanging above furniture.
How Do I Keep My Canvas Level?
Use a bubble level when marking your wall and when hanging the canvas. If your canvas slips, try using two hooks instead of one, or add small rubber bumpers to the bottom corners for stability.
What Should I Do If My Canvas Is Very Large Or Heavy?
For large or heavy canvases (over 25 pounds), use wall anchors or screw directly into wall studs for maximum support. Consider professional installation for canvases over 50 pounds or for valuable works.
Mounting a canvas on your wall can feel intimidating, but with the right tools and knowledge, it’s a project almost anyone can tackle. Pay attention to details like height, hardware, and wall type, and you’ll have a display that’s both secure and stunning.
Take your time, measure carefully, and don’t be afraid to experiment with layout—your space will thank you for it.