
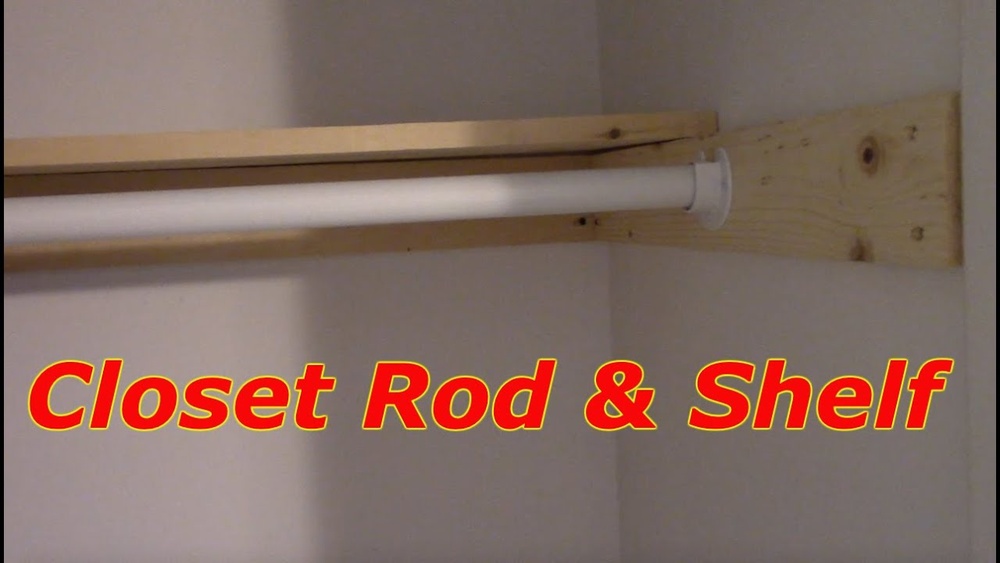
Mounting a closet rod might seem simple, but the results depend on careful planning and correct installation. A strong closet rod keeps clothes organized and supports their weight for years. If you rush or guess, you risk sagging rods, broken brackets, or even a total collapse.
Whether you’re upgrading an existing closet or building one from scratch, understanding each step will help you avoid common mistakes and save time. This guide will walk you through every phase—from measuring and selecting materials to securing the rod and checking for strength.
You’ll learn practical tips, discover non-obvious insights, and get clear answers to questions that beginners often miss.
Understanding Closet Rod Types
Before you pick up tools, it’s important to know the different closet rod types. Not all rods work for every closet, and some materials are much stronger than others. Choosing the right rod will save you frustration and money over time.
Common Materials
- Wood rods: Popular for their classic look. Usually made from oak, maple, or pine. Wood rods are strong but can warp if exposed to humidity. In climates with high moisture, wood rods may swell or twist, so sealing or painting the wood can help prevent damage. Some people also prefer wood because it’s quieter—metal hangers make less noise sliding on wood than metal.
- Metal rods: Typically steel or aluminum. Steel rods are the strongest but heavier. Aluminum is lighter but can bend if overloaded. Steel rods often have a chrome or powder-coated finish, making them resistant to rust and easy to clean. If you expect to hang heavy winter coats or lots of clothes, steel is often the best choice for long-term use.
- Plastic rods: These are lightweight and cheap but not recommended for heavy loads. Plastic can work for children’s closets or temporary spaces, but it tends to become brittle and crack with age, especially if exposed to sunlight.
Diameter And Strength
The standard diameter for closet rods is 1 1/4 inch. This size is best for most clothing. Anything thinner may bend under weight. For heavy-duty needs, look for rods up to 1 5/16 inch. A thicker rod distributes weight more evenly and resists sagging.
Example: If you have mostly heavy clothes, like suits or coats, a 1 5/16 inch steel rod is a safer bet. For light shirts and dresses, 1 1/4 inch is usually enough.
Adjustable Vs Fixed
- Adjustable rods: Expand to fit different widths. Good for flexible spaces or temporary installations. They often come in telescoping designs, which are easy to fit and reposition. However, the join in the middle can sometimes become a weak point if overloaded.
- Fixed rods: Cut to length. They provide more stability and strength. Fixed rods are often chosen for permanent closets, especially when you need a sturdy, long-term solution.
Specialty Rods
Some closets use double rods (one above the other) for more storage. Others use oval-shaped rods, which resist bending better than round rods.
Non-obvious insight: Oval rods are often used in high-end closets because they hold more weight and are less likely to twist. The flat bottom also keeps hangers spaced evenly, which prevents crowding.
Extra tip: If you want a modern look, oval rods with matching chrome brackets give a sleek, professional appearance.
Planning Your Closet Rod Installation
Correct planning will make the installation smoother and safer. Don’t skip this step. Careful planning also helps you avoid surprises, like running into pipes, electrical wiring, or wall obstacles.
Measuring Your Closet
Measure the width between the walls where you want to mount the rod. Use a sturdy tape measure and double-check. Write down the measurement.
- If installing between two side walls: Measure from wall to wall.
- If installing with one open end: Measure from the wall to where the rod will end.
Pro tip: If the walls aren’t perfectly parallel, measure both the front and back width of the closet. Use the smaller measurement for your rod length to ensure it fits.
Deciding Rod Height
Standard rod height is 66 inches from the floor. If you want double rods, use 80 inches for the upper rod and 40 inches for the lower rod. These heights work well for most adults, but your needs may vary.
Example Heights
| Rod Type | Recommended Height (inches) |
|---|---|
| Single Rod | 66 |
| Upper Double Rod | 80 |
| Lower Double Rod | 40 |
Tip: Adjust heights for children or accessibility needs. For example, if your closet is for a child, you might lower the rod to 48–54 inches, making it easier for them to reach. If you need to hang long dresses or coats, leave a section higher or without a lower rod.
Extra detail: Always check for shelving above the rod before finalizing the height. If you plan to add a shelf, make sure you leave at least 12 inches of space between the rod and the shelf so hangers fit easily.
How Much Weight Will The Rod Hold?
Most rods support 80–120 pounds if installed correctly. Steel rods can hold more, but the brackets and wall anchors are equally important.
Non-obvious insight: The rod’s strength means nothing if the brackets or wall anchors fail. Always match rod strength to bracket quality.
Example: If you use a heavy steel rod but pair it with weak plastic brackets, the weakest part will fail first. It’s always better to “overbuild” a little—use stronger materials than you think you need, especially if your closet gets a lot of use.

Credit: www.youtube.com
Choosing Closet Rod Brackets
Brackets keep the rod stable and prevent sagging. There are several types to consider, and the right bracket makes a big difference in long-term durability.
Types Of Brackets
- End brackets: Support the rod at both ends. These are the most common and essential for any closet rod.
- Center brackets: Used for spans longer than 48 inches. Without these, rods will sag in the middle. Center brackets are sometimes adjustable for height, making them helpful on uneven walls.
- Adjustable brackets: Useful for uneven walls or customized setups. These can help compensate for slightly sloped floors or walls that aren’t perfectly square.
| Bracket Type | Best For | Strength |
|---|---|---|
| End Bracket | Short rods (under 48″) | High |
| Center Bracket | Long rods (over 48″) | Essential |
| Adjustable Bracket | Uneven walls | Variable |
Practical tip: For rods over 6 feet, use two center brackets for maximum support. Large closets often benefit from extra brackets even if the rod is technically “strong enough.” More support means less risk of long-term bending.
Material Matters
Choose brackets made from steel or heavy-duty plastic. Avoid thin metal or low-quality plastic, which can crack. Powder-coated steel brackets are rust-resistant and look good for years.
Real world example: In laundry rooms or humid spaces, steel brackets with anti-rust coatings are more reliable than bare metal or plastic.
Matching Bracket To Rod
Always check that the bracket’s opening matches your rod’s diameter. If the bracket is too large, the rod will wobble. If it’s too small, the rod won’t fit at all. Many stores sell matching rod and bracket sets, which can save time and guesswork.
Extra tip: Some brackets come with a small locking screw or set screw to hold the rod in place—these add extra security and prevent the rod from sliding out.
Gathering Tools And Materials
You need the right tools and materials for a safe, sturdy installation. Having everything ready before starting helps avoid delays.
Essential Tools
- Drill (cordless or corded): For drilling pilot holes and driving screws.
- Level (at least 2 feet long): Ensures your rod is perfectly horizontal.
- Tape measure: For all your measuring needs.
- Stud finder: Locates solid wood studs behind drywall.
- Pencil: For marking positions.
- Screwdriver: For final tightening.
- Saw (if cutting the rod): A hacksaw for metal, a wood saw for wood rods.
- Safety goggles: Always protect your eyes from dust and debris.
Helpful suggestion: Some people also keep a vacuum or dustpan nearby to clean up sawdust or drywall dust as they go.
Materials
- Closet rod (cut to length)
- Brackets (end, center, or adjustable)
- Screws (preferably 2.5-inch): Longer screws hold better in studs.
- Wall anchors (for drywall): Choose anchors rated for at least 50 pounds each.
- Sandpaper (for wood rods): Smooth rough edges after cutting.
- Paint or finish (optional): Seals wood rods and helps prevent warping.
Non-obvious insight: Using a level is crucial. Even a slight tilt causes hangers to slide and clothes to bunch up. If you don’t have a long level, use a shorter level and a straight board or rod as a guide.
Step-by-step Closet Rod Mounting Instructions
This section covers every step—from marking to mounting—with clear guidance. Following each step closely ensures a sturdy, long-lasting installation.
Step 1: Mark The Mounting Points
Use a pencil to mark the height and width for both end brackets. Make sure the marks are level.
- Place the level horizontally between the marks.
- Adjust if needed to ensure both ends are exactly the same height.
Practical tip: Mark both ends, then check the distance with your tape measure to confirm accuracy.
Extra detail: If you’re installing double rods, use a separate color or style of mark for each rod height. This avoids confusion during installation.
Step 2: Locate The Studs
A stud finder helps you find wood studs behind drywall. Mount brackets into studs for maximum strength.
- Move the stud finder along the wall at the marked height.
- When you find a stud, mark its position.
If you cannot mount into a stud, use heavy-duty wall anchors.
Extra insight: In older homes, studs may not be spaced evenly. If you can’t find a stud at your bracket location, don’t just “hope for the best”—always use an anchor rated for at least 50–75 pounds.
Step 3: Pre-drill Holes
Use the drill to make pilot holes at each mark. Pilot holes prevent splitting and make screwing easier.
- Drill into studs if possible.
- For drywall, insert wall anchors after drilling.
Pro tip: Use a bit slightly smaller than the screw diameter for pilot holes. This gives the screw threads something to grip, adding strength.
Step 4: Attach Brackets
Screw the brackets into place using strong screws.
- Start with one end bracket.
- Check with the level before tightening.
- Install the other end bracket.
- For long rods, install center brackets evenly spaced between the ends.
Practical tip: Don’t overtighten screws, especially in drywall. It can strip the hole and weaken the hold.
Extra: If using metal studs (common in commercial buildings), use self-drilling screws or anchors specifically made for metal.
Step 5: Cut The Rod (if Needed)
If the rod is too long, use a saw to cut it to your measured width.
- For metal rods, use a hacksaw.
- For wood rods, use a regular wood saw.
Sand the cut ends to remove splinters or sharp edges.
Pro tip: Wrap masking tape around the cut line to prevent splintering when sawing wood or to mark a straight cut for metal.
Step 6: Insert The Rod
Slide the rod into the bracket openings.
- For adjustable rods, expand to fit snugly.
- For fixed rods, check that both ends rest securely in the brackets.
If you have center brackets, lift and rest the rod onto them.
Extra tip: If the rod feels loose in the brackets, add a small piece of felt or rubber inside the bracket to prevent movement and noise.
Step 7: Test For Stability
Apply gentle pressure to the rod. Hang a few heavy items and check for sagging or movement.
- If the rod moves, check bracket screws and anchors.
- For extra strength, add another center bracket.
Non-obvious insight: Testing with heavy items before filling the closet prevents surprises later. If the rod flexes more than 1/8 inch under a moderate load, consider upgrading your supports.
Common Mistakes And How To Avoid Them
Even experienced DIYers make errors when mounting closet rods. Here’s what to watch out for:
- Skipping the level check: Clothes will slide and bunch up if the rod isn’t perfectly level.
- Using weak anchors: Rods mounted only in drywall (without anchors) may fail quickly.
- Ignoring center brackets: Long rods sag or bend without proper support.
- Mounting too close to the wall: Leave at least 12 inches of clearance from the back wall for hangers.
- Overloading the rod: Don’t exceed the rod’s weight limit. Calculate before loading.
Example: If you hang 50 shirts, each weighing about 1 pound, you need at least a rod that supports 50 pounds. Add coats or heavy jackets, and you may need stronger brackets.
Extra detail: If your closet is near a bathroom or laundry, moisture can weaken both wood rods and drywall anchors. Use rust-resistant materials and check for signs of mildew or rust over time.
Choosing The Right Wall Anchors
Wall anchors are essential for drywall installations. Not all anchors are equal.
Types Of Wall Anchors
- Plastic expansion anchors: Good for light loads. Not recommended for closet rods.
- Toggle bolts: Strongest. Use for heavy rods and long spans.
- Molly bolts: Medium strength. Suitable for most standard rods.
| Anchor Type | Strength | Best Use |
|---|---|---|
| Plastic Expansion | Low | Light shelves |
| Toggle Bolt | High | Closet rods, heavy loads |
| Molly Bolt | Medium | Standard rods |
Practical tip: Use toggle bolts if you can’t find studs. They spread pressure and hold heavy rods securely.
Extra: When drilling for toggle bolts, make sure the hole is large enough for the toggle to pass through, but not so large that the bracket can move.
Special Cases: Mounting Between Uneven Or Open Walls
Sometimes closets don’t have two solid side walls. Here’s what to do:
Mounting With One Open End
- Use a floor-to-ceiling pole for support.
- Attach one end bracket to the wall and the other to the pole.
Detail: Floor-to-ceiling poles can be found at hardware stores, or you can use a metal pipe cut to length. Make sure it’s anchored securely at both the floor and ceiling.
Uneven Walls
- Adjustable brackets let you compensate for uneven surfaces.
- Shim behind the bracket to make it level.
Example: If one wall is slightly higher, measure from the floor up and match the heights using shims.
Extra tip: Use a carpenter’s square to double-check your work. It helps keep everything straight, even in older homes where nothing is perfectly level.
Double Rod Installation
Adding a second rod increases storage but requires careful planning.
Steps
- Measure the upper rod at 80 inches and the lower rod at 40 inches.
- Install the upper rod first using standard steps.
- For the lower rod, ensure at least 36 inches of clearance for hanging shirts and pants.
- Use center brackets for both rods if the span is over 48 inches.
Practical tip: For coats or long dresses, leave a section with only the upper rod.
Extra detail: If you want shelves between rods, measure shelf height before installing the lower rod. Also, use shorter center brackets for the lower rod so hangers don’t hit the upper rod.
Maintenance And Upgrades
A strong installation lasts years, but regular checks keep it safe.
Maintenance Tips
- Inspect brackets and screws every 6 months.
- Tighten any loose screws.
- Check for rod sagging.
- Replace damaged brackets or rods quickly.
Extra tip: In humid climates, check for rust on metal parts and mildew on wood. Clean and repaint or replace as needed.
Upgrading Your Closet Rod
If your closet needs to hold more, consider:
- Switching to a steel rod
- Adding extra center brackets
- Upgrading to toggle bolts
- Installing oval rods for extra strength
Example: If your rod sags after a year, upgrading brackets or switching to a steel rod can solve the problem without rebuilding the whole closet.
Non-obvious insight: Upgrading wall anchors can make a bigger difference than changing the rod itself, especially in drywall installations.

Credit: www.jvmech.com
Data: Closet Rod Strength Comparison
Here’s a quick comparison of rod materials and their typical weight limits.
| Rod Material | Max Weight Supported (lbs) | Recommended Uses |
|---|---|---|
| Wood (1 1/4″) | 80-100 | Regular clothes |
| Steel (1 1/4″) | 120-150 | Heavy coats, suits |
| Aluminum (1 1/4″) | 70-90 | Light clothes |
| Plastic (1 1/4″) | 30-50 | Kids’ closets |
| Oval Steel | 160+ | High-capacity closets |
Non-obvious insight: Upgrading to oval steel rods increases capacity without needing thicker brackets.
Added detail: For custom closets, some people use industrial pipes for rods. These can hold even more weight, but they require special brackets and a strong wall structure.
Safety Tips For Mounting Closet Rods
Safety is important, even for a simple home project.
- Wear safety goggles when cutting or drilling.
- Use caution when working with power tools.
- If unsure about wall strength, consult a professional.
- Keep children away from tools and installation area.
Example: Drilling into drywall can produce dust; goggles prevent eye injury.
Extra advice: If you feel the drill “catch” suddenly, stop—there may be wiring or plumbing in the wall. When in doubt, use a stud finder with built-in wire detection or call a professional.
Practical Advisor’s Checklist For Success
To make sure your closet rod is strong and reliable, follow this final checklist:
- Measure twice, cut once.
- Use a level for every step.
- Mount brackets into studs or use strong wall anchors.
- Use center brackets for rods over 48 inches.
- Test with heavy clothes before filling the closet.
- Check for sagging after one week.
- Upgrade brackets or rod if needed.
- Inspect every 6 months.
Tip: Following this checklist prevents most common failures.
Extra: Keep leftover screws and anchors in a small bag taped inside the closet. If you need to tighten or upgrade later, you’ll have the right parts handy.
Frequently Asked Questions
What’s The Best Height For A Closet Rod?
The best height is 66 inches from the floor for a standard rod. For double rods, use 80 inches for the upper rod and 40 inches for the lower rod. Adjust for children or special needs. Always consider the length of your clothes—if you wear mostly long dresses, you may want a higher rod or an open section.
How Much Weight Can A Closet Rod Hold?
A typical wood or steel rod holds 80–120 pounds if installed with strong brackets and wall anchors. Use center brackets for rods longer than 48 inches. For very heavy loads (like commercial use), choose oval steel rods and heavy-duty brackets.
Can I Mount A Closet Rod Without Finding Studs?
Yes, but you must use strong wall anchors like toggle bolts. Mounting into studs is always safer and supports more weight. If you’re renting or don’t want to make large holes, look for tension rods or custom solutions, but expect lower weight limits.
What Should I Do If My Rod Starts To Sag?
Add more center brackets or upgrade to a stronger rod and brackets. Check screws and wall anchors for looseness. Replace damaged parts quickly. Sometimes, simply tightening the screws can solve minor sagging.
Are There Closet Rods For Heavy Coats Or Commercial Use?
Yes, steel or oval rods are best for heavy coats or commercial closets. Use heavy-duty brackets and wall anchors for maximum strength. For more details on rod types and materials, visit Home Depot.
Mounting a closet rod is a practical project that improves storage and keeps your clothes safe. With careful planning, the right tools, and smart choices, your rod will last for years. Remember to check strength, use quality materials, and follow each step closely.
If you ever doubt your skills or the strength of your walls, don’t hesitate to ask an expert. Your closet is an important part of your daily life—give it the attention it deserves.
Credit: www.reddit.com