
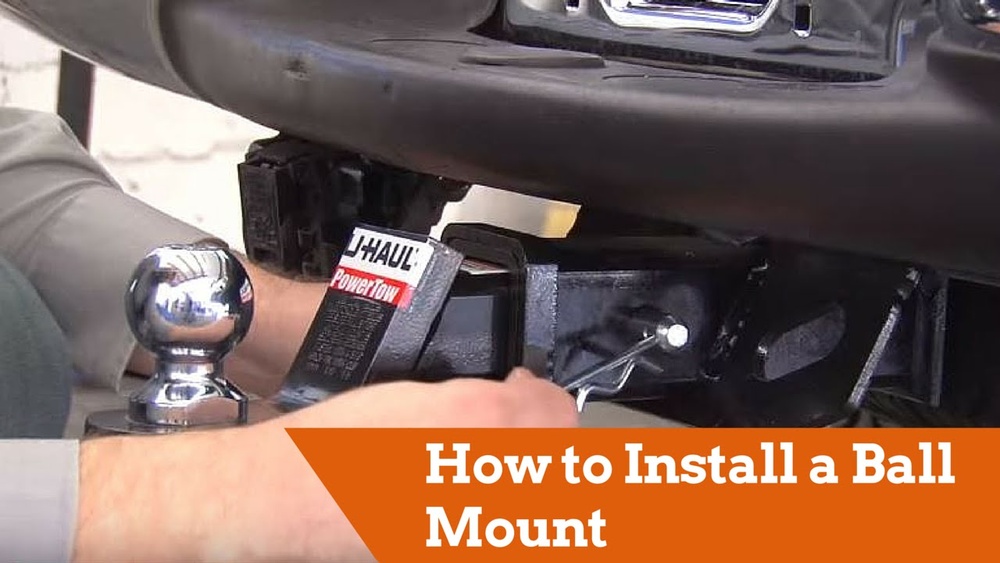
Mounting a hitch on a car can open new possibilities for travel, work, and adventure. Whether you want to tow a trailer, carry bikes, or haul cargo, installing a hitch makes your vehicle far more versatile. Many people are surprised that this is a project you can do yourself with basic tools and patience.
This guide will walk you through each step, explain the different hitch types, and help you avoid common mistakes. Even if you have never worked under your car, you’ll find practical advice and honest insights here.
Why Install A Hitch?
A hitch is more than just a piece of metal under your bumper. It gives your car new abilities, such as:
- Towing trailers for camping, moving, or work
- Carrying bikes or cargo racks
- Mounting accessories like ski racks or steps
Many vehicles come without a hitch, but adding one increases the car’s value and usefulness. It’s often cheaper to install a hitch yourself than pay a mechanic. Plus, knowing how it’s attached gives peace of mind when towing.
Understanding Hitch Types
Before you buy or install a hitch, you need to know which type fits your car and needs. Hitches come in several classes, and each class supports a different weight and use.
| Hitch Class | Max Trailer Weight | Max Tongue Weight | Common Uses |
|---|---|---|---|
| Class I | 2,000 lbs | 200 lbs | Bikes, small cargo carriers |
| Class II | 3,500 lbs | 350 lbs | Small trailers, light boats |
| Class III | 5,000 lbs | 500 lbs | Medium trailers, campers |
| Class IV | 10,000 lbs | 1,000 lbs | Large trailers, heavy loads |
Important note: Never exceed your car’s towing limits, even if the hitch is strong enough. Check your owner’s manual for the exact ratings.
Receiver Vs. Fixed Hitches
Most hitches are receiver hitches, which allow you to insert different accessories (like ball mounts or bike racks). Fixed hitches have a welded ball, so they’re not as flexible. Receiver hitches are more popular because they work with more attachments.
Hidden Vs. Exposed Hitches
Some hitches are hidden, meaning they sit behind the bumper and are less visible. Others are exposed, visible under the bumper. Hidden hitches look cleaner but may need more work to install. Exposed hitches are easier for DIY installs and are often cheaper.
Tools And Materials Needed
You don’t need a full mechanic’s shop to install a hitch, but some basic tools make the job much easier.
- Socket set (with metric and standard sizes)
- Torque wrench (to tighten bolts correctly)
- Wrench set
- Screwdrivers
- Drill and bits (sometimes needed for older cars)
- Jack and jack stands (to lift the car safely)
- Creeper (optional, but helps you slide under the car)
- Safety glasses and gloves
- Penetrating oil (like WD-40, for rusty bolts)
- Hitch kit (with all hardware and instructions)
Some kits include special fish wires for pulling bolts through the frame. Most cars do not need to weld anything, but check your hitch instructions to be sure.
Preparing For Installation
Before you get under the car, take time to plan. This saves frustration later and helps you avoid beginner mistakes.
Read The Instructions
Every hitch and car is a little different. Read the included instructions from start to finish. Pay attention to:
- Bolt locations
- Parts included
- Special tools or steps
Many people skip this and end up making extra holes or missing important washers.
Gather All Parts
Lay out your tools and hardware. Check that you have:
- The hitch itself
- All bolts, washers, and nuts
- Any included brackets or supports
- Fish wires (if your kit uses them)
Missing a bolt halfway through can stop the whole project.
Protect Your Car
Hitch installs sometimes require removing trim panels or lowering the exhaust. Lay down a blanket to protect your bumper and have a box for screws and small parts.
Lift The Car Safely
You may need to raise the back of your car. Use a jack to lift, then always place jack stands under solid points. Never trust just the jack. If you have ramps, those are even easier and safer.
Clean Mounting Points
Spray bolts and frame holes with penetrating oil if there’s rust or dirt. This makes removal and installation much smoother.
Step-by-step Hitch Installation
Let’s walk through a typical hitch install for a car or small SUV. Your vehicle might have some unique steps, but the main process is similar.
1. Remove Obstructions
Many cars have plastic covers, spare tires, or panels near the hitch area. Remove these with your screwdriver. On some models, you’ll need to temporarily lower the exhaust for better access. Use a bungee cord to support the exhaust pipe.
Pro tip: Take photos as you remove things. It makes reassembly much easier.
2. Locate Mounting Points
Check your frame for factory-drilled holes. Most modern cars have these covered with rubber plugs. Remove the plugs using a screwdriver. Clean any dirt or rust from these points.
If your car does not have holes, you may need to drill new ones. Double-check the hitch instructions before drilling.
3. Position The Hitch
This is usually a two-person job. Hold the hitch up to the frame and line up the holes. You can use a floor jack to help support the hitch if you’re working alone.
4. Insert Bolts
Some kits use fish wires to pull bolts through the frame from inside. Thread the bolt and washer onto the fish wire, feed it through the hole, and pull it out the mounting point.
Insert all bolts loosely at first. Do not tighten them yet. This allows you to adjust the hitch position for perfect alignment.
5. Tighten Bolts
Once all bolts are in place, use your hands to snug them. Then, use your torque wrench to tighten each bolt to the value in your instructions. This is critical for safety—over- or under-tightening can cause problems later.
Typical torque values: 70–110 ft-lbs, but always check your manual.
6. Reinstall Everything
Put back any panels, spare tires, or trim you removed. If you lowered the exhaust, re-hang it on the rubber hangers. Double-check that nothing is touching the exhaust pipe, as heat can damage the hitch or wires.
7. Inspect Your Work
Go over every bolt and part. Make sure:
- All bolts are tight
- Nothing is pinched or loose
- The hitch sits level and centered
It’s smart to check everything again after your first trip with a trailer or cargo.
Wiring For Trailers
If you plan to tow a trailer with lights, you’ll need to add trailer wiring. This connects your car’s lights to the trailer’s lights. Many hitch kits do not include wiring—buy a vehicle-specific wiring kit.
Plug-and-play Kits
Most modern cars support plug-and-play wiring. These kits snap into your tail light connectors without cutting wires. Follow these steps:
- Open your trunk and remove the tail light access panels.
- Unplug the factory connector.
- Plug the wiring kit in between the car harness and tail light.
- Route the trailer plug under the bumper.
Hardwiring (older Cars)
Some older cars require hardwiring. This means you connect the trailer wires directly to your car’s wires using crimp connectors. Test each wire to match brake, turn, and tail lights.
Tip: Use a test light or multimeter to avoid mistakes. Wrong wiring can blow fuses.
Grounding
Always attach the ground wire from the wiring kit to bare metal on your car’s frame. This ensures all lights work correctly.
Protecting The Wiring
Route the trailer plug so it doesn’t drag or get pinched in the trunk. Some people leave the plug inside and close it in the trunk when towing. Others run it outside for easy access.
Testing The Hitch And Lights
Before you hook up a trailer or carrier, test everything:
- Shake the hitch by hand—it should not move.
- Plug in a trailer and test all lights: Left, right, brake, and running.
- If lights are dim or don’t work, check your ground and connections.
Real-world Example: Sedan Hitch Install
Let’s take a typical car, like a 2017 Honda Accord. Most sedan hitches are Class I or II and use existing frame holes. The steps are:
- Remove two plastic underbody panels and a small heat shield.
- Lower the exhaust slightly for access.
- Insert bolts into the frame using included fish wires.
- Lift the hitch into place and attach nuts.
- Torque all bolts to 90 ft-lbs.
- Reinstall everything you removed.
Total time: about 1.5–2 hours for a first-time DIYer.
Common Mistakes And How To Avoid Them
Even careful people can make mistakes. Here are a few to watch for:
- Skipping instructions: Each car is different. Always read the manual fully.
- Not using a torque wrench: Guessing bolt tightness can lead to unsafe towing.
- Forgetting to tighten all bolts: Double-check every connection before driving.
- Pinching wires: If you add trailer wiring, route it so nothing gets crushed.
- Missing parts: Lay out all hardware before starting; missing a washer can cause rattling.
Comparing Diy And Professional Installation
You might wonder if it’s better to do the job yourself or hire a pro. Here’s a quick look at the differences.
| Factor | DIY Installation | Professional Installation |
|---|---|---|
| Cost | $100–$250 (parts only) | $300–$700 (parts + labor) |
| Time | 2–3 hours | 1–2 hours |
| Tools Needed | Basic hand tools | None |
| Skill Level | Beginner to intermediate | None required |
| Warranty | Depends on hitch brand | Often includes labor warranty |
Non-obvious insight: Many car dealers offer hitch install, but at a much higher price. Local mechanics or trailer shops are often more affordable and just as reliable.
Important Safety Tips
Mounting a hitch safely is critical. A mistake can damage your car or cause an accident. Here are some must-follow tips:
- Never crawl under a car supported only by a jack.
- Use eye protection when drilling or working under the car.
- Don’t overload your hitch; check both hitch and vehicle ratings.
- Inspect your hitch and bolts every few months, especially if towing often.
- Use thread locker on bolts if your kit suggests it.
Maintenance And Long-term Care
Hitches are tough, but they still need care. Here’s how to keep yours in top shape:
- Clean the receiver: Dirt and rust can build up. Use a wire brush and lubricate with light oil.
- Check bolts regularly: Retorque them every 6–12 months.
- Touch up paint: If you see rust, sand and repaint with black enamel.
- Store accessories: Remove bike racks or cargo carriers when not in use to prevent theft and rust.
Hitches are often forgotten after install, but regular checks prevent problems.
Choosing The Right Hitch For Your Car
Picking the wrong hitch is a common mistake. Here’s what to check before buying:
- Vehicle compatibility: Make sure the hitch fits your car’s year, make, and model.
- Weight ratings: Match the hitch class to your towing needs.
- Receiver size: Most Class I and II use a 1.25-inch receiver; Class III+ use 2-inch.
- Install difficulty: Some cars are “no-drill,” others require more work.
- Accessory needs: If you plan to use bike racks, make sure your hitch supports them.
Pro tip: Look for hitches with a powder-coated finish. They resist rust much better than painted models.
How To Select Hitch Accessories
Once you have the hitch, you may want accessories like ball mounts, bike racks, or cargo carriers. Here’s a quick comparison of common hitch accessories:
| Accessory | Main Use | Fits Which Hitch Classes? |
|---|---|---|
| Ball Mount | Towing trailers | All (check receiver size) |
| Bike Rack | Carrying bikes | I, II, III, IV |
| Cargo Carrier | Extra luggage space | II, III, IV |
| Hitch Step | Easy access to roof/trunk | II, III, IV |
| Towing Hook | Pulling stuck vehicles | III, IV |
Non-obvious insight: Always check the tongue weight rating of your accessories. Overloading a bike rack or cargo carrier can bend the hitch or damage your car’s frame.
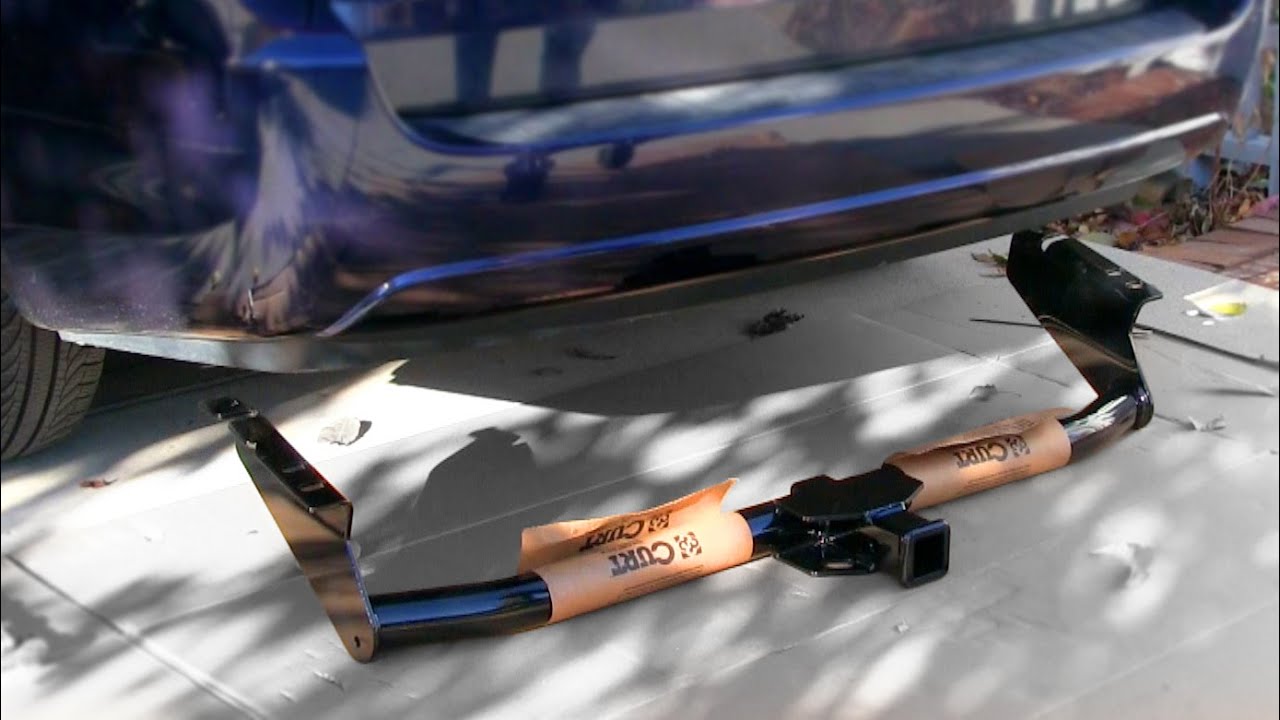
Credit: www.youtube.com
When To Ask For Help
Some situations call for a professional. If you run into these issues, consider getting assistance:
- Rusted or broken bolts you can’t remove
- Noisy or “clunking” hitch after install
- Unusual exhaust routing or heat shields
- Electrical problems after wiring install
Most mechanics and trailer shops have seen every problem before. It’s better to pay a little for expert help than risk safety.
Environmental Factors
If you live in a region with heavy snow or salt on the roads, your hitch is more likely to rust. Consider:
- Washing your hitch area in winter
- Using a rust inhibitor spray
- Storing your hitch accessories indoors
A little extra care keeps your hitch strong for years.
What To Do After Installation
You’ve mounted your hitch—what next? Here are the steps to finish the job:
- Register your hitch with the manufacturer for warranty.
- Test drive your car with and without a trailer or rack.
- Re-check all bolts and wiring after the first long trip.
- Get familiar with your car’s new towing limits.
- Read up on local towing laws (some states have extra requirements for lights or safety chains).
Towing Safety Tips
Pulling a trailer or heavy load changes how your car handles. Follow these rules:
- Brake earlier—your stopping distance is longer.
- Turn wider—trailers need more room.
- Check your mirrors often—watch for sway.
- Use safety chains for every trailer, even small ones.
- Never tow with passengers in a trailer.
If you’re new to towing, practice in an empty parking lot before hitting the highway.

Credit: www.amazon.com
Real-world Cost Breakdown
Many people wonder what the real cost of a DIY hitch install is. Here’s a sample breakdown for a typical midsize sedan:
- Hitch kit: $130
- Wiring kit: $50
- Tools (if you don’t have them): $60
- Total: $240
A mechanic may charge $300–$500 for the same job. Doing it yourself saves money, but only if you follow each step carefully.
Legal And Warranty Concerns
Check your car’s warranty before installing a hitch. Most manufacturers allow hitch installs, but drilling holes or splicing wires can void some warranties. Always use factory mounting points when possible. If in doubt, ask your dealer.
Some states require you to have extra lights, reflectors, or safety chains for trailers. Visit your local DMV website for exact rules.
Where To Learn More
If you want to dive deeper, many manufacturers offer install videos and detailed guides. Forums for your car’s make and model are also full of tips from other DIYers. For safe towing rules, the NHTSA is a reliable authority.
Frequently Asked Questions
How Long Does It Take To Install A Hitch On A Car?
Most people can install a hitch in 2 to 3 hours if they have basic tools and follow instructions. The first time may take longer, but the process is straightforward for most cars and SUVs.
Do I Need To Drill Holes To Mount A Hitch?
Most modern vehicles have factory-drilled holes for hitches, so you do not need to drill. Some older cars or rare models might require drilling. Always check your car and hitch instructions before buying.
Can I Install A Hitch Without Wiring?
Yes, you can mount a hitch just for bike racks or cargo carriers without wiring. However, if you plan to tow a trailer with lights, you’ll need to add a wiring kit to connect the trailer’s lights to your car.
Will A Hitch Affect My Car’s Warranty?
If you use factory mounting points and follow instructions, installing a hitch usually does not void your warranty. But drilling or splicing wires can sometimes cause problems. Check your owner’s manual or talk to your dealer to be sure.
How Do I Prevent Rust On My Hitch?
Clean your hitch regularly and apply touch-up paint if you see chips or rust. In snowy or salty regions, use a rust inhibitor spray and rinse your hitch area often to keep it in good shape.
Mounting a hitch on your car is a practical upgrade that adds real value. With careful planning and attention to detail, most people can handle this project at home. Whether you’re towing a trailer, hauling bikes, or just want more flexibility, a hitch makes your car more capable and ready for any adventure.

Credit: www.amazon.com