
Mounting a TV on the wall can transform your living room, bedroom, or office. It saves space, creates a modern look, and improves your viewing experience. But many people worry about damaging their walls or making mistakes. With the right guidance, tools, and preparation, you can mount your TV safely and securely.
This guide walks you through every step, from choosing the right mount to finishing the installation. Whether you’re a beginner or have some DIY experience, you’ll find clear advice, practical tips, and answers to common questions.
Why Mount A Tv On The Wall?
Wall-mounted TVs are popular for several reasons. First, they save floor space. You don’t need a bulky stand or cabinet, making your room look bigger and cleaner. Second, they offer better viewing angles. You can set the height and position to match your seating area.
Third, wall-mounted TVs are safer, especially in homes with children or pets. There’s less risk of the TV tipping over.
A 2022 survey by the Consumer Technology Association found that 58% of new TV buyers planned to mount their TV on the wall. This trend is growing as people seek modern designs and safer setups. Mounting your TV can also help reduce glare and protect the screen from accidental bumps.
Another big advantage is flexibility in room design. When the TV is on the wall, you have more options for arranging furniture. You can add shelves, artwork, or even a fireplace below the TV. Also, cleaning the floor is easier without a TV stand in the way.
Some people overlook security. In homes with young kids, a wall-mounted TV is much harder to pull or push over. This prevents accidents that sometimes happen with TVs on stands.
Choosing The Right Wall Mount
Before you start, you need to pick the right mount for your TV. Not all mounts are the same. They vary in design, weight capacity, and movement options.
Types Of Tv Wall Mounts
- Fixed mounts – These hold the TV flat against the wall. They don’t move, but they’re slim and simple.
- Tilting mounts – They let you tilt the TV up or down. This is useful if you want to reduce glare or mount the TV higher.
- Full-motion mounts – Also called articulating mounts. These let you pull the TV out, turn it left or right, and tilt it. They’re good for large rooms or if you want to watch from different spots.
For example, a fixed mount is perfect if you always watch TV from one spot, like a couch facing the wall. A tilting mount is a better choice if windows or lamps sometimes cause glare on your screen. If you have an open-plan room or want to watch from the kitchen and sofa, a full-motion mount offers the most flexibility.
Comparing Mount Types
Here’s a quick comparison:
| Mount Type | Movement | Best For | Average Price |
|---|---|---|---|
| Fixed | None | Small rooms, low budgets | $20–$50 |
| Tilting | Up/Down | Reducing glare, high placement | $30–$70 |
| Full-motion | Left/Right, Up/Down, Out/In | Large rooms, flexible viewing | $60–$200 |
Weight And Size Compatibility
Mounts are rated by weight and screen size. Check your TV’s manual for its VESA pattern (the distance between mounting holes). Most TVs use standard patterns like 200x200mm or 400x400mm. Make sure your mount matches this and can support the TV’s weight. Overloading a mount is dangerous.
If your TV is especially thin or large, it may need a specialty mount. Some ultra-thin TVs require a mount that sits very close to the wall, while heavy models (over 80 lbs) need heavy-duty mounts with more bolts.
Extra Features
Some mounts offer extras like built-in cable management, leveling adjustment, or easy-release tabs. These can make installation smoother and help keep your setup tidy.
A less obvious feature is post-install leveling. If your mount has this, you can make small adjustments even after the TV is on the wall. This is very helpful in older homes where walls may not be perfectly straight.
Preparing For Installation
Preparation is key. Rushing can lead to mistakes or damage. Take time to get everything ready.
Tools And Materials You’ll Need
- TV wall mount kit (with hardware)
- Electric drill and bits
- Stud finder
- Level
- Tape measure
- Socket wrench or screwdriver
- Pencil
- Safety glasses
- Masking tape
- Vacuum or broom (for cleanup)
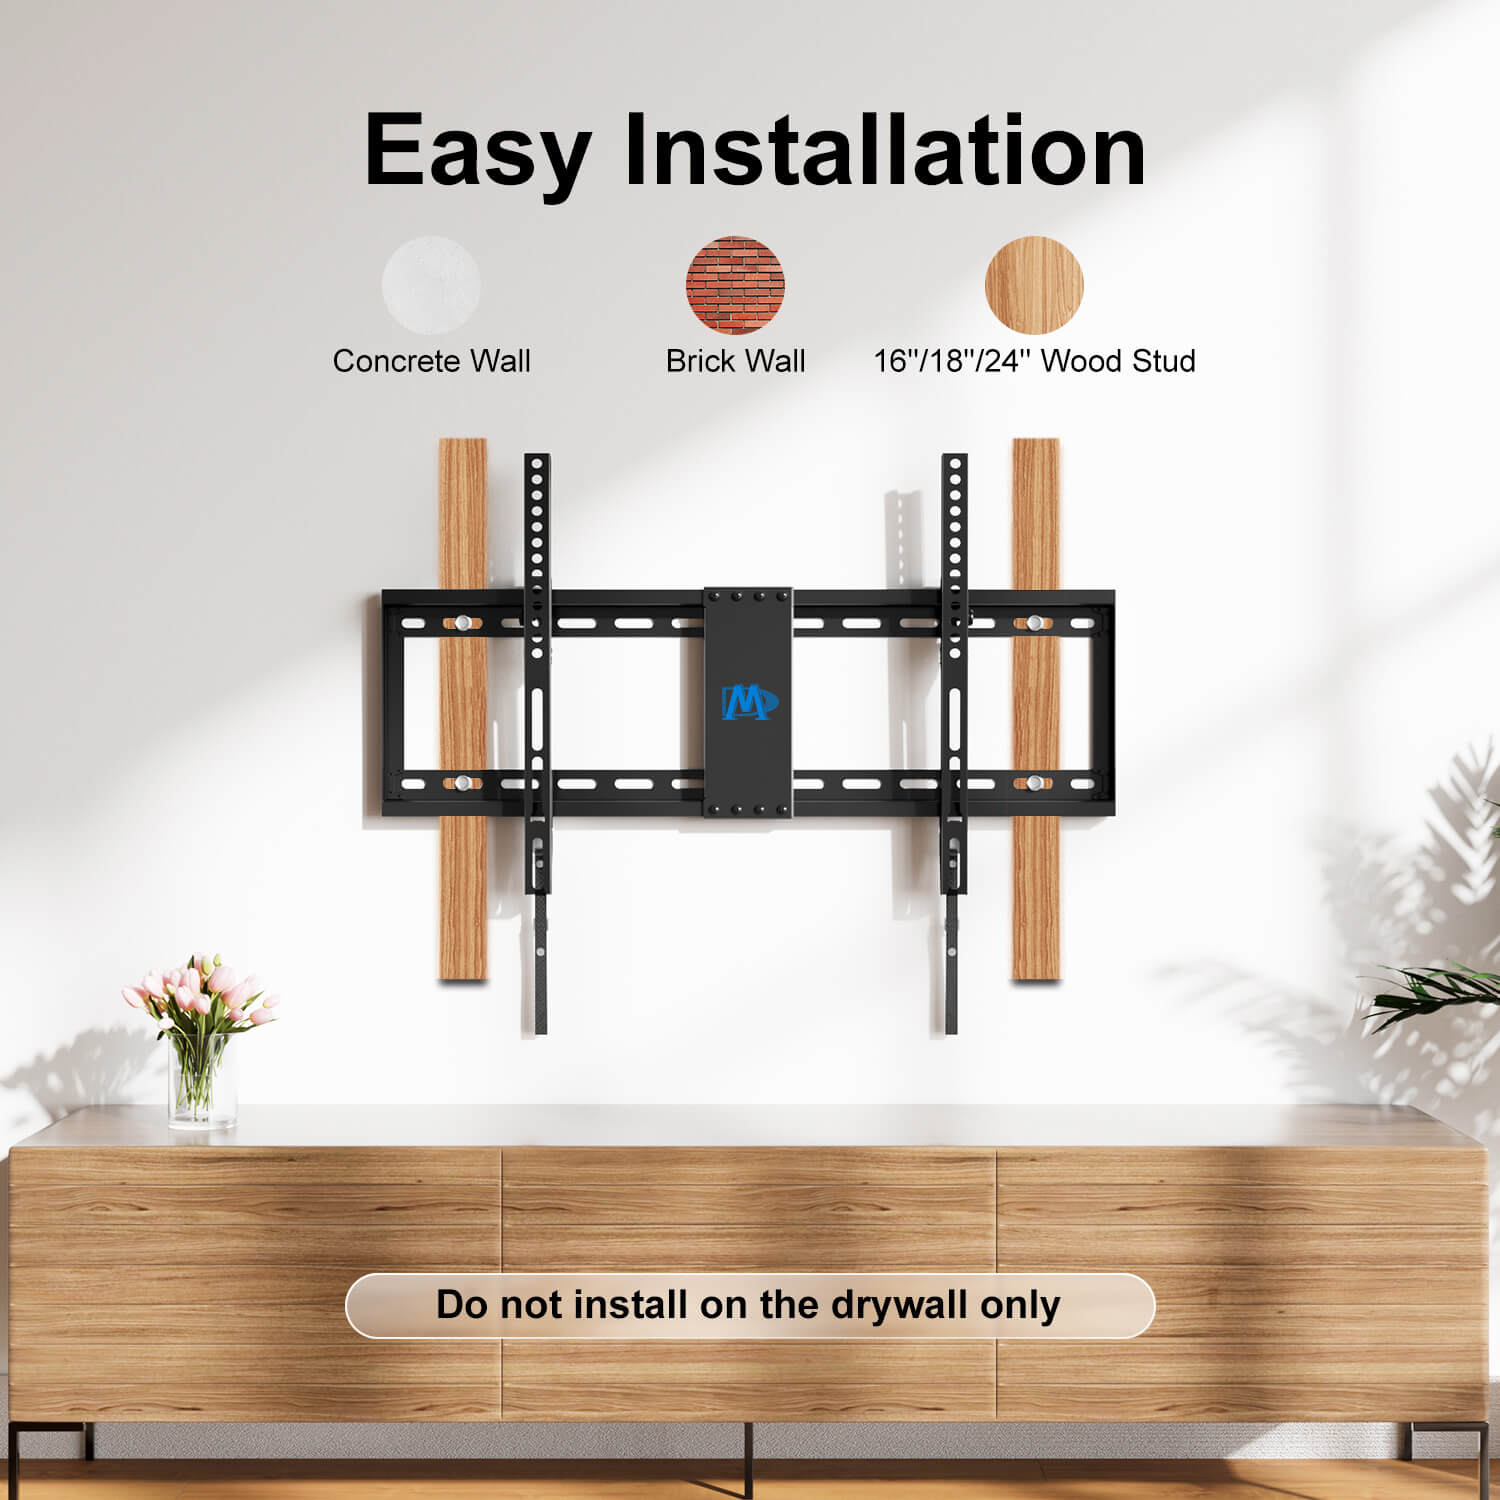
If your wall is concrete or brick, you’ll need masonry drill bits and anchors. For drywall, make sure to mount into studs, not just drywall.
Having all tools within reach will speed up the process. Some people forget safety glasses, but drilling can send dust or bits of wall into your eyes. Even a simple mask can help if you’re sensitive to dust.
Checking Your Wall
Most TVs need to be mounted on a wall with wooden studs or concrete. Drywall alone cannot support the weight. Use a stud finder to locate the studs. Mark their positions with a pencil or masking tape.
If you have a brick or concrete wall, you’ll need special anchors. Avoid mounting on metal studs unless your mount kit is rated for them.
One easy way to confirm a stud is to drive a small nail first. If it goes in easily and hits solid wood, you’re in the right spot. If it goes in and then suddenly sinks, you may have missed the stud.
Planning The Location
Choose a spot with:
- Easy access to power outlets
- No obstacles behind the TV
- A comfortable viewing height (eye level when seated is ideal)
- Room for cables and devices
A common mistake is mounting the TV too high. The center of the screen should be about 42–48 inches from the floor for most couches. If you have a fireplace, consider the heat and check clearance.
Think about sunlight, too. If you often have sunlight in the room, position the TV to avoid reflections. Also, leave space below for a soundbar or game console if you need it.
Measuring And Marking
Measure your TV’s width and height. Use masking tape on the wall to visualize the TV’s placement. Adjust until you’re happy with the look and viewing angle.
It helps to cut out a piece of cardboard the same size as your TV and tape it to the wall. This gives you a real sense of how much space the TV will take and if it will feel balanced in the room.
Mounting The Bracket
This is where careful work matters. Double-check everything before drilling.
Attaching Brackets To The Tv
Most TVs have four mounting holes on the back. Use the screws from your mount kit. Don’t overtighten. If your TV has a curved back or an odd shape, use spacers from the kit.
Some beginners forget to remove the stand from the TV before mounting. This can make the process awkward or damage the screen.
Another mistake is not checking for the correct screw length. Too long can damage the TV, too short won’t hold safely. Always use the ones provided in the kit unless your TV’s manual says otherwise.
Positioning The Wall Plate
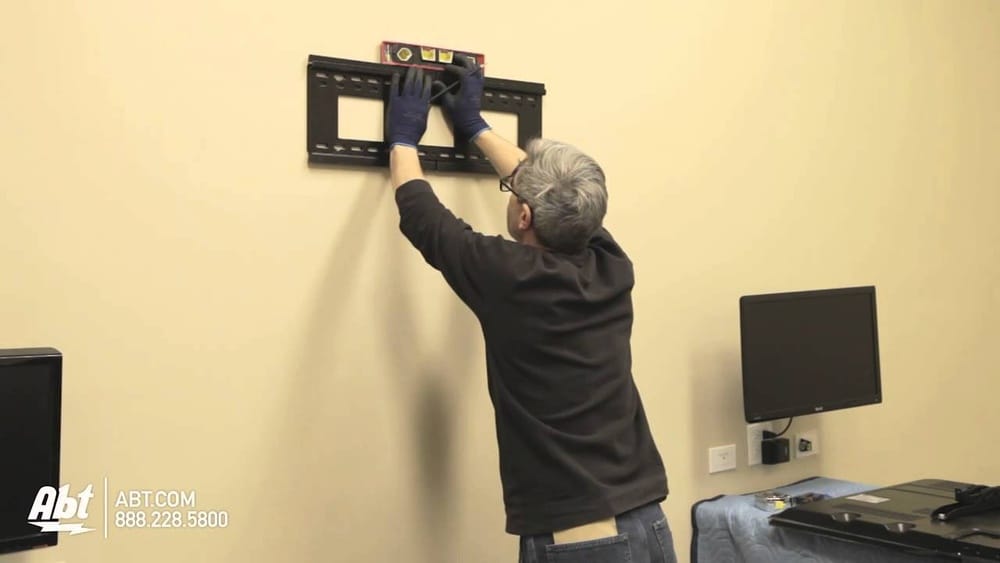
Hold the wall plate against the wall. Use a level to make sure it’s straight. Mark the holes for drilling with a pencil. Check again that you’re on the studs.
If the wall is uneven, use shims behind the wall plate to keep everything level. Double-check measurements—errors here are hard to fix later.
Drilling Holes
Drill pilot holes at your marks. For wood studs, use a bit slightly smaller than the lag bolts. For concrete, use the correct masonry bit and anchors.
When drilling, start slowly to avoid slipping. If you hit something hard or unusual, stop and check—you may have found a pipe or wire.
Securing The Wall Plate
Attach the wall plate using bolts from your kit. Tighten each bolt securely, but don’t overtighten. Use a level again to check that it’s still straight.
Some people skip using a level, but this can lead to a crooked TV. If your mount has leveling adjustment, you can fix small errors later.
If you feel resistance while tightening bolts, back them out and check alignment. For very heavy TVs, ask a friend to help hold the plate as you work.
Credit: www.youtube.com
Hanging The Tv
Now you’re ready to hang the TV on the wall plate.
Lifting And Attaching
This step is easier with two people. Carefully lift the TV and hook it onto the mount. Follow your kit’s instructions. Some mounts snap in place; others use screws for extra security.
Check that the TV is secure before letting go. Gently pull and push to confirm it’s locked.
If your mount uses locking screws or rods, make sure they’re fully engaged. Skipping these steps can risk the TV falling off the wall.
Adjusting The Angle
If your mount tilts or swivels, adjust to your preferred angle. Use the level again to ensure the TV isn’t slanted. Tighten any adjustment screws.
Take time to find the best angle for both comfort and picture quality. Sometimes, adjusting the angle just a few degrees can reduce glare or improve the view for everyone in the room.
Cable Management
Hide cables for a clean look. Some mounts have clips or channels. You can also use cable covers that stick to the wall. If you want a truly hidden setup, consider running wires inside the wall, but this requires extra tools and safety steps.
Here’s a quick comparison of cable management options:
| Method | Visibility | Difficulty | Cost |
|---|---|---|---|
| Wall clips | Visible | Easy | $5–$15 |
| Cable covers | Minimal | Easy | $15–$30 |
| In-wall wiring | Hidden | Hard | $40–$100 |
For extra neatness, consider using zip ties or Velcro straps to bundle cables behind the TV.
Testing And Troubleshooting
Before you finish, check your work.
Checking Stability
Gently shake the TV. It should not move or wobble. If it feels loose, check all bolts and connections.
Also, look for any sagging or gaps between the wall plate and the wall. A secure mount should be flush.
Connecting Devices
Plug in your TV and any devices. Check that cables reach and are not stretched. Turn on the TV and test your remote. Look for any issues with signal or picture quality.
Try switching between different HDMI ports or devices. Sometimes, tight spaces behind the TV can make certain ports hard to access. Adjust as needed before finalizing the setup.
Common Problems
- Crooked TV: Use the mount’s leveling adjustment or re-mount if needed.
- Loose bolts: Tighten carefully, but don’t strip the threads.
- Cable strain: Use covers or clips to prevent pulling.
Many beginners skip these checks and later regret it. Taking time now can save hours later.
If you notice picture distortion or lines on the screen, double-check that no cables are pinched.
Safety Tips And Mistakes To Avoid
Mounting a TV is not risky if you follow safety rules. But some mistakes can lead to injury or damage.
Key Safety Tips
- Always mount into studs or solid walls.
- Don’t use drywall anchors for heavy TVs.
- Wear safety glasses when drilling.
- Lift with two people, especially for TVs over 40 inches.
- Keep children and pets away during installation.
Double-check the weight rating of both the mount and the bolts you’re using. Never guess or use hardware not meant for heavy loads.
Mistakes Beginners Make
- Mounting too high: Causes neck strain.
- Ignoring stud finder: Leads to weak support.
- Using wrong screws: May damage the TV.
- Forgetting cable planning: Creates messy look.
- Skipping the level: Results in uneven installation.
A non-obvious insight: Many older homes have irregular stud spacing. Don’t assume studs are always 16 inches apart. Check each wall individually.
Another common oversight: Some power outlets are on the same stud as your mounting location. Plan your hole placement to avoid hitting wires.
If you’re unsure about any step, pause and double-check. Rushing is a top cause of accidents and mistakes.
Special Cases: Brick, Concrete, And Unusual Walls
Not all walls are the same. If you have brick, concrete, or unusual materials, follow special steps.
Brick And Concrete Walls
- Use masonry anchors and a hammer drill.
- Mark holes carefully and drill slowly to avoid cracks.
- Choose mounts with longer bolts for solid support.
- Avoid mounting near edges, which are weaker.
If you’re unsure about the wall material, drill a small test hole first. Brick, for example, is harder and often reddish inside. Concrete is gray and very dense.
Metal Studs
Mounting on metal studs is tricky. Use special toggle bolts designed for metal. Don’t rely on standard lag bolts. If possible, mount to wood blocking behind the wall.
Toggle bolts spread weight across a larger area of the stud. Always check your mount kit for metal stud compatibility.
Plaster Walls
Older homes may have plaster over wood lath. Use a stud finder made for plaster, or tap to locate wood. Drill slowly and avoid cracking the plaster.
If plaster is too brittle, consider adding a wooden backer board across studs for extra support.

Credit: www.tomsguide.com
Hiding Cables For A Clean Look
Cable clutter can ruin the modern look of a wall-mounted TV. Here are some ways to manage cables:
Surface Covers
Plastic cable covers stick to the wall and can be painted. They’re easy to install.
In-wall Kits
Some kits let you run HDMI and power cables behind drywall. This is more complex and requires cutting holes. Always follow local electrical codes.
If you’re not comfortable working with electricity, ask a pro to install a power outlet behind the TV.
Wireless Solutions
Wireless HDMI kits can send signals without cables. They cost more but reduce visible wires.
A non-obvious tip: Plan for future devices. If you may add a soundbar or gaming console, leave extra space for cables.
Also, check cable lengths before finalizing the TV position. Cables that are too short can cause stress on ports and connections.
Mounting Above A Fireplace
Many people want to mount their TV above a fireplace. This is possible, but there are risks.
Heat Concerns
Excess heat can damage the TV. Check the temperature above the fireplace. If it’s over 100°F (38°C), don’t mount your TV there.
If you use the fireplace often, install a heat shield or choose another location.
Viewing Angle
Mounting too high can cause neck strain. Use a tilting mount to angle the screen downward.
For best comfort, sit where you normally watch TV and check if your neck feels relaxed.
Cable Routing
Fireplaces often block easy access to outlets. Plan your cable path before mounting.
If needed, use extra-long HDMI cables or wireless solutions to reach your devices.
Professional Installation Vs Diy
Should you hire a pro or do it yourself? Here’s a quick comparison:
| Aspect | DIY | Professional |
|---|---|---|
| Cost | $50–$200 | $150–$500 |
| Time | 2–4 hours | 1–2 hours |
| Skill Needed | Basic tools | None |
| Risk | Higher | Lower |
| Warranty | None | Usually included |
DIY saves money and gives you control. Professional installers can handle tricky walls and guarantee their work. For large TVs or difficult setups, hiring a pro may be safer.
A pro can also hide cables inside the wall and ensure everything meets safety codes. If you’re renting or unsure about wall materials, a professional can help you avoid costly mistakes.
Environmental And Design Considerations
Mounting a TV can improve your room’s look. But it also affects lighting, sound, and comfort.
Lighting
Avoid placing the TV opposite bright windows. Glare can make viewing uncomfortable. Use tilting mounts to adjust the angle if needed.
Try watching TV at different times of day to check for glare. Curtains or blinds can also help control light.
Sound
Wall-mounted TVs may sound different than on a stand. Consider adding a soundbar or external speakers for better audio.
If you wall-mount a soundbar, follow similar steps as the TV—use a level and proper anchors. Some mounts allow you to attach a soundbar directly under the TV for a tidy look.
Room Design
A mounted TV creates a focal point. Plan other furniture around it. Leave space for devices and decorations.
Consider adding shelves or cabinets below the TV for extra storage. Try not to crowd the area with too many items, which can distract from the TV.
Real-world Examples And Data
A 2021 study by Statista showed that over 70% of households in the US have at least one wall-mounted TV. Homeowners report higher satisfaction with the look and space savings.
One example: In a small apartment, mounting a 55-inch TV freed up 15 square feet of floor space. The owner could add a bookshelf and extra seating.
Another insight: Many office conference rooms use wall-mounted TVs for presentations. This keeps the area tidy and professional.
A family with active children reported fewer accidents and less stress after mounting their TV, as there was no risk of it being knocked over during play.
Maintenance And Long-term Care
A mounted TV needs little upkeep, but some steps help keep it safe.
Cleaning
Dust your TV and mount regularly. Use a soft, dry cloth. Avoid spraying cleaners directly on the screen.
If you must clean sticky spots, spray cleaner onto a cloth first, never onto the TV.
Checking Bolts
Every six months, check that bolts are tight. Vibrations from use or nearby activity can loosen them.
If you live in an earthquake-prone area, check more often. Consider earthquake safety straps for extra security.
Inspecting Cables
Look for wear or damage on cables. Replace any frayed wires to prevent hazards.
Organize cables to avoid tangling. This makes device changes easier and keeps your setup looking clean.
Credit: mountingdreamonline.com
Frequently Asked Questions
How Do I Know If My Wall Can Support A Tv?
Use a stud finder to check for solid wood studs or concrete. Avoid mounting on drywall alone. If unsure, consult a professional.
What Is The Best Height To Mount A Tv?
The center of the screen should be 42–48 inches from the floor for most seating areas. Adjust for your room and furniture.
Can I Mount A Tv By Myself?
For small TVs (under 40 inches), it’s possible. For larger screens, ask a friend to help. Lifting alone risks injury and damage.
What If My Tv Does Not Have Vesa Holes?
Most modern TVs have VESA patterns. If not, you may need an adapter kit. Check your TV’s manual for compatible mounts.
Is Wall Mounting Safe For All Tv Sizes?
Yes, if you use the right mount and hardware for the TV’s weight and size. Always follow the manufacturer’s instructions.
Mounting your TV on the wall can make your space cleaner, safer, and more enjoyable. With careful planning, the right tools, and attention to detail, you can achieve a professional look. If you run into trouble or have unusual walls, don’t hesitate to seek expert help. For more detailed information on TV mounting standards, see Wikipedia.