
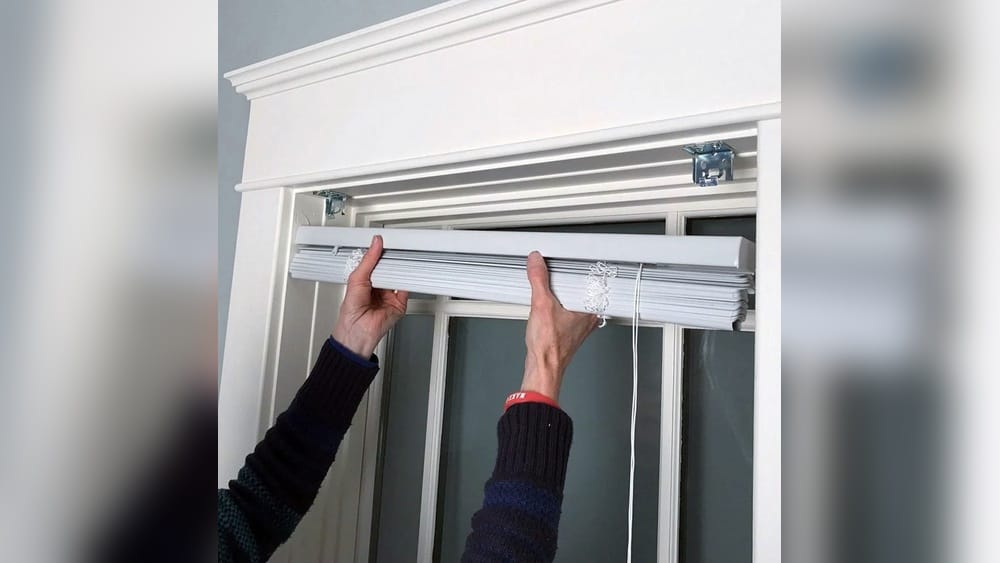
Mounting blinds can change the look and feel of your room. Blinds offer privacy, control over sunlight, and can even help save energy. But for many people, the idea of installing blinds is scary. It seems technical, time-consuming, or even risky.
The truth is, mounting blinds is much easier than it looks. With the right tools, clear steps, and a bit of patience, you can do it yourself and get professional results. This guide will help you understand everything you need—from choosing the right blinds to installing them securely.
You’ll learn smart tips, common mistakes, and see data that will help you make better decisions. Whether you want to mount blinds in your living room, bedroom, or office, you’ll find practical advice for every step.
Understanding Different Types Of Blinds
Blinds come in many styles, each with its own features and benefits. Choosing the right type for your space is the first step before thinking about installation.
Key Types Of Blinds
- Venetian blinds: Made with horizontal slats, usually wood, plastic, or metal. Great for light control.
- Vertical blinds: Long vertical slats, often used for large windows or sliding doors.
- Roller blinds: Fabric rolled up at the top. Simple, modern look.
- Roman blinds: Fabric that folds up in pleats. Elegant style.
- Cellular (honeycomb) blinds: Unique design traps air, helps with insulation.
- Panel blinds: Wide panels slide on a track. Ideal for big windows.
Comparing Blinds: Light Control And Privacy
Here’s a quick comparison of how different blinds perform for privacy and light control:
| Type | Privacy | Light Control | Ease of Cleaning |
|---|---|---|---|
| Venetian | High | Excellent | Easy |
| Vertical | Medium | Good | Moderate |
| Roller | Medium | Varies | Easy |
| Roman | High | Good | Moderate |
| Cellular | High | Excellent | Moderate |
| Panel | Medium | Good | Easy |
Non-obvious insight: Not all blinds suit every window. For example, Venetian blinds work best for small to medium windows, while panel blinds are better for wide spaces.
Deciding Between Inside Mount Vs. Outside Mount
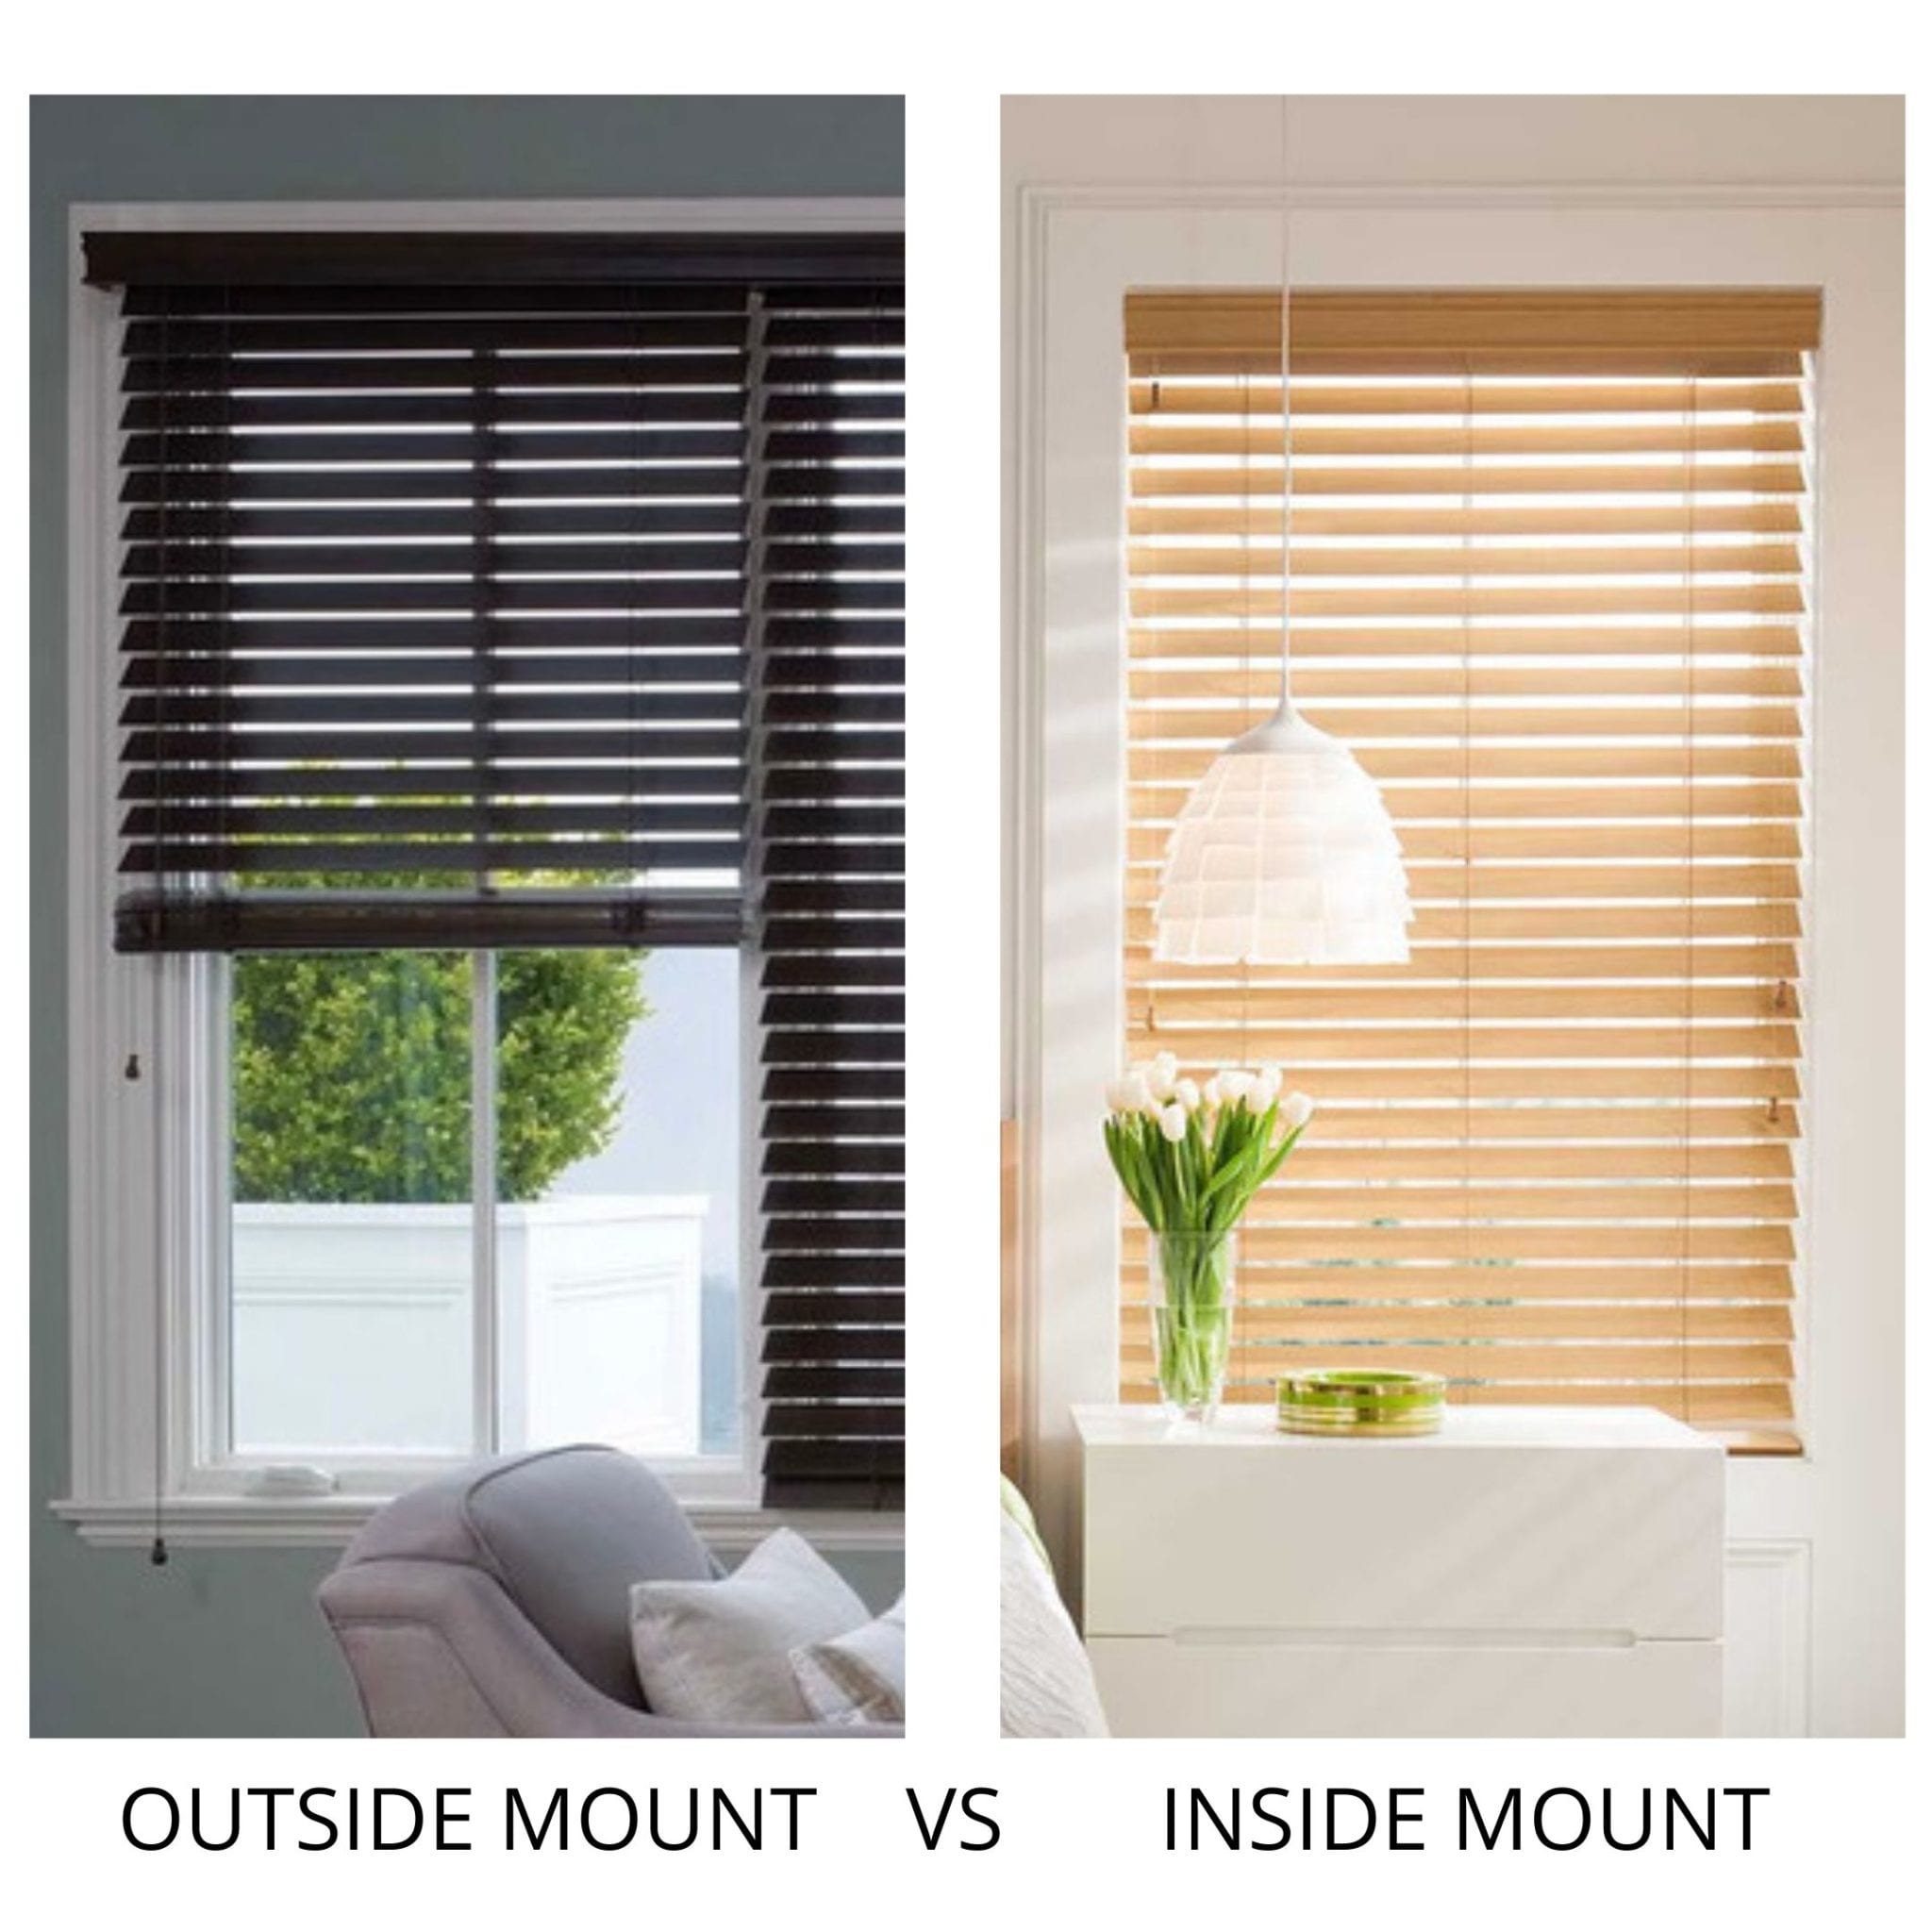
Before you buy or install your blinds, you need to choose how they will be mounted. There are two main options: inside mount or outside mount.
Inside Mount
- Blinds sit inside the window frame.
- Creates a clean, built-in look.
- Requires precise measurements.
- Works best if your window frame is deep enough.
Outside Mount
- Blinds hang outside the window frame, covering it.
- Can make windows look bigger.
- Useful for shallow windows or if you want to block more light.
- Offers more flexibility with measurements.
Inside Vs. Outside Mount: Pros And Cons
Here’s a comparison to help you decide:
| Mount Type | Look | Light Blocking | Ease of Installation | Best for |
|---|---|---|---|---|
| Inside | Neat, custom | Moderate | Requires precision | Deep frames |
| Outside | Bold, covers frame | Maximum | Flexible | Shallow frames, blackout |
Non-obvious insight: If you have uneven walls or old window trim, outside mount hides flaws and gives a fresher look.
Measuring Your Windows Correctly
Proper measurement is the foundation of a good blind installation. Even small mistakes can make blinds look odd, work poorly, or not fit at all.
What You Need
- Tape measure (preferably metal for accuracy)
- Notepad for recording numbers
- Pencil for marking
Measuring For Inside Mount
- Measure width at the top, middle, and bottom of the window opening.
- Record the smallest measurement. This ensures the blind fits inside.
- Measure height on the left, center, and right. Use the largest number for full coverage.
- Check depth of your window frame. Most blinds need at least 1.5 to 2 inches.
Measuring For Outside Mount
- Measure width of the area you want to cover. Add 2-3 inches on each side for better light blocking.
- Measure height from where you want the top to start to where you want the bottom to end.
- Decide if you want the blinds to cover the window trim or just the glass.
Common Measurement Mistakes
- Using an old tape measure with stretched or bent tape.
- Not checking for window frame depth.
- Forgetting to add extra width for outside mount.
- Writing numbers in the wrong units (inches vs centimeters).
Practical tip: Double-check all measurements before ordering. Mistakes often cost money and time.
Choosing The Right Tools And Materials
Mounting blinds doesn’t need expensive tools, but having the right ones makes the job easier and safer.
Essential Tools
- Drill with appropriate bits (usually 1/8” or 3/16”)
- Screwdriver (flathead and Phillips)
- Level for straight blinds
- Tape measure
- Pencil
- Wall anchors (if mounting into drywall)
- Step stool or ladder (if your window is high)
Materials
- Blinds with mounting brackets and screws (usually included)
- Wall anchors (for heavier blinds or weak walls)
- Safety glasses (optional but recommended)
Tool Comparison: Manual Vs. Electric
Here’s a simple comparison for choosing between manual and electric tools:
| Tool Type | Speed | Precision | Recommended For |
|---|---|---|---|
| Manual (screwdriver) | Slow | High | Small jobs, delicate surfaces |
| Electric (drill) | Fast | Medium | Large jobs, thick walls |
Non-obvious insight: Electric drills are faster, but manual screwdrivers give you more control, especially on fragile surfaces.
Preparing For Installation
Preparation is often overlooked, but it makes installation smoother and prevents mistakes.
Clear The Area
Move furniture, curtains, or anything blocking the window. Clean the window frame and wall. Dust and dirt can affect how brackets stick or screws hold.
Mark Your Mounting Points
Use a pencil to mark where brackets will go. For inside mount, mark inside the frame. For outside mount, mark above and beside the window.
Check For Hidden Wires Or Pipes
If you’re drilling into walls, check for electrical wires or plumbing. Use a stud finder if possible. This prevents accidents and damage.
Lay Out All Parts
Open your blind package. Check that you have all parts: brackets, screws, blind headrail, and any extra pieces. Missing parts can delay your project.
Practical tip: Take photos of your window and marks before drilling. If you make a mistake, you can go back and check.
Step-by-step Guide: How To Mount Blinds
This step-by-step guide covers most types of blinds. Always follow the instructions that come with your blinds, but these steps work for most installations.
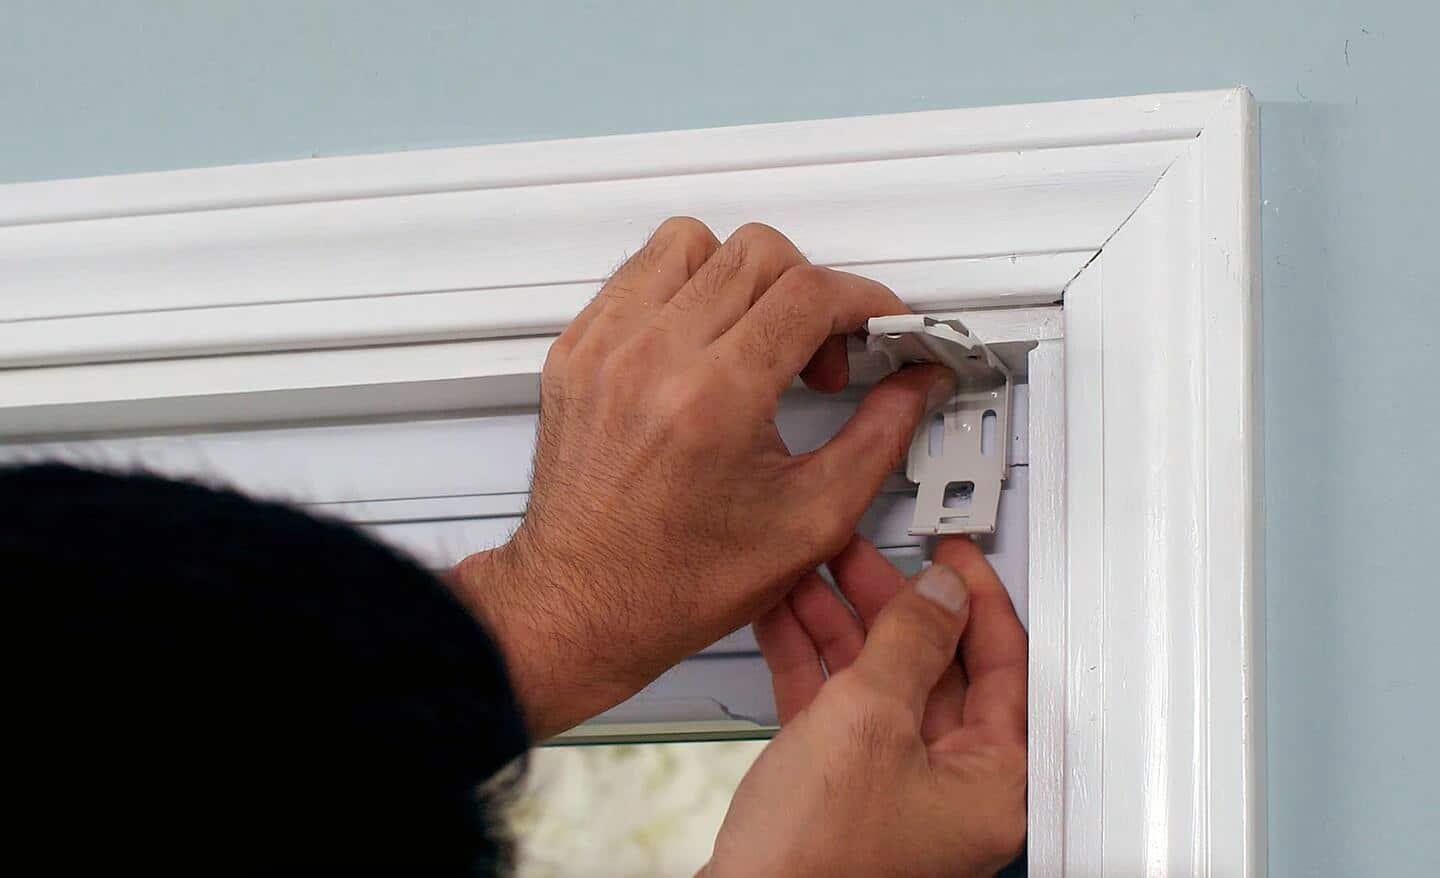
Step 1: Position The Brackets
- Hold the bracket up to the marked spots.
- For inside mount, place brackets inside the window frame at the top corners.
- For outside mount, brackets go above and outside the window trim.
Step 2: Drill Pilot Holes
- Use a drill to make small holes where screws will go.
- This prevents wood or drywall from splitting.
Step 3: Attach Brackets
- Use screws to secure brackets to the window frame or wall.
- For drywall, use wall anchors to ensure stability.
- Make sure brackets are level and straight.
Step 4: Insert The Blind Headrail
- Slide or snap the headrail (top part of the blind) into the brackets.
- Secure with any clips or screws provided.
- Check that the blind operates smoothly.
Step 5: Add Valance Or Cover (if Included)
- Some blinds come with a decorative cover (valance).
- Attach according to instructions.
Step 6: Test The Blind
- Lower and raise the blind several times.
- Check for smooth movement and ensure blinds are level.
Step 7: Secure Cords And Safety Devices
- If your blinds have cords, attach cord cleats or tension devices.
- This keeps cords safe, especially for children and pets.
Step 8: Clean Up
- Remove pencil marks.
- Clean dust from installation.
Example: For a standard Venetian blind, mounting usually takes 20–30 minutes per window. Larger blinds or more complex systems may need more time.
Credit: blindspotutah.com
Special Considerations For Different Wall Types
Not all walls are the same. The material can affect how you mount blinds and which tools or anchors you need.
Drywall
- Use wall anchors for outside mount.
- Avoid mounting heavy blinds without anchors.
Wood
- Drill pilot holes, but screws usually hold well.
- Be careful not to split old or dry wood.
Brick Or Concrete
- Use masonry drill bits and anchors.
- Screws alone won’t hold.
Plaster
- Drill slowly; plaster can crack.
- Use anchors designed for plaster.
Practical tip: If in doubt, use anchors. They add strength and prevent blinds from falling.
Common Mistakes And How To Avoid Them
Even experienced installers make mistakes. Here are the most frequent errors—and how to avoid them.
- Misaligned brackets: Always use a level to check alignment before drilling.
- Wrong measurements: Double-check all sizes, especially for inside mount.
- Skipping pilot holes: This can crack wood or drywall.
- Not using anchors: Especially important for drywall or heavy blinds.
- Mounting too close to window glass: Can cause blinds to hit or rub, making them hard to use.
- Ignoring safety devices: Cord safety is important, especially with children.
- Forgetting to check blind operation: Test before finalizing.
- Using wrong screws: Only use screws provided or recommended for your wall type.
Non-obvious insight: Sometimes, blinds come with screws too short for your wall. Buy longer screws if needed.
Extra Tips For A Professional Finish
Getting a neat, professional look isn’t just about following steps. Here are tips to improve your results:
- Use a level for every step. Crooked blinds are easy to spot and hard to fix.
- Fill old screw holes with wood filler or patching compound for a clean look.
- Match blind color to window trim for a seamless appearance.
- For outside mount, align the top of the blinds with door or window trim for symmetry.
- Cut excess length from cords and secure them.
- Add blackout liners for bedrooms if you want more darkness.
Practical tip: If your window isn’t perfectly square, center the blind visually rather than measuring from sides. This avoids gaps that look uneven.
How Mounting Blinds Improves Your Room
Mounting blinds isn’t just practical—it can change your space. Here’s how:
- Privacy: You control who sees in.
- Light control: Protect furniture from sun, adjust mood.
- Energy savings: Cellular blinds can reduce heat loss by up to 15% in winter (source: US Department of Energy).
- Style: Modern, clean lines or classic elegance.
- Noise reduction: Thick blinds help dampen sound.
Example: In a study of homes with new blinds, 72% of owners reported better sleep and more comfort.
Maintaining Your Blinds After Mounting
Once your blinds are up, regular maintenance keeps them working and looking good.
Cleaning Tips
- Dust weekly with a microfiber cloth or duster.
- Deep clean monthly. For metal or plastic blinds, use mild soap and water. For fabric, follow manufacturer’s instructions.
- Avoid harsh chemicals; they can damage finishes.
Checking For Wear
- Look for loose brackets or screws.
- Test blind movement. If it’s rough, lubricate the mechanism.
- Replace worn cords or slats.
Practical tip: Blinds last longer if you fix small problems early.
When To Call A Professional
Most blind installations are DIY-friendly, but some situations need expert help.
- Windows higher than 8 feet (need ladders and safety gear).
- Unusual wall materials (stone, tile).
- Complex motorized blinds.
- Large or heavy blinds (risk of falling).
Professional installers usually charge $50–$100 per window, depending on location and complexity.
Non-obvious insight: Some blind brands offer free installation with purchase—ask before buying.

Credit: www.wikihow.com
Cost Data: Diy Vs. Professional Installation
Thinking about cost? Here’s a simple comparison.
| Installation Type | Average Cost (Per Window) | Time Required | Quality Control |
|---|---|---|---|
| DIY | $0 (tools may cost $30–$50) | 30–60 minutes | Personal |
| Professional | $50–$100 | 15–30 minutes | Guaranteed |
Practical tip: If you plan to install blinds in several rooms, DIY can save hundreds of dollars.
Safety Considerations
Blind cords are a safety risk, especially for young children and pets. According to the Consumer Product Safety Commission, over 16,000 injuries related to blind cords occur annually in the US.
How To Make Blinds Safer
- Use cord cleats or tension devices.
- Choose blinds with cordless systems.
- Keep cords out of reach.
- Regularly check safety devices.
External link: For more child safety tips, visit Consumer Product Safety Commission.
Troubleshooting Common Problems
Sometimes, blinds don’t work as expected. Here’s how to solve the most common issues.
Blind Won’t Lower Or Raise
- Check if the headrail is fully inserted.
- Make sure brackets aren’t too tight.
- Look for tangled cords.
Blind Is Crooked
- Adjust bracket screws.
- Use a level to check alignment.
Blind Slats Won’t Tilt
- Check tilt mechanism. It may need lubrication.
- Replace broken parts if necessary.
Blind Falls Off Brackets
- Brackets may be loose—tighten screws.
- Use longer screws or anchors.
Practical tip: Keep extra screws and small parts. Many fixes are simple and quick.
Frequently Asked Questions
What Is The Best Type Of Blind For Bedrooms?
For bedrooms, cellular blinds or blackout roller blinds are popular. They block light and provide privacy. Cellular blinds also help with insulation, keeping rooms warmer in winter and cooler in summer.
How Long Does It Take To Mount Blinds?
Most standard blinds take 20–60 minutes to install per window. Simple blinds like roller or Venetian are faster. Complex or large blinds can take longer, especially for first-timers.
Can I Mount Blinds Without Drilling?
Some blinds use no-drill brackets that clip onto window frames. They’re good for renters or people who want to avoid holes. However, they may not be as secure, especially for heavy blinds.
What Should I Do If My Blinds Are Too Wide?
If blinds are too wide, you can trim some types (like aluminum or wood Venetian blinds) with a hacksaw. For fabric blinds, cutting is harder. It’s usually better to order the correct size or exchange.
Are Cordless Blinds Safer?
Yes, cordless blinds are much safer for homes with kids and pets. They use push or pull systems, removing the risk of cord injuries.
Mounting blinds yourself is a smart way to improve your home. With careful planning, the right tools, and these practical steps, you can get great results. Remember to measure twice, check your wall type, and always put safety first. After your blinds are up, regular care will keep them working for years.
If you need help, don’t hesitate to call a professional. With your new skills, you’ll enjoy a more comfortable, stylish, and secure space.
Credit: www.homedepot.com