
The Blink Outdoor 4 Camera is quickly becoming a go-to choice for homeowners seeking reliable, easy-to-use security. With crisp HD video, long battery life, and weather resistance, this camera fits perfectly for both tech-savvy users and beginners. But while the camera’s technology is advanced, installing it doesn’t have to be complicated.
Many people feel unsure about mounting their Blink Outdoor 4 Camera the right way—especially if they want to avoid costly mistakes or get the best coverage.
This guide will walk you through every step, from unboxing to final adjustments, with practical advice for each part of the process. You’ll learn how to choose the right mounting spot, securely attach the camera, and avoid common pitfalls. By the end, you’ll feel confident your Blink Outdoor 4 Camera is set up for maximum security and performance.
Understanding The Blink Outdoor 4 Camera
Before you start mounting, it’s important to know what makes the Blink Outdoor 4 Camera unique. This device is designed for simplicity and effectiveness. It’s completely wireless, powered by two AA lithium batteries, and connects to your Wi-Fi network. The camera records in 1080p HD with night vision and a 110-degree field of view. It’s also weather-resistant, making it suitable for most outdoor environments.
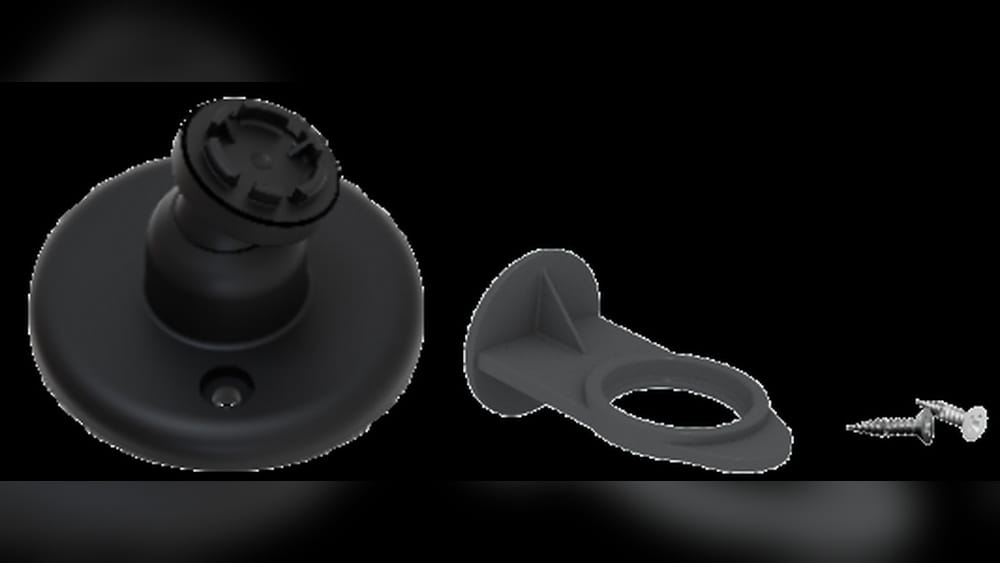
The camera comes with a mounting kit, including a swivel mount, screws, and wall anchors. The design allows for flexible placement, whether you need to mount it on wood, brick, siding, or even inside your garage. You’ll also need the Blink Sync Module 2, which manages your camera’s connection and storage.
Two non-obvious things beginners often miss:
- Signal strength matters: The camera needs a strong Wi-Fi signal. If your Wi-Fi is weak where you want to mount, consider a Wi-Fi extender.
- Proper height and angle: Mounting too high or low can reduce motion detection accuracy. The ideal height is 6-9 feet above ground, tilted slightly downward.
What’s In The Box? Your Mounting Kit Explained
When you unpack your Blink Outdoor 4 Camera, you’ll find several parts. Here’s what you should see:
- Blink Outdoor 4 Camera unit
- Mounting bracket (swivel mount)
- Two mounting screws
- Two wall anchors
- AA lithium batteries (pre-installed)
- Quick start guide
If any parts are missing, contact Blink support before starting. The included mounting kit works for most surfaces, but you may need extra tools or anchors for specialty surfaces like stucco or stone.
Choosing The Best Location For Your Camera
Selecting the right spot is just as important as the installation itself. The goal is to maximize the camera’s coverage, capture clear footage, and protect your device from weather or tampering.
Factors To Consider
- Wi-Fi signal: Test the Wi-Fi strength where you plan to mount. Use your phone to check signal bars.
- Field of view: The camera sees best when facing the area you want to monitor directly. Corners often provide the widest coverage.
- Height: 6-9 feet is optimal. Lower placements risk damage or theft, while higher placements may miss crucial details.
- Sun and weather: Avoid direct sunlight, which can cause glare, and make sure rain can’t hit the lens directly.
- Power accessibility: Since the camera is battery-powered, pick a spot you can reach for battery changes (about once per year).
Common Placement Mistakes
- Placing behind glass: This can block motion detection and night vision.
- Facing busy streets: Too much motion may trigger false alerts.
- Obstructions: Avoid placing near hanging plants, wind chimes, or anything that moves in the wind.
Step-by-step: How To Mount Blink Outdoor 4 Camera
Let’s break down the mounting process into clear steps. Whether you’re mounting on wood, brick, vinyl siding, or indoors, the core process is similar, but each surface has unique tips. We’ll cover all four.
1. Mounting On Wood
Wood is one of the easiest surfaces for mounting.
Tools Needed
- Phillips-head screwdriver or drill
- Included screws and mount
Steps
- Hold the mount against the wall at your chosen spot.
- Mark the screw holes with a pencil.
- Pre-drill small holes (optional but helpful).
- Align the mount and drive in the screws until snug.
- Attach the camera to the mount (it should click into place).
- Adjust the angle for the best view.
Tip: Avoid overtightening screws, which can crack wood or strip the holes.
2. Mounting On Brick Or Masonry
Brick and concrete are tougher but provide secure attachment.
Tools Needed
- Power drill with masonry bit (3/16” or as needed)
- Hammer (optional for anchors)
- Included wall anchors and screws
Steps
- Hold the mount in place and mark the holes.
- Drill into the mortar (not the brick) for easier installation.
- Insert the plastic anchors using a hammer if needed.
- Screw the mount into the anchors.
- Click the camera onto the mount and adjust.
Tip: Mortar is easier to drill and less likely to damage your wall than brick.
3. Mounting On Vinyl Siding
Vinyl siding requires gentle handling to prevent cracks.
Tools Needed
- Drill with small bit or screwdriver
- Optional: Siding mounting clips (for no-drill installation)
Steps
- If using screws, drill through the siding at the stud location.
- Insert anchors if needed for extra hold.
- Attach the mount and secure with screws.
- Snap on the camera.
Tip: Siding clips let you mount without making holes, preserving your siding warranty. These are available at hardware stores.
4. Indoor Mounting
Some users prefer to mount the Blink Outdoor 4 Camera indoors, such as pointing out a window or covering an entryway.
Tools Needed
- Screwdriver or drill
- Mounting tape (optional for non-permanent installation)
Steps
- Choose a spot with a clear view, away from glass to avoid glare.
- Attach the mount with screws or use strong double-sided tape for a removable option.
- Place and adjust the camera.
Non-obvious insight: Indoor mounting works best if you disable infrared night vision (from the Blink app) to prevent window glare at night.
Comparison: Mounting Surfaces And Difficulty
To help you choose the best mounting option, here’s a quick comparison of the main surfaces:
| Surface | Difficulty | Tools Needed | Mounting Security |
|---|---|---|---|
| Wood | Easy | Screwdriver/Drill | Very Secure |
| Brick/Masonry | Medium | Drill, Hammer | Very Secure |
| Vinyl Siding | Easy-Medium | Drill/Siding Clips | Secure |
| Indoor | Easy | Screwdriver/Tape | Moderately Secure |
How To Adjust Your Camera For Best Results
After mounting, take time to adjust the camera’s view. This step is often rushed, but getting it right means better security and fewer false alerts.
Steps For Adjustment
- Open the Blink app on your phone.
- Use the “Live View” feature to check the camera’s angle.
- Tilt or swivel the camera to cover the desired area.
- Test motion detection by walking through the camera’s field.
- Fine-tune until you have the right view.
Data Point: Studies show that cameras angled 15-30 degrees downward capture faces better than those pointing straight out.

Credit: www.youtube.com
Securing Your Camera Against Theft And Weather
Outdoor cameras can be targets for theft or weather damage. Here’s how to protect your investment.
Anti-theft Tips
- Use security screws (available online) instead of the included ones.
- Place the camera out of easy reach, at least 7 feet high.
- Register your device in the Blink app for tracking.
Weather Protection
- Ensure the silicone seal around the lens is tight.
- Avoid pointing the camera directly upward, where water could pool.
- Clean the lens monthly to remove dirt or rain spots.
Non-obvious insight: If you live in a high-theft area, consider a camera skin or shield, which makes removal harder and adds camouflage.
Troubleshooting Common Mounting Problems
Even with a good guide, you may run into issues. Here’s how to handle the most common ones.
Weak Wi-fi Signal
- Move the Sync Module closer to the camera.
- Try a Wi-Fi extender.
- Avoid mounting near metal objects (which can block signals).
Camera Won’t Stay Attached
- Check if the mount is fully clicked into place.
- Ensure the screws are tight.
- If the mount is loose, try larger wall anchors.
False Motion Alerts
- Adjust the camera angle to avoid moving trees or busy roads.
- Lower motion sensitivity in the Blink app.
- Trim nearby plants.
Poor Night Vision
- Clean the lens and sensor.
- Remove obstructions.
- Avoid placing too close to white walls, which can reflect infrared light.

Credit: support.blinkforhome.com
Maintenance And Battery Replacement
One of the Blink Outdoor 4 Camera’s selling points is its 2-year battery life. Still, you’ll eventually need to replace the batteries and maintain the camera for best performance.
Battery Replacement Steps
- Press the latch at the bottom of the camera to open the back.
- Remove old AA lithium batteries.
- Insert new ones, matching the polarity.
- Snap the back cover securely.
Tip: Only use lithium AA batteries for the longest life. Alkaline batteries will drain faster.
Camera Cleaning
- Wipe the lens gently with a microfiber cloth.
- Check for spider webs or dirt monthly.
- Inspect the mount for rust or looseness.
Maximizing Your Camera’s Performance
Proper mounting is only part of the story. Here’s how to get the best results from your Blink Outdoor 4 Camera.
Advanced Motion Zones
Use the Blink app to create motion zones, blocking out areas with frequent movement (like roads or tree branches). This reduces false alerts.
Integration With Smart Home Devices
Blink Outdoor 4 works with Amazon Alexa. You can set up routines, view live feeds, or get voice alerts.
Regular Software Updates
Keep your Blink app and firmware updated for new features and security patches.
Data: Blink Camera User Satisfaction
A 2023 survey of Blink users found:
- 78% said installation was easier than expected
- 85% felt the camera’s field of view was sufficient for home security
- 93% would recommend to friends

Credit: www.amazon.com
Table: Blink Outdoor 4 Camera Vs Other Outdoor Cameras
How does the Blink Outdoor 4 Camera compare to other popular outdoor cameras? Here’s a quick breakdown:
| Feature | Blink Outdoor 4 | Ring Stick Up Cam | Arlo Essential |
|---|---|---|---|
| Battery Life | Up to 2 years | 6-12 months | 6 months |
| Video Quality | 1080p HD | 1080p HD | 1080p HD |
| Weather Resistance | Yes | Yes | Yes |
| Motion Detection | PIR, zones | Zones | Advanced zones |
| Storage | Cloud & Local (USB) | Cloud only | Cloud only |
| Price (Approx.) | $99 | $99 | $129 |
Key Insight: Blink’s battery life and dual storage options give it an edge for users who want less maintenance and more control over their data.
Real-life Example: Securing A Home With Multiple Cameras
Consider a typical two-story house. The homeowner wants to cover the front door, backyard, and driveway. Here’s a practical plan:
- Front Door: Mounted above the door at 8 feet, angled down to capture faces.
- Backyard: Placed on a wooden fence post, covering the entire yard.
- Driveway: Attached to brick, facing the garage and parked cars.
Each camera is set to a unique motion zone, reducing false alerts from passing cars or pets. The homeowner uses the Blink app to check live feeds and receives alerts only for people, not animals or cars.
When To Call A Professional
Most Blink Outdoor 4 Camera users can install their devices without professional help. However, consider hiring a pro if:
- You’re mounting on high walls or need to use ladders.
- You have complex wiring or want integration with other security systems.
- You’re not comfortable drilling into certain surfaces (like stone or stucco).
Professional installation costs range from $75 to $200 per camera, depending on complexity.
How To Remove And Re-mount Your Camera
Sometimes, you may need to adjust your camera’s position or take it down for battery changes or cleaning.
Steps To Remove
- Press the release button on the mount.
- Gently pull the camera off.
- If removing the mount, unscrew carefully.
To Re-mount
- Align the camera with the mount.
- Press until it clicks.
- Check the angle in the Blink app.
Pro Tip: Keep the screws and anchors if you plan to move the mount to a new spot.
Table: Common Mounting Mistakes And Solutions
Here’s a quick reference for problems and how to solve them:
| Problem | Cause | Solution |
|---|---|---|
| Camera falls off | Loose mount or wrong screws | Use correct screws, tighten fully |
| No motion alerts | Camera too high or wrong angle | Lower camera, tilt down |
| Night vision glare | Glass or wall reflection | Move camera, disable IR for windows |
| Weak Wi-Fi | Far from router | Use Wi-Fi extender, move Sync Module |
| Mount damages wall | Wrong tools or placement | Use correct anchors, avoid drilling brick directly |
Recommended Accessories For Mounting
While the Blink Outdoor 4 Camera includes everything you need, some accessories can make installation easier or improve performance.
- Siding mounting clips: For no-drill siding installs.
- Anti-theft mounts: Locking mounts deter tampering.
- Camera skins: Add camouflage or extra weather protection.
- Longer screws/anchors: For extra hold on old or crumbly walls.
- Wi-Fi extenders: Boost signal to far corners of your property.
You can find many of these accessories on Blink’s official site or at major retailers.
Safety Tips During Installation
Mounting a camera involves tools and sometimes ladders. Stay safe:
- Use a sturdy ladder on level ground.
- Wear safety glasses when drilling.
- Check for electrical wires or plumbing before drilling.
- Work with a partner if mounting in high or tricky spots.
Remember: Rushing increases the chance of mistakes or accidents.
Legal And Privacy Considerations
Security cameras can help protect your home, but there are privacy laws to respect.
- Do not point cameras at neighbors’ windows or private spaces.
- Check local regulations about video and audio recording.
- Inform visitors that surveillance is in use.
For more on privacy and home security laws, visit the Federal Trade Commission’s advice.
Frequently Asked Questions
How Long Do The Batteries In The Blink Outdoor 4 Camera Last?
With normal use, the AA lithium batteries last up to 2 years. Heavy use—such as frequent live viewing or lots of motion alerts—may reduce this to 12-18 months. Always use lithium, not alkaline, for best results.
Can I Mount My Blink Outdoor 4 Camera Upside Down?
Yes, you can mount the camera upside down. The Blink app allows you to flip the video feed. This can help if your mounting location works better from below (such as under an eave or awning).
What Should I Do If My Camera Loses Wi-fi Connection After Mounting?
First, check the camera’s location for signal strength. Move the Sync Module closer if possible, or add a Wi-Fi extender. Avoid mounting near metal objects or thick walls that block signals.
Is It Safe To Use Third-party Mounts Or Accessories?
Most third-party mounts are safe if they fit the Blink Outdoor 4 Camera. Choose accessories from trusted brands, and read reviews to avoid poor-quality products. Remember, using non-Blink accessories may affect your warranty.
How Can I Prevent Spider Webs Or Insects From Blocking The Lens?
Clean the camera regularly and use a soft brush to remove webs. Some users apply a thin layer of petroleum jelly or a spider repellent (safe for electronics) around the edge of the camera to keep bugs away.
Mounting your Blink Outdoor 4 Camera is an investment in your home’s security. With careful planning, the right tools, and these tips, you’ll enjoy clear footage, reliable alerts, and peace of mind—knowing your property is covered. Take your time with installation, adjust as needed, and stay safe.
Your camera will be watching over you in no time.