
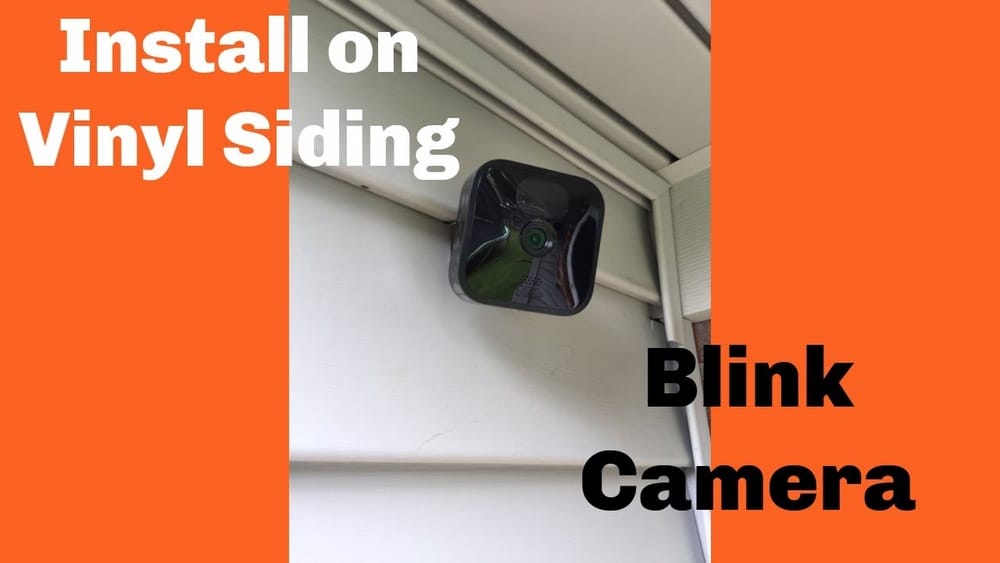
Mounting a Blink Outdoor camera can feel tricky when you want to avoid drilling holes or using screws. Maybe you’re renting, or you just don’t want permanent marks on your walls. The good news is that there are several reliable ways to set up your Blink Outdoor camera without ever picking up a drill. These methods are safe, secure, and can work even if you have limited DIY experience. This guide will take you through all the practical options, show you what works (and what doesn’t), and help you avoid common mistakes that cost time and money.
If you’re worried about your camera falling, losing power, or getting the wrong view, don’t be. Mounting without screws is not only possible—it’s easier than you might think. By the end of this article, you’ll know exactly how to mount your Blink Outdoor camera securely, what tools and materials you’ll need, and how to keep your device working at its best.
Why Mount A Blink Outdoor Camera Without Screws?
People choose screw-free mounting for many reasons. If you’re renting an apartment or home, you probably can’t drill into walls, siding, or fences. Even if you own your home, you may want to avoid damaging surfaces, especially expensive siding or brick.
Sometimes, weatherproofing is an issue—drilling can let water inside your walls. Some users simply want a flexible setup they can move easily.
There’s also the appeal of quick installation. Screw-free methods are often much faster, requiring no special tools. When you use removable mounts, you can test different spots, adjust the view, or bring your camera inside with minimal effort. This flexibility makes it easier to find the perfect angle for your Blink camera without worrying about mistakes.
Understanding Blink Outdoor Camera Mounting Needs
Before you start, it’s important to know what makes a good mount for the Blink Outdoor camera. This isn’t just about keeping your device off the ground—it’s about keeping it secure, stable, and weather-protected.
Key Factors For A Good Mount
- Camera stability: The camera must not shake or move in the wind. Shaky footage is hard to review and may miss important details.
- View angle: The lens should have a clear, unobstructed view of the area you want to monitor.
- Weather exposure: Even though Blink Outdoor cameras are weather-resistant, placing them under some cover can help them last longer.
- Power and Wi-Fi access: The camera should be close enough to your Wi-Fi router for a strong signal and, if needed, easily accessible for battery changes.
Unique Features Of Blink Outdoor Cameras
The Blink Outdoor model is lightweight—about 4 ounces (113 grams)—which makes screw-free mounting more practical. It uses two AA lithium batteries that last up to two years. The standard mounting plate is small and flat, making it compatible with many types of adhesive or clamp systems.
Methods To Mount Blink Outdoor Camera Without Screws
Let’s look at the most reliable and safe ways to mount your camera, including the materials you need, how to do it, and what to avoid.
1. Adhesive Mounting Strips
Adhesive strips are one of the most popular ways to mount lightweight devices like the Blink Outdoor camera. Brands like Command™ or 3M VHB™ (Very High Bond) are known for their strength and removability.
How To Use Adhesive Strips
- Clean the surface where you’ll attach the mount. Dust, oil, or moisture can weaken the bond.
- Attach the adhesive strip to the back of the Blink camera’s mounting plate.
- Press the mounting plate firmly against the wall for at least 30 seconds.
- Wait an hour (or as recommended) before attaching the camera to let the adhesive set.
Where They Work Best
- Painted walls
- Glass
- Metal siding
- Smooth wood or plastic
Not Ideal For
- Textured surfaces (like rough brick)
- Wet or greasy areas
- Locations exposed to extreme heat or cold
Pros And Cons
| Pros | Cons |
|---|---|
| Easy to apply and remove | Can fail in humidity or uneven surfaces |
| No tools needed | Limited weight capacity |
| Leaves no marks if removed properly | Must follow instructions for best results |
Non-obvious tip: Use outdoor-rated adhesive strips for weather resistance. Indoor strips can lose grip in rain or sun.
2. Double-sided Mounting Tape
Heavy-duty double-sided tape (like Gorilla Mounting Tape or Scotch Outdoor) offers more strength than standard adhesive strips. This method is great for surfaces where you want a little more holding power.
How To Use Mounting Tape
- Cut a piece of tape to fit the mounting plate.
- Stick the tape to the plate, pressing down to ensure full contact.
- Clean and dry the mounting surface.
- Press the plate (with tape) to the wall, holding for up to a minute.
- Wait for the adhesive to reach maximum strength (usually 24 hours).
Suitable Surfaces
- Painted or sealed wood
- Smooth stone
- Vinyl siding (flat areas)
What To Watch Out For
- Not recommended for rough, uneven, or dusty surfaces.
- Can be very hard to remove—test on a hidden area first.
Non-obvious insight: For best results, apply tape at room temperature and avoid repositioning once placed.
3. Magnetic Mounts
If you have a metal surface (like a metal fence, shed, or garage door), magnetic mounts are a fast and screw-free solution.
How Magnetic Mounts Work
Many third-party companies sell magnetic mounts designed for security cameras. These mounts use powerful neodymium magnets to hold the camera in place. Some even come with a rubber coating to prevent scratches.
- Attach the magnet to the back of the Blink camera’s mounting plate.
- Place the magnet on a clean, flat metal surface.
- Adjust the camera’s angle as needed.
Advantages
- No damage to the mounting surface
- Easy to move and reposition
- Strong hold, especially on flat steel
Limitations
- Only works with ferromagnetic metals (steel, iron)
- Not suitable for aluminum, wood, or vinyl
Practical tip: Test the magnet’s grip before leaving the camera unattended, especially if mounting outdoors.
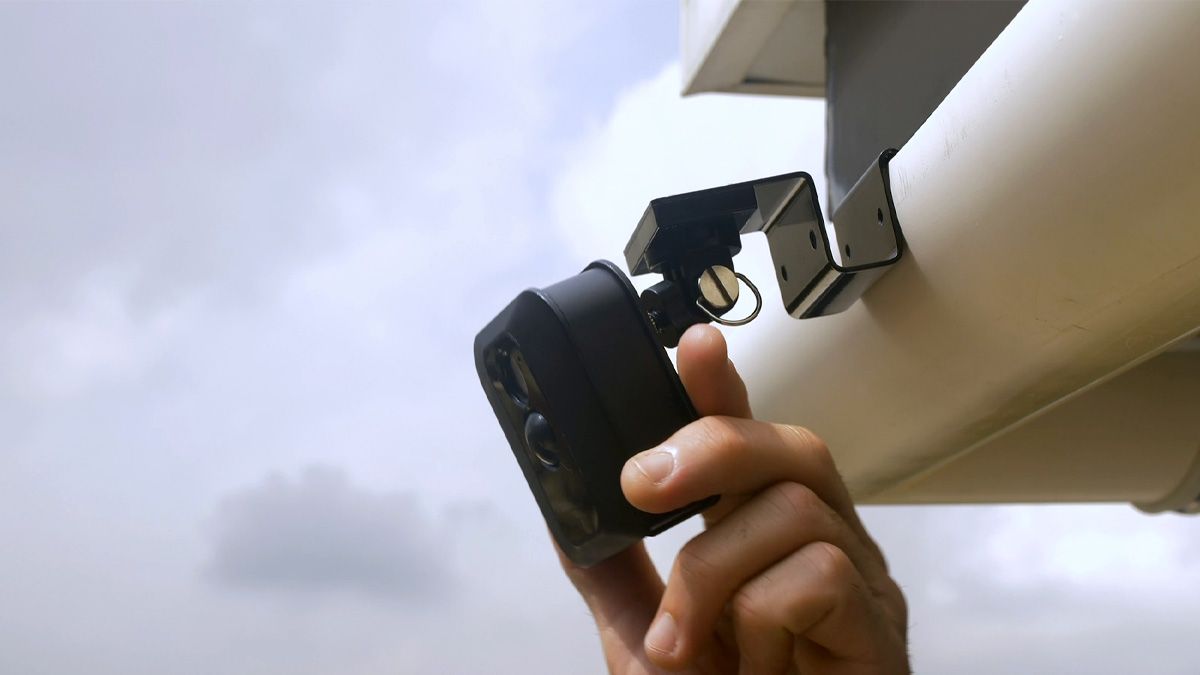
4. Outdoor Camera Mounting Brackets With Clamps
Clamp-style brackets are designed for temporary, no-drill installations. They grip onto railings, gutters, fences, or even thin window ledges.
How Clamp Mounts Work
- Open the clamp and fit it onto the target surface (for example, a balcony railing).
- Tighten the screw or lever to secure the clamp in place.
- Attach the Blink camera to the bracket using the mounting plate.
- Adjust the camera’s direction and lock it in position.
Where To Use Clamp Mounts
- Porch railings
- Balcony edges
- Rain gutters
- Window sills
Non-obvious insight: Padded clamps prevent damage to painted or delicate surfaces.
5. Suction Cup Mounts
Suction cups are ideal for mounting cameras on glass or other smooth, non-porous surfaces.
How To Use A Suction Cup Mount
- Clean both the glass (or tile) and the suction cup.
- Press the suction cup firmly and activate the lever (if available) to create a vacuum.
- Attach the camera to the suction mount.
- Check that the mount holds before leaving it unattended.
Best Use Cases
- Windows facing outside
- Smooth tile
- Car windows (for temporary setups)
Weaknesses
- Can lose grip in extreme cold or heat
- Not suitable for rough or painted walls
Practical tip: Check the suction mount regularly, as changes in temperature or humidity can affect the vacuum.
6. Vinyl Siding Clips
If you have vinyl siding, vinyl siding clips are a clever way to mount cameras without making any holes.
How Vinyl Siding Clips Work
- Slide the clip under the bottom edge of a siding panel.
- The clip will hook into place, creating a small lip.
- Attach the Blink camera’s mounting plate to the clip (some clips have holes for screws, but you can use adhesive strips instead).
Advantages
- No damage to siding
- Easy to move or remove
- Stable, even in wind
Drawbacks
- Only works with traditional vinyl siding
- May not fit all types of siding panels
Non-obvious tip: Combine a siding clip with adhesive for extra security in windy areas.
7. Outdoor Command Hooks
Large Command hooks (designed for outdoor use) can hold up to 5 pounds, making them strong enough for the Blink Outdoor camera and its mount.
How To Use Outdoor Command Hooks
- Clean the wall or siding surface.
- Apply the adhesive base to the hook.
- Press the hook in place and hold for 30 seconds.
- Wait as directed before hanging the camera from the hook.
Where They Work
- Smooth, sealed surfaces
- Painted concrete
- Tile
Not Suitable For
- Brick or rough stucco
- Surfaces exposed to constant water
Practical tip: For angled shots, use a hook with an adjustable arm.
Comparing Screw-free Mounting Methods
To help you pick the best method, here’s a comparison of the top options:
| Mounting Method | Weight Capacity | Surface Types | Removability | Weather Resistance |
|---|---|---|---|---|
| Adhesive Strips | 2-4 lbs | Smooth, flat | High | Medium (outdoor-rated only) |
| Mounting Tape | 5-10 lbs | Smooth, flat | Low | High |
| Magnetic Mount | Varies (strong magnets) | Metal only | High | High |
| Clamp Brackets | Up to 10 lbs | Railings, ledges | High | High |
| Suction Cup | 1-3 lbs | Glass, tile | High | Low-Medium |
| Vinyl Siding Clip | 3-5 lbs | Vinyl siding | High | High |
| Outdoor Command Hook | 3-5 lbs | Smooth, sealed | High | Medium (outdoor-rated only) |
Credit: www.howtogeek.com
Step-by-step Guide: Mounting With Adhesive Strips (most Common Method)
Since adhesive strips are the most widely used, here’s a detailed walk-through to get the best results.
Materials Needed
- Outdoor-rated adhesive strips (Command™ or 3M VHB™)
- Blink Outdoor camera and standard mounting plate
- Rubbing alcohol and clean cloth
- Measuring tape or level (optional)
Steps
- Choose the right spot. Pick a location with a clear view, within Wi-Fi range, and out of direct rain if possible.
- Clean the surface. Wipe the area with rubbing alcohol to remove dirt and oils. Allow to dry.
- Prepare the mounting plate. Attach the adhesive strip to the back of the Blink mounting plate, pressing firmly.
- Place the mount. Press the mounting plate (with adhesive) to the wall for at least 30 seconds.
- Wait for bond. Most adhesives reach full strength after an hour; 3M VHB may take 24 hours.
- Attach the camera. Once set, slide the Blink camera onto the plate.
Extra tip: Test the hold by gently tugging the mount before attaching the camera.
Maintenance And Checks
- Every few months, check that the adhesive is still holding strong, especially after storms or heat waves.
- If the camera needs battery changes, remove it carefully to avoid pulling off the mount.
Best Practices For Screw-free Mounting
Mounting your Blink Outdoor camera without screws can be very effective if you follow a few key guidelines:
- Don’t overload mounts. Even though the camera is light, always check the weight rating of your adhesive, tape, or bracket.
- Pick stable, sheltered spots. Under eaves or ledges protects both the camera and mount.
- Test before leaving unattended. Wait at least a few hours after mounting before trusting it with the camera overnight.
- Keep spares on hand. Adhesive strips and mounting tape can lose strength over time. Having extras means you can swap out worn parts easily.
- Record your mounting method. If you have multiple cameras, note which mounting method you used where, in case you need to troubleshoot later.
Credit: www.youtube.com
Mistakes To Avoid
Even with the best materials, it’s easy to make small mistakes that can cause your camera to fall or fail. Here are common pitfalls:
- Skipping surface prep. Dirt or moisture stops adhesives from sticking.
- Using indoor adhesive outdoors. Only outdoor-rated adhesives can handle weather changes.
- Mounting on uneven surfaces. Adhesive can’t grip rough or bumpy walls.
- Ignoring weight limits. Pushing adhesive beyond its capacity risks falls.
- Placing in direct sun or rain. Extreme conditions can weaken most no-screw mounts.
Beginner’s tip: Always check the camera’s view in the Blink app before finalizing your mount.
Adjusting Camera Angle And View
Once your Blink Outdoor camera is mounted, you may need to adjust its angle for the best coverage.
- Use the app. The Blink app shows live video so you can fine-tune the view.
- Try different heights. Mounting the camera 7-9 feet above ground often gives the best field of view.
- Avoid obstructions. Make sure plants, decorations, or siding don’t block the lens or motion sensor.
If you need to change the angle often, choose a mount with an adjustable arm, like a clamp bracket or a Command hook with a swivel.
Security And Theft Prevention
Screw-free mounts can make your camera easy to move—but also easier for thieves to grab. Here’s how to keep your device safe:
- Mount high enough that it’s out of easy reach (above 9 feet if possible).
- Use anti-theft skins or cases that disguise the camera or make it harder to remove.
- Consider a decoy camera lower down, with the real Blink camera out of reach.
- Check on your camera regularly and use Blink’s “offline” alerts.
If theft is a major concern, you may want to combine a removable mount with a discreet location or add a security cable (threaded through the mount or nearby).
Weatherproofing Your Mount
Even though the Blink Outdoor is weather-resistant, your mounting method may not be. Here’s how to protect both:
- Use outdoor-rated adhesives and mounts. Indoor versions will fail in rain or sun.
- Mount under cover if possible. Eaves, awnings, or porch ceilings help keep the adhesive dry.
- Check after storms. Inspect mounts after heavy rain, wind, or snow.
- Consider UV protection. Direct sunlight can break down some adhesives over time.
Non-obvious tip: If using tape or strips, cut away any excess to prevent water pooling behind the mount.

Credit: www.maxsol.com.au
When (and Why) To Avoid Screw-free Mounting
Screw-free methods are great for flexibility and ease, but there are cases where they’re not the best choice:
- Very rough or porous surfaces (like raw brick or stucco) don’t hold adhesives well.
- High-theft areas might require a more permanent, tamper-proof mount.
- Extreme climates (very hot, cold, or wet) can shorten the life of adhesives or suction cups.
If you must use a screw-free method in tough conditions, check the mount often and be ready to replace or reinforce as needed.
Real-world Examples
Example 1:
A renter in a city apartment used outdoor Command hooks to mount a Blink camera just outside their window. By cleaning the surface and letting the adhesive set overnight, they got over a year of stable use—and were able to remove the hook with no marks when they moved out.
Example 2:
A homeowner with vinyl siding used a siding clip combined with a small patch of 3M VHB tape. The camera survived several storms and stayed perfectly in place, all without any permanent installation.
Example 3:
A user with a metal shed simply attached a strong magnetic mount. They could move the camera from one door to another in seconds, depending on where they needed coverage.
Non-obvious insight: Testing different spots with removable mounts lets you optimize your camera’s view before you commit to a final location.
Cost Comparison Of Mounting Methods
Mounting your Blink camera without screws doesn’t have to be expensive. Here’s a simple price comparison:
| Mounting Method | Typical Cost (USD) | Number of Uses | Average Lifespan |
|---|---|---|---|
| Adhesive Strips | $5-$10 (pack) | 4-8 strips | 6-12 months |
| Mounting Tape | $8-$15 (roll) | Many cuts | 1-2 years |
| Magnetic Mount | $12-$20 (each) | Reusable | 5+ years |
| Clamp Bracket | $15-$25 (each) | Reusable | 5+ years |
| Siding Clip | $8-$12 (pack) | 4-6 clips | 5+ years |
| Outdoor Command Hook | $6-$10 (each) | Reusable base, replace adhesive | 6-12 months |
Practical tip: Buying multi-packs or rolls gives you spares for future camera moves.
Where To Buy No-screw Mounting Accessories
- Hardware stores: Most sell Command hooks, adhesive strips, and mounting tape.
- Home improvement chains: Home Depot, Lowe’s, and similar stores often stock clamp mounts and vinyl siding clips.
- Online retailers: Amazon, Walmart, and eBay have a wide range of third-party Blink-compatible magnetic and clamp mounts.
- Specialty security stores: Some offer camera-specific accessories with better weather resistance.
Look for accessories marked “outdoor rated,” “heavy-duty,” or “security camera compatible. ” Always read user reviews to check real-world durability.
Maintaining Your Blink Outdoor Camera
Once your camera is mounted, regular maintenance will keep it working perfectly:
- Check the mount every few months for signs of wear, peeling, or weakness.
- Clean the camera lens with a soft cloth to avoid blurry footage.
- Change batteries as needed (the app will alert you when power is low).
- Update the Blink app to get the latest features and security patches.
Extra tip: If you notice the camera view shifting, inspect the mount—wind, weather, or vibration can loosen some screw-free methods over time.
When To Replace Or Reinforce Your Mount
Adhesive and tape mounts aren’t forever. Replace or reinforce your mount if:
- The camera feels loose or wobbly when touched.
- The adhesive is peeling or has visible gaps.
- The camera has fallen or shifted after a storm.
- You see water or dirt behind the mount.
If you need to reinforce, add a second layer of adhesive or use a backup method (for example, a siding clip plus tape).
Additional Resources
For more details about Blink Outdoor camera specs and mounting options, the official Blink support site is a great resource:
blink Outdoor Camera Support
Frequently Asked Questions
Can I Use Blu Tack Or Putty To Mount My Blink Outdoor Camera?
Blu Tack and similar putties are not strong enough for outdoor use and can fail in heat, cold, or rain. Always use products rated for outdoor mounting to avoid accidents.
Will Mounting Without Screws Void My Blink Camera Warranty?
No, using screw-free mounting methods does not affect your Blink camera’s warranty. The key is to avoid damaging the camera itself—never cover vents or the lens.
How Often Should I Check The Adhesive Or Mounting Method?
Check every 2-3 months, or after major weather events. If you see any signs of weakening (like sagging or peeling), replace the adhesive or reinforce the mount.
Can I Mount The Camera Upside Down?
The Blink Outdoor camera works best upright, but you can mount it upside down if needed—the app lets you rotate the video. Make sure the motion sensor is not blocked.
What’s The Best Screw-free Method For Brick Or Rough Surfaces?
Adhesive and tape don’t stick well to rough brick. For these surfaces, try a clamp mount (if there’s an edge) or a magnetic mount (if there’s metal nearby). Otherwise, consider a freestanding camera stand.
Mounting your Blink Outdoor camera without screws is not only possible—it’s safe, flexible, and can look just as clean as a permanent installation. By choosing the right method for your surface and following the tips above, you’ll get reliable security coverage without damage or hassle.
Whether you’re a renter, a homeowner, or just want an easy setup, these solutions will keep your camera—and your peace of mind—right where you want them.