
Mounting cabinet door hinges is a job that many homeowners and DIY enthusiasts face at some point. Whether you’re installing brand-new cabinets or giving your old ones a facelift, knowing how to install hinges correctly is essential. Properly mounted hinges ensure your cabinet doors open smoothly, stay aligned, and look neat for years.
While it might seem like a simple task, doing it well requires attention to detail, the right tools, and a bit of planning. This article will walk you through everything you need to know—from understanding different hinge types, choosing the right hardware, preparing your doors, and mounting the hinges step by step.
Plus, you’ll discover common mistakes and practical tips that even experienced DIYers sometimes overlook.
Understanding Cabinet Door Hinges
Cabinet hinges come in many shapes and sizes. Choosing the right type for your cabinets is the first step to a successful installation.
Main Types Of Cabinet Hinges
1. Butt Hinges
These are simple and visible when the door is closed. They are common in traditional cabinetry.
2. Concealed (european) Hinges
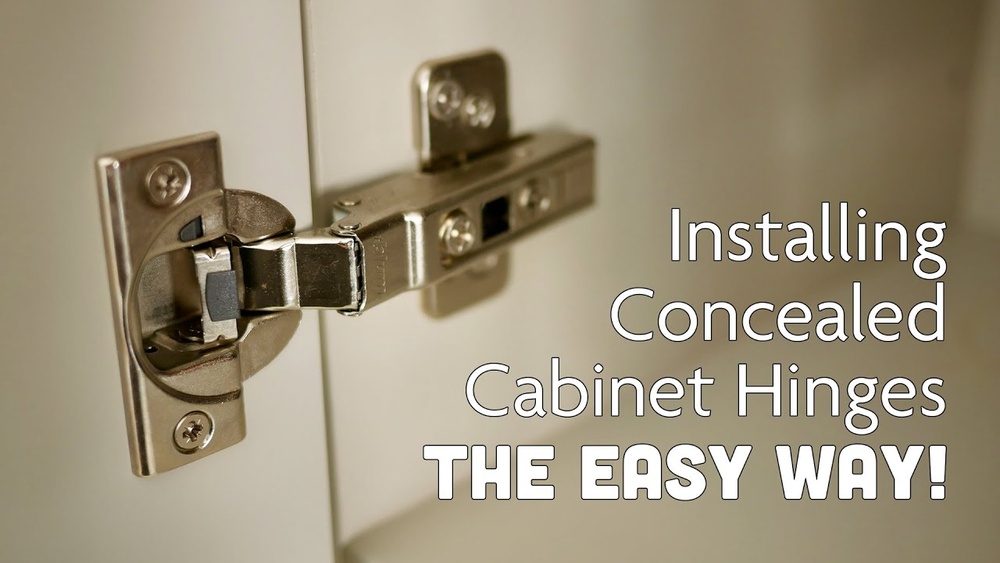
These hinges are hidden from view when the door is closed. They are popular in modern kitchens for their clean look and adjustability.
3. Overlay Hinges
Designed for doors that sit on top of the cabinet frame. The hinge wraps around the frame edge.
4. Inset Hinges
Used for doors that fit flush with the cabinet frame.
5. Semi-concealed Hinges
Part of the hinge is visible from the outside, but the rest is hidden.
Choosing The Right Hinge
Selecting the right hinge depends on:
- Cabinet style: Face frame or frameless
- Door position: Overlay, inset, or partial overlay
- Function: Soft-close, self-closing, or standard
Hinge Comparison Table
Below is a quick comparison to help you choose:
| Hinge Type | Visibility | Best For | Adjustability |
|---|---|---|---|
| Butt | Visible | Traditional cabinets | Low |
| Concealed | Hidden | Modern, frameless cabinets | High |
| Overlay | Partially visible | Face frame cabinets | Medium |
| Inset | Visible | Inset doors | Low |
A non-obvious point: overlay size matters. Overlay describes how much the door covers the cabinet frame. Hinges come in different overlay sizes, so measure carefully to match your cabinet design.
Tools And Materials Needed
Having the right tools and materials ready makes the job smoother and helps avoid mistakes.
Essential Tools
- Drill/driver with Phillips bits
- Screwdriver (manual for final tightening)
- Tape measure for accurate placement
- Combination square or straightedge
- Awl or center punch to mark screw holes
- Pencil or marker
- Clamps to hold doors steady (optional but helpful)
- Forstner bit (usually 35mm) for concealed hinges
- Chisel (for butt or inset hinges)
Materials
- Cabinet door hinges (right type and quantity)
- Matching screws (often come with hinges)
- Mounting plates (for concealed hinges)
- Door bumpers (to soften door closure)
- Wood filler (for mistakes or repairs)
Tool Comparison Table
See how different tools help the process:
| Tool | Purpose | Optional? |
|---|---|---|
| Drill/driver | Drilling pilot holes, driving screws | Essential |
| Awl | Marking screw holes | Optional |
| Clamps | Holding doors steady | Optional |
| Forstner bit | Boring cup holes for concealed hinges | Essential (for concealed hinges) |
Pro tip: If you’re installing many hinges, a jig made for hinge placement can save time and improve accuracy.
Measuring And Marking Hinge Placement
Getting the hinge position right is crucial. Even small errors can cause doors to hang unevenly or rub against each other.
Where To Place Hinges
- For doors under 40 inches tall, use two hinges—one near the top and one near the bottom.
- For taller doors, add a third hinge in the center for extra support.
Standard placement:
- Top hinge: 2–3 inches from the top edge
- Bottom hinge: 2–3 inches from the bottom edge
- Third hinge (if needed): Centered between top and bottom
Measuring Steps
- Lay the door face down on a work surface.
- Measure and mark the hinge locations on the edge.
- Use a combination square to draw a line across the door’s edge at each mark—this keeps hinges straight.
- Repeat the process on the cabinet frame or box.
Hidden insight: If you’re replacing old doors, you can use the old screw holes as a guide. But always check that the old locations are correct—sometimes previous installers made mistakes.
Marking For Concealed Hinges
Concealed hinges require a special cup hole on the door backside. Mark the location based on the manufacturer’s instructions, usually about 22mm from the door edge.
Common mistake: Not leaving enough space between the cup hole and the door edge. This can cause the wood to split.
Preparing Doors For Hinge Installation
Good preparation makes the installation smoother and helps avoid damage to your doors.
Drilling Pilot Holes
- Always drill pilot holes for the screws. This keeps the wood from splitting and makes it easier to drive the screws straight.
- Use a bit slightly smaller than the screw diameter.
Boring Concealed Hinge Cup Holes
- Use a 35mm Forstner bit in a drill press or hand drill.
- Set the depth stop so you don’t drill through the door. The cup hole is usually 12–13mm deep.
- Hold the drill steady and go slowly.
Non-obvious tip: Clamp a piece of scrap wood under the door to prevent tear-out when the bit breaks through the surface.
Mortising For Butt Or Inset Hinges
Some hinges need a shallow recess (mortise). Use a chisel and mallet to carefully remove wood, following your marked lines.
Practical example: For a 3″ butt hinge, mark a rectangle as wide and deep as the hinge leaf. Score the outline with a utility knife before chiseling for cleaner edges.

Credit: pineandpoplar.com
Step-by-step: How To Mount Cabinet Door Hinges
Mounting cabinet door hinges is best done in stages. Below is a detailed guide for both concealed and traditional hinges.
Mounting Concealed (european) Hinges
1. Attach The Hinge To The Door
- Insert the hinge cup into the bored hole.
- Align the hinge with your pencil lines.
- Secure with the provided screws, but don’t overtighten.
2. Position The Mounting Plate
- Hold the door against the cabinet in its final position.
- Mark the mounting plate location on the cabinet side or frame.
- Remove the door and attach the mounting plate with screws.
3. Hang The Door
- Clip or screw the hinge arm to the mounting plate (depending on hinge style).
- Check for movement and alignment.
4. Adjust The Door
- Use the adjustment screws on the hinge to fine-tune:
- Up/down
- In/out
- Left/right
Hidden insight: Small adjustments make a big difference. Don’t be afraid to tweak until the gap between the doors is even.
Mounting Butt, Overlay, Or Inset Hinges
1. Position The Hinge
- Set the hinge on the door edge, lining up with your marks.
- Mark screw hole positions with an awl.
2. Attach The Hinge To The Door
- Drill pilot holes.
- Drive screws partway.
- Double-check alignment, then tighten fully.
3. Mount The Door
- Hold the door in the correct position on the cabinet.
- Use shims under the door to keep it level with the cabinet base.
- Mark the screw holes on the cabinet frame.
- Drill pilot holes, then screw the hinge leaf to the frame.
4. Test And Adjust
- Open and close the door several times.
- If the door rubs, loosen the screws slightly and reposition as needed.
Extra tip: If working alone, a stack of books or a clamp can hold the door in place while you attach it.
Checking Alignment And Making Adjustments
Perfect alignment is key for smooth cabinet operation and a professional look.
What To Look For
- Even gaps between doors (usually 1/8″ to 3/16″)
- Doors open and close smoothly without rubbing
- Doors are level and plumb
How To Adjust
- Concealed hinges: Use the built-in adjustment screws. Most have three-way adjustment (side, height, depth).
- Traditional hinges: Loosen screws and shift the hinge slightly, then retighten.
Fine-tuning Tips
- If doors bind, check for warped wood or uneven cabinet frames.
- For stubborn alignment issues, try loosening all screws, adjusting, then retightening in sequence.
- Add door bumpers to soften closure and reduce noise.
Pro insight: Sometimes, even small movements (1mm) make a big difference. Take your time with adjustments.

Credit: www.youtube.com
Common Mistakes And How To Avoid Them
Even experienced DIYers sometimes make errors when mounting cabinet hinges. Here are the most common pitfalls and how to avoid them.
1. Skipping Pilot Holes
Driving screws directly into wood without pilot holes can cause splits or crooked hinges. Always pre-drill.
2. Poor Measuring
A small error in hinge placement can cause big alignment problems. Double-check your measurements before drilling.
3. Overtightening Screws
Tightening screws too much can strip the holes or break the hardware. Snug is enough.
4. Using Wrong Hinges
Not all hinges fit all cabinet types. Make sure your hinge matches your door overlay and cabinet style.
5. Installing Doors Upside Down
It happens more than you’d think. Mark the top and bottom of each door before starting.
6. Not Checking Overlay
If you mismatch overlay size, your doors won’t cover the cabinet frame as expected. Measure overlay carefully before buying hinges.
Non-obvious mistake: Not testing the door swing before tightening all screws. Always check that the door opens fully and clears nearby obstacles.
Practical Tips For A Professional Finish
Small details separate a DIY job from a truly professional look.
Use Quality Hinges
Low-quality hinges often wear out quickly or cause sagging. Investing in good hardware is worth it for smooth operation and durability.
Hide Screw Heads
Some hinges have covers for visible screws. Use these for a cleaner look.
Touch Up Paint Or Finish
If you chip paint during installation, touch up right away to prevent moisture damage.
Add Door Bumpers
Clear rubber bumpers reduce noise and protect the cabinet finish. They stick to the door corners easily.
Label Parts
When installing multiple doors, label each door and its matching cabinet opening. This avoids confusion and saves time.
Test All Doors
Open and close each door several times before putting dishes or tools back in the cabinet. Early testing helps spot issues before they become problems.
Insider tip: If a screw hole becomes stripped, remove the screw and insert a wooden toothpick with wood glue into the hole. Let it dry, then reinsert the screw for a tight fit.
Special Situations: Frameless Vs Face Frame Cabinets
Cabinet construction style affects how you mount hinges.
Face Frame Cabinets
These have a front frame around the cabinet box. Hinges may mount to the frame or inside edge.
- Use face frame hinges for easiest installation.
- Overlay and inset positions are easier to adjust.
Frameless Cabinets
These don’t have a front frame, just a box. Common in European and modern styles.
- Use concealed hinges designed for frameless cabinets.
- Pay close attention to drilling depth and position for mounting plates.
Data point: According to the Cabinet Makers Association, over 60% of new kitchens in the US use frameless cabinets, so concealed hinges are more common than ever.
Replacing Or Upgrading Existing Hinges
Sometimes you need to replace old hinges with new ones, either for better performance or a new look.
Steps For Replacement
- Remove the old hinges and clean the area.
- Check if new hinges fit the existing holes. If not, fill old holes with wood filler and drill new ones.
- Follow the same steps as for new installation.
Pro insight: Take one door off at a time so you can use the existing alignment as a guide for the new hardware.
Upgrading To Soft-close Hinges
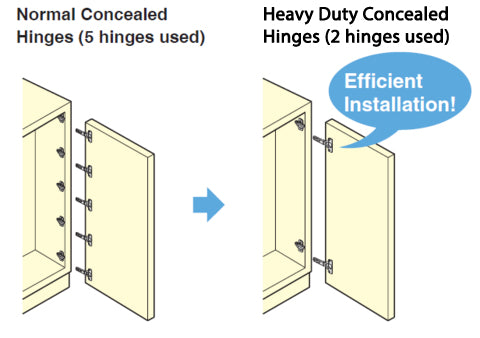
Many homeowners upgrade to soft-close hinges for quieter, gentler door operation. These usually require concealed hinge cups. If your old doors use surface-mount or butt hinges, you may need to drill new cup holes.
Credit: www.eurofitdirect.co.uk
When To Call A Professional
While most DIYers can handle hinge installation, some situations are best left to the pros:
- Installing very heavy or oversized doors
- Custom cabinets with unusual shapes
- Doors that need advanced repairs or adjustments
If you’re not confident, a skilled carpenter can finish the job quickly and accurately.
Environmental And Safety Considerations
Working safely and minimizing waste benefits everyone.
Safety Tips
- Wear safety glasses when drilling or chiseling.
- Clamp doors to the workbench to keep your hands free.
- Unplug the drill when changing bits.
Environmental Tips
- Recycle old hardware if possible.
- Use wood fillers and paints labeled as low-VOC for better indoor air quality.
- Keep leftover hinges for future repairs or projects.
Frequently Asked Questions
How Do I Know Which Hinge Overlay Size I Need?
Measure from the edge of your cabinet opening to the edge of your door when the door is closed. This measurement is your overlay. Match this to the hinge specifications for best fit. If in doubt, bring your door or a photo to a hardware store for advice.
Can I Install Concealed Hinges On Old Cabinet Doors?
Yes, but you’ll need to drill a 35mm cup hole in each door using a Forstner bit. Check the door thickness—most concealed hinges need doors at least 5/8″ thick. Thin or brittle doors may not work.
What’s The Best Way To Fix A Stripped Screw Hole?
Remove the screw, insert a toothpick or dowel with wood glue, let it dry, then reinstall the screw. This creates a new grip for the screw. For bigger holes, use a wood plug.
How Many Hinges Should I Use For A Tall Cabinet Door?
For doors up to 40 inches, two hinges are enough. For taller doors, use three hinges—top, bottom, and one in the middle—to prevent sagging and ensure smooth operation.
Is It Worth Upgrading To Soft-close Hinges?
Soft-close hinges are popular because they prevent slamming and reduce wear. They’re especially useful in kitchens with children or in high-traffic areas. Upgrading can add value to your home and make daily use more pleasant. For more details, see Hinge (Wikipedia).
Mounting cabinet door hinges is a practical skill with lasting benefits. With careful planning, the right tools, and attention to detail, you can achieve a professional result—even if you’re new to DIY projects. Remember, small details matter, and taking your time during installation pays off in the long run.
Whether you’re updating a single cabinet or tackling a full kitchen, you’ll appreciate the improved function and appearance every time you open a door.