
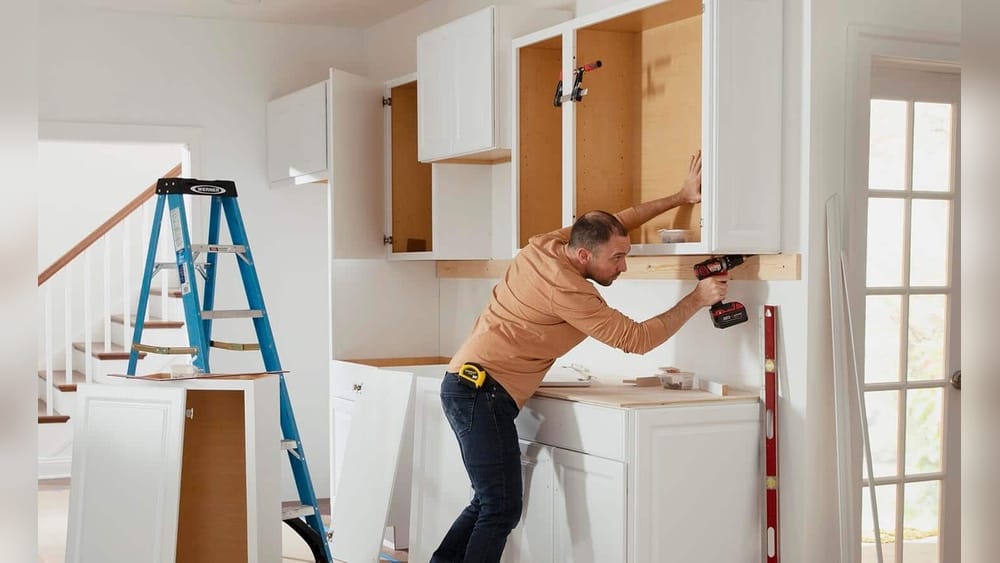
Mounting cabinets is a skill that can transform your kitchen, bathroom, or workspace. Done well, it makes your room look professional and neat. Done poorly, it can lead to unsafe cabinets, crooked lines, or expensive repairs. Whether you’re a homeowner planning a renovation or a DIY enthusiast eager to learn, understanding the steps to mount cabinets is essential.
This guide will walk you through the entire process, from preparation to finishing touches. You’ll learn the right tools, best practices, and common mistakes to avoid. Even if English isn’t your first language, this article uses clear words and simple explanations, so you can follow confidently.
Planning Your Cabinet Installation
Before you drill any holes or lift heavy boxes, you need a good plan. Cabinets are a big investment, and mistakes are hard to fix. Careful planning saves time, money, and stress.
Measuring Your Space
Start by measuring the area where you want to mount the cabinets. Use a tape measure and write down:
- Wall length (from corner to corner)
- Floor to ceiling height
- Window and door positions
- Electrical outlets and plumbing
Double-check your measurements. Small errors can lead to big problems later.
Choosing The Right Cabinets
Cabinets come in different styles, sizes, and materials. Consider:
- Purpose: Kitchen, bathroom, laundry, or storage?
- Size: Standard wall cabinets are 12-24 inches deep and 30-42 inches tall. Base cabinets are usually 24 inches deep.
- Material: Solid wood, plywood, MDF, or particleboard.
- Finish: Painted, stained, laminated.
If you’re replacing old cabinets, measure them before removing. This helps you find the right size for your new ones.
Planning Your Layout
Draw a simple sketch of your room and where each cabinet will go. Include:
- Cabinet sizes and positions
- Appliances (stove, fridge, dishwasher)
- Walkways and clearances
Follow the “work triangle” rule in kitchens: keep the sink, stove, and refrigerator close, but not too crowded.
Ordering Cabinets
Order cabinets that fit your measurements and layout. Custom cabinets are more expensive but can fit unusual spaces. Stock cabinets are cheaper and faster to get. Semi-custom cabinets offer some flexibility.
Non-obvious insight: Many beginners forget to check if the ceiling and floor are level. Uneven surfaces make cabinet installation harder. Use a level tool to check before you start.
Gathering Tools And Materials
You’ll need the right tools to mount cabinets safely and securely. Here’s what you should have ready:
- Tape measure
- Pencil
- Level (24-48 inches)
- Stud finder
- Drill and drill bits
- Screwdriver
- Cabinet screws (2.5-3 inches)
- Clamps
- Shims (thin wood or plastic wedges)
- Hammer
- Safety glasses
- Helper (cabinet installation is easier with two people)
Optional tools:
- Cabinet jack or support pole
- Laser level
- Impact driver
Non-obvious insight: Use cabinet screws, not drywall screws. Drywall screws break easily and don’t hold heavy cabinets.
Preparing The Room
A clean, safe workspace makes mounting cabinets easier.
Removing Old Cabinets
If you’re replacing old cabinets, remove them carefully:
- Empty all items from the cabinets.
- Turn off water and electricity if needed.
- Remove cabinet doors and drawers.
- Unscrew the cabinets from the wall.
- Use a pry bar to remove stubborn cabinets (be gentle to avoid wall damage).
Patch holes and repaint walls if needed. Make sure the wall is smooth and dry.
Marking Studs And Layout
Cabinets must be attached to wall studs for strength. Use a stud finder to locate the studs. Mark their positions with a pencil.
Draw horizontal lines where the top and bottom of the cabinets will go. Use a level to make sure the lines are straight.
Mounting Wall Cabinets
Most installers mount wall cabinets before base cabinets. Wall cabinets are lighter and easier to handle.
Step 1: Marking The Cabinet Height
Standard wall cabinets usually start 54 inches above the floor (for kitchens). This gives 18 inches of space above a 36-inch countertop.
Draw a level line at this height across the wall.
Step 2: Installing A Ledger Board
A ledger board is a temporary support. Screw a straight 1×4 board to the wall at the lower line. It holds the cabinets while you secure them.
Step 3: Drilling Pilot Holes
Drill pilot holes in the cabinet backs where the screws will go. This prevents splitting and makes installation easier.
Step 4: Hanging The Cabinets
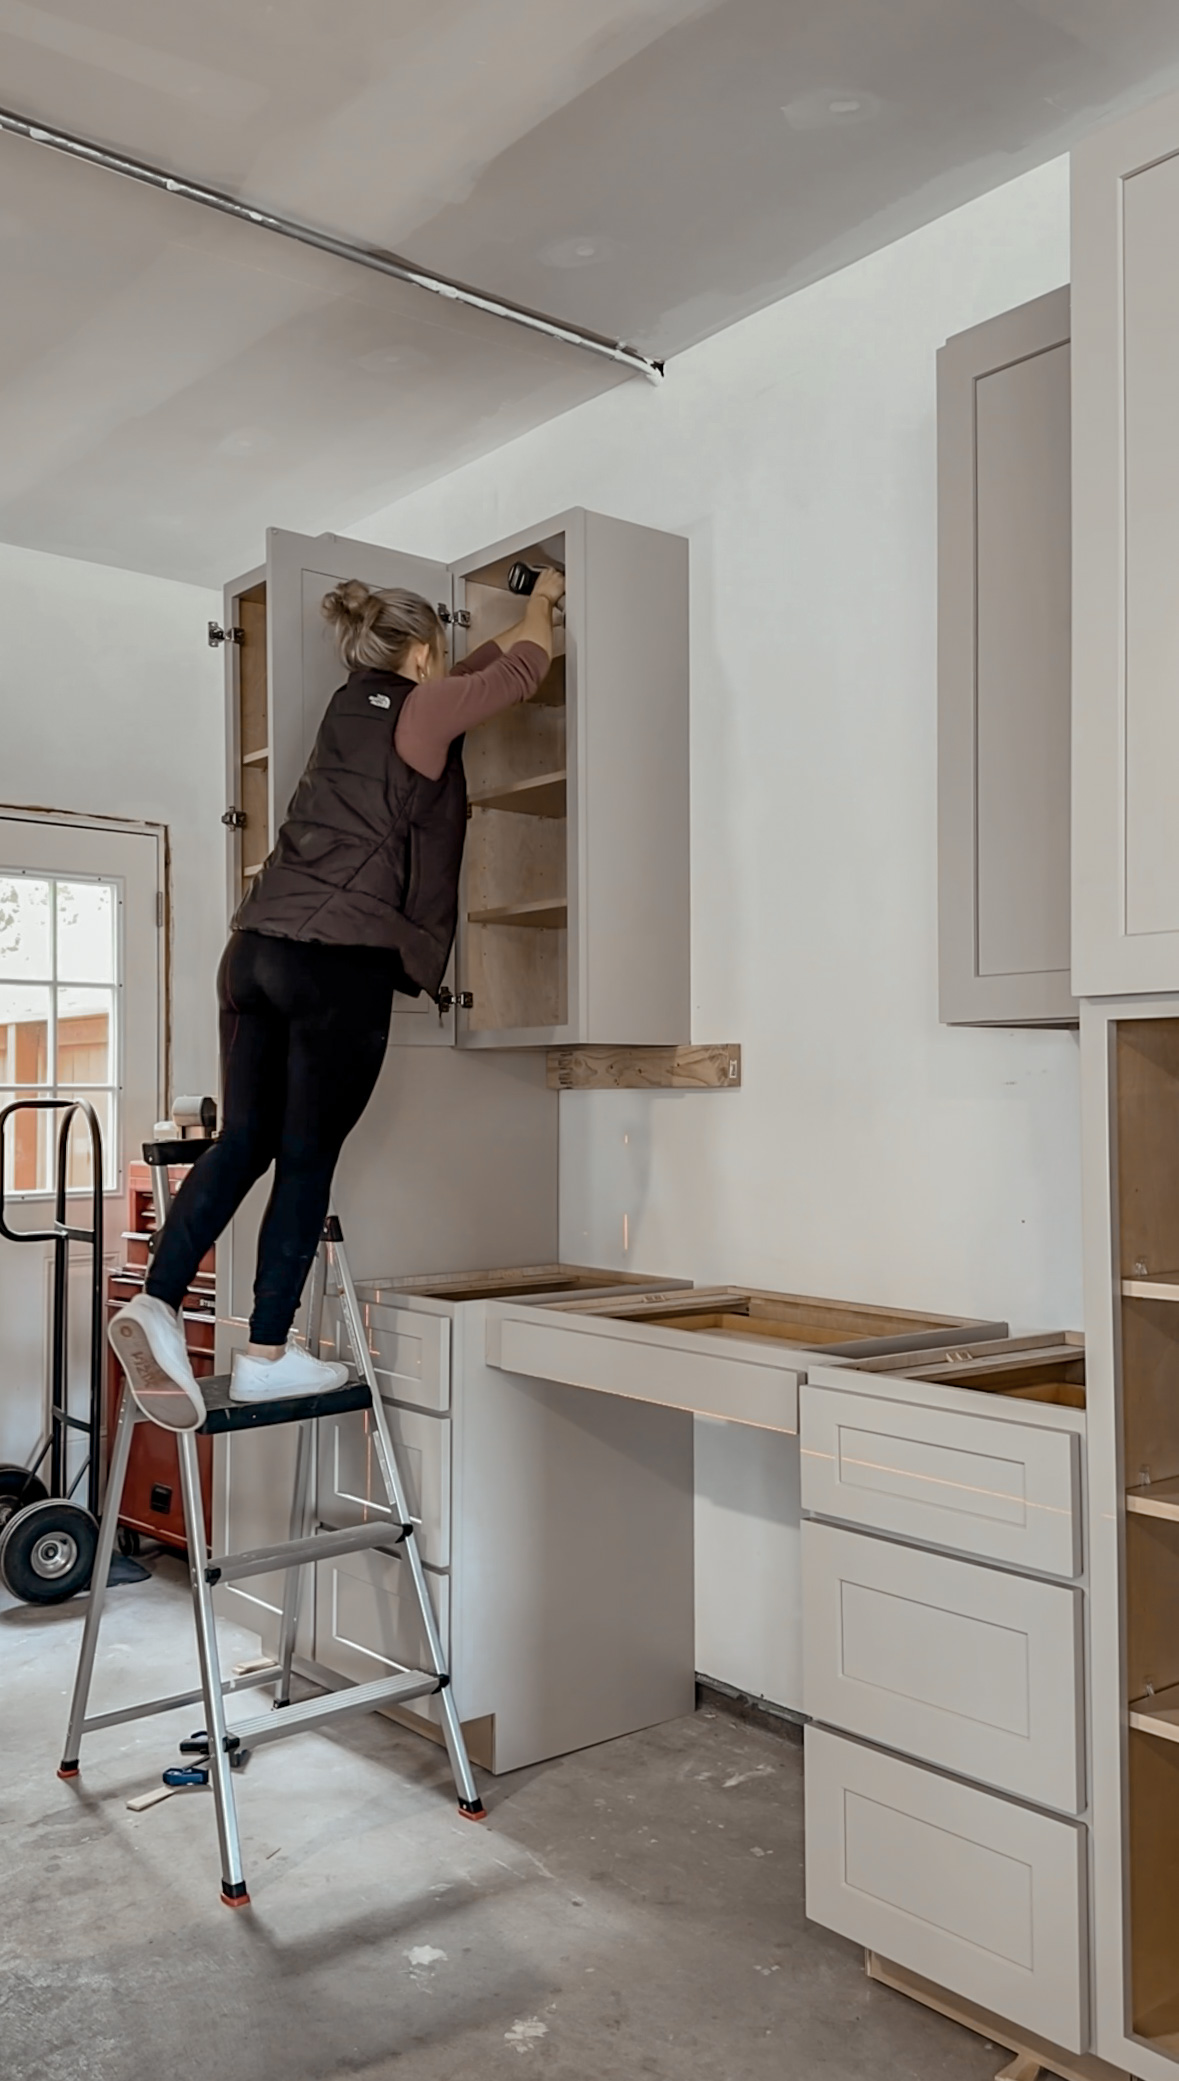
- Lift the first cabinet onto the ledger board. Line it up with the stud marks.
- Check the cabinet is level and plumb (vertical).
- Drill screws through the cabinet back into the wall studs.
- Repeat for the next cabinet.
- Clamp cabinets together and screw through the side walls to join them.
Non-obvious insight: Start at a corner or near the window. If your wall is not perfectly straight, starting at the most visible point helps hide small gaps.
Step 5: Removing The Ledger Board
Once the cabinets are secure, remove the ledger board.
Step 6: Installing Cabinet Doors And Hardware
Attach doors, handles, and hinges as needed. Adjust hinges for smooth opening.
Mounting Base Cabinets
Base cabinets support countertops and sinks. They must be strong and level.
Step 1: Marking The Layout
Draw lines where each base cabinet will go. Mark the front and back edges.
Step 2: Placing And Leveling Cabinets
Set the first cabinet in place. Use a level to check the top and sides. Use shims under the cabinet to adjust for uneven floors.
Step 3: Securing Cabinets To The Wall
Drill pilot holes in the cabinet back. Screw the cabinet to wall studs.
Step 4: Joining Cabinets
Clamp the next cabinet to the first. Screw through the side wall to join them. Repeat for all base cabinets.
Step 5: Installing Drawers And Doors
Attach drawers, doors, handles, and hinges. Adjust for smooth movement.
Step 6: Preparing For Countertop Installation
Check all cabinets are level and secure. Clean the tops. Install countertops according to manufacturer instructions.
Common Mistakes And How To Avoid Them
Mounting cabinets is not difficult, but beginners often make mistakes. Here are some to watch out for:
- Skipping the level check: Cabinets must be level. If not, doors won’t close right, and countertops will not fit.
- Not securing to studs: Wall anchors are not strong enough. Always screw into studs.
- Using wrong screws: Use cabinet screws, not drywall or wood screws.
- Forgetting shims: Floors and walls are rarely perfect. Shims help adjust for uneven surfaces.
- Rushing measurements: Double-check all measurements before drilling or cutting.
- Damaging the wall: Use gentle force when removing old cabinets. Patch and paint before installing new ones.
- Ignoring plumbing and wiring: Mark all pipes and wires. Avoid drilling into them.
Comparing Cabinet Mounting Methods
Some people use different mounting methods. Here’s a simple comparison.
| Method | Strength | Difficulty | Best For |
|---|---|---|---|
| Screwing into studs | Very strong | Moderate | Heavy cabinets, kitchens |
| Wall anchors | Weak | Easy | Light cabinets, temporary installs |
| French cleat | Strong | Moderate | Garage, workshop |
| Direct glue | Very weak | Easy | Small, decorative cabinets |
Direct glue is rarely used for mounting real cabinets. French cleats are best for open shelves or in workshops.
Safety Tips For Mounting Cabinets
Cabinet installation is not dangerous, but you should follow some safety rules.
- Wear safety glasses when drilling or removing cabinets.
- Lift heavy cabinets with two people.
- Keep your workspace clear of tools and debris.
- Make sure cabinets are secure before letting go.
- Turn off water and electricity near sinks and appliances.
- Don’t stand on cabinets to reach higher spots.
Non-obvious insight: Many injuries happen when people try to lift cabinets alone. Always ask for help.
Cabinet Mounting Data And Statistics
Mounting cabinets is common in home renovation. Here are some data points:
- Over 60% of US homeowners choose to mount new cabinets during kitchen remodels.
- The average kitchen cabinet installation costs $3,000–$8,000 depending on materials and labor.
- Cabinets that are not mounted to studs are five times more likely to fall or cause damage.
- Most cabinets last 15–20 years if mounted properly.
Comparing Cabinet Materials
Different cabinet materials affect mounting and durability.
| Material | Weight | Durability | Mounting Ease | Cost |
|---|---|---|---|---|
| Solid wood | Heavy | High | Moderate | High |
| Plywood | Medium | High | Easy | Medium |
| MDF | Medium | Medium | Easy | Low |
| Particleboard | Light | Low | Easy | Very low |
Solid wood is strong but heavy. Plywood is a good balance of strength and weight. MDF and particleboard are easier to mount but less durable.
Credit: comestayawhile.com
Practical Tips For A Professional Finish
Mounting cabinets is more than just screwing boxes to the wall. Here’s how to get a professional look:
- Use caulk along the edges for a clean finish.
- Adjust doors and drawers so they open smoothly.
- Hide screw heads with matching covers.
- Match the cabinet color to your room’s style.
- Clean up dust and debris after installation.
If your cabinets have gaps, use fill strips or trim pieces to cover them.
Non-obvious insight: Many installers skip caulking, but it stops moisture and improves appearance.
Troubleshooting Common Cabinet Issues
Problems can happen during or after mounting. Here’s how to fix them:
Cabinets Not Level
Check with a level. Use shims under the cabinet to adjust.
Cabinet Doors Won’t Close
Adjust the hinges. If the cabinet is not square, loosen the screws and realign.
Gaps Between Cabinets
Use clamps to pull cabinets together. Fill small gaps with caulk or trim.
Cabinets Pulling Away From Wall
Check screws. If they are not in studs, move the cabinet and drill into a stud.
Damaged Wall
Patch holes with spackle. Sand and paint before installing cabinets.
Professional Vs Diy Cabinet Mounting
Some people hire professionals, others do it themselves. Here’s a comparison.
| Aspect | Professional | DIY |
|---|---|---|
| Cost | Higher | Lower |
| Time | Quick | Slower |
| Quality | Consistent | Varies |
| Tools | All provided | May need to buy/rent |
| Warranty | Often included | None |
Hiring a pro is best if you want fast, guaranteed results. DIY can save money but takes more time and effort.
How To Mount Cabinets Over Uneven Walls Or Floors
Many homes have uneven walls or floors. This makes mounting cabinets harder.
- Use shims to fill gaps under cabinets.
- For walls, check with a long level. Mark high and low spots.
- If the wall bows out, use filler strips behind the cabinet.
- For floors, adjust each cabinet separately with shims.
If the uneven area is too big, you may need to repair the wall or floor before mounting.
Non-obvious insight: Installing a filler strip behind the cabinet can hide wall bumps without making the cabinet look crooked.

Credit: www.thisoldhouse.com
Mounting Cabinets Around Plumbing And Wiring
Cabinets often need to go around pipes, wires, or vents.
- Mark all pipes and wires before starting.
- Cut holes in the cabinet backs for pipes or wires.
- Use a hole saw or jigsaw for clean cuts.
- Do not drill into pipes or wires.
If you’re not sure where the pipes and wires are, ask a professional.
When To Hire A Professional
Mounting cabinets is possible for most DIYers, but you should hire a professional if:
- The cabinets are very large or heavy.
- You have no experience with tools.
- Your walls or floors are very uneven.
- There are many pipes or wires in the way.
- You want a warranty or fast installation.
Professionals have the tools and experience to handle difficult jobs.
Maintenance After Mounting Cabinets
Once your cabinets are installed, keep them in good shape.
- Clean with mild soap and water.
- Tighten screws and hinges if they get loose.
- Fix scratches with touch-up paint or filler.
- Check for moisture or leaks under sinks.
Proper maintenance keeps your cabinets looking new and prevents problems.
Advanced Cabinet Mounting Techniques
If you want a special look, try these advanced methods:
- Floating cabinets: Mount cabinets with hidden brackets so they look like they float.
- Corner cabinets: Use special hardware for tricky corners.
- Pull-out shelves: Install inside cabinets for easy access.
- Under-cabinet lighting: Mount LED strips for better visibility.
Advanced techniques require more skill and tools, but can make your cabinets stand out.
Real-life Cabinet Mounting Example
Let’s walk through a real kitchen cabinet mounting case:
A homeowner wants to mount six wall cabinets above a countertop. The wall is 10 feet long, with two windows in the middle.
- Measure the wall and mark stud positions.
- Draw a level line 54 inches above the floor.
- Install a ledger board at the line.
- Start at the left corner, lift the first cabinet onto the ledger.
- Screw into studs, check with a level.
- Add the next cabinet, clamp and join to the first.
- Repeat for all cabinets.
- Remove the ledger board.
- Install doors, handles, and adjust hinges.
The result: neat, level cabinets with no gaps. The homeowner saves $2,000 by doing the work themselves.
Useful Resources
If you need more help, check out the official guides from the National Kitchen and Bath Association. For technical details and standards, visit NKBA.

Credit: www.familyhandyman.com
Frequently Asked Questions
How Do I Find Wall Studs For Mounting Cabinets?
Use a stud finder to locate studs. Move the tool slowly across the wall, marking each stud with a pencil. Studs are usually 16 inches apart. Tap the wall lightly and listen for solid spots if you don’t have a stud finder.
Can I Mount Cabinets On Drywall Without Studs?
No, drywall is not strong enough. Cabinets must be screwed into studs. If you don’t hit a stud, use a strong anchor, but this is only safe for light cabinets. For heavy cabinets, always find a stud.
What Screws Should I Use To Mount Cabinets?
Use cabinet screws (2.5–3 inches long) with a flat head. They are designed to hold heavy loads. Drywall screws are weak and can break. For soft woods, use coarse threads; for hardwoods, use fine threads.
How Do I Fix Uneven Cabinets After Installation?
Loosen the mounting screws. Insert shims under the cabinet to level it. Tighten the screws again. Check with a level. If the wall is uneven, use trim or filler strips to hide gaps.
Is It Worth Hiring A Professional To Mount Cabinets?
If you lack experience, have heavy cabinets, or need a fast, guaranteed result, hiring a professional is smart. DIY mounting saves money, but takes more time and risk. Weigh your skills, budget, and needs before deciding.
Mounting cabinets is a rewarding project when done right. With careful planning, the right tools, and attention to detail, your cabinets will look professional and last for years. Take your time, double-check your measurements, and don’t be afraid to ask for help.
Whether you choose DIY or professional installation, understanding the process gives you confidence and control over your home improvement.