
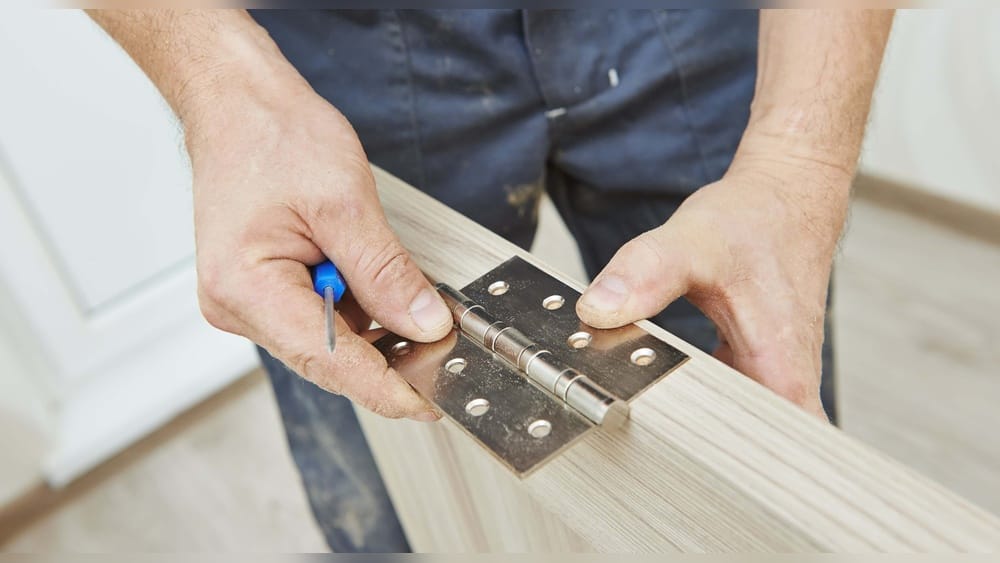
Mounting door hinges may look simple, but if you want your door to swing smoothly and last for years, every step matters. Many people make small mistakes—like misplacing screws or not aligning hinges—that lead to squeaky, sticky, or sagging doors.
If you’re installing a new door or replacing old hinges, learning the right way can save you time, money, and frustration. This guide explains the process in clear, practical steps, with tips that even many experienced DIYers don’t know.
You’ll discover how to choose the right hinges, measure and mark accurately, cut clean mortises, and attach everything for a perfect fit. We’ll cover tools, step-by-step instructions, troubleshooting, and answer the most common questions about mounting door hinges. Whether you’re a homeowner, a hobbyist, or just want to improve your skills, you’ll learn everything you need to know to get pro-level results—even if you’ve never installed a hinge before.
Understanding Door Hinges
Before you start, it’s important to know what you’re working with. Door hinges are mechanical bearings that connect your door to its frame, letting the door open and close. The most common type for home use is the butt hinge, but there are others for special uses.
Types Of Door Hinges
Different doors need different hinges. Here are the most common types:
- Butt hinges – The standard for most interior and exterior doors. Two metal plates joined by a pin. Strong, simple, and widely available.
- Continuous (piano) hinges – Run the full length of the door. Used for cabinets, piano lids, or lightweight doors.
- Ball bearing hinges – Similar to butt hinges but with ball bearings for smoother, quieter movement. Best for heavy doors or frequent use.
- Concealed hinges – Hidden when the door is closed. Used for cabinets or modern interior doors.
- Spring hinges – Have a built-in spring to close the door automatically. Used for fire doors or where self-closing is needed.
Parts Of A Door Hinge
Each hinge has a few main parts:
- Leaf: The flat plates that attach to the door and frame.
- Pin: The rod that holds the two leaves together and lets them rotate.
- Knuckle: The rounded part around the pin.
- Screw holes: Where you’ll attach the hinge with screws.
Choosing The Right Hinge
For most home doors, a 3.5-inch or 4-inch butt hinge is standard. Heavier or taller doors may need 4.5-inch hinges. Also, check the hinge material—brass or stainless steel for outdoor use, steel or zinc-plated for indoors.
Pay attention to the corner style: square corner hinges need a chisel-cut mortise, while radius corner hinges fit a rounded mortise. Measure the old hinge or check your door’s pre-cut mortise before buying.
Tools And Materials You Need
Mounting door hinges requires only basic tools, but using the right ones makes the job easier and gives better results. Here’s what you’ll need:
- Tape measure and pencil for marking
- Combination square or try square for accuracy
- Utility knife for scoring wood
- Chisel (1/2 inch or 3/4 inch) for mortising
- Hammer or mallet (preferably wooden)
- Drill with drill bits and screwdriver bits
- Screwdriver (manual or electric)
- Hinges (check size and material)
- Hinge screws (usually included with hinges)
- Wood filler (for old screw holes, if replacing hinges)
- Sandpaper or sanding block
Optional but helpful:
- Router with a hinge mortising bit (for many doors or pro results)
- Hinge template (for repeat accuracy)
- Clamps (to hold the door steady)
Pro tip: Don’t use drywall screws for hinges—they snap easily. Use proper hinge screws, usually #9 or #10, 3/4” to 1-1/4” long.
:max_bytes(150000):strip_icc()/GettyImages-1142989454-43997a66a4c441078f51fdb08a215d85.jpg)
Credit: www.thespruce.com
Planning And Preparation
A little planning makes the job much smoother. Decide if you’ll mount the hinges with the door on or off the frame. Removing the door makes marking and cutting easier, but small doors (like cabinets) can be done in place.
Measuring Hinge Placement
Standard doors use two or three hinges:
- 2 hinges: For doors up to 60 inches tall.
- 3 hinges: For doors over 60 inches or heavy materials.
The typical hinge positions:
- Top hinge: 7 inches from the top of the door to the top of the hinge.
- Bottom hinge: 11 inches from the bottom of the door to the bottom of the hinge.
- Middle hinge: Centered between top and bottom (for three-hinge doors).
These are guidelines—always check what’s standard in your area or match the other doors in your house.
Marking The Door And Frame
- Use a pencil and combination square to mark straight, level lines for the hinge positions.
- Place the hinge leaf against the edge of the door at your marks. Trace around it with your utility knife or pencil. The cut should match the hinge thickness.
Non-obvious tip: Always mark and cut the door before the frame. The door is easier to work with, and small errors are easier to adjust on the frame side.
Cutting The Hinge Mortises
A mortise is a shallow, flat-bottomed cut in the wood where the hinge sits. It lets the hinge leaf sit flush with the door edge. If you skip this step, the door may bind or not close fully.
How Deep Should The Mortise Be?
The mortise should be exactly the thickness of the hinge leaf. Most residential butt hinges are 2–2.5 mm thick (about 1/16 inch).
Cutting Mortises By Hand
- Score the outline: Use a utility knife to cut along the pencil line. This prevents tear-out.
- Chisel the edges: Place the chisel at the scored line, bevel side toward waste. Tap gently with a mallet to define the edge.
- Remove wood: With the chisel flat side down, pare out thin layers from the middle. Work slowly—don’t dig too deep.
- Check depth: Test fit the hinge often. The hinge should be flush with the wood, not above or below.
- Smooth the surface: Sand lightly if needed.
For best results, keep the chisel sharp. Dull tools cause splintering.
Using A Router Or Hinge Template
If you have many doors to do, a router with a hinge jig speeds up the job and gives pro-level accuracy. Set the bit depth to match your hinge and let the jig guide your cuts.
Mortising The Frame
Once the door mortises are cut and you’re happy with the fit, repeat the process on the frame (jamb) at the matching heights. Accurate marking is key—a small mismatch here can cause the door to bind.
/SPR-how-to-install-door-hinges-on-door-blanks-5075615-hero-a51d77c0866249109ed47088e512258b.jpg)
Credit: www.thespruce.com
Attaching Hinges To The Door
Now, attach the hinges to the door before hanging it. This gives you more control and reduces mistakes.
Steps To Attach Hinges
- Position the hinge in the mortise. The knuckle should just stick out from the door edge.
- Mark screw holes with a pencil or an awl. Pre-drilling prevents the wood from splitting.
- Drill pilot holes slightly smaller than the screws.
- Drive the screws in—start with the center screw, then the others. Don’t overtighten; this can strip the holes.
Non-obvious insight: If using a power drill, use the lowest torque setting to avoid stripping screws. For older, soft wood, consider driving the last turn by hand.
If the screws spin freely or won’t grip, fill the hole with a wood matchstick and glue, let it dry, then re-drive the screw.
Hanging The Door And Fitting Hinges To The Frame
With the hinges attached to the door, you’re ready to mount the door on the frame.
Hanging The Door
- Support the door: Use shims, blocks, or a helper to hold the door in position. The top gap should be about 1/8 inch.
- Align hinge leaves: Swing the hinge leaf (the one not yet attached) into position on the frame mortise.
- Mark and drill pilot holes in the frame.
- Drive screws into the top hinge first. This carries the weight and lets you adjust as needed.
- Attach the rest of the hinges. Check the gaps around the door as you work.
If the door is heavy, start with only one screw per hinge until you’re sure of the fit, then add the rest.
Checking Alignment
Close the door and check the fit:
- The door should swing freely without rubbing.
- The gap should be even all around (usually 1/8 inch).
- The door should latch smoothly.
If something’s off, don’t panic. Small adjustments can fix most problems.
Common Problems And How To Fix Them
Even skilled installers run into issues. Here’s how to solve the most frequent problems.
Door Won’t Close Fully
Possible causes:
- Mortise too shallow (hinge sticks out): Deepen mortise with a chisel.
- Screws not tight: Tighten or replace with longer screws.
- Hinge misaligned: Remove and reposition.
Door Binds Or Rubs
- Check for paint build-up or debris in the mortise.
- Sand the edge of the door slightly if needed.
- Check that the hinge knuckle isn’t hitting the jamb.
Door Sags Or Drops
- Use longer screws in the top hinge (reach the framing stud).
- Check for stripped screw holes; fill and re-drive screws.
- Add a third hinge for heavy doors.
Hinge Screws Stripped Out
- Fill hole with wood glue and matchsticks or a dowel.
- Let dry, then re-drill a pilot hole.
Squeaky Hinges
- Add a drop of light oil to the hinge pin.
- If squeak remains, remove the pin, clean with steel wool, and oil before replacing.
Installing Hinges On Pre-hung Doors
Many new doors are pre-hung—hinges and frame come already attached. But you may still need to adjust or replace hinges, or fit the door in an existing frame.
Tips for pre-hung doors:
- Check hinge size and spacing. Match them exactly if installing in an old frame.
- Use shims to adjust the frame for plumb (vertical) before securing screws.
- Tighten all hinge screws after final adjustments.
If you need to replace a hinge, remove one at a time and replace immediately—this keeps the door in position.
Special Cases: Exterior, Heavy, And Fire Doors
Not all doors are created equal. Heavier doors, exterior doors, or fire doors need extra attention.
Exterior Doors
- Use weather-resistant hinges (stainless steel or brass).
- Use longer screws (at least 1.5 inches) to reach framing.
- Three or more hinges for security.
Heavy Doors
- Choose ball bearing hinges for smoother operation and longer life.
- Three or even four hinges may be needed for tall or wide doors.
Fire Doors
- Must use fire-rated hinges—check local building codes.
- Usually require steel screws and three hinges minimum.
- Don’t modify the door or frame without checking regulations.
Comparing Hinge Types For Different Doors
To help you choose, here’s a comparison of common hinges used for home doors:
| Hinge Type | Best For | Strength | Cost | Maintenance |
|---|---|---|---|---|
| Butt Hinge | Interior/Exterior, Standard Doors | High | Low | Low |
| Ball Bearing Hinge | Heavy or High-Use Doors | Very High | Medium | Very Low |
| Spring Hinge | Self-Closing Doors | Medium | Medium | Medium |
| Continuous Hinge | Cabinets, Long Doors | Medium | Medium | Low |
| Concealed Hinge | Cabinets, Modern Interiors | Medium | High | Medium |
Door Hinge Sizes: Which One Do You Need?
Choosing the right size is key for performance and appearance. Here’s how common sizes compare:
| Hinge Size | Door Height | Door Thickness | Typical Use |
|---|---|---|---|
| 3.0 inch | Up to 60 inches | 1-3/8 inch | Interior doors |
| 3.5 inch | 60–90 inches | 1-3/8 to 1-3/4 inch | Most interior/exterior doors |
| 4.0 inch | Over 90 inches | 1-3/4 inch | Heavy exterior doors |
| 4.5 inch | Over 96 inches | 2 inches | Commercial/extra heavy doors |
Non-obvious tip: When in doubt, use the same size as the old hinge or match other doors in your house for a uniform look.
Safety Tips When Mounting Door Hinges
Using hand tools and handling doors can be risky if you’re not careful. Here’s how to stay safe:
- Wear safety glasses when chiseling or drilling.
- Keep your hands behind the blade when using a chisel or utility knife.
- Use a stable work surface. Secure the door with clamps if possible.
- Don’t force screws—if they resist, check alignment or pre-drill a larger hole.
- Store tools safely when finished.
Real-world Example: Replacing Hinges On A Bedroom Door
Let’s walk through a practical example using the steps above.
- Remove the old door from the frame by tapping out the hinge pins and lifting the door off.
- Check the old hinge size—measure from top to bottom and across the leaf.
- Buy new hinges of the same size and corner style.
- Fill old screw holes with wood filler if needed. Let dry, then sand smooth.
- Mark new hinge positions using the standard measurements (7” from top, 11” from bottom).
- Mortise the door edge: Score, chisel, and test fit until flush.
- Attach new hinges: Mark, pre-drill, and screw in place.
- Hang the door: Support with shims, align hinges, mark frame, and attach.
- Test the door: Check for smooth swing and even gaps. Adjust as needed.
This method works whether you’re upgrading old, painted-over hinges or installing a brand-new door.
Maintenance Tips For Long-lasting Hinges
A well-installed hinge can last decades, but a little care goes a long way.
- Oil hinges once a year with a drop of light machine oil.
- Check screws yearly and tighten if any loosen.
- Clean off paint or debris that may build up.
- If a hinge pin becomes loose, gently tap it back in place or replace the pin.
Environmental factors matter: in humid climates, use rust-resistant hinges and wipe away condensation.
Door Hinges And Home Security
Did you know that the right hinges make your home safer? Exterior doors should always use security hinges—these have non-removable pins or extra tabs that prevent burglars from lifting the door out.
For extra security:
- Use three or more hinges on heavy exterior doors.
- Install at least one long screw per hinge that reaches the wall stud.
- Consider hinges with built-in security pins.
For more tips on home security, check resources like the Consumer Reports Home Security Guide.
Comparing Hinge Installation Methods
Here’s a quick look at different ways to install hinges and their pros and cons.
| Method | Tools Needed | Skill Level | Best For | Time Required |
|---|---|---|---|---|
| Hand Chisel | Chisel, Hammer, Square | Beginner–Intermediate | One or two doors | 20–30 min/door |
| Router & Jig | Router, Jig | Intermediate–Pro | Many doors, perfect fit | 10–15 min/door |
| No-Mortise Hinges | Screwdriver, Drill | Beginner | Lightweight or temporary doors | 10 min/door |
If you’re just starting, the hand chisel method is slow but forgiving. For many doors or a renovation, investing in a router and jig pays off.

Credit: www.doorware.com
Frequently Asked Questions
What Size Hinge Do I Need For My Door?
For most interior doors, a 3.5-inch butt hinge works well. For heavier or exterior doors, use a 4-inch or 4.5-inch hinge. Always match the old hinge if replacing or measure the door’s thickness and height for best results.
How Many Hinges Should I Use On A Standard Door?
Most standard doors need two hinges. If your door is taller than 60 inches, uses heavy material, or is an exterior door, use three hinges for better support and to prevent sagging.
Can I Use The Same Screws For All Hinges?
No—hinge screws are usually #9 or #10 and are made to fit the hinge holes perfectly. Using the wrong screws (like drywall screws) can cause them to break or pull out. For exterior doors, use longer screws (at least 1.5 inches) for extra strength.
What If My Screw Holes Are Stripped?
Fill the hole with wood glue and matchsticks or a small dowel. Let it dry, then re-drill the pilot hole and drive in a new screw. This gives your hinge a solid grip and prevents sagging.
How Can I Make My Door Hinge Installation Last Longer?
Use quality hinges and screws, oil the hinges once a year, and check screw tightness regularly. For exterior doors, choose rust-resistant materials. Proper mortise depth and tight screws prevent loosening over time.
Mounting door hinges the right way isn’t just about following steps—it’s about careful measurement, matching the right materials, and checking your work as you go. With these techniques, your doors will swing smoothly and last for years, and you’ll gain the satisfaction of a job done right.
Whether you’re upgrading old hardware or fitting a new door, use these tips and you’ll get reliable, professional results every time.