
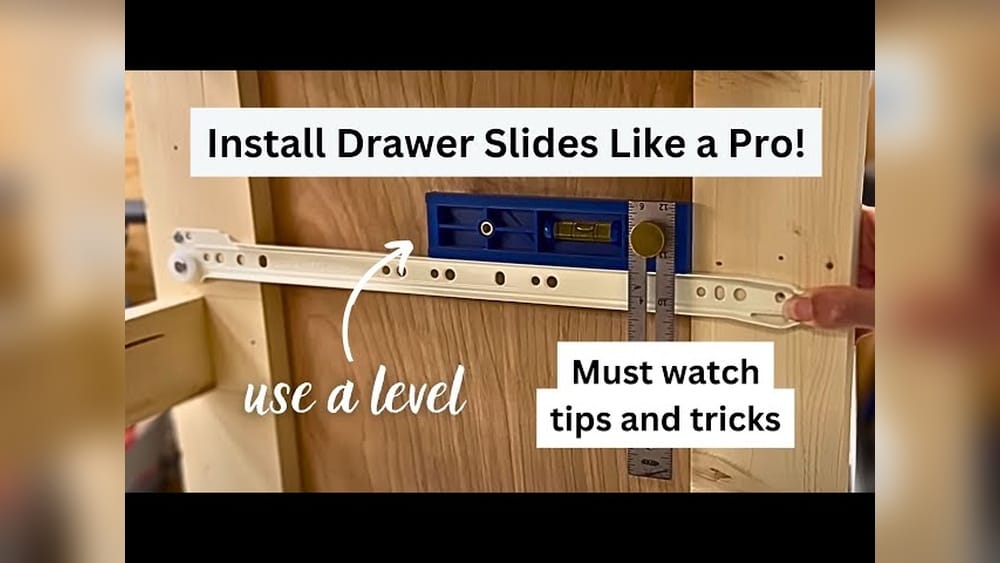
Mounting drawer slides can be one of those tasks that seems simple—until you try it yourself. If you want drawers that open smoothly, close quietly, and last for years, getting the installation right is essential. Whether you’re building new furniture or upgrading old cabinets, learning how to mount drawer slides properly makes a huge difference in both function and appearance.
This guide will walk you through every step, explain different slide types, and give practical tips that even experienced DIYers sometimes overlook.
Understanding Drawer Slides
Before you start, it’s important to know what drawer slides are and why they matter. Drawer slides are hardware pieces that allow drawers to move in and out of cabinets. The right slides make drawers glide smoothly, support heavy loads, and prevent annoying sticking or wobbling.
There are several types of drawer slides, each with their own strengths. Choosing the right one depends on your project, how much weight the drawer will hold, and the look you prefer.
Main Types Of Drawer Slides
| Slide Type | Mounting Position | Extension | Typical Use |
|---|---|---|---|
| Side-Mount | Sides of drawer and cabinet | ¾ or Full | Desks, kitchen cabinets |
| Undermount | Bottom of drawer | Full | High-end cabinetry |
| Center-Mount | Under center of drawer | ¾ | Lightweight drawers |
| European/Bottom-Mount | Bottom edge of drawer | ¾ | Budget cabinets, DIY |
Side-mount slides are the most common and easiest for beginners. Undermount slides hide under the drawer for a cleaner look but require precise measurements. Center-mount slides are less common and usually for light drawers. European slides are simple and affordable but not as smooth.
Ball-bearing Vs. Roller Slides
You’ll also see ball-bearing and roller mechanisms:
- Ball-bearing slides: Smoother, support more weight, and last longer. Great for kitchen or tool drawers.
- Roller slides: Cheaper, simple, but can wear out faster. Best for light use.
Tools And Materials Needed
Mounting drawer slides is much easier with the right tools. Here’s what you’ll need for a successful installation:
- Screwdriver (manual or powered)
- Tape measure
- Pencil
- Level (preferably small/torpedo level)
- Drill with drill bits
- Screws (usually included with slides)
- Awl or nail (for marking holes)
- Clamps (optional, but helpful)
- Drawer slides (the type and length for your project)
- Shims (to adjust alignment if needed)
- Safety glasses
Some projects also benefit from a jig—a special tool for positioning slides. While not required, a jig can speed up the process and boost accuracy, especially if you’re installing several drawers.

Credit: www.woodmagazine.com
Measuring For Drawer Slides
Accurate measurements are the foundation for smooth, reliable drawers. A common mistake is skipping or rushing this step, which leads to frustrating problems later.
Determining Slide Length
Most slides come in even-inch lengths (e.g., 12″, 14″, 16″, up to 28″). The slide should be the same length as your drawer box (not the drawer front), but it’s okay if the slide is slightly shorter. Never use a slide longer than the drawer box.
Example: If your drawer box is 16″ deep, use 16″ slides. If the box is 15¾”, use 14″ slides.
Measuring Drawer And Cabinet
- Drawer width: Measure the outside width of the drawer box.
- Cabinet opening width: Measure the inside width of the cabinet where the drawer will fit.
- Clearance: Subtract the drawer width from the cabinet opening. Divide by 2 for each side. Most side-mount slides need ½” clearance per side.
Common mistake: Not all slides need the same clearance. Read the slide’s instructions carefully. Undermount slides, for example, have different requirements.
Checking Drawer And Cabinet Squareness
Use a tape measure across both diagonals inside the cabinet opening and the drawer box. If the measurements match, the box is square. If not, you’ll need to adjust during installation or use shims.
Pro tip: Even small errors (1/16″) can cause binding. Don’t skip this step.
Preparing For Installation
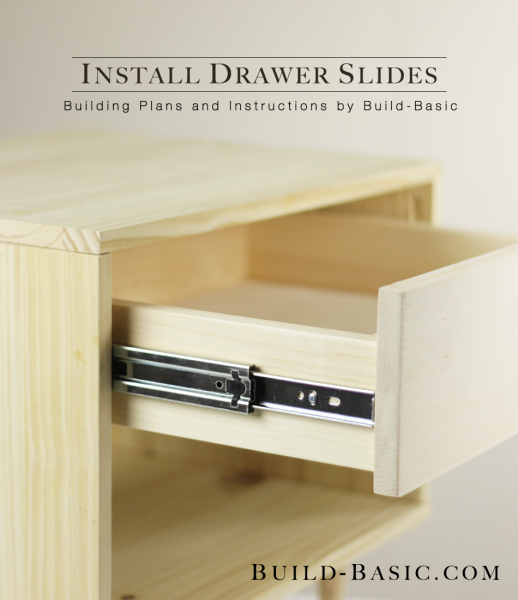
Getting organized before you drill is key. Lay out all parts and hardware. Identify the cabinet member (the part that attaches to the cabinet) and the drawer member (the part that attaches to the drawer). Many slides have a lever or tab to separate the two.
Label the front and back of your slides with a marker if it isn’t obvious. Mixing them up can lead to confusion and mistakes later.
Remove the drawers from the cabinet, and clear the workspace. If you’re replacing old slides, unscrew and remove them now.
How To Mount Side-mount Drawer Slides
Side-mount slides are the most popular and beginner-friendly choice. Here’s how to install them step by step.
1. Mark The Slide Position
- Measure up from the bottom of the cabinet opening (not the floor) and mark the height where you want the slide to sit.
- Use a level to draw a straight line from the front to the back on both cabinet sides. This will guide your slide.
Tip: For most drawers, the slide sits 1/32″ to 1/16″ above the bottom of the drawer. This avoids rubbing.
2. Attach Cabinet Members
- Place the cabinet member (the part without the moving rail) inside the cabinet, lining it up with your line.
- Hold the slide in place and mark the screw holes.
- Drill small pilot holes for the screws.
- Attach with screws, starting with the front and back. Don’t over-tighten—this can bend the slide.
Check with a level to ensure the slide is perfectly straight. Repeat for the other side.
3. Attach Drawer Members
- Place the drawer member flush with the bottom edge of the drawer box.
- Mark the screw holes, drill pilots, and attach with screws.
- Make sure the slide is parallel to the drawer bottom.
Non-obvious insight: If your drawer box is slightly out of square, you can use thin cardboard shims to level the slide. This prevents future sticking.
4. Insert The Drawer
- Align the slides and gently push the drawer into the cabinet.
- You’ll feel some resistance as the slides engage. Once fully inserted, pull out and push in several times to test.
- Adjust screws if the drawer feels tight, loose, or uneven.
Final adjustment: If the drawer isn’t flush with the cabinet face, adjust the slide position slightly forward or back.
How To Mount Undermount Drawer Slides
Undermount slides offer a clean, modern look. They’re more challenging to install but worth the effort for high-end cabinets.
1. Prepare The Drawer
- Notch the drawer sides: Most undermount slides require small notches at the back of the drawer for the slide hardware.
- Measure carefully and use a saw or chisel to create the notches.
- Drill holes for the locking devices at the front (these secure the slide to the drawer).
Pro tip: Check the slide manufacturer’s template for notch size and hole placement.
2. Attach Slides To Cabinet
- Use a jig or ruler to position the slides evenly on both sides of the cabinet.
- The slide should be level and parallel to the cabinet floor.
- Attach with screws, checking for straightness.
3. Install Locking Devices
- Position the locking devices at the front underside of the drawer, per instructions.
- Secure with screws.
4. Insert The Drawer
- Tilt the drawer up at a slight angle and set the back onto the slides.
- Lower the front to engage the locking devices.
- Push the drawer in fully until you hear a “click.”
Non-obvious insight: If the drawer tilts or binds, adjust the locking devices left or right. These devices offer fine-tuning for perfect alignment.
How To Mount Center-mount And European Drawer Slides
While less common, center-mount and European bottom-mount slides are found in older or budget furniture.
Center-mount Slides
- Attach the slide to the center underside of the drawer box.
- Secure the back end of the slide to the cabinet’s back wall.
- Check for levelness and adjust as needed.
Limitation: Center-mount slides only support light drawers and don’t offer full extension.
European/bottom-mount Slides
- Attach the slide to the bottom edge of the drawer.
- The other side mounts to the cabinet side.
- These slides are usually forgiving but can feel “loose” with heavy loads.
Example: Many ready-to-assemble dressers use European slides for cost savings.
Common Problems And How To Fix Them
Even with careful work, things can go wrong. Here’s how to solve common issues:
- Drawer binds or sticks: Slides may not be parallel. Loosen screws and realign. Use shims if needed.
- Drawer falls out: Check that the slide is the right length and installed fully.
- Drawer sits crooked: Cabinet or drawer box may be out of square. Adjust slides or shim the low side.
- Drawer doesn’t close fully: Slide may be too long, or something is blocking the back.
- Screws pull out of wood: Use longer or wider screws, or fill the hole with a wood plug and re-drill.
Comparison Of Drawer Slide Types
To help you pick the right drawer slide for your project, here’s a quick comparison:
| Slide Type | Cost | Weight Capacity | Installation Difficulty | Durability |
|---|---|---|---|---|
| Side-Mount | $$ | Up to 100 lbs | Easy | High |
| Undermount | $$$ | Up to 100 lbs | Moderate | Very High |
| Center-Mount | $ | 40 lbs | Easy | Medium |
| European | $ | 50 lbs | Very Easy | Medium |
Tip: For kitchen or workshop drawers, ball-bearing side-mount or undermount slides are the best choice for durability and smoothness.
Mistakes To Avoid
Mounting drawer slides isn’t complicated—but small errors can lead to big headaches.
- Skipping pilot holes: Screws can split the wood or go in crooked.
- Not checking for level: Even small angles cause binding.
- Using the wrong screws: Always use the screws provided or those recommended by the slide manufacturer.
- Measuring from the wrong reference point: Always measure from the cabinet opening, not the face frame or floor.
- Ignoring slide clearance: Each slide type has exact clearance needs—read instructions!
Pro insight: Beginners often forget to check for obstructions inside the cabinet, like support rails or shelves. Plan your slide position around these obstacles.
Credit: build-basic.com
Upgrading Old Drawers
You don’t always need new cabinets to enjoy smooth drawers. Upgrading old slides is a cost-effective way to improve function.
- Remove the old slides and patch holes with wood filler.
- Sand the area smooth for a good fit.
- Check the drawer box for damage—fix splits or loose joints before installing new slides.
- Choose slides that match your clearance. Sometimes you’ll need to trim the drawer or add shims for a perfect fit.
Tip: Older furniture may not be perfectly square. Be ready to shim or adjust your slides for best results.
Tips For A Professional Finish
Small details set professional installations apart from amateur work.
- Test-fit everything before screwing in permanently.
- Use a jig or spacer for consistent, repeatable results if installing multiple drawers.
- Label all parts if you’re working on several drawers at once.
- Lubricate ball-bearing slides with a small amount of silicone spray for ultra-smooth action.
- Hide screws: For undermount slides, use the smallest screws possible, and keep them out of view.
Experienced installer tip: Always install the top drawer first. It’s easier to work your way down, and mistakes are less visible at the bottom.
Special Situations: Frameless Vs. Face-frame Cabinets
Cabinet construction affects how you mount drawer slides.
Face-frame Cabinets
- Have a front frame around the opening.
- Slides may need spacers or brackets to clear the frame.
- Measure from the inside edge of the face frame.
Frameless Cabinets
- No front frame; sides are flush.
- Slides attach directly to cabinet sides.
- Easier for beginners.
Tip: Many slide manufacturers sell special mounting brackets for face-frame cabinets. Always check compatibility before buying.
Advanced Tips And Adjustments
Sometimes, even after careful installation, drawers need fine-tuning.
- Side-to-side adjustment: Many undermount slides offer built-in side adjustment. Loosen screws, shift the slide, and retighten.
- Height adjustment: Use shims or adjust the slide up/down if the drawer rubs.
- Depth adjustment: If the drawer front sits too far in or out, move the slide forward or back.
Non-obvious insight: If you’re installing soft-close slides, check that the slow-close mechanism works before finishing. Some models have an adjustment screw for tension.
Maintenance For Long-lasting Slides
Drawer slides require little maintenance, but a few simple steps will keep them working for years.
- Clean regularly: Dust and dirt can build up. Wipe slides every few months.
- Lubricate: Use a silicone-based spray for ball-bearing slides if they squeak.
- Check screws: Tighten any that come loose over time.
- Don’t overload: Keep within the slide’s weight rating to avoid damage.
Environmental And Safety Considerations
When working with tools and hardware:
- Wear safety glasses to protect your eyes when drilling or screwing.
- Dispose of old hardware properly—recycle metal parts if possible.
- Use dust collection if cutting notches or drilling many holes.
For environmentally conscious choices, look for slides made from recycled steel or products with low-VOC finishes.
When To Call A Professional
Most homeowners can mount drawer slides with patience and the right tools. But some situations call for a pro:
- Very expensive cabinetry: Mistakes can be costly.
- Complicated custom drawers: Odd shapes or large sizes.
- Historic furniture: Preserve value by using a restoration expert.
If you’re unsure, it’s better to ask for help than risk damage.
Resources And Further Reading
For more details, see the expert guides on the official Woodworker’s Journal site. They offer step-by-step photos and advanced tips for both beginners and pros.

Credit: www.youtube.com
Frequently Asked Questions
How Do I Know Which Length Of Drawer Slide To Buy?
Measure the drawer box from front to back, not including the drawer front. Choose a slide that matches this length. If your exact size isn’t available, pick the next shortest size.
Can I Install New Drawer Slides On Old Drawers?
Yes, but you may need to patch old holes or adjust the drawer size with shims or trimming. Check that the new slides fit your cabinet’s clearance requirements.
What If My Cabinet Isn’t Perfectly Square?
If your cabinet or drawer box isn’t square, use thin shims (like cardboard or plastic) behind the slides to adjust alignment. This helps prevent binding and sticking.
Do I Need Special Tools To Mount Drawer Slides?
Basic tools—like a screwdriver, drill, tape measure, and level—are enough for most installations. For multiple drawers, a jig can speed up and improve accuracy.
How Much Weight Can Drawer Slides Hold?
Standard side-mount and undermount slides hold up to 100 lbs. For heavy-duty needs, look for slides rated for 150 lbs or more. Always check the manufacturer’s specifications.
Mounting drawer slides is a skill that pays off every day with smooth, reliable drawers. With careful measuring, the right tools, and a little patience, even beginners can achieve professional results. Whether you’re building new furniture or upgrading old cabinets, these steps will help you avoid common mistakes and enjoy years of trouble-free use.