
Mounting a microwave above your stove can transform your kitchen. It saves space, gives a modern look, and makes cooking more convenient. But installing an over-the-range microwave isn’t as simple as lifting it onto a shelf. You need to know about proper support, electrical wiring, venting, and safety.
Many people underestimate the job, then face problems like poor ventilation, loose brackets, or even damaged walls. If you want a smooth installation—and a safe kitchen—this guide will help you do it right.
Why Mount A Microwave Above The Stove?
Many kitchens have limited counter space, and microwaves are bulky. Placing your microwave above the stove solves this problem. This spot, often called “over-the-range,” is designed for appliances that combine a microwave with a vent hood. Here are the main reasons people choose this setup:
- Space-saving: Frees up counter space for food prep.
- Efficient workflow: You can move hot food between the stove and microwave easily.
- Integrated ventilation: Most over-the-range microwaves have built-in fans to remove steam, smoke, and odors.
- Stylish look: Gives your kitchen a clean, modern appearance.
This setup is especially popular in apartments and smaller homes, but it’s also common in larger kitchens for its practical value.
What You Need Before You Start
A successful installation starts with preparation. Missing a tool or skipping a step can lead to frustration—or even damage. Here’s what you should check and gather before starting.
Microwave Selection
Not every microwave is designed to go above a stove. You need an over-the-range microwave. These models are built to handle heat and have special venting features. Check the model’s dimensions, weight, and mounting requirements.
Tools And Materials
You’ll need:
- Stud finder
- Tape measure
- Level
- Drill and drill bits
- Phillips and flathead screwdrivers
- Pencil
- Wrench or socket set
- Microwave mounting template (usually included)
- Mounting bracket (should come with your microwave)
- Toggle bolts or wood screws
- Safety goggles and gloves
- Step ladder
- Duct tape (for venting connections)
- Wire stripper (if wiring is needed)
Electrical And Venting Requirements
- Dedicated 120V outlet: Most microwaves need a grounded outlet in the cabinet above the stove.
- Venting: Over-the-range microwaves must vent to the outside or recirculate through filters.
- Clearance: Check your microwave’s manual for required clearance from the cooktop (usually 13–18 inches).
Help From A Friend
Microwaves are heavy (typically 50–75 lbs). Lifting one alone is risky. Arrange for someone to assist you when mounting the unit.
Planning The Installation
A little planning saves headaches later. First, check your kitchen layout.
Measuring The Space
Use your tape measure to check these key dimensions:
- Cabinet width: Most microwaves are 30 inches wide, matching standard stove and cabinet sizes.
- Cabinet depth: Ensure the microwave won’t stick out too far.
- Distance above stove: 13–18 inches is standard, but check both appliance manuals and local codes.
- Electrical outlet location: The cord usually runs up through a hole in the upper cabinet.
If the space is too small or too large, you may need to adjust cabinets or choose a different microwave model.
Checking For Obstacles
Look for:
- Gas or water lines: Make sure you won’t drill into pipes.
- Stud locations: Use a stud finder to locate wall studs for secure mounting.
- Venting path: If you want outside venting, plan the ductwork route.
Reviewing The Template
Most microwaves include a paper mounting template. This shows where to drill holes for the bracket and power cord. Tape it to the wall and cabinet to double-check alignment.
Understanding Venting Options
Venting is a key part of microwave installation. It removes smoke, steam, and odors while you cook.
Types Of Venting
There are three main venting options:
| Venting Type | Description | Pros | Cons |
|---|---|---|---|
| External (Ducted) | Vents air outside through ductwork | Best odor/smoke removal Prevents indoor humidity | Requires wall or roof duct More installation work |
| Recirculating (Ductless) | Filters and recycles air back into kitchen | Easy to install No ductwork needed | Less effective for smoke Filters must be replaced |
| Rear-vented | Vents out back wall directly | Simple for certain layouts | Requires wall modification Not always possible |
External venting is best for heavy cooking. Recirculating is good if you can’t add ducts, but be ready to change filters often. Rear-vented works in some designs, but not all.
How To Choose
- If you already have a vent hood, consider reusing the duct.
- If your kitchen has no vent, a recirculating microwave is easier, but less effective.
- Always follow local building codes for venting.
Safety Considerations
Many people skip safety steps, risking damage, injury, or even fire. Here’s what you must keep in mind:
- Turn off power: Shut off electricity at the breaker before working with wires.
- Use safety gear: Wear goggles and gloves when drilling or lifting.
- Mount to studs: Never mount a microwave only to drywall. Use wall studs or heavy-duty anchors.
- Follow clearance guidelines: Too little space above the stove can cause heat damage.
- Check local codes: Some areas have rules for microwave height and venting.
A non-obvious tip: If you’re replacing a range hood, check for hidden wires or old mounting hardware in the wall before drilling.
Step-by-step Guide To Mounting The Microwave
Let’s walk through the process, from preparation to final checks.
1. Remove Old Appliances And Clean The Area
Clear the stove area. If replacing a hood or old microwave, disconnect it and remove screws/brackets. Clean the wall and cabinet bottom—grease can make brackets slip.
2. Mark The Mounting Locations
- Tape the mounting template to the wall.
- Mark the bracket holes and cord hole on the wall and under the cabinet.
- Use a level to ensure everything is straight.
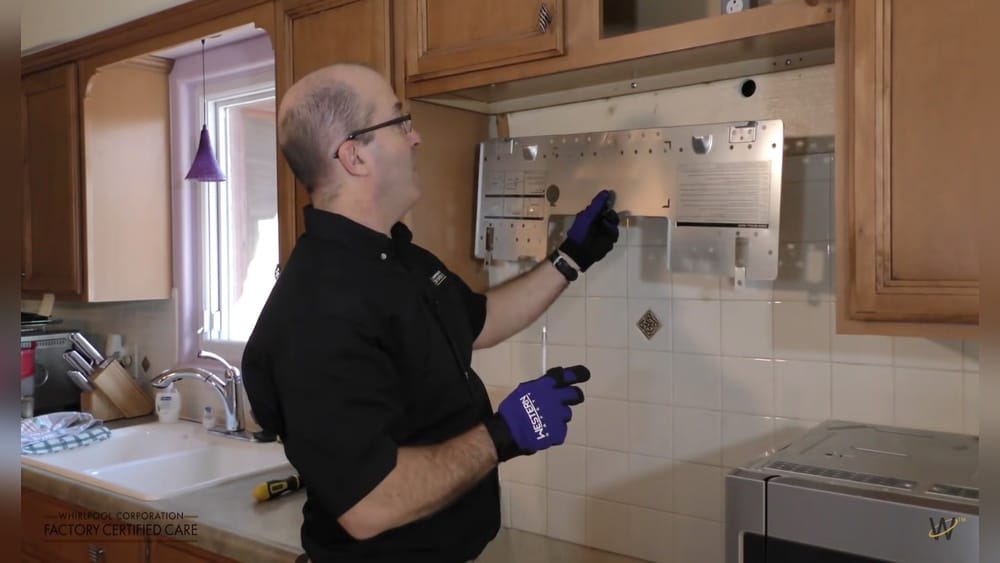
3. Install The Mounting Bracket
- Hold the bracket against the wall, lining up with your marks.
- Drill pilot holes into studs or use toggle bolts for hollow walls.
- Secure the bracket with heavy-duty screws.
Pro tip: If studs aren’t in the right spot, use a piece of plywood anchored to the studs, then attach the bracket to the plywood.
4. Prepare The Cabinet
- Drill a hole (usually 2-inch diameter) in the bottom of the upper cabinet for the power cord.
- If venting upward, cut a hole for the duct as shown in your template.
5. Adjust The Venting (if Needed)
- Over-the-range microwaves can vent up, back, or recirculate. You may need to rotate or move the blower fan inside the microwave.
- Check your manual and change the blower position before mounting.
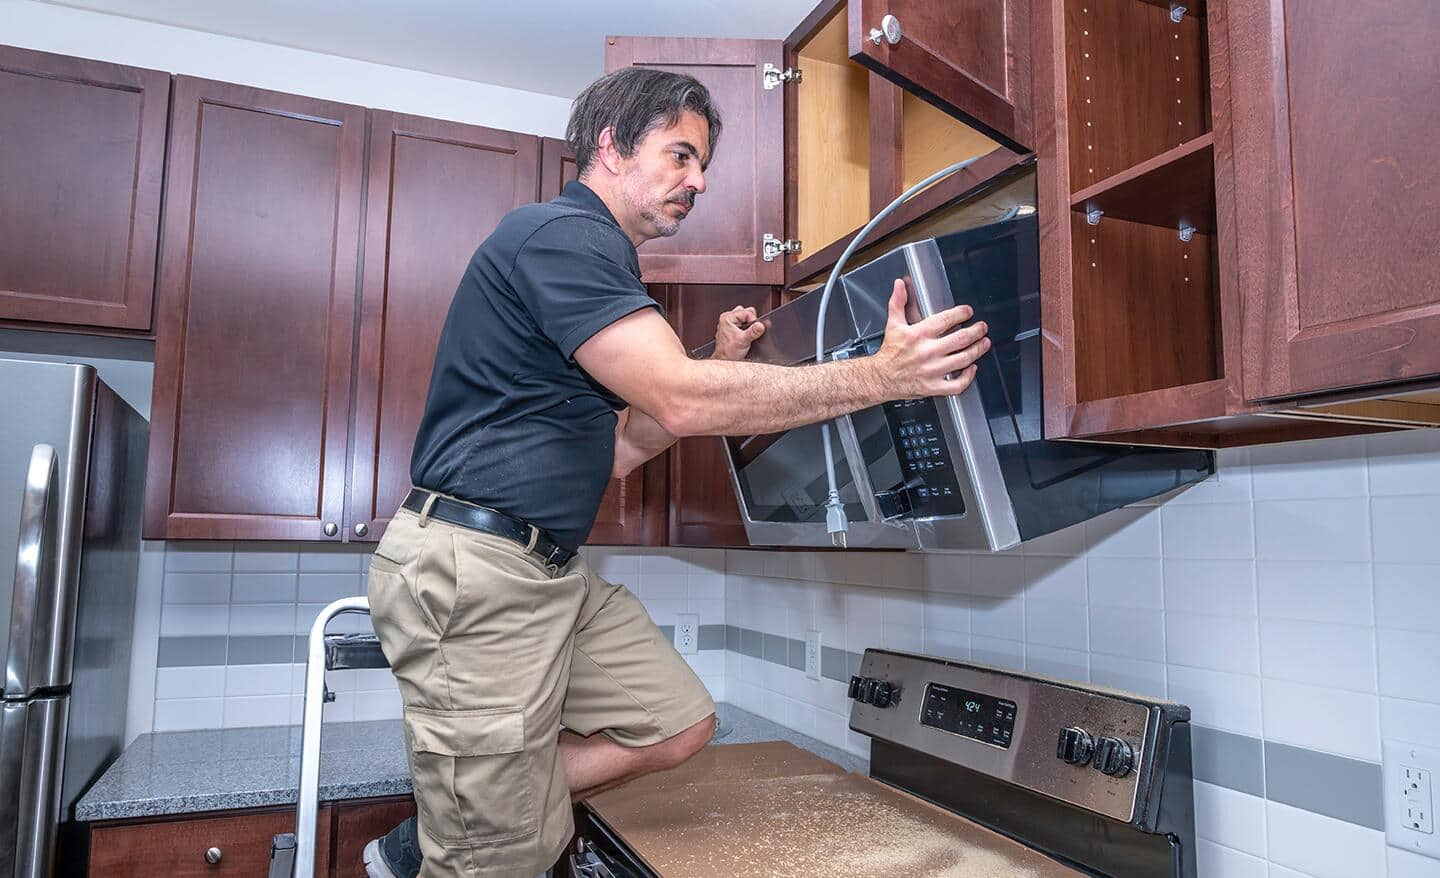
6. Lift And Position The Microwave
With a helper, lift the microwave. Tilt the back into the wall bracket so it hooks securely.
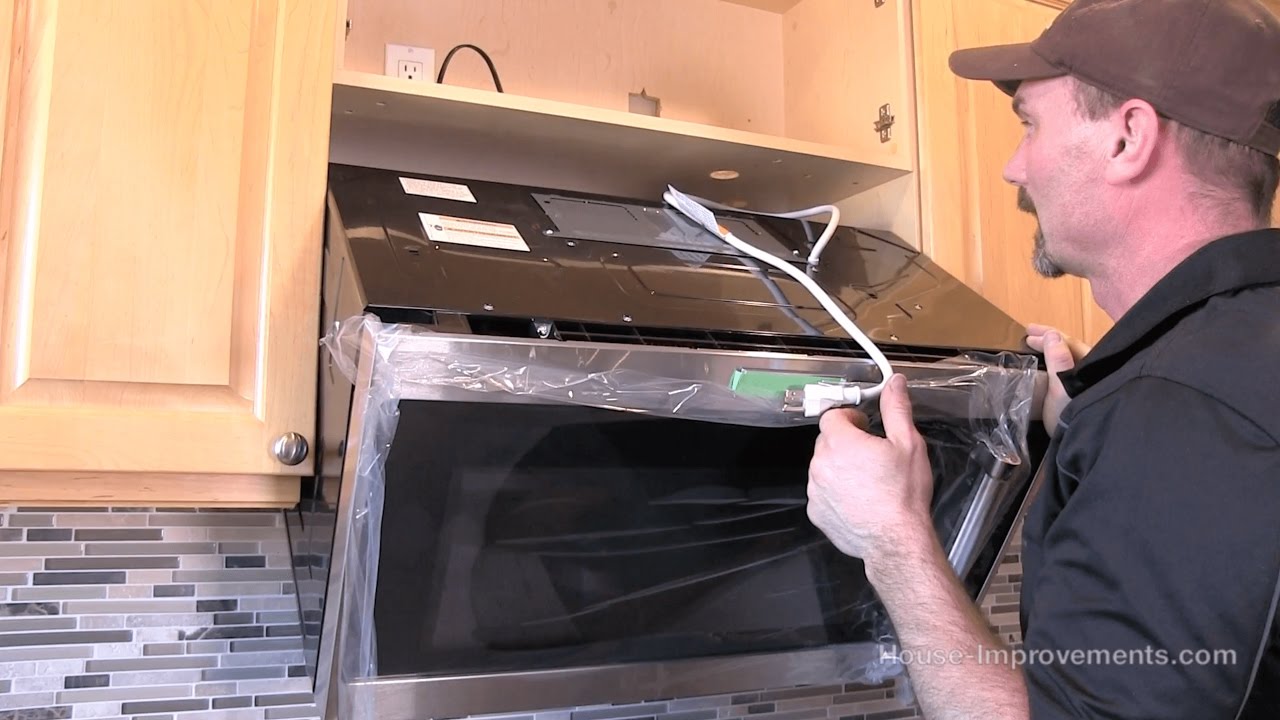
- Feed the power cord through the cabinet hole.
- While your helper holds the microwave, align the top with the cabinet bottom.
7. Secure The Microwave
- Insert the long bolts (provided) through the upper cabinet holes into the microwave’s top.
- Tighten evenly, but don’t overtighten—you could crack the cabinet or microwave case.
- Double-check that the microwave is level and snug.
8. Connect Vent And Power
- Attach the vent duct (if used) to the microwave’s outlet. Seal with duct tape.
- Plug in the power cord.
- Install charcoal or grease filters if recirculating.
9. Test Operation
- Turn on power at the breaker.
- Test the microwave functions, including the vent fan and light.
- Run the fan while boiling water on the stove to check for proper airflow.
10. Final Checks
- Inspect all mounting points for tightness.
- Make sure the cabinet doors open/close freely.
- Look for any gaps or misalignments.
Common Mistakes And How To Avoid Them
Many DIYers make the same mistakes. Knowing them ahead of time can save you money and stress.
Not Using Studs
Drywall cannot hold the weight of a microwave. Always secure brackets to studs or use approved anchors.
Wrong Height
Mounting too low can damage the microwave with stove heat or block pots. Too high makes it hard to reach safely.
Skipping Venting Steps
Failing to seal ducts or install filters properly leads to poor performance and more kitchen odors.
Not Leveling
A crooked microwave can cause food to heat unevenly and looks bad.
Rushing The Job
Trying to do it alone, or skipping steps, leads to mistakes. Take your time and get help when lifting.
Overlooking Electrical Codes
Some people try to use an extension cord. This is unsafe and often against code. Always use a dedicated outlet.
Comparing Diy Vs. Professional Installation
Should you do it yourself or call a pro? Here’s a side-by-side look:
| DIY | Professional |
|---|---|
| Cheaper (just materials) | Costs $100–$300 for labor |
| Flexible timing | Quick, often under 2 hours |
| Requires tools and lifting help | Brings own tools and helpers |
| Risk of mistakes or code issues | Usually offers a warranty |
| Good for skilled DIYers | Best for complex venting or wiring |
If your kitchen has unusual wiring or needs new ductwork, hiring a professional is often safer and faster. But for standard replacements, many handy homeowners can do it themselves.
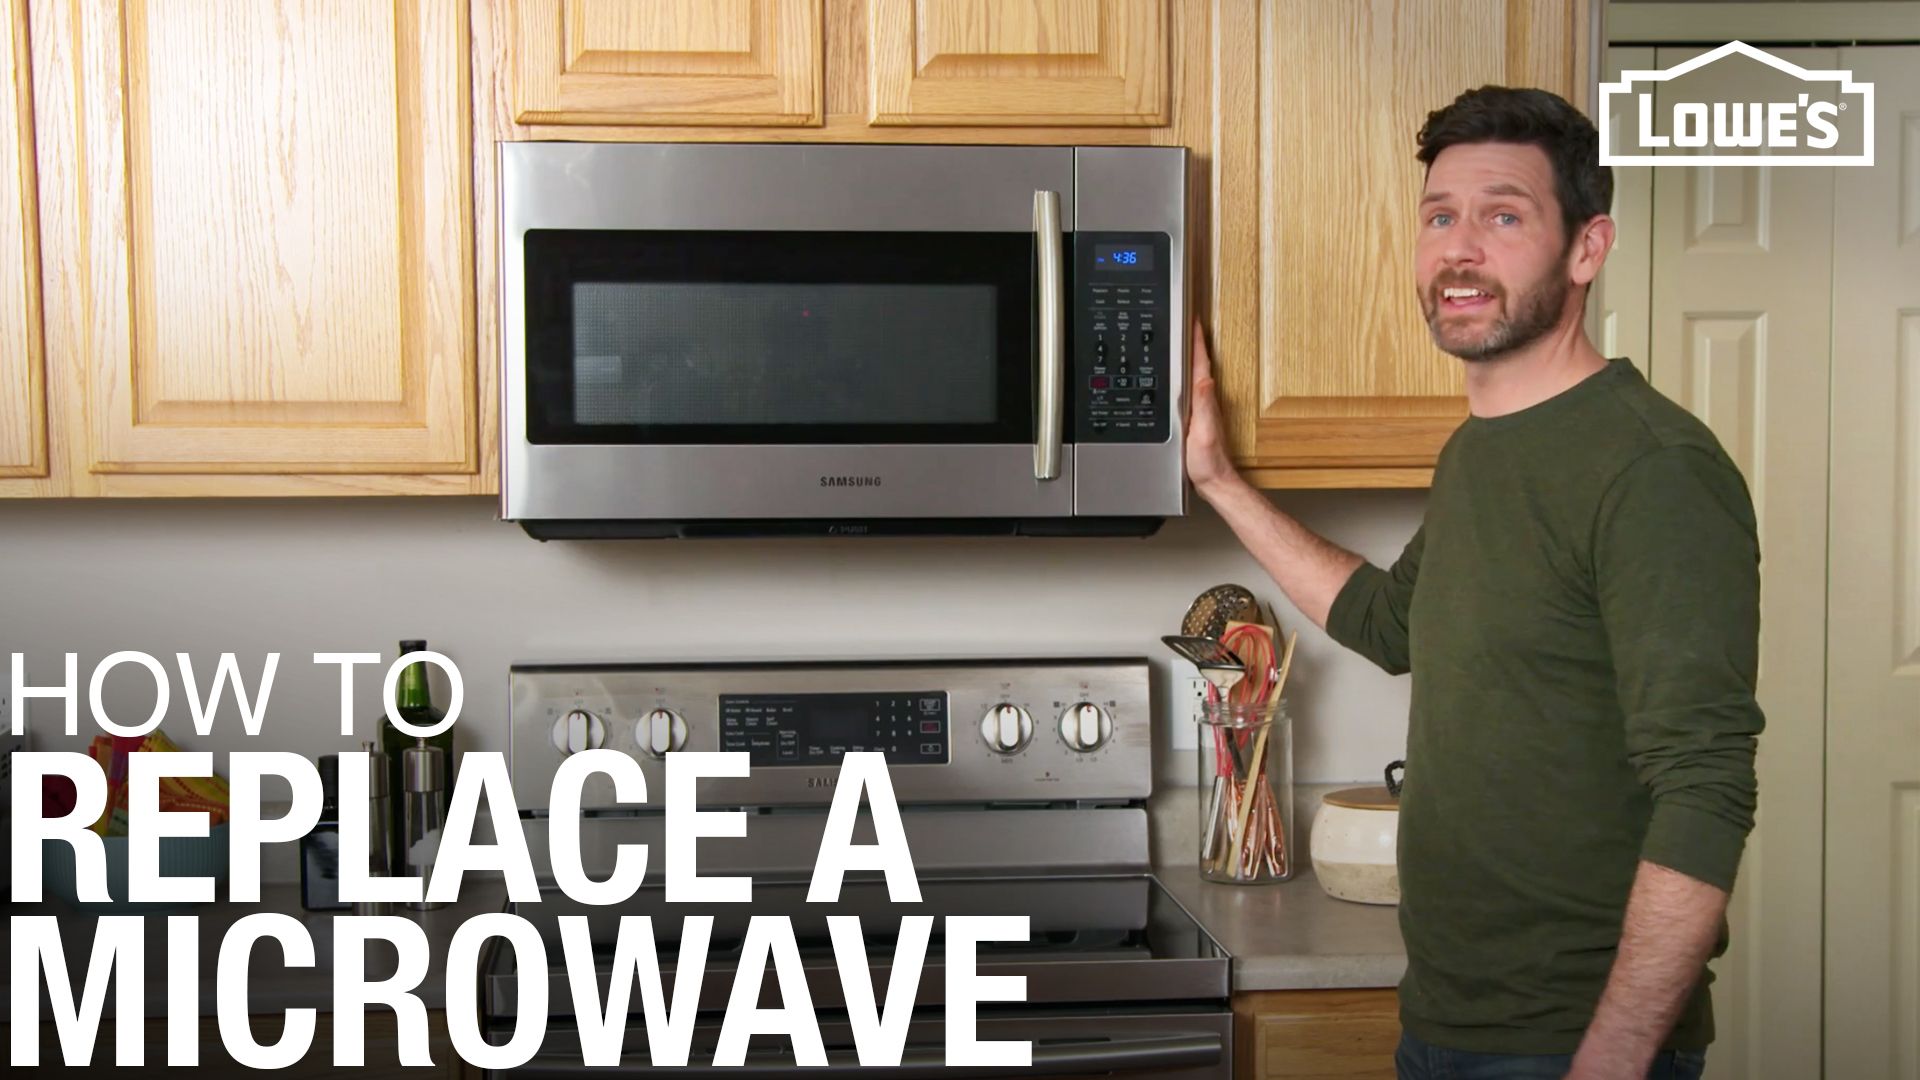
Credit: www.lowes.com
How To Choose The Right Microwave For Above The Stove
Not every microwave fits every space. Consider these factors:
Size
- Width: Standard is 30 inches, but check your cabinet width.
- Height: Make sure it fits with the required clearance.
- Depth: Deeper models may stick out too far.
Venting
- Can it vent the way you want (up, back, or recirculate)?
- Does it come with filters or will you need to buy them?
Power And Features
- Wattage: 900–1200 watts is typical for fast cooking.
- Sensor cooking: Adjusts time and power automatically.
- Exhaust fan strength: Measured in cubic feet per minute (CFM). Higher CFM is better for heavy cooking.
Brand And Warranty
Choose a brand with good reviews and a clear warranty. Some brands offer installation help or videos.
Price
Over-the-range microwaves cost $200–$700, depending on features. Installation kits may be extra.
Non-obvious insight: Double-check the door swing direction. If your kitchen is tight, a left- or right-hinge door can block cabinets or walls.
Practical Tips For A Smooth Installation
- Take a photo of the wall and cabinet before installation. If you ever need repairs, you’ll know where wires and studs are.
- Label the circuit breaker that controls your microwave. This saves time in future repairs.
- Keep the microwave’s manual, mounting template, and spare screws in a kitchen drawer.
- If your cabinet bottom is thin, reinforce it with plywood before mounting the microwave.
- Ask your helper to hold the microwave slightly tilted back during installation. This makes hooking it onto the bracket easier.
Credit: www.homedepot.com
Maintenance After Installation
An over-the-range microwave needs regular care to last.
- Clean the filters: Metal filters can go in the dishwasher every month. Charcoal filters (for recirculating models) need replacement every 6–12 months.
- Wipe the vent: Grease and dust build up quickly.
- Check mounting bolts every 6 months to ensure nothing has loosened.
- Inspect ductwork annually for blockages if vented outside.
Skipping maintenance can shorten your microwave’s life and reduce venting performance.
When To Call A Professional
Some situations are best left to experts:
- If you must run new electrical wiring or outlets.
- If you need to cut through brick, concrete, or tile for venting.
- If your wall or cabinet is damaged.
- If the microwave is unusually heavy or complex.
Many appliance stores offer installation for a fee. It’s worth considering if you want peace of mind or have a tricky kitchen layout.
Environmental And Health Considerations
Proper venting is not just about comfort—it can affect indoor air quality. Cooking on the stove releases moisture, grease, and sometimes carbon monoxide (for gas stoves). A microwave with a strong vent helps remove these.
Recirculating vents are better than nothing, but they do not remove all pollutants. For people with allergies, asthma, or sensitive lungs, an external vent is best.
Real-world Example
Consider a family in a small apartment. Their old microwave sits on the counter, taking up much-needed prep space. They install a 1000-watt over-the-range microwave with a recirculating vent. The job takes two hours with a friend. The hardest part?
Lifting the heavy unit and keeping it level while attaching bolts. After installation, they reclaim two feet of counter space and enjoy a cleaner kitchen.
In another example, a homeowner with a gas stove does a full kitchen remodel. They choose an external-venting microwave. The installer runs a duct through the attic, which takes extra time and cost. The result: virtually no lingering cooking odors, even after frying fish or grilling steaks.
Credit: www.youtube.com
Troubleshooting Common Problems
Even after careful installation, problems can occur. Here’s how to handle a few:
Microwave Shakes Or Moves
- Check that all bolts are tight.
- Make sure the wall bracket is fully seated in studs.
Weak Or No Venting
- Check for blocked or disconnected ductwork.
- Clean or replace filters.
- Make sure the vent fan is set to the correct direction.
Microwave Door Won’t Open Fully
- The unit may be mounted too close to a wall or cabinet. Measure and adjust as needed.
Power Issues
- Ensure the outlet is working. Try another appliance.
- Check that the microwave is plugged in.
- Reset the circuit breaker.
If problems persist, contact the manufacturer or an electrician.
Frequently Asked Questions
How High Should A Microwave Be Mounted Above The Stove?
Most manufacturers recommend 13 to 18 inches from the top of the stove to the bottom of the microwave. Local codes may require a specific height. Too low, and the microwave can be damaged by heat; too high, and it’s hard to reach safely.
Can I Install An Over-the-range Microwave Without A Vent?
Yes, you can. Many over-the-range microwaves offer a recirculating vent option. These use charcoal filters to clean the air and release it back into the kitchen. However, they are less effective than external venting.
Do I Need A Dedicated Electrical Outlet?
Yes. Over-the-range microwaves need a dedicated 120V grounded outlet (usually 15 or 20 amps). Never use an extension cord. The outlet is typically installed in the cabinet above the stove.
Can I Reuse The Old Range Hood Vent For My Microwave?
Often, yes. If your old hood vented outside, you can usually connect your new microwave to the same duct. Check your microwave’s venting compatibility (vertical, horizontal, or recirculating) and use the correct adapters. Always seal duct joints with foil tape.
Where Can I Find More Detailed Installation Help?
For official instructions, always check the microwave’s manual. For more step-by-step guides and code details, see the Home Depot Installation Guide.
Mounting a microwave above your stove is a practical upgrade for most kitchens. With careful planning, the right tools, and attention to safety, you can complete this project and enjoy a more efficient cooking space for years to come.