
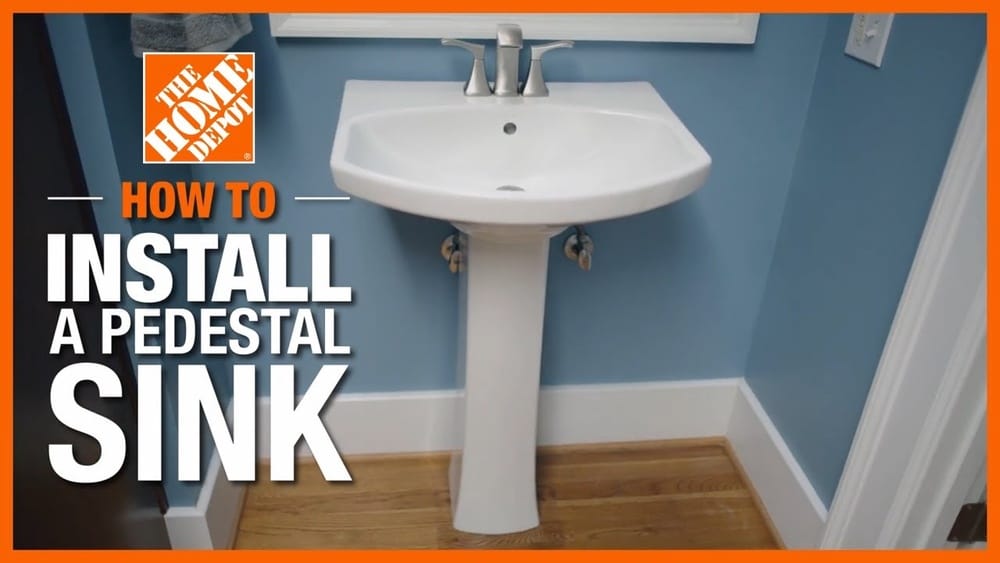
Mounting a pedestal sink can completely change the look of a bathroom. It gives a clean, open feel, making even small spaces seem bigger. But many people worry the installation is too hard, or that their sink will wobble and leak.
In truth, with the right guidance, tools, and a bit of patience, almost anyone can mount a pedestal sink and get professional-looking results.
This guide will walk you through the process step by step. You’ll learn about choosing the right location, preparing plumbing, attaching the sink securely, and finishing with a neat caulk line. Along the way, you’ll find tips and warnings that save time and prevent mistakes.
By the end, you’ll understand not just how to mount a pedestal sink, but how to do it with confidence.
Understanding Pedestal Sinks
Pedestal sinks combine a basin (the sink bowl) with a pedestal (the upright support). The pedestal hides the plumbing and supports some of the sink’s weight, while the basin is anchored to the wall. This style is popular in both modern and classic bathrooms because it looks light and elegant.
Why Choose A Pedestal Sink?
- Space-saving: Great for small bathrooms or powder rooms.
- Stylish: Works with many décor styles.
- Easy to clean: No cabinets or corners to trap dust.
- Affordable options: Wide price range for different budgets.
However, pedestal sinks offer little storage and need strong wall anchors. Knowing these pros and cons helps you decide if this type is right for your bathroom.
Tools And Materials You’ll Need
Having the proper tools makes the job smoother and helps prevent damage. Here’s what you should gather before starting:
- Pedestal sink kit: Includes the basin, pedestal, and mounting hardware.
- Adjustable wrench
- Drill and bits (including masonry bits for tile/concrete walls)
- Level
- Tape measure
- Bucket and sponge
- Pipe wrench
- Screwdriver (Phillips and flathead)
- Pencil or marker
- Silicone caulk (bathroom grade)
- Caulk gun
- Plumber’s putty
- Flexible supply lines
- P-trap kit
- Wall anchors/bolts (if not included)
- Safety glasses and gloves
Pro tip: Buy extra wall anchors rated for heavy loads if your wall is drywall or plaster. Standard plastic anchors may not hold the weight.
Planning And Measuring
Before any drilling or plumbing, planning is key. Measure carefully, check all connections, and visualize how the pedestal and basin will sit in your space.
Positioning The Sink
- Height: Standard height from the floor to the rim is 32–36 inches (81–91 cm).
- Centering: The sink should line up with your existing drain and water lines. If not, small adjustments are possible with flexible supply lines, but major offsets may need plumbing changes.
- Clearance: Leave at least 15 inches (38 cm) from the center of the sink to any side wall or toilet. This ensures comfort and meets most building codes.
Marking The Mounting Points
- Place the pedestal where you want it.
- Set the basin on top, with someone holding it steady.
- Use a pencil to mark holes on the wall through the basin’s mounting holes.
- Mark the base outline on the floor. This guides you when drilling for the pedestal anchor.
Non-obvious tip: Always check for studs behind the wall where the basin will mount. Anchoring into a stud is much stronger than using wall plugs alone.
Preparing Plumbing Connections
Before installing the sink, all rough plumbing should be in place. This includes the drain pipe (usually 1-1/4″ or 1-1/2″) and hot/cold water lines.
Checking Water Supply And Drain
- Valves: Each supply line should have a shutoff valve. If not, install them now.
- Pipe Height: Supply pipes should be about 21–24 inches from the floor, spaced about 8 inches apart.
- Drain: The center of the drain should be 18–20 inches above the floor.
If your pipes aren’t in these positions, you may need to adjust the sink’s location or hire a plumber to move the pipes.
Removing The Old Sink
If replacing an existing sink, follow these steps:
- Turn off water at both supply valves.
- Disconnect supply lines using an adjustable wrench.
- Place a bucket under the drain trap and unscrew the trap to let water drain out.
- Remove any caulk or adhesive holding the old sink.
- Carefully lift and remove the old sink and pedestal (if present).
- Clean the wall and floor area.
Insight: Take a photo of the old plumbing before removal. It’s a handy reference when connecting the new sink.
Installing The Faucet And Drain Assembly
It’s easier to install the faucet and drain on the basin before mounting it to the wall.
- Attach the faucet to the basin following the manufacturer’s instructions. Use plumber’s putty or gasket as directed.
- Install the pop-up drain assembly. Apply plumber’s putty under the drain flange. Tighten the locknut but don’t overtighten.
- Connect the supply lines to the faucet. Don’t connect to the wall yet.
Extra tip: Hand-tighten supply lines first to avoid cross-threading. Only use a wrench for a final snug fit.
Mounting The Pedestal Sink Basin To The Wall
This is where careful measuring pays off. The basin must be level, flush to the wall, and securely anchored.
Drilling The Wall
- Use a level to double-check your mounting hole marks.
- For tile walls, use a masonry bit and go slowly to avoid cracking.
- Insert heavy-duty wall anchors if you’re not drilling into a stud.
Attaching The Basin
- With help, lift the basin into position, aligning the mounting holes.
- Insert mounting bolts or screws through the basin into the wall anchors or studs.
- Tighten bolts evenly. Don’t overtighten—porcelain can crack.
- Check the basin is level side-to-side and front-to-back. Adjust as needed.
Non-obvious insight: Some sinks have rubber or plastic washers. These go between the bolt head and basin to reduce stress and prevent cracking.
Securing The Pedestal
The pedestal supports the basin but is not meant to bear all the weight.
Aligning The Pedestal
- Slide the pedestal under the basin.
- Ensure the basin’s weight is shared between the wall anchors and the pedestal.
- Some pedestals have a mounting hole at the base for securing to the floor. Mark this spot.
Anchoring The Pedestal
- If required, drill a hole in the floor for the anchor bolt.
- Insert the anchor, position the pedestal, and secure with a bolt.
- Again, don’t overtighten—ceramic or porcelain can chip.
Practical tip: Double-check that the pedestal isn’t pushing the basin off-level. Adjust by loosening the wall bolts slightly, repositioning, then retightening.
Connecting Plumbing Under The Sink
Now, connect the supply lines and drain under the newly mounted basin.
Water Connections
- Attach flexible supply lines from the faucet to the shutoff valves.
- Tighten by hand, then give a slight turn with a wrench.
Drain Connection
- Attach the P-trap to the drain tailpiece and wall pipe.
- Hand-tighten the slip nuts, then check for leaks later.
- Adjust the trap for alignment—avoid strain on the pipes.
Leak Testing
- Open both supply valves slowly.
- Check for drips at all connections.
- Let water run for several minutes, watching the drain trap.
- If leaks appear, tighten fittings gently. Never overtighten.
Extra: Use a dry paper towel to detect slow leaks—slide it under each joint.

Credit: www.homedepot.com
Sealing And Finishing Touches
Proper sealing prevents water damage and gives a finished look.
Caulking Around The Basin
- Use a bathroom-grade silicone caulk.
- Run a thin bead around the edge where the basin meets the wall.
- Smooth with a wet finger or caulk tool.
- Wipe off excess with a damp cloth.
Sealing The Pedestal Base
- If water might get on the floor, run a bead of caulk around the base.
- This helps prevent moisture getting under the pedestal.
Cleaning Up
- Remove any stickers or protective film from the sink.
- Polish with a soft, damp cloth.
- Check once more for level and for leaks.
Table: Pedestal Sink Vs. Vanity Sink
To help you see the differences, here’s a quick comparison:
| Feature | Pedestal Sink | Vanity Sink |
|---|---|---|
| Storage Space | Minimal/None | Cabinet below for storage |
| Footprint | Small, open | Larger, more enclosed |
| Visual Style | Classic, airy | Varied, often bulkier |
| Installation | Requires wall anchoring | Freestanding, easier for beginners |
| Maintenance | Easy to clean | Cabinets may trap moisture |
Common Mistakes And How To Avoid Them
Many first-timers run into similar problems. Here are some to watch for:
- Not finding a stud: Anchoring only to drywall often leads to a loose or sagging sink.
- Overtightening bolts: This can crack porcelain—a costly mistake.
- Forgetting to check for level: Even small tilts are obvious and annoying.
- Ignoring leaks: Always test all connections with water before finishing.
- Improper drain height: If your wall drain is too high or low, the P-trap won’t fit properly.
Pro tip: If the wall isn’t flat, use plastic shims behind the basin to prevent stress and cracks.
Table: Tools Needed For Pedestal Sink Installation
Here’s a summary of tools and what they’re used for:
| Tool | Purpose |
|---|---|
| Adjustable wrench | Tighten supply and drain fittings |
| Drill & bits | Wall and floor holes for anchors |
| Level | Ensure everything is straight |
| Caulk gun | Apply silicone caulk cleanly |
| Pencil/marker | Mark mounting points |
| Plumber’s putty | Seal drain assembly |
| Pipe wrench | Stubborn pipe connections |
Table: Estimated Cost Breakdown
Installing a pedestal sink can be affordable or costly depending on the options you choose. Here’s a look at typical costs:
| Item | Low Cost | High Cost |
|---|---|---|
| Pedestal sink kit | $90 | $500+ |
| Faucet set | $30 | $200+ |
| Plumbing supplies | $25 | $80 |
| Tools (if needed) | $0 (if owned) | $100+ |
| Professional installation | $200 | $500+ |
Insight: Doing the work yourself usually costs less than $250 if you already have basic tools. Hiring a pro can raise the total to $700 or more.
Tips For A Professional-looking Finish
- Use painter’s tape along the wall before caulking for a crisp line.
- If your floor is uneven, shim under the pedestal before final tightening.
- Hide supply lines behind the pedestal where possible for a cleaner look.
- Choose a faucet and sink style that match your other fixtures.
- If painting the wall, do it before mounting the sink for easier access.

Credit: www.signaturehardware.com
When To Call A Professional
Some situations are best handled by a plumber or contractor:
- Old or damaged pipes: These may leak or break during installation.
- Moving supply or drain lines: This often requires special tools and expertise.
- Weak walls: If the wall can’t support the sink’s weight, reinforcement may be needed.
- Tiling or wall repair: Installing a sink on fresh tile or patching after removal can be tricky.
If you’re unsure, get a quote. Sometimes, paying for a few hours of skilled labor saves money and stress in the long run. You can find more on this topic at Family Handyman.
Troubleshooting: Common Problems
Sink Wobbles After Installation
- Check for loose wall anchors or missing shims. Tighten bolts gently.
- Use plastic shims to level the base if the floor is uneven.
Drain Leaks
- Make sure all slip nuts are tight but not overtightened.
- Check that the drain flange is seated with plumber’s putty, not caulk.
Water Won’t Drain Properly
- The P-trap may be misaligned or blocked. Realign and clear any debris.
- Make sure the drain slope is correct; water must flow downhill.
Wall Damage After Removing Old Sink
- Patch holes with spackle or wall repair compound.
- Paint before installing the new sink for a neat finish.

Credit: www.homedepot.com
Maintaining Your Pedestal Sink
Keeping your new sink looking and working its best is simple:
- Wipe down the basin and pedestal regularly with a mild cleaner.
- Avoid harsh chemicals that can dull the finish.
- Check for leaks at supply and drain connections every few months.
- Re-caulk as needed if the sealant cracks or peels.
Pro tip: Place a soft mat under the pedestal when cleaning the floor to protect against accidental bumps.
Frequently Asked Questions
How Long Does It Take To Mount A Pedestal Sink?
Most people can complete the job in 3 to 5 hours if all plumbing is in place. Beginners may take longer, especially if removing an old sink or adjusting pipes.
Can I Install A Pedestal Sink On Any Wall?
Not all walls are strong enough. You need at least one stud behind the wall or must use heavy-duty anchors. For drywall or plaster, reinforce the wall or consult a professional.
What If The Plumbing Doesn’t Line Up With My New Sink?
Flexible supply lines and adjustable P-traps allow for small adjustments. If the pipes are too far off, moving them may require a plumber.
How Much Weight Can A Pedestal Sink Support?
Most sinks are designed to hold the weight of the basin and normal use, not heavy loads. Do not lean or put heavy items on the sink. Anchoring to a stud increases strength.
Is A Pedestal Sink Hard To Clean?
No, pedestal sinks are easy to wipe down. There are no cabinets or hard-to-reach corners. Just clean around the base and behind the pedestal regularly.
Mounting a pedestal sink is a rewarding project that can freshen up any bathroom. With the right tools, careful planning, and attention to detail, you can achieve a sturdy, stylish result that adds value to your home. Whether you’re remodeling or replacing an old sink, these steps will help you avoid common pitfalls and finish with confidence.
Take your time, measure twice, and enjoy your updated space!