
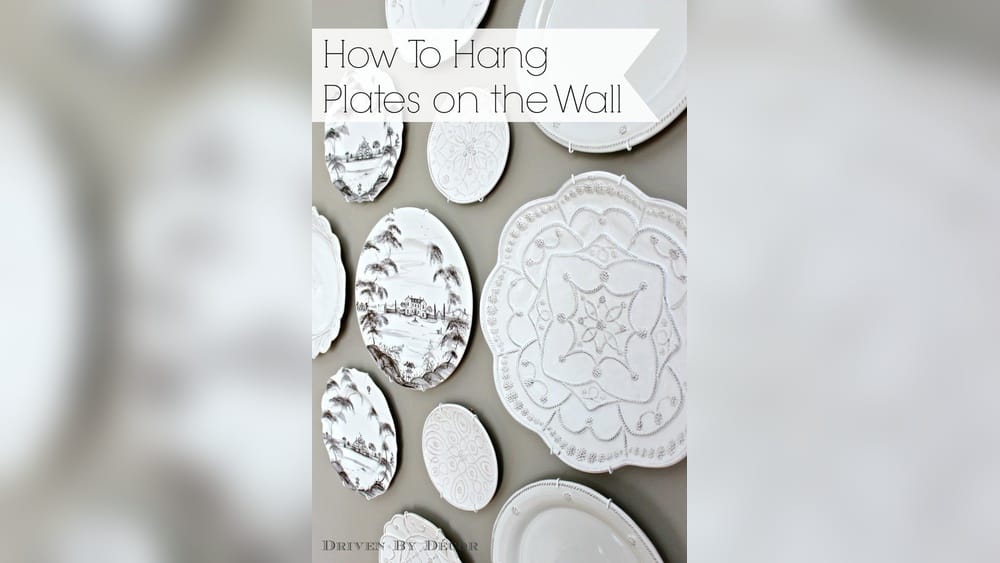
Decorative plates on walls can turn a plain room into a special space. This simple technique adds color, tells a story, and shows your style in a unique way. But if you have never mounted plates on a wall before, the process can seem confusing.
What’s the best method? Will the plates stay secure? How do you arrange them so they look good, not messy? These are common questions, and the answers can save you time, money, and even broken plates.
In this article, you’ll learn everything about how to mount plates on wall—from choosing the right plates and tools, to planning your layout, to the safest hanging techniques. We’ll look at creative ideas, practical steps, common mistakes, and expert tips. By the end, you’ll feel ready and confident to turn your wall into a stunning display.
Why Mount Plates On The Wall?
People have been decorating with plates for centuries. In many homes, especially in Europe and Asia, plates are not just for eating—they’re for showing off craftsmanship, culture, and memories. Today, hanging plates is a popular trend in interior design. Here’s why:
- Personal touch: Plates can be souvenirs, gifts, or family heirlooms. Displaying them keeps memories alive.
- Affordable art: Plates often cost less than paintings or prints, but can be just as eye-catching.
- Versatility: You can use plates of different sizes, colors, and styles to match any room theme.
- Easy refresh: Unlike wallpaper or large art, swapping plates is quick and doesn’t damage the wall much.
A 2023 survey by the American Home Decor Association found that 37% of people who decorate with wall art have included plates at least once. The trend is growing, especially among younger homeowners.
Choosing The Right Plates For Your Wall
Before you start, decide which plates you want to display. Not all plates are suitable for wall mounting, and your choices affect how secure and attractive your display will be.
Types Of Plates For Wall Displays
- Ceramic and porcelain plates: Classic choice, available in many designs. Some are fragile, so handle with care.
- Glass plates: Beautiful but more delicate. Best for spots where they won’t get bumped.
- Melamine and plastic plates: Lightweight and less likely to break, but usually less decorative.
- Metal plates: Modern, durable, and often used for contemporary decor.
Things To Consider When Selecting Plates
- Weight: Heavier plates need stronger hangers and anchors.
- Size: Mix large and small plates for interest, but be careful not to overcrowd.
- Shape: Round is traditional, but square or oval plates can add a modern twist.
- Design: Color, pattern, and style should suit your room.
- Sentimental value: Priceless plates (antiques, family heirlooms) need extra care.
Pro tip: If a plate is valuable or irreplaceable, consider displaying a replica and keeping the original safe.
Tools And Supplies You’ll Need
Proper tools make the job easier and safer. Here’s a basic list:
- Plate hangers: Spring-loaded wire holders that grip the plate from behind.
- Adhesive plate discs: Sticky pads that attach to the back of a plate (for plates you don’t want to damage with wires).
- Wall anchors and screws: For heavy plates or if you’re not screwing into a stud.
- Picture hooks: For lighter plates.
- Measuring tape and level: Keeps your display straight and balanced.
- Painter’s tape or paper templates: Helps plan the layout before you drill or hammer.
- Pencil: For marking positions.
- Hammer or drill: For installing hooks or anchors.
Comparison Of Plate Hanging Methods
Here’s a quick look at popular options:
| Method | Best For | Pros | Cons |
|---|---|---|---|
| Wire Plate Hangers | Most plates | Secure, reusable, adjustable | Visible from side, may scratch plate |
| Adhesive Discs | Flat-backed plates | No visible hardware, gentle on plate | May fail on textured backs, not for very heavy plates |
| Plate Stands/Shelves | Deep plates, frequent swaps | No wall damage, easy to change | Takes more space, less secure |
Insight: Many beginners don’t realize that plate hangers come in different sizes. Always match the hanger to your plate size for a snug fit.
Planning Your Plate Arrangement
Before you hang anything, plan your layout. This step makes a big difference in the final look.
Steps To Plan Your Layout
- Gather all your plates and lay them on a table or floor.
- Experiment with arrangements. Try different combinations—symmetrical, random, in rows, circles, or waves.
- Take photos of the best options. It’s easier to compare them this way.
- Make paper templates. Trace each plate on paper, cut out the circles, and tape them to the wall.
- Adjust the templates until you’re happy with the look.
Popular Arrangements
- Grid: Neat rows and columns, good for matching plates.
- Cluster: Plates grouped tightly in an organic shape, often used for different sizes.
- Linear: Plates hung in a straight line (horizontal or vertical).
- Asymmetrical: Plates scattered in a freeform, artful way.
Non-obvious tip: The arrangement’s center should match your eye level—usually about 57–60 inches from the floor. For displays above furniture, keep at least 8–12 inches above the top of the item.
Example: Layout Planning Data
Here’s a simple data table for how many plates fit in a typical arrangement:
| Arrangement Type | Minimum Plates | Maximum Plates (per 6 ft wall) | Visual Effect |
|---|---|---|---|
| Grid | 4 | 16 | Formal, balanced |
| Cluster | 3 | 10 | Casual, dynamic |
| Linear | 2 | 6 | Clean, modern |
| Asymmetrical | 3 | Varies | Creative, artistic |
How To Mount Plates On Wall: Step-by-step Guide
Now comes the main part—getting your plates up safely and attractively.
1. Prepare The Plates And Wall
- Clean the plates: Remove dust and grease so hangers or adhesive stick well.
- Inspect the wall: Make sure it’s dry and free of loose paint. For older walls, check for hidden wiring or pipes before drilling.
- Mark the layout: Use your paper templates or painter’s tape to mark where each plate will go.
2. Choose The Right Hanging Method
There are several safe ways to mount plates:
Wire Plate Hangers
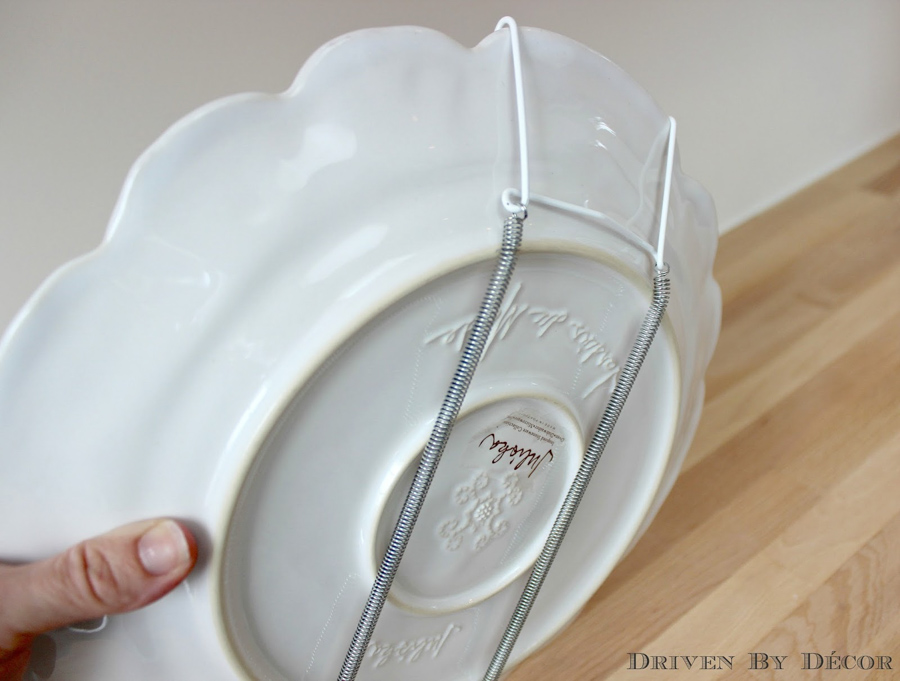
These are spring-loaded metal clips that fit around the plate’s rim.
Steps:
- Select a hanger that matches your plate’s diameter.
- Hook the hanger over the rim, making sure the springs are tight.
- Check that the hanger sits flat and doesn’t scratch the plate. Add felt pads if needed.
- Hammer a picture hook or screw into the wall at the marked spot.
- Hang the plate, adjusting so it sits level.
Tip: Always test the hanger with the plate before mounting on the wall.
Adhesive Plate Discs
These are flat, sticky pads that glue to the back of the plate.
Steps:
- Clean the back of the plate with rubbing alcohol.
- Wet the disc’s back slightly and press onto the plate.
- Let it dry for at least 12 hours (overnight is best).
- Hang the plate by the disc’s built-in hook.
Warning: Adhesive discs work best on flat, smooth surfaces. They may not hold on rough or textured backs.
Plate Stands Or Shelves
For deep or unusual plates, consider a narrow shelf or stand.
Steps:
- Install a narrow ledge or rail on the wall.
- Place the plate with its base resting securely.
- Use removable museum putty at the base to keep plates from slipping.
3. Secure Each Plate
- For heavy plates (over 2 lbs), use wall anchors, not just nails.
- Double-check that each plate is secure and won’t slide or tip.
- Use a level to keep rows straight.
4. Final Adjustments
- Step back and view the whole display. Adjust as needed.
- Check for even spacing and alignment.
- Remove any visible pencil marks.
Extra insight: Many people forget to consider wall texture. On rough walls (like plaster or brick), use stronger anchors and avoid adhesive discs.
Creative Ideas For Plate Walls
Mounting plates doesn’t have to mean plain rows on a white wall. Here are some creative ideas:
- Mix with art: Combine plates with framed art or photos for a gallery wall effect.
- Create a focal point: Use a large, colorful plate in the center, surrounded by smaller ones.
- Go vertical: Hang plates in a tall, narrow line between windows or doors.
- Color gradients: Arrange plates by color from light to dark for a gradient effect.
- Seasonal swaps: Use removable hangers so you can change plates for holidays or seasons.
- Layered depth: Use shelves or brackets to make some plates stand out more than others.
- Mirror mix: Add small mirrors among your plates for extra sparkle and light reflection.
Example: In a 2022 interior design competition, the winning wall display used blue and white plates in a swirling pattern, echoing the movement of wind. The effect was both modern and classic.
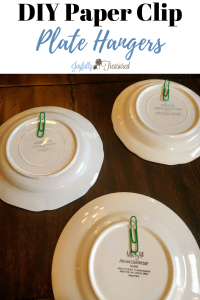
Credit: joyfullytreasured.com
Safety Tips And Common Mistakes
Mounting plates is not hard, but some mistakes can lead to broken plates or damaged walls. Avoid these common errors:
Mistakes To Avoid
- Using the wrong hanger size: Too small and the plate may fall; too large and it can slip out.
- Skipping wall anchors: Heavy plates need solid support, especially on drywall.
- Not testing adhesives: Some adhesives fail on glazed or textured plate backs.
- Forgetting about humidity: Kitchens and bathrooms can loosen adhesives over time.
- Overcrowding: Plates need space to shine. Too many together can look messy.
- Ignoring weight limits: Picture hooks and adhesive discs often have weight limits—always check before hanging.
Quick Safety Checklist
- Are all hangers rated for your plate’s weight?
- Is every plate secure before letting go?
- Are there no sharp metal edges touching the plate’s surface?
- Is your step ladder stable while working?
Non-obvious safety tip: For homes in earthquake zones, use museum putty or gel on both the plate and hanger to prevent shaking loose.
How To Care For Plate Walls
Once your plates are up, a little maintenance keeps them looking great for years.
- Dust regularly: Use a soft, dry cloth or feather duster.
- Check hangers yearly: Make sure nothing is coming loose, especially after wall vibrations or temperature changes.
- Avoid direct sunlight: Sun can fade colors over time, especially on painted or printed plates.
- Handle with care: When changing plates, work gently to avoid chipping edges.
If a plate falls or cracks, remove it immediately to prevent injury. Replace with a similar size to keep your arrangement looking balanced.
Comparing Plate Wall Mounting To Other Wall Decor
How does a plate wall compare to other popular wall decor methods? Here’s a helpful table:
| Wall Decor | Cost Range | Difficulty | Changeability | Unique Value |
|---|---|---|---|---|
| Plates | $20–$200 | Medium | Easy to swap | Personal, colorful, 3D effect |
| Framed Art | $30–$800+ | Easy | Easy to swap | Flat, classic look |
| Mirrors | $40–$250 | Medium | Less flexible | Brightens space |
| Fabric Hangings | $25–$150 | Easy | Very flexible | Soft, textured |
Insight: Plate walls offer a rare combination of affordability, 3D interest, and personal storytelling that’s hard to match with other decor.
Environmental And Practical Considerations
Decorating with plates is also environmentally friendly compared to buying new framed art or plastic decor. Many people use vintage plates from thrift stores or family collections. This reduces waste and gives new life to old objects. If you’re worried about damaging valuable antiques, you can use safe, removable hangers or display replicas.
In rental homes, adhesive hooks or shelves are the least damaging method. Some products are designed to leave no marks when removed, perfect for temporary displays.

Credit: housewithhome.com
Modern Plate Wall Trends
Interior design evolves quickly. In 2024, several trends are popular:
- Mixed materials: Combining ceramic, metal, and glass plates for more texture.
- Monochrome displays: Using plates in a single color but different shapes and finishes.
- Oversized plates: Large statement pieces as a room’s main focus.
- Interactive layouts: Plates combined with LED lighting or smart home features.
- Storytelling walls: Using plates to tell a story—like family history, travels, or recipes.
Designers often recommend starting with a small area (like a hallway or above a sideboard) before trying a large-scale plate wall.
Useful Resources And Further Reading
For more ideas and inspiration, you can explore websites like House Beautiful, which often features plate wall galleries and expert tips.
Frequently Asked Questions
What Is The Best Way To Hang Plates Without Damaging The Wall?
For minimal wall damage, use adhesive plate discs or removable hooks. These work well for lighter plates and are simple to remove later. For heavier plates, use small picture hooks or drywall anchors, which leave only tiny holes. Always test adhesives on a hidden area first.
Can I Hang Plates On A Brick Or Tile Wall?
Yes, but you’ll need special tools. Use a masonry drill bit to make holes for wall anchors or screws. For tile, drill slowly and use masking tape to prevent slipping. Adhesive discs may not stick well to brick, so mechanical fasteners are safer.
How Do I Keep Plates From Getting Dusty On The Wall?
Regular dusting with a soft cloth or feather duster is best. For very detailed plates, use a soft paintbrush to reach into crevices. Avoid wet cleaning unless absolutely necessary, as moisture can weaken adhesives over time.
Are Plate Hangers Safe For Valuable Or Antique Plates?
They can be, if you use the right size and add felt pads to avoid scratches. For priceless antiques, consider displaying a replica or using a secure shelf with museum putty for extra protection.
What Should I Do If A Plate Falls And Breaks?
Clean up any pieces carefully to avoid injury. If the plate was part of a group, try to replace it with one of a similar size and color. If the plate is valuable, save the pieces for professional repair.
—
Mounting plates on your wall is both an art and a craft. With thoughtful planning, the right tools, and a little creativity, you can create a display that brightens your home and tells your story. Remember: take your time, measure twice, and hang with care. Your wall will thank you—and so will anyone who visits your space.
Credit: www.drivenbydecor.com