
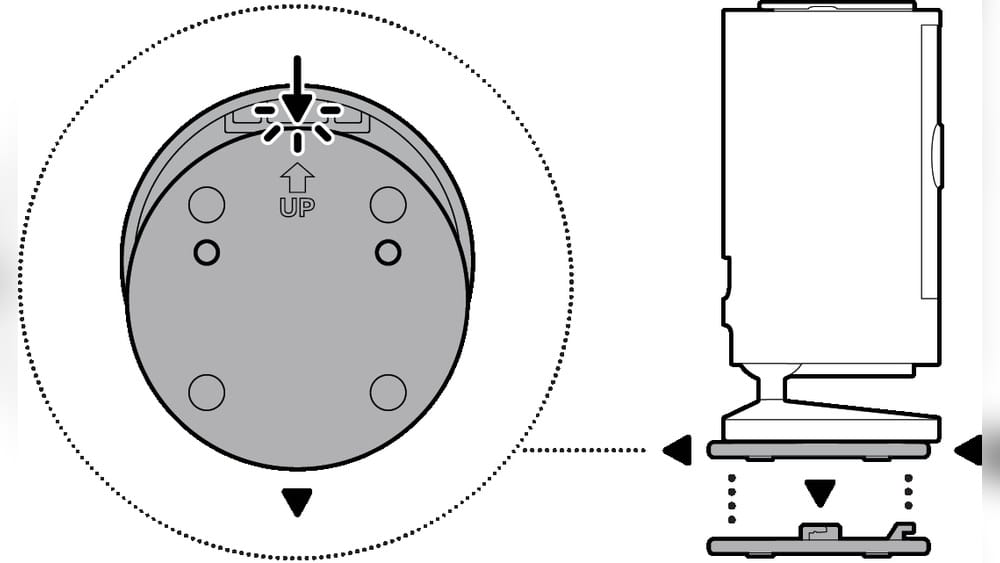
Mounting a Ring Indoor Camera can transform the way you monitor your home. Many people buy this smart camera for simple security, but often feel unsure about how to install it the right way. With the right setup, you’ll get the best view, stronger Wi-Fi connection, and a device that works reliably, every day.
In this guide, you’ll learn everything you need—from choosing the perfect location and mounting tools, to step-by-step instructions and pro tips for a neat, secure, and effective installation.
Most Ring Indoor Camera users are first-timers with smart home devices. If that’s you, don’t worry. Mounting this camera is easier than you think, and you don’t need special skills or expensive tools. You’ll also find out how to avoid common mistakes, and how to handle tricky situations like mounting on brick or near power outlets.
By the end, you’ll have a complete understanding of the whole process, and know how to get the most out of your Ring Indoor Camera.
Why Mounting Matters For Your Ring Indoor Camera
Choosing the right spot and mounting method for your Ring Indoor Camera makes a big difference. The right installation means:
- Clearer video footage: Catch faces, details, and movement easily.
- Stronger security: Cover the most important areas, like doors or windows.
- Better Wi-Fi connection: Fewer drops and smoother video.
- Neater cables: Safer, tidier, and less visible wiring.
A poorly mounted camera can lead to blind spots, weak signals, or even a damaged device if it falls. Many users don’t realize that the camera’s field of view (FOV) and Wi-Fi signal strength are directly affected by how and where you mount it.
Placing your camera too high, too low, or facing a light source can ruin your video quality. Taking a few extra minutes to plan your install will pay off every day.
Understanding Your Ring Indoor Camera
Before you start, it’s smart to get familiar with the parts and features of your Ring Indoor Camera. Knowing what each piece does will help you mount it correctly, and troubleshoot if anything goes wrong.
The Ring Indoor Camera is a compact, plug-in security camera designed for indoor use. It offers 1080p HD video, two-way talk, motion detection, and connects to your home Wi-Fi. The device comes with a mounting base, screws, wall anchors, and a power cable. Some models also support privacy features like camera covers or customizable motion zones.
Here’s a quick look at the main parts:
- Camera lens: Captures the video. Face this toward the area you want to monitor.
- Microphone and speaker: For two-way talk.
- Mounting base: Lets you attach the camera to walls or ceilings.
- Power port: Where the cable plugs in.
- Status light: Shows if the camera is on or off.
Not all Ring Indoor Camera versions are the same. Some older models may lack features like privacy covers or advanced motion detection. Always check your user manual or the official Ring website if you’re not sure about your model’s features.
Ring Indoor Camera Key Specs
Below is a comparison of key specs for the most common Ring Indoor Camera models.
| Feature | Indoor Cam (1st Gen) | Indoor Cam (2nd Gen) |
|---|---|---|
| Resolution | 1080p HD | 1080p HD |
| Field of View | 140° diagonal | 143° diagonal |
| Privacy Cover | No | Yes |
| Power | Plug-in only | Plug-in only |
| Two-Way Talk | Yes | Yes |
| Mounting Hardware | Included | Included |
Planning Your Mounting Location
The spot you choose for your Ring Indoor Camera is just as important as how you mount it. A poor location can make the camera almost useless for home security.
What To Consider
- Coverage area: Point the camera at doors, windows, or main walkways.
- Height: Mount at eye level (about 4-6 feet off the ground) for clear face shots.
- Power outlet access: The camera needs to be plugged in, so stay within reach of an outlet.
- Wi-Fi strength: Avoid areas with weak signals. Test with your phone if you’re unsure.
- Light sources: Don’t face the camera directly at windows or lamps—this can cause glare.
- Privacy: Consider areas where you do or don’t want to record (e.g., don’t point at bathrooms).
Common Locations
- Living room corners: Overlooks the widest area.
- Hallways: Catches anyone passing through.
- Near entry doors: Sees who comes in and out.
- Stairways: Monitors movement between floors.
Real-world Example
Suppose you want to monitor your front hallway. Mounting the camera near the ceiling might seem logical, but placing it at eye level on a side wall can give a clearer shot of faces, while still covering the door. If your hallway is narrow, angle the camera slightly to capture the whole area.
Tools And Materials You’ll Need
Mounting a Ring Indoor Camera doesn’t require many tools. Most homes already have what you need. Here’s a checklist:
- Screwdriver: Phillips-head fits the included screws.
- Drill (optional): Useful for harder walls (brick, concrete).
- Drill bits: Match the size of the wall anchors (usually 1/4 inch).
- Tape measure: For accurate placement.
- Pencil: To mark screw holes.
- Level: Keeps the camera straight.
- Mounting hardware: Screws and anchors (come in the box).
- Cable clips or adhesive strips: For neat cable management.
If mounting on drywall, the included hardware is usually enough. For brick or concrete, you’ll need a drill and masonry bit. Most users can finish the job in under 20 minutes.

Credit: www.youtube.com
Step-by-step Guide To Mounting The Ring Indoor Camera
Here’s a simple, detailed process you can follow. These steps work for both 1st and 2nd generation Ring Indoor Cameras.
1. Test The Camera Position
Before you drill any holes, plug in your camera and hold it in the spot you want to mount. Use the Ring app to view the live feed. Adjust the angle until you see the area you want to monitor.
This “test run” helps avoid mistakes later.
2. Mark The Mounting Holes
Use a pencil to mark where the screws will go. The mounting base has holes for two screws. Hold the base flat against the wall and make sure it’s level before marking.
3. Prepare The Wall
- For drywall: Use the included anchors if you’re not drilling into a stud.
- For wood: Screws can go directly into the surface—no anchors needed.
- For brick/concrete: Use a drill with a masonry bit to make holes for the anchors.
4. Attach The Mounting Base
Line up the base with your marks. Insert the anchors (if needed), then screw the base to the wall. Make sure it’s tight, but don’t overtighten—the plastic can crack.
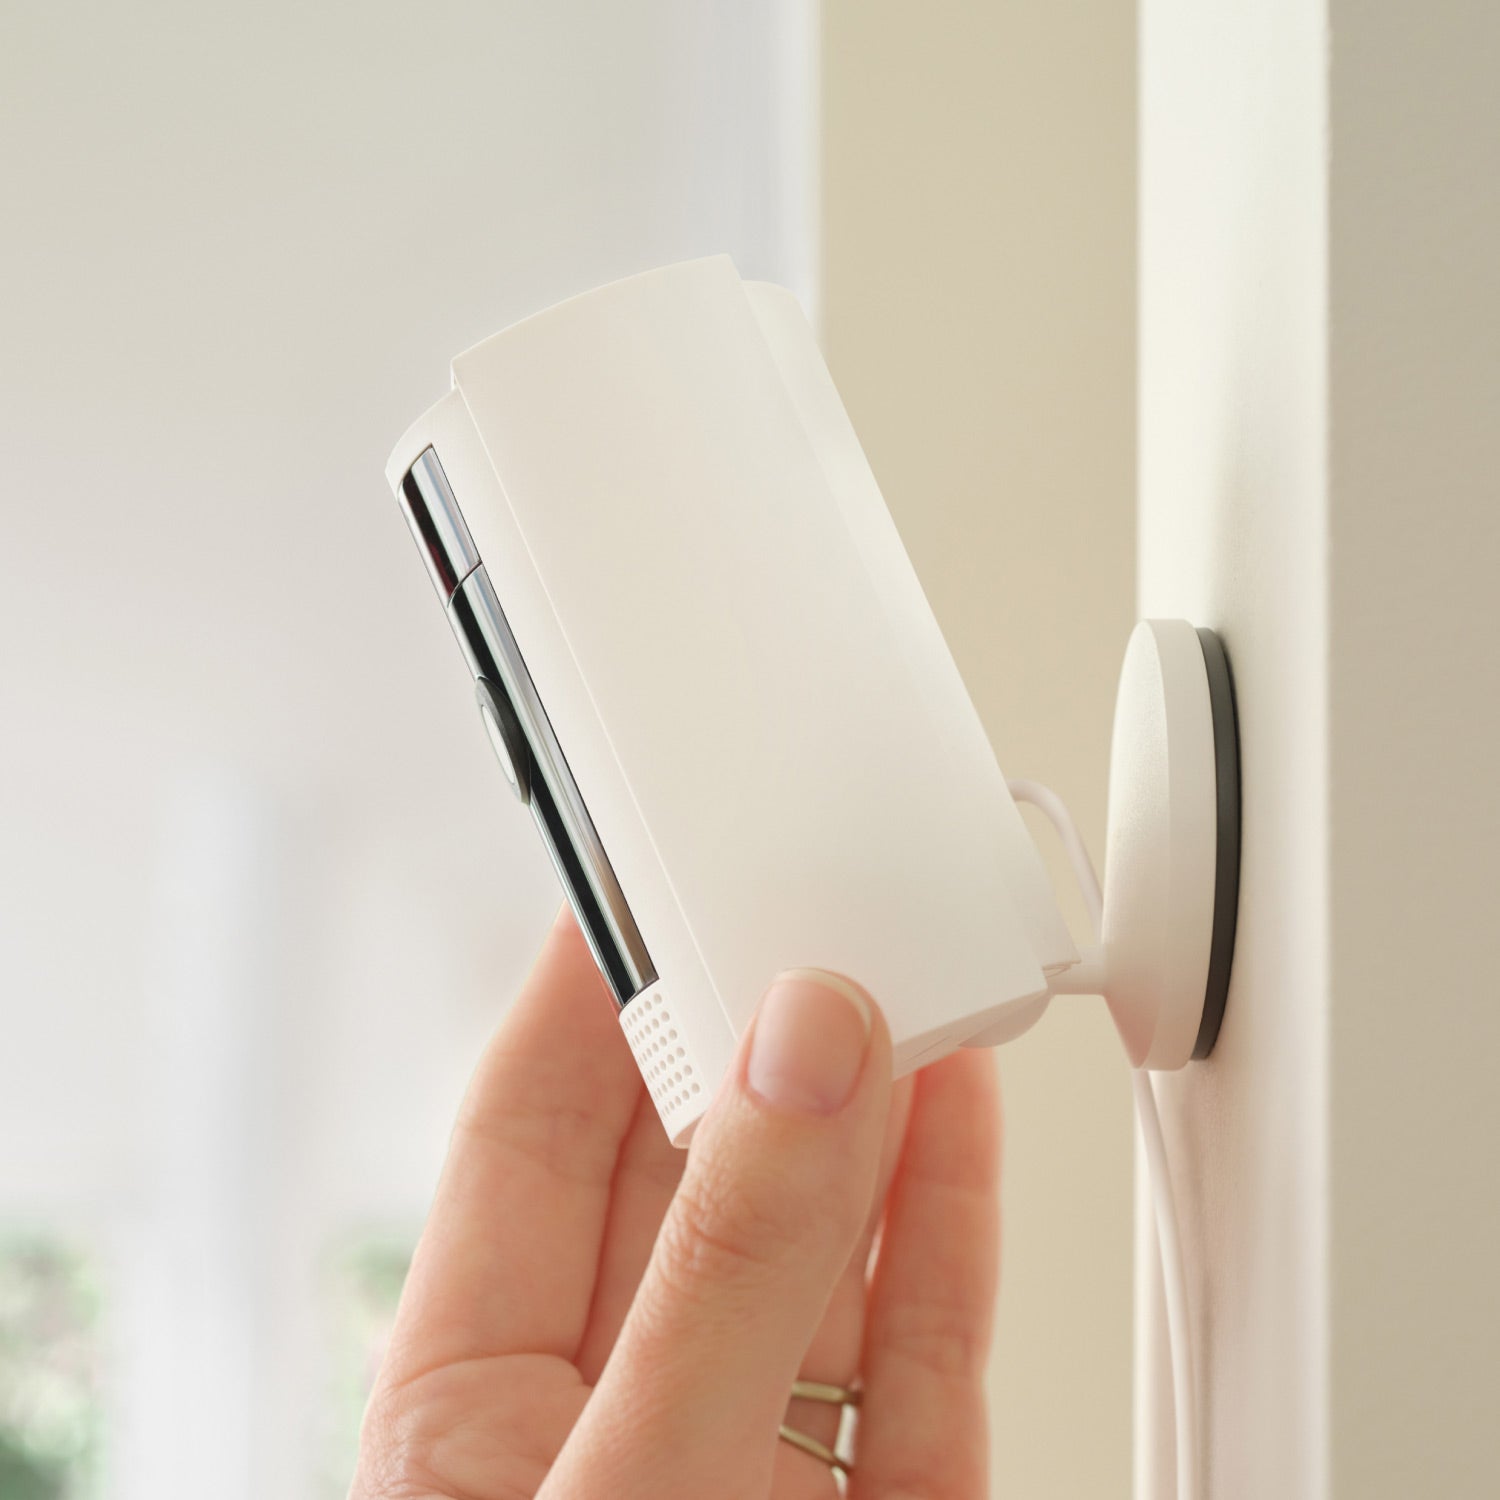
5. Attach The Camera
Snap or screw the camera onto the base, depending on your model. Plug in the power cable. Adjust the angle so the camera points where you want.
6. Tidy The Cables
Use cable clips or adhesive strips to run the power cord neatly along the wall. This keeps things tidy and prevents tripping hazards.
7. Test The View Again
Open the Ring app and check the live feed. Walk around the area to see how well the camera detects motion and records video. Adjust the angle if needed.
Mounting On Different Surfaces
Not all walls are the same. Here’s how to handle the most common types:
Drywall
Easy to work with. Use the included wall anchors if you’re not screwing into a stud. If mounting on a stud, anchors aren’t necessary.
Wood
Directly screw the mounting base into the wood. No anchors needed. This is the fastest and strongest option.
Brick Or Concrete
You’ll need a drill and masonry bit. Mark the holes, drill, tap in the anchors, then screw the base in. If you don’t have a masonry bit, many hardware stores will drill the holes for you if you bring in the mounting base and wall location.
Glass Or Tile
Not recommended. Drilling into glass or tile can crack the surface. Instead, use strong double-sided adhesive strips, but be aware this may not be as secure as screws.
Ceiling Mounting Vs. Wall Mounting
Some people want to mount their Ring Indoor Camera on the ceiling, for a bird’s-eye view. Here are the pros and cons:
Ceiling Mounting
Pros:
- Covers a wide area.
- Harder for intruders to reach or tamper with.
- Good for monitoring large rooms.
Cons:
- Can create awkward angles (faces are harder to see).
- Harder to adjust camera once installed.
- May require a longer power cable.
Wall Mounting
Pros:
- Easier to aim at specific areas.
- Eye-level placement gives better detail.
- Easier to hide cables.
Cons:
- May be easier for someone to reach.
- Slightly smaller coverage area.
Tip: If you mount on the ceiling, angle the camera down toward the area of interest, not straight down.
Managing Power And Cables
The Ring Indoor Camera is a plug-in device, so you need to plan for power. Here’s how to keep things neat and safe:
Extension Cords
If your outlet is far from the mounting spot, use a UL-listed extension cord. Don’t run cords under rugs or through doorways—this can cause wear and fire risk.
Hiding Cables
- Use cable clips to secure the cord along baseboards or corners.
- Paint the cable to match your wall color.
- For a cleaner look, use adhesive cable channels.
Safety Tips
- Don’t overload outlets.
- Keep cords away from pets and children.
- Replace any damaged cables right away.
Setting Up The Camera In The Ring App
Mounting is only half the job. The other half is setting up your camera in the Ring app, so you can view footage, get alerts, and talk through the camera.
Connecting To Wi-fi
- Plug in your camera and wait for the status light to blink.
- Open the Ring app and tap “Set Up a Device.”
- Scan the QR code on your camera or packaging.
- Follow the in-app instructions to connect to your Wi-Fi network.
- Test the live view to make sure the connection is strong.
Customizing Settings
- Motion zones: Set up areas you want the camera to monitor.
- Notifications: Choose how and when you get alerts.
- Privacy features: Some models let you disable audio or set privacy zones.
Sharing Access
You can let family members access the camera feed through the app. Go to Device Settings > Shared Users, and send an invite.
Example: Setting Motion Zones
If your camera covers a living room, you may want to block out areas with lots of movement (like a window with trees outside) to reduce false alerts. Use the app’s motion zone tool to draw boxes only around the areas you care about.
Troubleshooting Common Problems
Even with careful installation, you might run into problems. Here are fixes for the most common issues:
Weak Wi-fi Signal
- Move your router closer to the camera.
- Use a Wi-Fi extender.
- Avoid mounting near thick walls or metal surfaces.
Blurry Or Washed-out Video
- Clean the lens with a soft cloth.
- Make sure the camera isn’t facing direct sunlight.
- Adjust the angle to reduce glare.
Camera Not Powering On
- Check the outlet with another device.
- Try a different power adapter.
- Make sure the power cable is fully inserted.
Mounting Base Feels Loose
- Check if you used the right wall anchors.
- Tighten the screws, but don’t overtighten.
- For crumbly drywall, use larger anchors.
Motion Alerts Not Working
- Make sure motion detection is turned on in the app.
- Adjust motion zones.
- Test by walking in front of the camera.
Insight: Many people mount their camera and then forget to adjust their Wi-Fi settings. If your home network changes (new router, password, etc.), you must update the camera in the Ring app, or it will stop working.
Upgrading Or Moving Your Camera
Sometimes you need to move your Ring Indoor Camera to a new spot, or upgrade to a new model. Here’s how to do it smoothly:
Moving The Camera
- Unplug and remove the camera from the old mount.
- Patch old holes with wall filler if needed.
- Repeat the mounting steps at the new location.
- Update the location name in the Ring app.
Upgrading To A New Model
- Remove the old camera and mount.
- Install the new mounting base (if different).
- Set up the new camera in the app.
- Delete the old device from your Ring account.
Tip: Save your mounting hardware—screws and anchors can often be reused for the new camera.
Comparing Ring Indoor Camera With Other Indoor Cameras
Ring is a popular brand, but how does the Ring Indoor Camera compare to similar options? Here’s a quick comparison with two other common indoor cameras: the Google Nest Cam Indoor and the Wyze Cam v3.
| Feature | Ring Indoor Camera | Google Nest Cam Indoor | Wyze Cam v3 |
|---|---|---|---|
| Video Quality | 1080p HD | 1080p HD | 1080p HD |
| Field of View | 140-143° diagonal | 130° diagonal | 130° diagonal |
| Power | Plug-in | Plug-in | USB Plug-in |
| Two-Way Talk | Yes | Yes | Yes |
| Cloud Storage | Subscription | Subscription | Subscription or MicroSD |
| Mounting Hardware | Included | Magnetic base | Included |
Insight: While all three cameras offer similar video quality, only the Ring Indoor Camera is fully integrated with other Ring and Amazon Alexa devices. Wyze offers cheaper cloud plans and local storage, but the build quality and support may not match Ring or Google.
For more on smart home camera features, see the official CNET camera guide.
Credit: www.romantik-chalets.com
Maintenance And Security Tips
Mounting your camera is just the start. Keeping it working well over time is equally important.
Regular Maintenance
- Clean the lens every few months to remove dust.
- Check the mount for looseness or damage.
- Update firmware through the Ring app for security and new features.
- Test the live view and motion alerts regularly.
Security Best Practices
- Use a strong, unique password for your Ring account.
- Turn on two-factor authentication (2FA) in the app.
- Share camera access only with trusted people.
- Keep the Ring app updated.
Privacy Tips
- Use privacy covers or zones if you don’t want to record certain areas.
- Tell visitors that cameras are in use—this is required by law in some places.
- Review your footage regularly, and delete old recordings you don’t need.
Non-Obvious Tip: Don’t point cameras at windows if you want to use night vision. The infrared lights can reflect off the glass and create glare in your videos.
Environmental Factors To Consider
While the Ring Indoor Camera is built for indoor use, some environments need special care.
Humidity
Avoid mounting in bathrooms, kitchens, or anywhere with high humidity. Moisture can damage the camera and cause foggy video.
Temperature
The Ring Indoor Camera works best between 32°F and 104°F (0°C to 40°C). Don’t mount near heat sources like radiators or stoves.
Pets
If you have pets, mount the camera above their usual height to avoid false motion alerts. You can also customize motion zones to ignore pet activity.
Children
Keep cables and the camera out of reach of young children to avoid accidental unplugging or damage.

Credit: www.youtube.com
What To Do If You Rent Your Home
Many renters worry about making holes in the wall. Here are some tips:
- Use removable adhesive strips for mounting. They hold well for lightweight cameras.
- Ask your landlord for permission before drilling.
- Consider placing the camera on a high shelf, if you can’t mount it.
- Save original wall paint to touch up small holes when you move out.
Insider Tip: Small screw holes can be filled with toothpaste in a pinch, but wall filler is a better long-term fix.
Advanced Placement Ideas
If you want to get creative, here are a few advanced placement ideas:
- Bookshelf mounting: Hide the camera among books for a discreet setup.
- Corner ceiling mount: Use a mini shelf bracket to aim the camera across the whole room.
- Above door frames: Great for monitoring entry/exit without being noticed.
- Garage or basement: Just be sure it stays dry and within Wi-Fi range.
Note: Always check the Ring app’s live view after mounting in a new spot to make sure you’re covering the right area.
Final Checklist Before You Finish
Review these steps before you call the job done:
- Is the camera view clear and covers the right area?
- Is the mount secure (no wobbling)?
- Are the cables neat and safe?
- Does the camera show “Online” in the Ring app?
- Are motion alerts working as expected?
- Have you adjusted settings for privacy and notifications?
- Did you test the camera during both day and night?
If you can say “yes” to all these, your Ring Indoor Camera is ready to protect your home.
Mounting a Ring Indoor Camera is a small project with a big impact. The right setup keeps your loved ones and property safer, and gives you peace of mind—even when you’re far from home. With the steps and tips above, you’re now prepared to mount your camera like a pro, avoid common mistakes, and enjoy the full benefits of your smart security device.
Frequently Asked Questions
How High Should I Mount My Ring Indoor Camera?
The best mounting height is eye level, around 4 to 6 feet off the ground. This position captures clear images of faces and movements, making it easier to identify people. If you mount it too high, you may only see the tops of heads; too low, and pets or furniture may block the view.
Can I Use Double-sided Tape To Mount The Camera?
Yes, double-sided adhesive strips can work for lightweight cameras like the Ring Indoor Camera, especially if you rent or don’t want to drill holes. However, this method isn’t as secure as using screws. Over time, tape can lose grip, especially in humid or dusty areas.
Does The Ring Indoor Camera Work Without Wi-fi?
No, the camera needs a Wi-Fi connection to stream video, send alerts, and save footage to the cloud. Without Wi-Fi, the camera won’t record or let you view live feeds. Make sure your Wi-Fi is strong in the area you plan to mount the camera.
Can I Move My Ring Indoor Camera After Installing It?
Yes, you can move the camera any time. Unplug it, unscrew or unclip it from the mount, and patch the holes if needed. You can reuse the mounting hardware in a new spot. Don’t forget to update the camera’s location name in the Ring app for easier management.
Is The Ring Indoor Camera Waterproof?
No, the Ring Indoor Camera is not waterproof. It is designed for indoor use only. Avoid mounting it in bathrooms, outdoors, or anywhere it might get wet. For outdoor use, choose a Ring model specifically made for outdoor conditions.
With these answers and the detailed steps above, you’re now ready to mount your Ring Indoor Camera with confidence and get the most out of your smart home security system.