
Mounting solar panels on your roof is one of the smartest ways to lower your electricity bills and use clean energy. Many homeowners are curious, but the process can seem complicated. This guide will help you understand each step, from planning to installation, with clear explanations and practical advice.
Whether you want to do it yourself or hire a professional, you’ll learn what matters most, which mistakes to avoid, and how to make the right choices for your home.
Solar panels are now more affordable and efficient than ever. In 2023, the cost for residential solar systems dropped by nearly 20% compared to five years ago. Many governments offer incentives, too. But installing panels on your roof isn’t just about buying them and putting them up.
You need to check your roof’s condition, choose the right mounting system, and follow safety rules. If you rush or skip steps, you might waste money or even damage your roof.
Let’s break down the process so you can confidently mount solar panels on your roof and start saving.
Understanding Solar Panel Mounting Systems
Before you begin, it’s important to know the different mounting systems available for rooftop solar panels. Each system is designed for certain roof types and climates, and choosing the right one affects efficiency and durability.
Types Of Mounting Systems
- Flush Mounts
- Panels sit close to the roof, ideal for pitched roofs.
- They’re affordable and simple, but not best for flat roofs.
- Flush mounts are the most common choice for homes because they blend in with the roofline and are less visible from the street. They also offer less wind resistance compared to raised systems.
- Tilt Mounts
- Panels are tilted at an angle to capture more sunlight.
- Useful for flat roofs or locations with less sunlight.
- Tilt mounts allow you to adjust the angle for seasonal sun changes, which can increase energy production by 10–20% in some areas. They are especially useful in northern regions where the sun stays lower in the sky.
- Ballasted Mounts
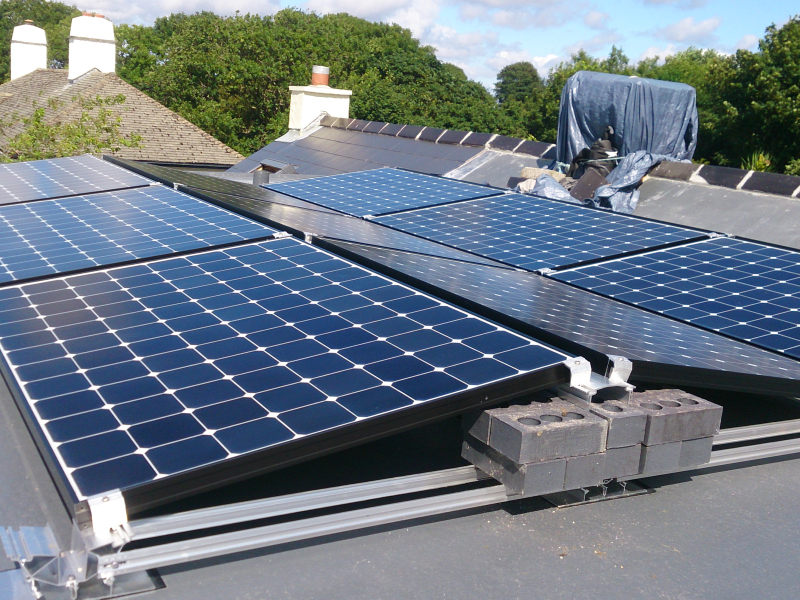
- Panels are held in place by weights, not roof penetrations.
- Common for flat commercial roofs; less popular for homes.
- These systems are quick to install and avoid roof leaks because they don’t require drilling. However, they’re heavier and may not suit all structures. Ballasted mounts require roofs that can handle extra weight, which is sometimes overlooked by beginners.
- Roof-Integrated Mounts
- Panels replace parts of the roof (like tiles or shingles).
- Good for new roofs or major renovations.
- These systems offer a sleek look and can improve home value. They are often installed during new home construction or when the roof is being replaced anyway. They can cost more but save on roofing materials.
Comparing Mounting Systems
Here’s a simple table to help you compare the main mounting types:
| Mounting System | Best For | Cost Range (USD) | Roof Penetration | Longevity |
|---|---|---|---|---|
| Flush Mount | Pitched Roofs | $1,000–$2,000 | Yes | 20–30 years |
| Tilt Mount | Flat Roofs | $1,500–$2,500 | Yes | 20–30 years |
| Ballasted Mount | Flat Roofs (Commercial) | $1,200–$2,200 | No | 15–25 years |
| Roof-Integrated | New Roofs | $2,000–$3,500 | N/A | 30+ years |
Non-obvious Insight
Many beginners think all panels must be flush-mounted. But in regions with heavy snowfall, tilted mounts make snow slide off, reducing maintenance and keeping panels productive. In high-wind zones, flush mounts are less likely to lift or rattle, while ballasted systems might not be allowed due to weight restrictions.
Always check your local building codes for mounting system requirements.
Checking Your Roof’s Suitability
Not every roof is ready for solar panels. You need to check the structure, the angle, and the materials before you start.
Roof Condition
- Age: If your roof is older than 15–20 years, consider replacing it first. Installing panels on a weak roof means you’ll pay extra to remove and reinstall them when you fix the roof later. Most solar panels will last 25+ years, so your roof should last at least that long.
- Material: Asphalt shingles, metal, and tile roofs are best for solar. Wood or slate can be tricky and may need special mounts. Metal roofs with standing seams are ideal because mounts clamp directly to the seams, avoiding holes.
A professional roof inspection can help you spot hidden problems, such as soft spots or loose shingles, before you commit to solar.
Roof Angle And Orientation
- Pitch: Roofs with a slope between 15° and 40° work best. Flat roofs need tilt mounts. Too steep or too flat means less sunlight and more chance for debris buildup.
- Direction: In the US, south-facing roofs get the most sunlight. East and west are okay, but less efficient. In the southern hemisphere, north-facing roofs are ideal.
- Obstructions: Check for chimneys, vents, and trees that can cast shadows. Even small shading can cut power output by 10–30%. Satellite dishes or skylights may also reduce usable space.
Sometimes, panels can be split between different roof faces if you don’t have a large, clear area. This is called a “multi-array” layout.
Structural Support
Solar panels and mounting hardware add weight. Most panels weigh around 40 pounds each, plus mounting rails. If your roof isn’t strong enough, you may need extra support. A structural engineer can check if your roof needs reinforcement, especially for older homes or homes in heavy snow regions.
Here’s a comparison of roof materials and their solar suitability:
| Roof Material | Solar Suitability | Extra Steps Needed |
|---|---|---|
| Asphalt Shingles | Excellent | None |
| Metal | Very Good | Special clamps |
| Tile | Good | Tile replacement kits |
| Slate/Wood | Fair/Poor | Custom mounts, risk of cracking |
Non-obvious Insight
Many homeowners forget to check the attic for water leaks or weak rafters. These issues can cause problems after installation. Always inspect inside as well as outside. Also, check after a heavy rain—if water is leaking now, it will likely be worse after installing solar hardware.
Planning Your Solar Panel Layout
A good panel layout is key to maximizing your energy output. You need to plan how many panels you’ll use, where they’ll go, and how to connect them.
Calculating Panel Needs
- Find your average monthly electricity use (in kilowatt-hours, kWh). You can check your utility bills or use online calculators.
- Solar panels produce about 250–400 watts each. Multiply the number of panels by their output and expected sunlight hours. For example, a 350W panel in an area with 5 sun hours per day can make about 1.75 kWh per day.
- Most homes need 20–30 panels to cover typical usage. Large families or homes with electric heating or EV charging may need more.
If your budget or roof space is limited, you can start with a smaller system and add more panels later if your inverter supports expansion.
Layout Design
- Place panels where sunlight is strongest, usually on the largest south-facing area.
- Keep panels in rows, avoid shading, and leave space for maintenance. Leave at least 18 inches of clearance from the roof edge for fire safety.
- If your roof is irregular or has several faces, split panels across multiple areas. Try to keep each group of panels facing the same direction for easier wiring.
Use solar design software or free online tools to map sun exposure and visualize the best layout for your roof.
Wiring And Inverter Location
- Plan cable routes from panels to the inverter (usually in the garage or basement). Try to minimize bends and sharp turns.
- Shorter cable runs mean less energy loss.
- Choose microinverters or optimizers if you have shading or panels on different roof faces. Microinverters can boost production if some panels are shaded while others are in full sun.
Example Layout
A 2,000 sq ft home in California uses about 800 kWh/month. With 30 panels (330W each), placed on two roof sections, you can generate up to 10,000 kWh/year, covering most needs. If one section is shaded in the morning, you can still make good use of the afternoon sun by placing some panels on the west side.
Choosing The Right Mounting Hardware
Picking the right hardware matters for safety and long-term performance. Cheap or mismatched mounts can fail and damage your roof.
Main Hardware Components
- Rails: Long metal bars that hold panels. Rails must be strong enough to handle wind and snow loads.
- Roof attachments: Connect rails to roof structure. These must be waterproofed carefully.
- Clamps: Hold panels to rails. Some clamps are adjustable for different panel sizes.
- Flashings: Waterproof covers for roof penetrations. Flashings prevent leaks and must be correctly sized for your roof material.
Materials
Most mounts are made of aluminum or stainless steel. Aluminum is light and rust-resistant, but stainless steel lasts longer in coastal regions. In salty or humid climates, stainless steel hardware prevents corrosion, which is important for system longevity.
Hardware Comparison
| Hardware Type | Material | Weather Resistance | Cost |
|---|---|---|---|
| Rails | Aluminum | Excellent | $50–$150 each |
| Roof Attachments | Stainless Steel | Superior | $40–$100 each |
| Clamps | Aluminum | Good | $10–$30 each |
| Flashings | Rubber/Metal | Good | $10–$25 each |
Non-obvious Insight
Some installers skip flashings to save time. This often leads to leaks after heavy rain. Always insist on proper waterproofing for every roof penetration. Also, check the warranty for your mounting hardware—some brands offer longer coverage, which adds peace of mind.

Credit: jmhpower.com
Safety Precautions Before Installation
Solar panel installation is risky. You’ll work on the roof, handle electrical equipment, and drill holes. Safety can’t be ignored.
Essential Safety Steps
- Wear fall protection gear: Harnesses and roof anchors. Even a single slip can cause serious injury.
- Check weather conditions; never work in rain or strong wind. Wet roofs are slippery and dangerous.
- Use insulated tools to avoid electric shocks.
- Shut off main power during wiring. Label the breaker to prevent someone from turning it back on by mistake.
- Have a partner or helper; never work alone. A second person can help with heavy lifting and emergencies.
Common Mistakes
- Not securing ladders properly. Use ladder stabilizers and tie-offs.
- Forgetting to check for overhead power lines. Stay at least 10 feet away from wires.
- Ignoring local building codes. This can result in fines or forced removal of your solar panels.
Professional Help
If you’re unsure, hire a certified installer. They know local codes and safety requirements. Professional teams also offer warranties for their work. Some electrical work must be done by a licensed electrician in many areas.
Step-by-step Guide To Mounting Solar Panels
Here’s how to mount solar panels on your roof, step by step. These instructions cover most home installations, but always adapt for your specific roof and local rules.
1. Mark Panel Locations
- Use chalk lines or markers to outline where each panel will go.
- Check spacing for rails and leave enough room for wiring.
- Double-check measurements before drilling to avoid mistakes.
2. Install Roof Attachments
- Drill pilot holes into rafters (not just the roof surface).
- Place roof attachments and secure with lag bolts.
- Add flashings to seal holes and prevent leaks.
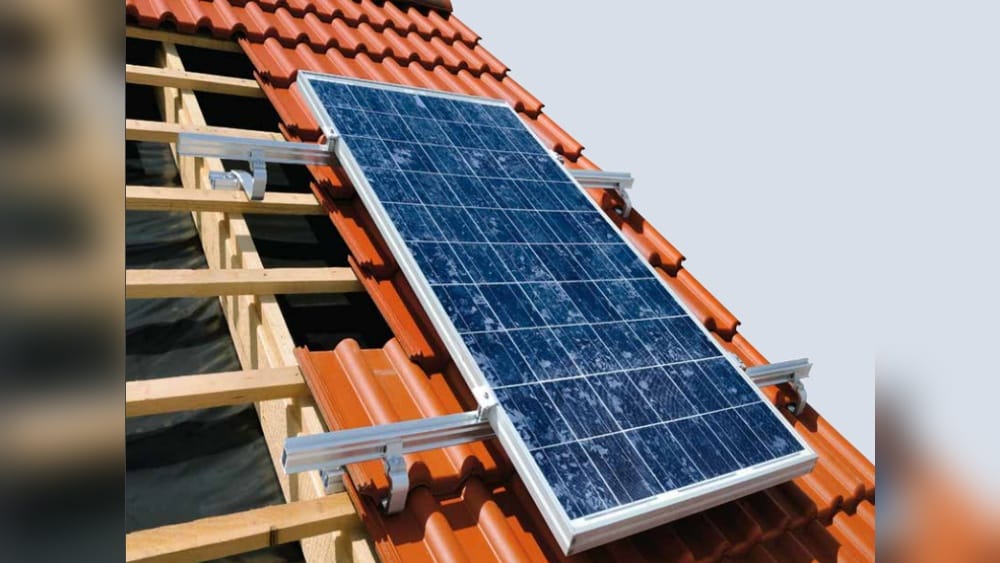
- If your roof is tile, remove tiles carefully before drilling and use tile replacement kits to avoid cracks.
3. Mount Rails
- Attach rails to roof attachments.
- Use a level to keep rails straight.
- Tighten bolts securely, but don’t over-tighten.
- Rails must be parallel to each other for panels to sit flat.
4. Attach Panels
- Place panels onto rails.
- Secure with clamps on each side.
- Double-check alignment and spacing.
- Leave a small gap between panels for airflow and expansion.
5. Connect Wiring
- Run cables from panels to inverter.
- Use waterproof cable covers.
- Connect panels in series or parallel, as planned.
- Label each wire for easy troubleshooting later.
6. Install Inverter
- Place inverter close to your main power supply.
- Connect panel wires to inverter terminals.
- Ground the system properly. Proper grounding prevents electrical fires and meets code.
7. Final Inspection
- Check all bolts, clamps, and wiring.
- Clean the panels with a soft cloth.
- Power up the system and test for correct output.
- Take time to check for loose connections or exposed wires.
Pro Tip
Always take photos at each stage. They help with warranty claims and show inspectors your work. In some areas, photo documentation is required for rebate programs.
Permits And Local Regulations
Most cities require permits for solar installations. This protects your home and ensures safe, legal work.
How To Get A Permit
- Apply at your local building department.
- Submit roof plans and panel layout.
- Show proof of structural integrity.
- Pay permit fees (usually $100–$500).
- Be prepared for questions about your electrical plan or mounting hardware.
Inspections
An inspector will visit after installation. They check for:
- Proper mounting
- Electrical safety
- Code compliance
- Some areas require both a building and electrical inspection.
Hoa Rules
If you live in a community with a Homeowners Association, check their rules. Some HOAs limit panel placement or require approval. Contact your HOA early to avoid delays.
Non-obvious Insight
Some states let you bypass HOA bans for solar if you show energy savings. Always research your legal rights. For example, California’s Solar Rights Act limits HOA restrictions.
Common Mistakes To Avoid
Many beginners make mistakes that cost time and money. Here are some to watch for:
- Ignoring roof age: Mounting panels on an old roof leads to double costs.
- Skipping waterproofing: Leaks cause expensive roof repairs.
- Wrong tilt angle: Panels set too flat or steep lose efficiency.
- Placing panels under shade: Even partial shade hurts output.
- Poor cable management: Loose cables can cause fires or damage.
- Not following local codes: Fines and forced removal are possible.
- Underestimating weight: Weak roofs may collapse under extra load.
- Not checking for pests: Birds and squirrels can nest under panels and damage wiring.
Expert Tip
Always ask for a detailed quote and timeline from installers. Hidden costs often appear after work begins. Insist on a complete list of fees before signing a contract.
Maintenance And Monitoring
After installation, you need to maintain and monitor your panels for best results.
Cleaning Panels
- Dust, leaves, and bird droppings reduce efficiency.
- Clean panels every 3–6 months with water and a soft brush.
- Avoid harsh chemicals or abrasive pads.
- Clean in the morning or evening when panels are cool to prevent cracking.
Inspecting Hardware
- Check rails and clamps for rust or looseness yearly.
- Tighten bolts as needed.
- After storms or high winds, inspect for damage or shifted panels.
Monitoring Output
- Use apps or monitoring systems to track power production.
- If output drops, check for shading, dirt, or electrical issues.
- Some inverters send alerts if a panel isn’t working.
Non-obvious Insight
Some panels come with built-in monitoring. This helps spot issues early, but many homeowners miss this feature when buying. Ask your installer if monitoring is included, and choose one with real-time alerts for peace of mind.
When To Hire A Professional Installer
DIY installation is possible, but hiring a professional has clear advantages.
Benefits
- Faster installation (usually 1–2 days)
- Warranty on labor and hardware
- Expert knowledge of permits and codes
- Access to better equipment and bulk pricing
Cost
Professional installation adds about $2,000–$5,000 to your system. But it can prevent mistakes and future repairs.
Finding The Right Installer
- Look for NABCEP certification.
- Check reviews and ask for references.
- Compare quotes from at least three companies.
- Ask about after-sales service and maintenance.
Example
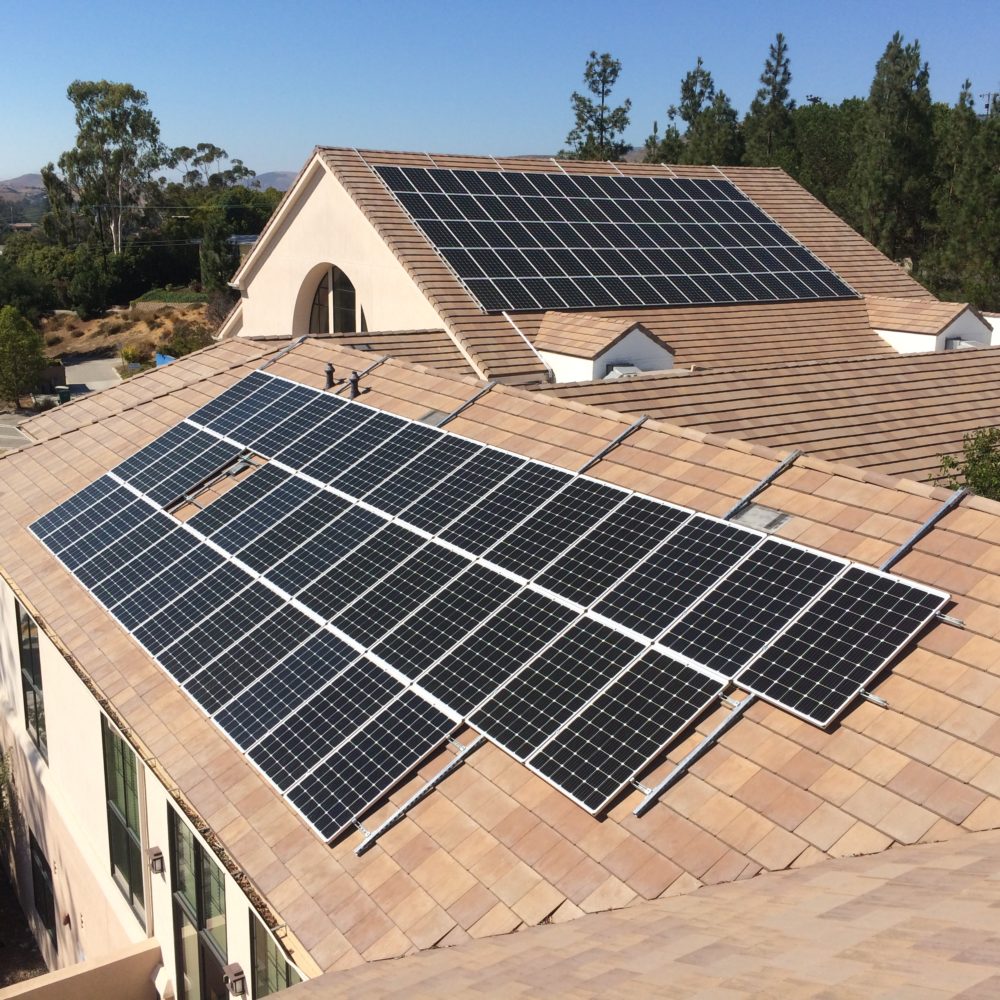
A homeowner in Texas hired a certified installer and got the system running in two days, with all permits handled. DIY would have taken weeks and risked errors. The installer also provided a 10-year workmanship warranty.
Credit: www.solarpowerworldonline.com
Cost Breakdown And Roi
Installing solar panels is an investment. Here’s how the costs and returns typically look.
Installation Costs
- Panels: $6,000–$10,000 (20–30 panels)
- Mounting hardware: $2,000–$3,000
- Inverter: $1,000–$2,000
- Labor: $2,000–$5,000 (if hiring)
- Permits and fees: $500–$1,000
Total Cost: $11,500–$21,000
Savings
- Average electricity bill savings: $1,200–$2,000/year
- Payback period: 6–10 years
Incentives
Many states offer tax credits and rebates. The US federal tax credit covers 30% of system costs. This can reduce upfront costs and speed up payback.
Roi Example
A $15,000 system in California can pay for itself in 7 years, then deliver free electricity for another 18+ years. If you finance your system, monthly savings often cover the loan payment.
External Resource
For more details on incentives, visit the official US Department of Energy.
Frequently Asked Questions
How Long Do Solar Panels Last On A Roof?
Most solar panels last 25–30 years. Mounting hardware usually matches this lifespan. Panels may lose efficiency after 20 years but still produce power. After 25 years, most panels still make about 80% of their original output.
Can I Install Solar Panels Myself?
Yes, you can install panels if you have basic DIY skills and follow safety rules. But permits, inspections, and electrical work require knowledge and confidence. If unsure, hire a professional. DIY installation also means you’re responsible for any problems that arise.
Do Solar Panels Damage The Roof?
Properly installed panels don’t damage your roof. Use flashings and secure attachments to prevent leaks. Panels can even protect the roof from weather. In some cases, panels extend roof life by shielding it from sun and rain.
What Happens If My Roof Needs Repairs After Installation?
If your roof needs repairs, panels must be removed first. This costs extra. That’s why it’s best to install panels on a newer roof or after roof repairs. Some companies offer “removal and reinstall” service at a discount if they installed the panels.
How Much Sunlight Do I Need For Solar Panels To Work?
Solar panels need direct sunlight for best results. Most US homes get enough sun for solar, but shade from trees or buildings reduces output. Panels still work on cloudy days, but less efficiently. If you live in a very cloudy or shaded area, consider a ground-mounted system in a sunnier spot.
Mounting solar panels on your roof is a big step toward energy independence. With careful planning, the right materials, and attention to safety, you can enjoy clean power and lower bills for decades. The process isn’t as hard as it looks if you break it down and follow best practices.
Whether you install yourself or hire a pro, understanding each step helps you make smart decisions and avoid costly mistakes. Taking time to research and plan upfront pays off with years of reliable, affordable energy for your home.
Credit: nakedsolar.co.uk