
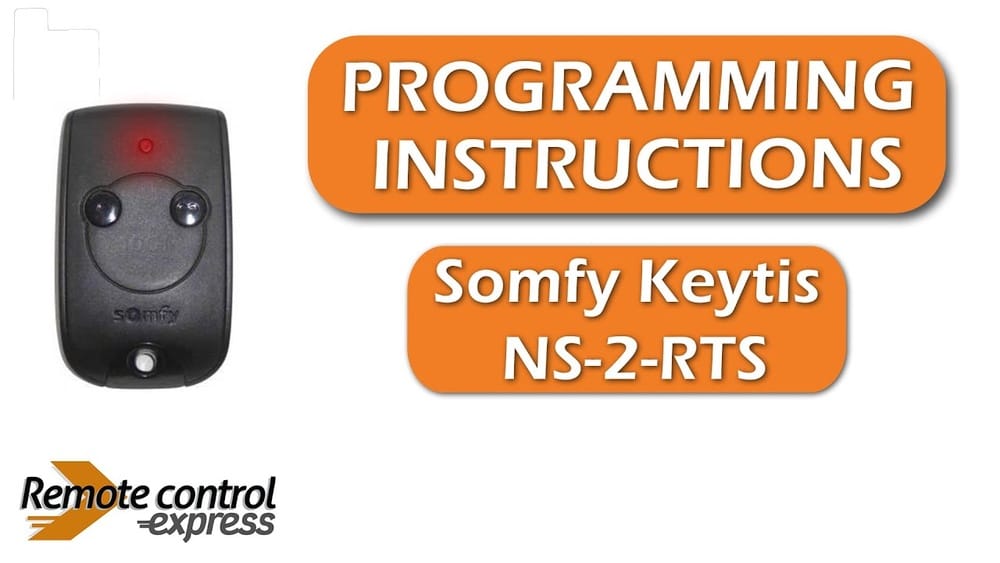
Programming a remote control can feel like a technical puzzle, especially when you’re new to home automation. If you own a Somfy remote control, you probably want your motorized blinds, shades, or awnings to work smoothly with just a click. The good news is, programming a Somfy remote is easier than you might think. With the right steps and a bit of patience, you can set up your system in less than an hour—even if you’ve never done it before.
In this guide, I’ll walk you through the entire process. You’ll learn about different types of Somfy remotes, what you need before you start, and step-by-step instructions for both single and multiple device setups. We’ll also cover troubleshooting, advanced programming, and some common mistakes beginners make.
By the end, you’ll have the confidence to program your Somfy remote like a pro.
Understanding Somfy Remote Controls
Before jumping into programming, it’s important to know what type of Somfy remote control you have. Different models offer different features. Making the right identification saves you time and avoids confusion during setup.
Types Of Somfy Remotes
- Situo 1/5: Basic remotes for controlling one or five channels. Each channel can operate one or a group of motors.
- Telis 1/4/16 RTS: Radio Technology Somfy (RTS) remotes, popular for their wireless convenience. They come in single, four, or sixteen channel versions.
- Smoove Wall Switch: Wall-mounted, touch-sensitive controls for a fixed location.
- Nina Timer/Timer IO: Advanced remotes with timers and scheduling, compatible with both RTS and IO Homecontrol motors.
- Telis Patio or Lounge: Designed for outdoor or stylish indoor use, with weather-resistant casing.
Somfy also offers specialized remotes for curtains, projection screens, and garage doors. Always check your motor system compatibility, as RTS and IO are not cross-compatible.
How Somfy Remote Controls Work
Somfy remotes use radio frequency (RF) signals—typically 433.42 MHz for RTS models. This means you don’t need a direct line of sight to your window coverings, but thick walls and metal can sometimes block the signal.
Each motor has a memory chip inside. When you program a remote, you’re pairing its unique signal with the motor’s memory. This allows you to add, remove, or reassign remotes as your needs change.
Preparing For Programming
A successful setup starts with good preparation. Skipping these steps can lead to frustration and wasted time.
What You Need
- Your Somfy remote control (with working batteries)
- Access to the motorized device (blinds, awning, shade, etc.)
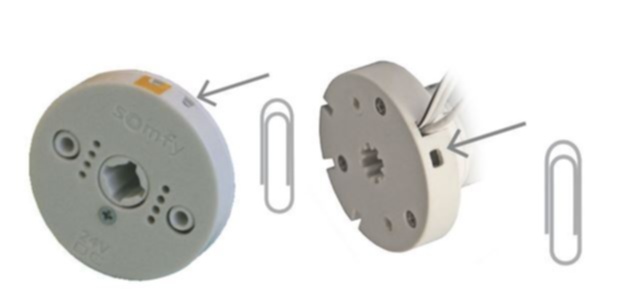
- A small tool (paperclip or pin) for pressing the programming button, if needed
- A ladder or step stool (if your device is mounted high)
- The current user manual for your remote and motor model
If you don’t have the manual, you can usually find it on the official Somfy website or the retailer’s support page.
Safety Precautions
- Turn off power to the motor if you need to handle wiring or install new motors.
- Keep hands and tools away from moving parts during programming.
- Ensure children and pets stay clear of the work area.
Common Mistakes To Avoid
- Trying to program with low or dead remote batteries.
- Skipping the motor reset step when pairing new remotes.
- Not noting the current programming—this can overwrite your existing settings.
Step-by-step: Programming A Single Somfy Remote
Let’s start with the basics. Most homes use a single-channel remote for one device. Here’s how to program it.
1. Reset The Motor To Factory Settings (if Needed)
If you’re working with a brand new motor or want to erase old settings, you should reset it:
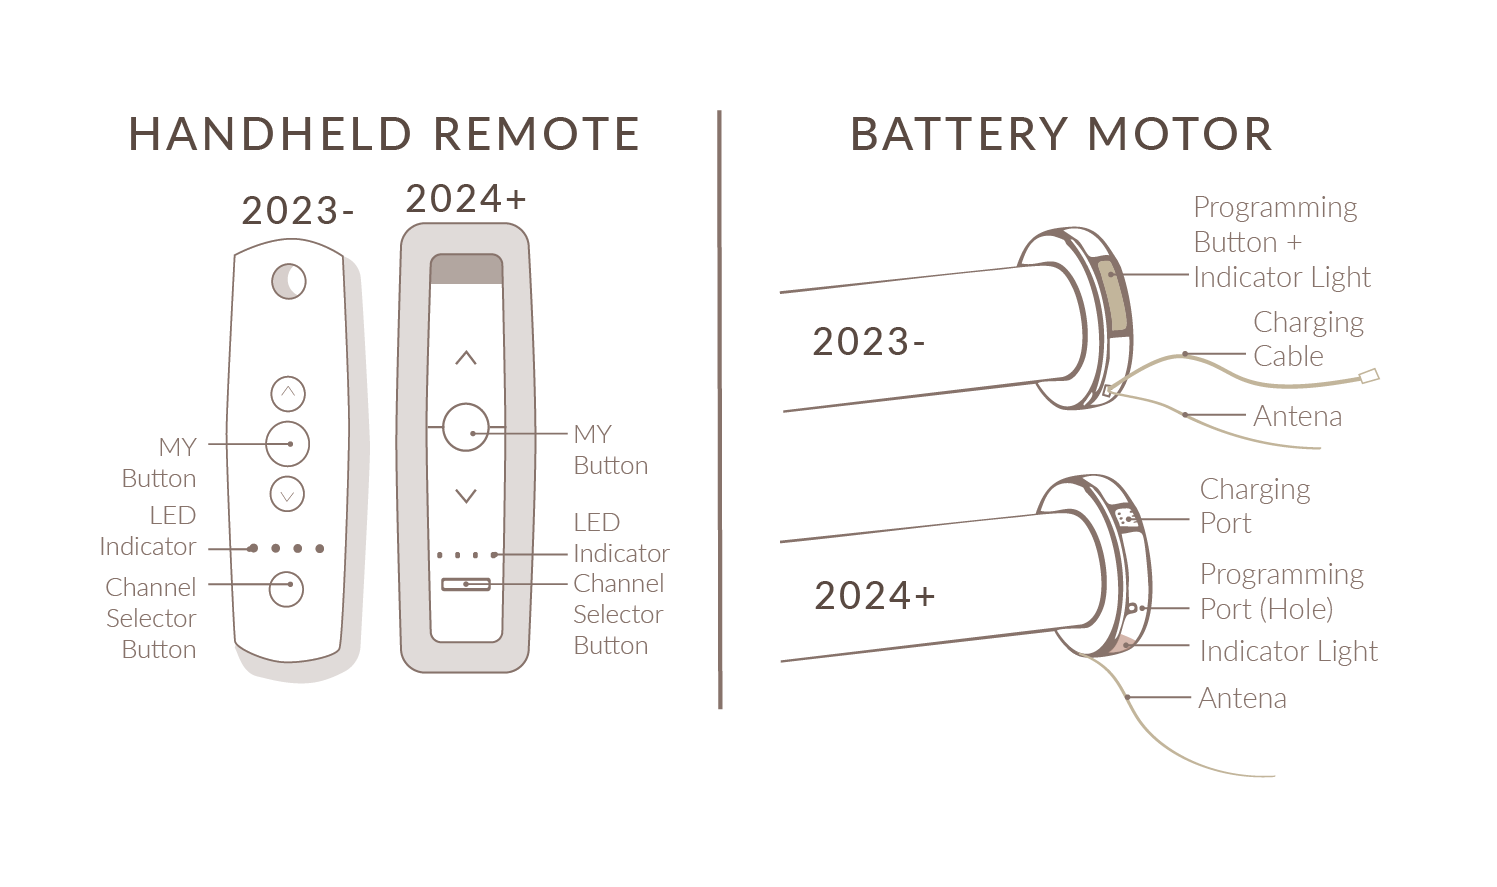
- Press and hold the motor’s programming button (often on the motor head or power cable) for about 12 seconds.
- The motor will jog (move up and down quickly) once after 2 seconds, and again after about 10 seconds.
- Release the button after the second jog. The motor is now in factory mode.
This step is critical if you’re pairing a new remote or troubleshooting.
2. Set The Motor Into Programming Mode
- Briefly press the programming button on the motor. The motor will jog once, showing it’s ready to pair.
- For some models, you may need to use a paperclip or pin to press a recessed button.
3. Pair The Remote
- Press and hold the programming button on the remote (usually on the back, labeled “PROG”).
- The motor will jog again.
- Release the button. The remote is now paired.
4. Test The Remote
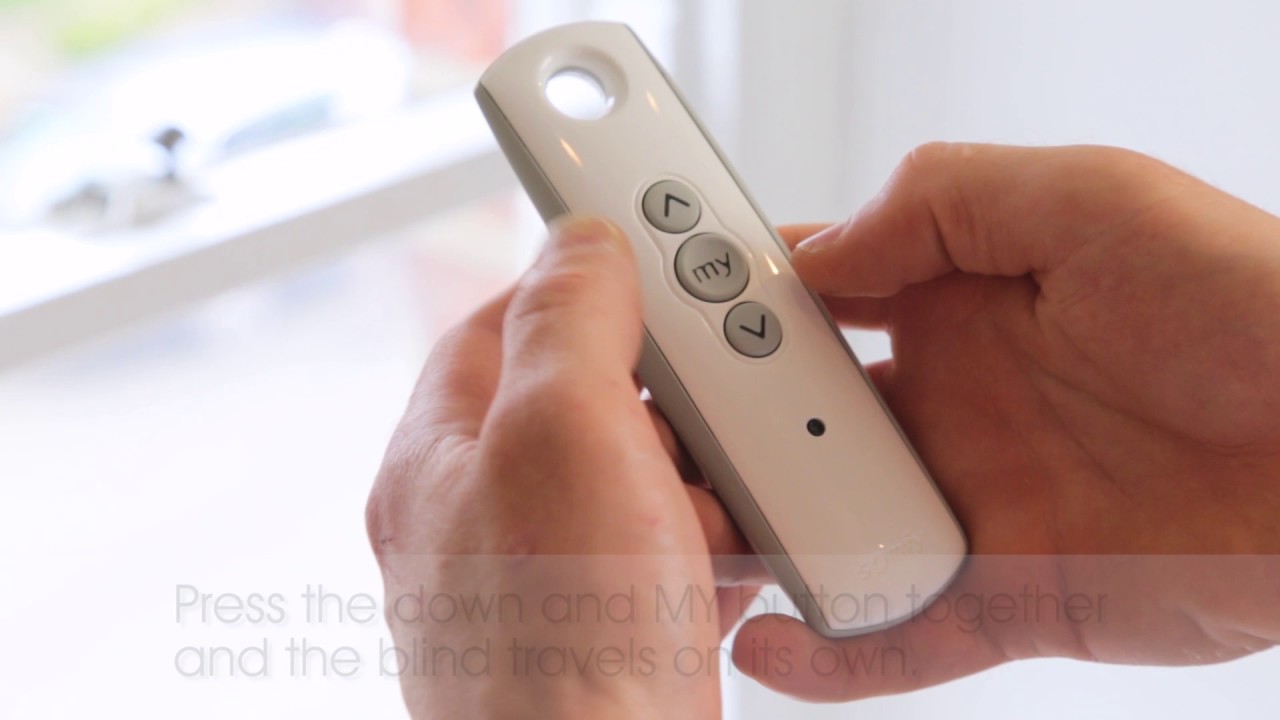
- Press the up, down, and stop buttons.
- The window covering should respond to each command.
- If not, repeat the pairing steps carefully.
5. Set Limits (top And Bottom Positions)
- Move the shade to the top position using the remote.
- Press and hold both the up and down buttons until the motor jogs.
- Adjust the position with single presses if needed.
- Confirm the limit by pressing the stop button.
- Repeat for the bottom position.
Setting limits prevents the motor from over-running and damaging your blinds.
6. Save And Exit Programming Mode
- Press the stop button for two seconds to save.
- The motor will jog to indicate success.
Pro tip: If your remote controls multiple channels, select the correct channel before pairing.
Programming Multiple Devices Or Channels
If you have more than one motorized product, you’ll want a multi-channel remote. This allows individual or group control.
How Multi-channel Programming Works
Each channel on the remote acts like a separate remote. You can assign a motor to a single channel or to multiple channels for group operation.
Steps For Multi-channel Programming
- Select the channel you want to program (use the channel selector button).
- Put the motor in programming mode (as described above).
- Pair the remote to that channel by holding the PROG button.
- Test and set limits for each device.
- To create a group, assign the same motor to more than one channel.
Example Use Case
Suppose you have three windows and a patio awning:
- Channel 1: Living room blind
- Channel 2: Kitchen blind
- Channel 3: Bedroom blind
- Channel 4: Patio awning
- Channel 5: All devices together
You can control each window separately, or all at once on Channel 5.
Data Table: Remote Models And Channel Capacity
Here’s a quick reference for common Somfy remote models:
| Remote Model | Number of Channels | Special Features |
|---|---|---|
| Situo 1 RTS | 1 | Basic single device control |
| Telis 4 RTS | 4 | Multi-device, group control |
| Telis 16 RTS | 16 | Large installations, group programming |
| Nina Timer IO | Multiple | Scheduling, smart features |
Advanced Programming: Timers, Scenes, And Smart Home Integration
Somfy remotes are not just for basic up/down movement. Many users want timers, scenes, and smart home compatibility.
Setting Up Timers
If your remote has a display (like the Nina Timer), you can program it to open or close blinds at set times.
- Access the timer menu.
- Set open/close times for weekdays and weekends.
- Assign timers to individual channels or groups.
Timers save energy and improve security by simulating presence when you’re away.
Creating Scenes
A scene is a custom preset—for example, “Movie Night” could close all shades and lower the projector screen.
- Select the desired channel(s).
- Adjust each device to the desired position.
- Save the scene using the remote’s menu or a “scene” button.
Integrating With Smart Home Systems
Many users want to control Somfy devices with Amazon Alexa, Google Home, or home automation hubs.
- Use the Somfy TaHoma or Connexoon hub to connect your remotes to Wi-Fi.
- Follow the app instructions to add devices.
- Link the hub to your smart assistant.
This integration lets you use voice commands or automate based on sunrise/sunset. Not all remotes support direct smart integration—check compatibility before buying new devices.
Comparison Table: Basic Vs Advanced Programming Features
| Feature | Basic Remotes (RTS) | Advanced Remotes (IO/Nina) |
|---|---|---|
| Manual Control | Yes | Yes |
| Group Control | Limited | Advanced |
| Timers | No | Yes |
| Scenes | No | Yes |
| Smart Home Integration | With external hub | Direct or via hub |
Troubleshooting Common Problems
Even with clear instructions, things don’t always go as planned. Here’s how to solve the most common issues when programming a Somfy remote control.
The Motor Doesn’t Respond
- Check the batteries in your remote.
- Make sure you’re within range (typically 65 feet/20 meters).
- Confirm the motor is powered and not in sleep mode.
- Retry the programming process step by step.
The Remote Was Working, But Stopped
- Replace the batteries.
- Reboot the motor by cutting power for 2 minutes, then restoring it.
- Look for interference from nearby electronics (Wi-Fi routers, microwaves).
Can’t Set Upper/lower Limits
- Some motors require a specific sequence to set limits—review your manual.
- If limits won’t save, reset the motor and try again.
- Make small adjustments with the remote instead of holding buttons.
Accidentally Erased All Programming
- Perform a full motor reset (hold programming button for 12+ seconds).
- Re-pair all remotes as if starting from scratch.
Device Moves In Wrong Direction
- Swap the up/down commands by pressing both together for 7 seconds (depends on model).
- Refer to your manual for reversing directions.
Data Table: Quick Troubleshooting Guide
| Problem | Possible Cause | Solution |
|---|---|---|
| No response | Dead batteries | Replace batteries |
| Partial movement | Limits not set | Reprogram limit positions |
| Wrong direction | Motor polarity | Reverse direction via remote |
| Loss of memory | Power surge | Reset and reprogram |
Credit: www.somfysystems.com
Extra Tips For Smooth Programming
Some advice comes only from hands-on experience. Here are insights you won’t find in every manual.
- Label your channels on the remote with a sticker or marker. This helps avoid confusion, especially in large homes.
- Keep a programming log—write down which channel controls which device, and who last changed the settings.
- If you’re programming multiple remotes, do one at a time. Trying to program several at once often leads to errors.
- Update firmware on smart hubs regularly. Some integration issues are fixed with simple updates.
- When adding new devices, always test each before mounting blinds or shades fully. It’s easier to fix problems before final installation.
- If your home has thick walls, consider an external antenna or Somfy repeater to boost signal strength.
Maintenance And Battery Care
Programming is only the beginning. To keep your Somfy remote control working well, regular maintenance is important.
- Change batteries yearly or when the remote feels sluggish.
- Clean the remote with a soft cloth. Avoid water or harsh chemicals.
- For wall-mounted switches, check for dust buildup inside the cover.
- Store spare remotes in a safe place—away from children, heat, and direct sunlight.
If you use rechargeable batteries, ensure they match the voltage specified in your manual.
When To Call A Professional
Most users can program a Somfy remote by themselves. However, certain situations call for expert help:
- Installing multiple motors in a complex home automation system.
- Integrating with advanced smart home platforms (like KNX or Control4).
- Replacing hardwired switches or doing electrical work.
- If you’ve tried all troubleshooting steps and the device still won’t respond.
Professional installation may cost more upfront, but saves time and prevents damage to expensive motorized shades.
Where To Find Official Support
Somfy offers extensive support through their website, including manuals, videos, and a customer hotline. For specific instructions by model, visit the Somfy official support page.
You can also find community forums and YouTube channels with video guides. Just ensure you’re following instructions for your exact model and region.
Credit: www.youtube.com
Real-world Examples
Programming a Somfy remote isn’t just for tech enthusiasts. Here are some real-life scenarios:
- A busy parent programs blinds to close at sunset, keeping the house cool and saving on air conditioning.
- A small business owner uses group channels to close all storefront shades at closing time, improving security.
- A traveler sets up scenes that mimic presence, opening and closing blinds during vacation for added security.
In each case, the remote control becomes an everyday tool—not a source of stress.
Frequently Asked Questions
How Do I Reset My Somfy Remote Control?
Most Somfy remotes reset by holding the PROG button for 12 seconds. The exact method depends on the model. Check your manual, or visit the Somfy support site. Resetting erases all programming, so only do this if you want to start from scratch.
Can I Use One Somfy Remote For Multiple Devices?
Yes. Multi-channel remotes like the Telis 4 or 16 allow you to control several devices, either individually or in groups. Assign each device to a separate channel, or create groups for simultaneous control.
Why Won’t My Somfy Remote Pair With My Motor?
Check the batteries first. Make sure you’ve put the motor into programming mode (watch for the “jog”). If the remote is still not pairing, do a full reset on the motor and try again. Interference or distance can also affect pairing.
How Do I Change The Direction Of My Blinds With The Remote?
Press and hold both the up and down buttons together for about 7 seconds, until the motor jogs. This reverses the direction. Some models have a dedicated direction button or require a different sequence—always consult your manual.
Is Somfy Compatible With Alexa Or Google Home?
Yes, but you’ll need a compatible hub like Somfy TaHoma or Connexoon. These hubs bridge the remote control and your smart home system. Once set up, you can use voice commands to control your shades or blinds.
Getting your Somfy remote control programmed may seem intimidating, but it’s a straightforward process once you break it down. With a little patience and careful attention to the steps, you’ll enjoy smooth, reliable operation of your motorized shades or awnings. Remember, preparation and small details matter—label your channels, keep batteries fresh, and don’t hesitate to ask for help if needed. Home automation should make your life easier, not harder. By following this guide, you’re well on your way to mastering your Somfy system and enjoying a more comfortable, convenient home.
Credit: www.quiltcraft.com