
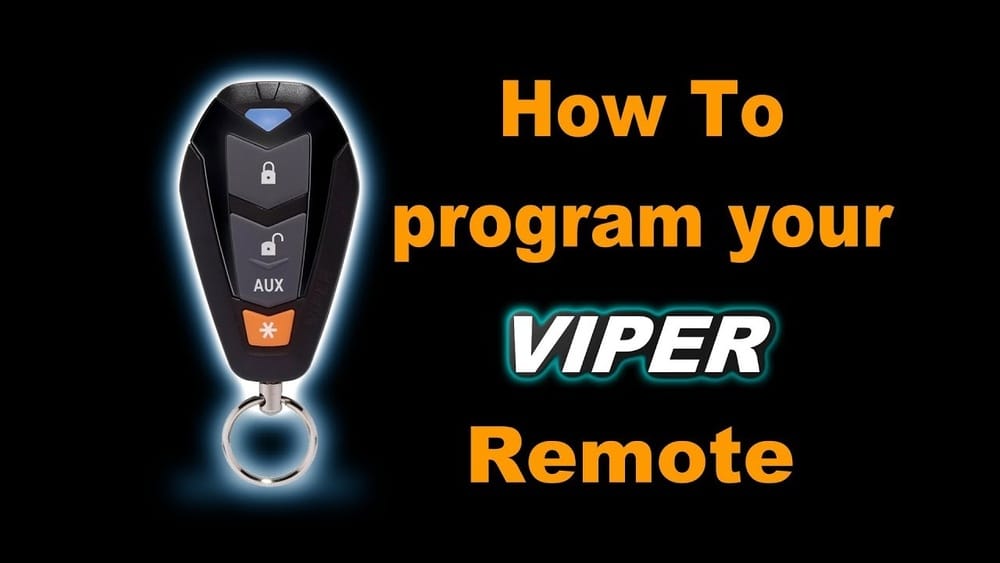
Programming a Viper remote control is not just a technical task—it’s about making your car safer and your daily routine easier. If you’ve ever lost your remote, bought a new one, or noticed your remote isn’t working, learning to program it yourself can save you time and money.
Many people think this process is complicated, but with the right instructions, anyone can do it. Whether you’re a car owner, a beginner, or someone who wants to understand more about car security, this guide will walk you through every step.
You’ll also learn helpful tips, common mistakes to avoid, and how to troubleshoot problems along the way. Even if you have no technical background, this article will break things down into clear, manageable steps. You’ll gain not only the skill to program your Viper remote, but also a stronger sense of control over your vehicle’s safety.
Understanding Viper Remote Controls
Before you start programming, it’s important to know what a Viper remote control is and how it works. Viper is a popular brand for car security and remote start systems. Their remotes allow you to lock and unlock your car, start the engine from a distance, and sometimes control extra features like trunk release or panic alarm. These remotes are designed to make your life more convenient, especially in cold or hot weather, or when you want to locate your car in a crowded parking lot.
Types Of Viper Remote Controls
There are several models of Viper remotes, each with different features. Knowing your model is key because programming steps can vary.
- 1-way remotes: Send commands to the car, but don’t receive feedback. You press a button, and the remote sends a signal.
- 2-way remotes: Send commands and get a confirmation signal back (like a beep or vibration). This means you know if your command was received.
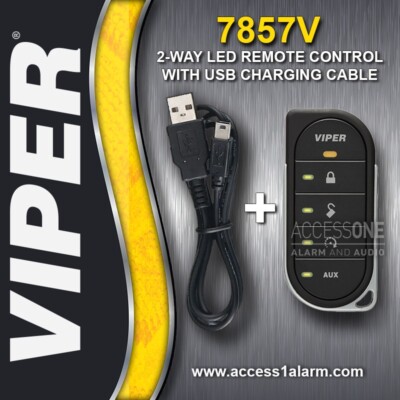
- LCD screen remotes: Show status information on a screen. They might show if the car is locked or if the engine is running.
- Smartphone remotes: Use your phone instead of a traditional remote. These work through an app and can offer features like GPS tracking or instant alerts.
If you’re unsure which model you have, check the back of the remote or the instruction manual. Most models have a number like “474V” or “7756V” printed on them. This model number is important if you ever need support or need to order a replacement.
Sometimes, remotes look very similar but have different features inside. For example, a 1-way and a 2-way remote could look almost the same, but the 2-way will usually have an extra LED or a small speaker.
Viper Remote Features
Common features include:
- Lock/Unlock
- Remote Start
- Trunk Release
- Panic Alarm
- Auxiliary Functions (like window control)
Not every remote supports all features. For example, older 1-way remotes usually only lock/unlock and trigger alarms, while newer 2-way or LCD remotes offer more options. Some features also depend on what your car system supports. For instance, you may have a remote with a trunk button, but if your car’s system doesn’t have a trunk release module, that button will not work.
Some advanced remotes allow customizing which buttons do what, or support multiple cars with one remote—though this requires additional programming steps.
Why Programming A Viper Remote Matters
Programming your remote is about making sure it works with your car’s security system. If you get a new remote, replace the battery, or reset the system, programming links the remote to your car. Without this link, your remote is just a piece of plastic—it won’t do anything.
Key reasons to program:
- Replacing a lost or broken remote
- Adding a new remote for a family member
- After battery replacement (sometimes remotes lose memory)
- After system reset or car battery change
Programming is also a security measure—only programmed remotes can control your car. That means others cannot unlock or start your vehicle unless they have access to your programmed remote. This makes it much harder for thieves to clone or use unauthorized remotes.
Another reason to program is if you buy a used car with a Viper system. You should clear out old remotes and add your own, so previous owners no longer have access.
Credit: www.ebay.com
Things You Need Before Programming
Getting ready saves time and prevents mistakes. Here’s what you need:
- Your Viper remote(s): New or existing.
- Car keys: To turn the ignition during programming.
- Access to your car’s Viper system: Usually located under the dashboard.
- Manual/model number: Check your remote and system for the correct instructions.
- Patience: Some steps require timing and precision.
In some cases, you may need a valet switch (a small button installed in your car for programming), and the LED indicator on your dashboard. If you’re not sure where these are, look in your car manual or ask a dealer.
A few things can catch you off guard. For example, if your car has had electrical work or a stereo system installed, wiring might be moved. Take a flashlight to find hidden components. If your car has a custom dashboard, the valet switch could be in a less obvious spot.
It’s also smart to have extra batteries for your remote. Even remotes that seem new can have weak batteries from sitting on shelves.
Safety Tips Before You Start
It’s easy to overlook basic safety when programming electronics. Here are some tips:
- Work in a safe, dry area: Avoid moisture or extreme heat. Electronics and water don’t mix.
- Turn off the engine: Make sure your car is parked and the engine is off.
- Disconnect unnecessary electronics: Remove any devices that might interfere (like Bluetooth adapters).
- Check your battery: Both your car and remote should have good batteries.
Programming often involves turning the ignition on and off. Never leave your car running unattended during the process. If you’re working in a garage, make sure there’s enough ventilation to avoid breathing exhaust fumes.
It’s also wise to keep a window slightly open, just in case the system locks the doors during programming. That way, you won’t lock yourself out.
Step-by-step Guide To Programming A Viper Remote
Now, let’s walk through the programming process. Most Viper remotes use similar steps, but always check your manual for details. The following guide covers the most common models.
Step 1: Locate The Valet Switch And Led
The valet switch is usually hidden under the dashboard, near your left knee. The LED indicator is a small light on your dashboard. You’ll need both for programming.
If you can’t find the valet switch, try to look under the steering column, near the pedals, or in the fuse box area. The LED is often a small, round light near the windshield or on the center console.
Step 2: Prepare The Car
- Sit inside the car and close all doors. If doors are open, some systems will not enter programming mode.
- Insert the key into the ignition, but don’t start the engine.
If your car has push-button start, refer to your manual for the correct way to turn the ignition “ON” without starting the engine. Usually, this means pressing the start button without pressing the brake pedal.
Step 3: Enter Programming Mode
- Turn the ignition ON (not start, just ON).
- Press and release the valet switch once for each remote you want to program. For example, to program two remotes, press twice.
- The LED indicator will turn on or blink, signaling programming mode.
Some models require you to press the valet switch within a certain time frame (for example, 5 seconds). If you wait too long, the system will exit programming mode, and you’ll have to start over.
Step 4: Program The Remote
- Press the lock button on the remote. The LED will blink or stay solid to confirm.
- If you have more remotes, repeat the process for each.
- Turn the ignition OFF to exit programming mode.
On some remotes, you may need to press both the lock and unlock buttons together. If the LED doesn’t respond, check the battery or try again.
Step 5: Test Your Remote
After programming, test the remote:
- Lock and unlock the doors.
- Try remote start if available.
- Check trunk release and panic alarm.
If the remote doesn’t work, repeat the steps and check for mistakes. Sometimes, waiting 10–15 seconds after turning the ignition off helps the system reset.
If you notice that only some features work (for example, lock/unlock but not remote start), your car system may not support all functions, or an additional module may be needed.
Programming Different Models: A Closer Look
Some Viper remotes require special steps. Here’s a breakdown for popular models.
Programming A 7756v Remote
The 7756V is a 2-way remote with advanced features.
- Enter programming mode by turning ignition ON and pressing the valet switch.
- Press the lock button until the LED blinks.
- Confirm with the unlock button.
- Repeat for all remotes.
- Turn ignition OFF to finish.
With this model, you might also hear a beep or feel a vibration when programming is successful. This is one of the benefits of 2-way remotes—they give you feedback.
Programming An Older 474v Remote
Older models like 474V use simpler steps.
- Turn ignition ON.
- Press valet switch.
- Press lock button on remote.
- Wait for LED confirmation.
- Turn ignition OFF.
These remotes usually do not give as much feedback, so watch the LED closely. If you don’t see a response, check the battery or repeat the steps.
Programming Smartphone Remotes
For smartphone remotes, download the Viper app, connect via Bluetooth, and follow on-screen instructions. These often require entering a PIN sent to your phone.
You may need an additional Viper SmartStart module installed in your car. Make sure your phone’s Bluetooth is turned on, and that you have a stable internet connection for the setup process.
Comparison Table: Viper Remote Programming Steps
Here’s a quick reference for some models:
| Remote Model | Programming Steps | Special Requirements |
|---|---|---|
| 7756V | Ignition ON, valet switch, lock/unlock buttons | 2-way feedback, LED confirmation |
| 474V | Ignition ON, valet switch, lock button | Simple LED, single feedback |
| Smartphone | App setup, Bluetooth, PIN entry | Requires smartphone, app download |
Troubleshooting Common Problems
Programming doesn’t always work the first time. Here’s how to fix common issues.
Remote Not Responding
- Check batteries: Weak batteries cause problems.
- Check distance: Stand close to the car when programming.
- Check for interference: Other electronics may block signals.
If you are in a parking lot with many cars, move to a less crowded area. Sometimes, other remote signals can interfere.
Led Doesn’t Light Up
- Faulty valet switch: Try pressing harder or check wiring.
- System locked: Some cars need the doors to be unlocked first.
If pressing the switch doesn’t work, try using a pen or a small tool, but don’t force it.
Remote Works, But Some Functions Don’t
- Feature not supported: Your remote may not support all features.
- System not installed: Extra features like trunk release require separate installation.
Sometimes, you need to activate features in your car’s main system as well. Check your main Viper system manual for details.
Programming Fails After Battery Change
- Repeat programming: After replacing batteries, remotes may lose memory.
- Check manual: Some models require a reset before programming.
If you replaced your car battery or had electrical work done, the remote might need to be re-linked.
Comparison Table: Common Problems And Solutions
| Problem | Possible Cause | Solution |
|---|---|---|
| Remote not responding | Weak battery | Replace battery, retry |
| LED not lighting | Faulty switch | Check wiring, press harder |
| Functions missing | Unsupported feature | Check remote model |
| Programming fails | Incorrect steps | Repeat process, check manual |
Tips For Smooth Programming
Many people miss small details that make programming easier. Here are some non-obvious insights:
- Timing matters: Pressing buttons too slowly or too quickly can fail the process. Most systems have a time window (like 5–10 seconds) for each step.
- Use fresh batteries: Even new remotes can ship with weak batteries. Always replace them before starting.
- Program all remotes at once: If you want multiple remotes, program them together. Programming one at a time can erase the memory of previous remotes.
- Check door status: Some systems require all doors closed or locked.
- Don’t rush: Waiting a few seconds between steps helps avoid errors.
- Keep extra remotes away: During programming, only have the remotes you want to program nearby. Other remotes can interfere with the signal.
If you’re unsure, try a practice run without pressing any remote buttons, just to learn where switches and LEDs are.
Real-world Example: Programming For A Family
Imagine you buy a new car and want your spouse to have their own remote. You buy a second Viper remote and need to program it. If you only program the new remote, the old remote may stop working. The best practice is to program both remotes during the same session.
This ensures both are linked to the car’s system. Many users forget this, leading to frustration when only one remote works.
For families, it’s common to have multiple drivers. Each person may want their own remote. It’s a good idea to label remotes with a sticker or a keychain tag, so each family member knows which remote is theirs. Also, keep a written record of when you last programmed the remotes.
This can help if you need to troubleshoot later.
Advanced Programming Features
Some Viper remotes allow for extra customization. If you want to adjust settings like remote start timing or auxiliary functions, advanced programming is required.
Adjusting Remote Start Timer
On 2-way or LCD remotes, you can set how long the car runs after remote start.
- Enter advanced mode (see manual).
- Use lock/unlock buttons to set timer (usually in minutes).
- Confirm with the valet switch.
- Exit programming mode.
For example, you might set your car to run for 10 minutes in winter, so it warms up before you get in. This feature is especially useful in areas with extreme temperatures.
Adding Auxiliary Functions
Auxiliary functions (like window roll-down) require special wiring and programming.
- Install auxiliary module (often by a professional).
- Enter programming mode.
- Assign auxiliary function to a button (lock/unlock or special button).
- Confirm with LED and test.
Some remotes let you control multiple cars. This is done by holding a specific button when programming and assigning a car number.
Comparison Table: Basic Vs Advanced Programming
| Feature | Basic Programming | Advanced Programming |
|---|---|---|
| Lock/Unlock | Standard | Custom timing, multi-car |
| Remote Start | On/Off | Run timer, temperature control |
| Auxiliary | Usually not available | Window, trunk, custom features |
When To Seek Professional Help
Sometimes programming isn’t possible at home. Here are signs you should ask a professional:
- Remote still doesn’t work after multiple tries
- Valet switch is broken or missing
- Car security system is damaged
- You want advanced features installed
Dealers and car security shops have special tools and knowledge. While it costs more, they can fix complex problems and ensure your system is secure.
It’s also wise to ask for help if your car has been modified or if you suspect previous owners made changes to the wiring. Professionals can quickly identify problems that might take you hours to find.
Keeping Your Viper Remote Safe
Once your remote is programmed, it’s important to protect it. Losing your remote or damaging it can leave your car vulnerable.
Tips for safety:
- Keep remotes away from water and heat
- Store a spare remote in a safe place
- Replace batteries regularly
- Label each remote (if you have several)
Also, if you sell your car or buy a used one, always check and reprogram remotes. This prevents old remotes from accessing your car.
Another good habit is to check the remote every few months. Try all buttons and functions. This helps you spot weak batteries or problems before you’re stuck outside your car.

Credit: www.youtube.com
Data And Statistics: Viper Remote Usage
Viper is a leader in car security. Here are some statistics:
- Over 10 million Viper remotes are in use worldwide.
- Around 70% of users program their remotes at home.
- Most remote programming failures are caused by weak batteries or incorrect steps.
- The average remote lasts 3-5 years before needing replacement.
These numbers show that most people can program their remotes successfully at home. The most common problems are easy to fix—fresh batteries and careful attention to steps make a big difference.
How Viper Remote Programming Compares To Other Brands
Viper is known for easy programming, but other brands have their own systems. Here’s a brief comparison.
- Viper: Uses valet switch and LED, easy for beginners.
- Clifford: Similar steps, but more advanced features.
- Compustar: Requires special tools for some models.
- Avital: Simple programming, but fewer features.
If you switch brands, always check their manuals. Some brands need dealer help or extra equipment.
Some brands also have customer support lines or online videos to help with programming. If you’re unsure, searching for your car and remote model together can reveal helpful guides.

Credit: www.ebay.com
Non-obvious Insights For Beginners
Beginners often miss these key points:
- Programming all remotes together: If you add a new remote, always program all remotes in the same session. Otherwise, older remotes may stop working.
- Check for firmware updates: Some newer Viper systems allow firmware updates that improve performance or add features. Visit the official Viper website for details.
Another tip is to write down the steps as you go. This helps you keep track and makes it easier if you need to repeat the process later.
Programming Faqs
Frequently Asked Questions
How Many Viper Remotes Can I Program At Once?
Most Viper systems allow up to four remotes. Always program all remotes together. If you program only one, the others may stop working.
Do I Need To Reprogram After Changing The Remote Battery?
Not always. If the remote loses memory, you’ll need to reprogram. If it works after battery change, no reprogramming is needed.
Can I Program A Viper Remote Myself Or Do I Need A Dealer?
You can program most Viper remotes yourself if you follow the steps carefully. Some advanced models or damaged systems require dealer help.
What If My Valet Switch Is Missing Or Broken?
Without a working valet switch, programming is difficult. You may need to replace the switch or ask a professional for help.
Is There A Risk Of Someone Else Programming Their Remote To My Car?
No. Only remotes programmed during your session will work. After programming, old remotes are deactivated unless included in the session.
What If My Remote Only Works From A Short Distance?
This usually means the battery is weak, or there is interference from metal objects or electronics. Try replacing the battery and moving to an open area.
How Do I Know If My Remote Is Out Of Sync?
If your remote suddenly stops working after a battery change or system reset, it may be out of sync. Reprogramming usually fixes this.
Final Thoughts
Programming a Viper remote control is a practical skill that helps you take control of your car’s security. While the steps may seem technical at first, anyone can learn with careful attention and patience. Always start by identifying your remote model, gather your tools, and follow each step in order.
Remember to program all remotes together, use fresh batteries, and check your car’s features for compatibility. If you run into problems, troubleshooting and professional help are always options.
Taking the time to learn this process gives you peace of mind and saves you money. You don’t need to rely on dealers or expensive shops for simple programming. Instead, you gain confidence in handling your own car security. For more information on car security systems, you can visit the Wikipedia page on car alarms. With these skills, your car—and your routine—will be safer and easier every day.