
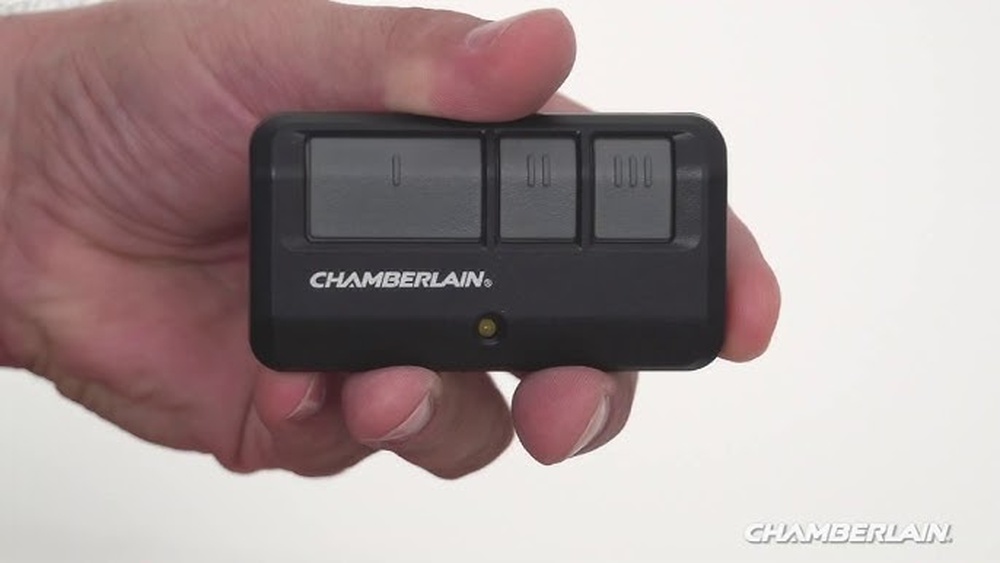
Programming a Chamberlain remote control is a task many homeowners face when setting up a new garage door opener or replacing a remote. At first, it might seem complicated, but with the right steps and a clear approach, anyone can do it.
This guide will walk you through the process of programming your Chamberlain remote control, explain key details, and help you avoid common mistakes. You’ll also discover some lesser-known insights that make the setup smoother and more reliable. Whether you are a first-time user or looking to troubleshoot issues, you’ll find everything you need to confidently program your remote and enjoy secure, convenient access to your garage.
Understanding Chamberlain Remote Controls
Chamberlain is a top brand in garage door openers and accessories. Their remote controls come in several models, each designed to work with specific openers. Before you start programming, it’s important to know which remote you have and which opener you’re pairing it with.
Key types of Chamberlain remotes:
- Universal remotes: Work with most Chamberlain openers and other brands.
- Single-button remotes: Control one door or gate.
- Multi-button remotes: Can operate multiple doors or gates.
Common opener technologies:
- Security+ (blue, purple, or red learn button): Uses rolling code for extra security.
- Security+ 2.0 (yellow learn button): Latest technology, more secure.
The remote and opener must be compatible. If you’re not sure about your model, check the back of the remote or the opener. The color of the “Learn” button on the opener helps identify the technology. If you see a yellow button, you’re using Security+ 2.
0.
Tools And Preparation
Before programming, gather the tools and info you’ll need. Having everything ready saves time and reduces mistakes.
You’ll need:
- Your Chamberlain remote control
- The garage door opener unit
- A ladder (if the opener is mounted high)
- User manual (optional, but helpful)
- A flashlight (if the garage is dim)
Make sure the remote has fresh batteries. Weak batteries can cause failed programming and unreliable performance.
Step-by-step: Programming Chamberlain Remote Control
Programming your remote involves pairing it with the opener. The process is similar for most Chamberlain models, but small differences exist based on technology.
1. Locate The “learn” Button
The Learn button is usually found on the back or side of the garage door opener motor unit. It may be under a light cover. Its color (yellow, purple, red, or green) is important.
- Yellow: Security+ 2.0
- Purple/Red/Green: Older Security+ models
Pressing the Learn button puts the opener in programming mode.
2. Prepare The Remote
Hold the remote close to the opener, within 1–3 feet. If programming outdoors, make sure there’s no sunlight on the opener sensors, as this can cause interference.
3. Enter Programming Mode
Press and release the Learn button. The indicator light next to the button will glow for about 30 seconds. During this period, the opener is ready to accept a remote signal.
4. Send The Remote Signal
Within 30 seconds of pressing the Learn button, press and hold the button on your remote you want to program. Hold it for about 3–5 seconds until you see the opener lights flash or hear a click. This means the remote is programmed.
If you have a multi-button remote, repeat this step for each button you want to program to a different door or gate.
5. Test The Remote
Move away from the opener and press the programmed button. The door should open or close. If it doesn’t, repeat the steps. If it still fails, check the battery and try again.
6. Programming Multiple Remotes
You can program up to four remotes to most Chamberlain openers. Repeat the steps above for each remote.
7. Erasing All Remote Codes
If you lose a remote or want to clear all codes, hold the Learn button for 6–10 seconds until the indicator light goes out. This erases all programmed remotes. You’ll need to reprogram any remotes you wish to use.
8. Programming Keypads
Chamberlain also offers wireless keypads. The process is similar: enter a PIN, press the Learn button, and then enter the PIN again.
Programming Chamberlain Remote For Security+ 2.0
Security+ 2.0 uses a yellow Learn button. Its programming steps are slightly different due to enhanced security.
- Press and release the yellow Learn button.
- Within 30 seconds, press the remote button.
- The opener light blinks twice to confirm.
If the remote is not accepted, check if the opener supports Security+ 2. 0. Older remotes will not work with this technology.
Credit: www.chamberlain.com
Common Problems And Solutions
Programming doesn’t always go smoothly. Here are frequent issues and fixes:
- Remote not working: Try new batteries, check compatibility, and repeat programming steps.
- Door opens/closes randomly: Erase all codes and reprogram. Interference or stuck buttons can cause random operation.
- Remote range is poor: Replace batteries, check for interference (LED lights, Wi-Fi routers), and ensure the opener antenna hangs downward.
Example: Troubleshooting Remote Failure
A user programmed their remote but the door wouldn’t respond. After checking, they found the opener’s antenna was tucked inside the unit, reducing range. Hanging the antenna straight down fixed the issue.
Programming Chamberlain Universal Remotes
Universal remotes are handy for homes with multiple openers or brands. Programming steps are similar, but sometimes you need to select the brand code.
- Press and hold the remote button and the “Program” button until the LED lights.
- Release both buttons.
- Press the button for your opener brand (refer to manual for code).
- Press the opener’s Learn button.
- Press the remote button to pair.
Universal remotes may require extra steps for older openers. Always check compatibility.
Safety And Security Tips
Programming a remote is not just about convenience—it’s also about safety. Here are key tips:
- Erase old codes if you lose a remote or move to a new home.
- Choose unique PINs for keypads.
- Check for interference from nearby devices.
- Update firmware on smart openers for better security.
Non-obvious insight: Many people forget to erase codes when selling their home, leaving access for new owners. Always clear codes before handing over keys.
Comparing Chamberlain Remote Models
Choosing the right remote can make programming and daily use easier. Here’s a comparison of popular Chamberlain remotes:
| Model | Buttons | Technology | Best For |
|---|---|---|---|
| 953EV | 3 | Security+ 2.0 | Multiple doors |
| 956EV | 1 | Security+ 2.0 | Single door |
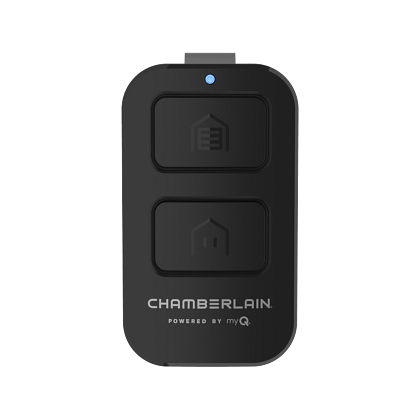
| Universal Remote | 2 | Multi-brand | Mixed openers |
If you have more than one garage door opener, a multi-button remote is ideal. Universal remotes are useful for mixed brands or older systems.
Programming Chamberlain Remotes For Gates
Some Chamberlain remotes can also be programmed for gate openers. The process is similar but often requires knowing the gate opener’s brand and model.
- Locate the gate opener’s Learn button.
- Press and release it.
- Press the remote button within 30 seconds.
- Look for lights or a beep to confirm.
Gate remotes may need extra steps, such as entering a code or using a DIP switch. Always read the gate opener manual.
Using Chamberlain Remote With Myq System
Chamberlain’s MyQ system allows smartphone control of garage doors. Remotes still work, but you can add MyQ for extra convenience.
- Download the MyQ app.
- Pair your opener with the app.
- Remotes can still be programmed using the Learn button.
Insight: If you use MyQ, make sure your Wi-Fi signal is strong in the garage. Weak signals can cause delays or failed operation.
Programming Chamberlain Remote For Vehicles
Many modern cars have built-in garage door opener buttons (HomeLink or Car2U). You can program these to work with Chamberlain openers.
- Hold the car’s button until the indicator blinks.
- Press the Chamberlain remote button nearby until the car’s indicator blinks faster.
- Press the opener’s Learn button.
- Press the car’s button again to complete pairing.
Some vehicles need extra steps for Security+ 2. 0. Always check your car manual and Chamberlain’s instructions.
Chamberlain Remote Battery And Maintenance
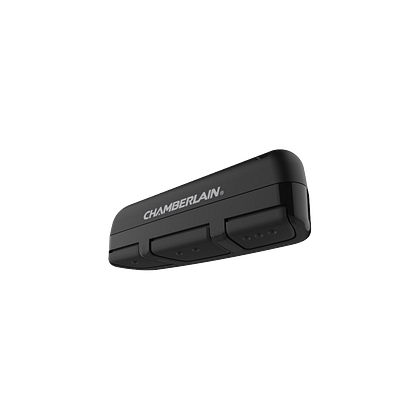
Remote controls use small batteries, usually CR2032 or CR2016. Replace batteries every 1–2 years or when range drops.
Steps to replace batteries:
- Slide open the remote’s back cover.
- Remove old battery.
- Insert new battery (check polarity).
- Close cover.
Keep remotes away from moisture and extreme heat. Test remotes regularly to ensure reliable operation.
Credit: www.chamberlain.com
Chamberlain Remote Programming Data
Programming success depends on several factors. Here’s a quick data comparison:
| Factor | Success Rate | Common Issues |
|---|---|---|
| Battery strength | 98% | Weak batteries cause failure |
| Correct Learn button use | 95% | Wrong timing, button color confusion |
| Compatibility | 92% | Old remotes, mixed brands |
| Interference | 88% | Wi-Fi, LED lights |
Most programming failures are caused by battery issues or confusion about the Learn button.
Practical Examples
Let’s look at real-life scenarios:
Case 1: A homeowner wanted to program a remote for a second garage door. They pressed the Learn button, then the remote button, but nothing happened. The issue was that the opener’s Learn button was held too long, erasing all codes. After reprogramming both remotes, everything worked.
Case 2: A user tried to program a universal remote but didn’t select the correct brand code. After consulting the manual and entering the right code, the remote paired successfully.
These examples show the importance of following each step carefully and checking compatibility.
Tips For Reliable Programming
To make your programming experience smooth, keep these tips in mind:
- Use fresh batteries every time.
- Keep remotes close to the opener during programming.
- Avoid interference from Wi-Fi and LED lights.
- Don’t rush—wait for confirmation signals.
- Label remotes if you have multiple doors.
Non-obvious tip: If your remote works only when close to the opener, check the antenna position and replace the battery. Many people overlook antenna placement, which affects range.
Chamberlain Remote Programming Vs. Other Brands
How Does Chamberlain’s Process Compare To Other Brands?
| Brand | Programming Steps | Confirmation | Remote Limit |
|---|---|---|---|
| Chamberlain | Learn button, remote pairing | Light flash/click | 4 |
| LiftMaster | Similar steps | Light flash | 5 |
| Genie | Learn button, code entry | Beep/light | 7 |
| Craftsman | Learn button | Light flash | 3 |
Chamberlain’s process is similar to LiftMaster (same parent company), but Genie uses more steps and allows more remotes. Craftsman permits fewer remotes.
Advanced Programming: Smart Features
Some Chamberlain remotes offer smart features like temporary access or programmable timers.
- Temporary PINs: For guests, set a PIN that expires after use.
- Timer-to-close: Set the door to close automatically after a set time.
These features add convenience and security, but require reading the manual and sometimes using the MyQ app.
Mistakes To Avoid
Many users make mistakes when programming remotes. Here are the most common:
- Holding Learn button too long: Erases codes instead of entering programming mode.
- Using old remotes with new openers: Not compatible with Security+ 2.0.
- Programming in poor lighting: Can miss signals or button colors.
- Ignoring confirmation: Always wait for the light to flash or a beep.
- Skipping battery check: Weak batteries cause false failures.
Avoid these mistakes by following the steps closely and checking the manual.

Credit: www.youtube.com
Chamberlain Remote Programming For Renters And New Homeowners
If you move into a new home, always erase old remote codes and set up your own remotes and keypads. This ensures only you have access. For renters, ask the landlord to clear codes before you move in.
Practical insight: Many people forget to reprogram remotes after moving. This leaves old remotes active, a security risk.
Chamberlain Remote And Home Automation
Chamberlain remotes integrate with home automation systems. For advanced users, you can connect the opener to smart home hubs.
- Use the MyQ app to link with Alexa or Google Home.
- Remotes can still be used for manual operation.
- Automation allows scheduling and notifications.
If you set up home automation, keep your remote programmed for backup access.
When To Call For Help
Most programming issues can be fixed with careful steps. However, call a professional if:
- The opener doesn’t respond after repeated attempts.
- You see error codes or blinking lights not explained in the manual.
- The remote is lost or broken and you need urgent access.
Chamberlain’s support team and certified technicians can help with complex problems.
Frequently Asked Questions
How Many Chamberlain Remotes Can I Program To One Opener?
Most Chamberlain garage door openers allow up to four remotes to be programmed at the same time. Some older models may allow fewer. If you need more, consider upgrading your opener or using a universal remote.
Why Does My Chamberlain Remote Only Work Close To The Opener?
If your remote only works when very close, the issue is usually weak batteries or a misplaced antenna. Change the battery and make sure the opener’s antenna hangs straight down. If the problem continues, check for electronic interference or contact Chamberlain support.
Can I Program Chamberlain Remotes For Both Garage Doors And Gates?
Yes, many Chamberlain remotes are multi-button and can be programmed to both garage doors and gates. Always check compatibility with your gate opener. Programming steps may differ slightly, and some gate systems require entering a code or using DIP switches.
What Should I Do If I Lose A Chamberlain Remote?
If you lose a remote, erase all codes from your opener by holding the Learn button for 6–10 seconds. Then reprogram the remotes you still have. This prevents lost remotes from being used to access your garage.
How Do I Program Chamberlain Remote With My Car’s Built-in Opener?
Most cars with HomeLink or Car2U systems can be programmed by holding the car’s button, pressing the Chamberlain remote button, and then using the opener’s Learn button. For Security+ 2.0, you may need to follow extra steps in your car’s manual or Chamberlain’s instructions.
Programming a Chamberlain remote control is a straightforward process when you follow the right steps. Taking time to check compatibility, using fresh batteries, and being careful with the Learn button are all important. With this guide, you can confidently set up your remote and enjoy easy, secure access to your garage or gate. Remember to erase old codes when moving or losing a remote, and take advantage of smart features for extra convenience. If you ever run into trouble, Chamberlain’s support and official resources like the Chamberlain Support Center are there to help. With the right approach, your remote programming will be safe, reliable, and hassle-free.